Uncategorized
now browsing by category
Visual Journaling as a Creative & Reflective Practice

Benjamin E. Hoffman is the Visual Arts Teacher at Kutztown Area High School. Benjamin teaches grades 9-12, exploring the creative process of visual journaling across multiple studio art courses. Benjamin is the current President-Elect for PAEA and serves as the Chairman of the Kutztown University Arts Society.
Visual Journaling as a Creative & Reflective Practice
“I am someone who cares about others deeply; thinks about the time that is wasted; how to appreciate the beauty in the areas of life that are often underappreciated. I strive for success and am often stifled by my desire for perfection and order. I appreciate how sounds influence my mood, yet evoke a feeling that divides my focus. I sit beside you, taking in all that you have to share; collecting dust upon the items that have stayed with me forever. There are treasures kept inside, and moments left unspoken, but each memory has its rightful place. I stand considerably tall, seeking ways to welcome more than which I can hold. I am always moving forward and prioritizing my day, but within each space is a story to be told. Family, tradition, and a surface like no other, I sit towards a corner, patiently watching as others surpass the expectations of which they have set for themselves. I wonder how my role may ever change and how the information I cherish will one day impact my future. I inevitably leave space to grow, and areas left unfinished. There exists change and renewal in myself, each vignette supporting a structure that builds upon itself. I am linear. I am resilient and contest a great deal of stress. Even so, I relentlessly seek opportunities to add to my collection, curating a tier of curiosities throughout my life.”
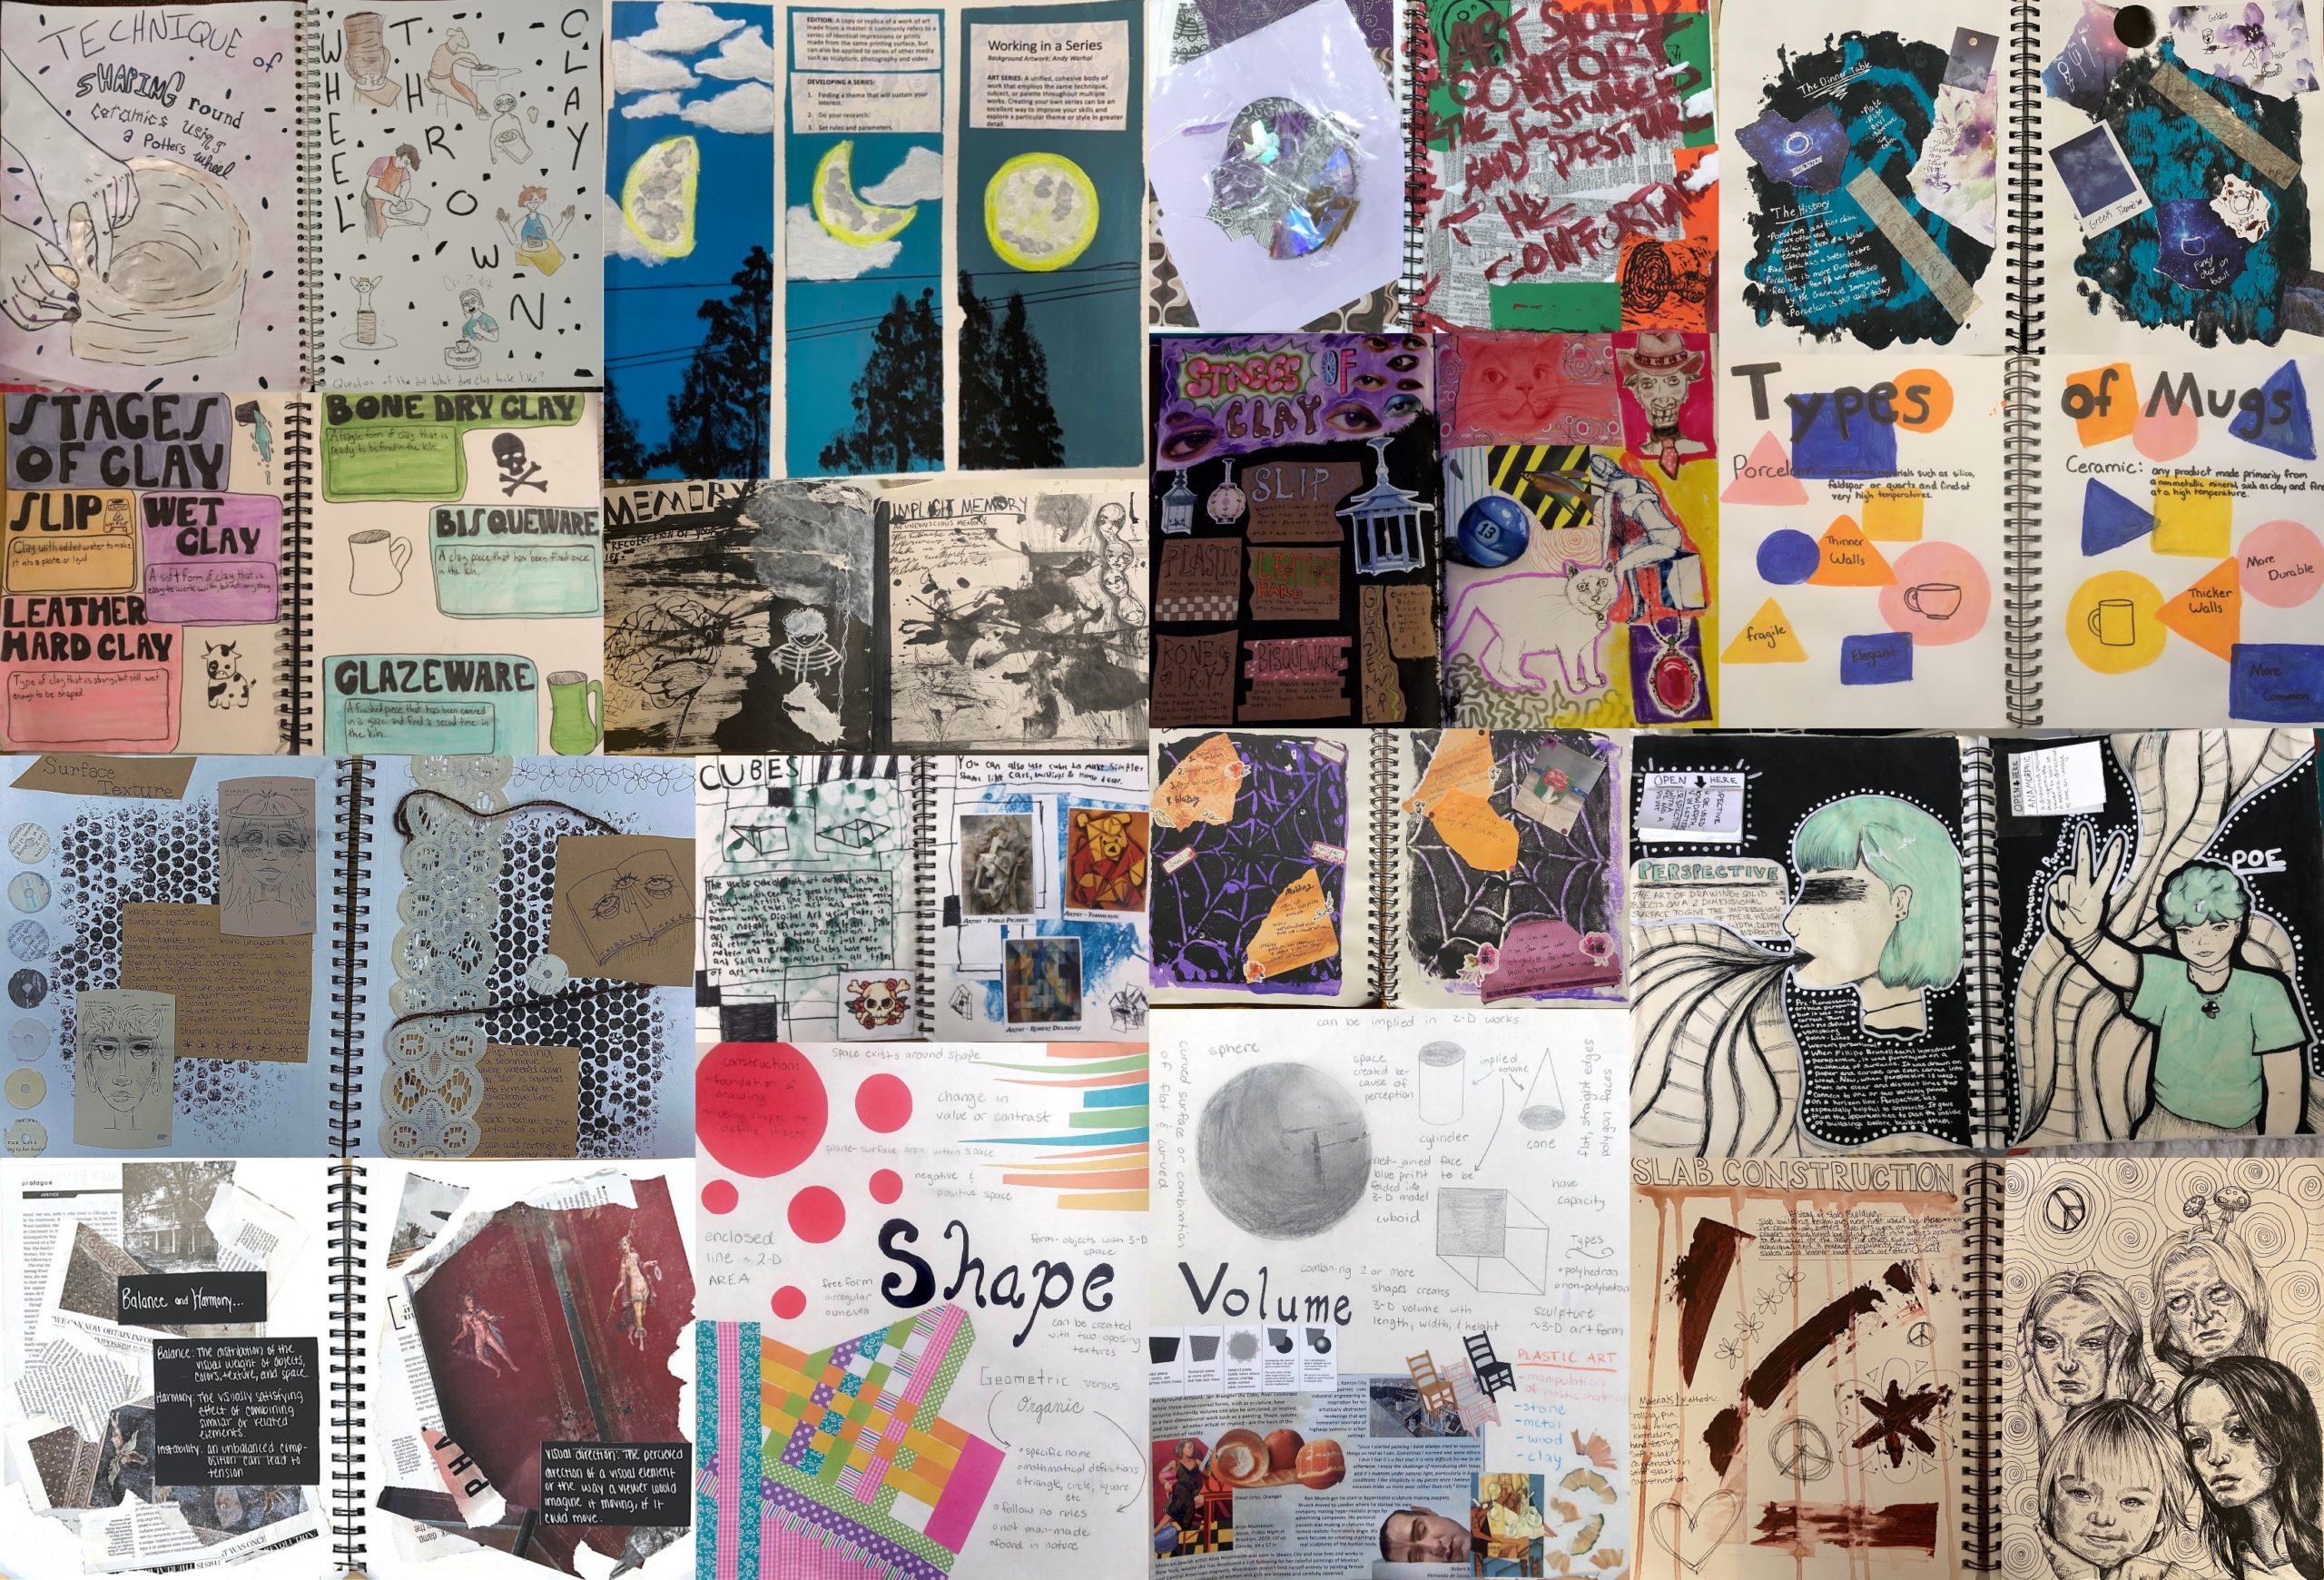
Active journaling promotes an entry for open-ended discovery, affording learners an opportunity to document, comment, and record their findings. I share the above passage as an introduction to who I am and how I approach visual journals. Journaling can challenge learners to discover an authentic practice while furthering their own understanding of themselves, and the world around them. Throughout the year, students engage in a series of journal prompts that invite learners to routinely express ideas while documenting their process. While some individuals pace themselves over several weeks, others work late into the evening, photographing their ideas as they unravel before their eyes. My experience of journaling has helped students better articulate their ideas, examine their surroundings, and expand upon their own best practices through mixed-media techniques and historical references.
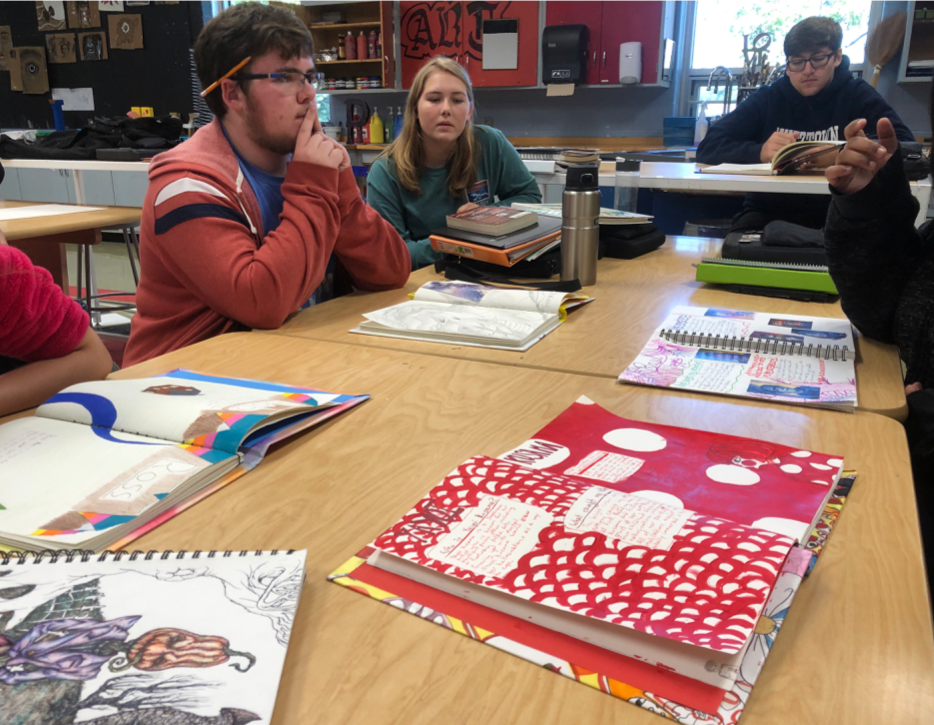
Journals have always played a significant part in my curriculum. From documenting student work, collecting ideas, and taking notes, each visual spread offers something unique for students. Over the past several years, our sketch lab has grown, becoming an integral part of my instruction. By dedicating a space full of materials and time to work, students have thrived, creating visual spreads that cover relevant artists, ideas, and coursework.
So why use sketchbooks or journals in the classroom? They develop technical skills, challenge thinking and personal expression through art, and afford connections to learning that otherwise goes unnoticed. Journaling can exist in a myriad of ways. In our space, students explore the process of constructing journals, visual notetaking, and weekly prompts. Join us as we welcome you into our space and invite you to journal alongside.
Constructing Journals
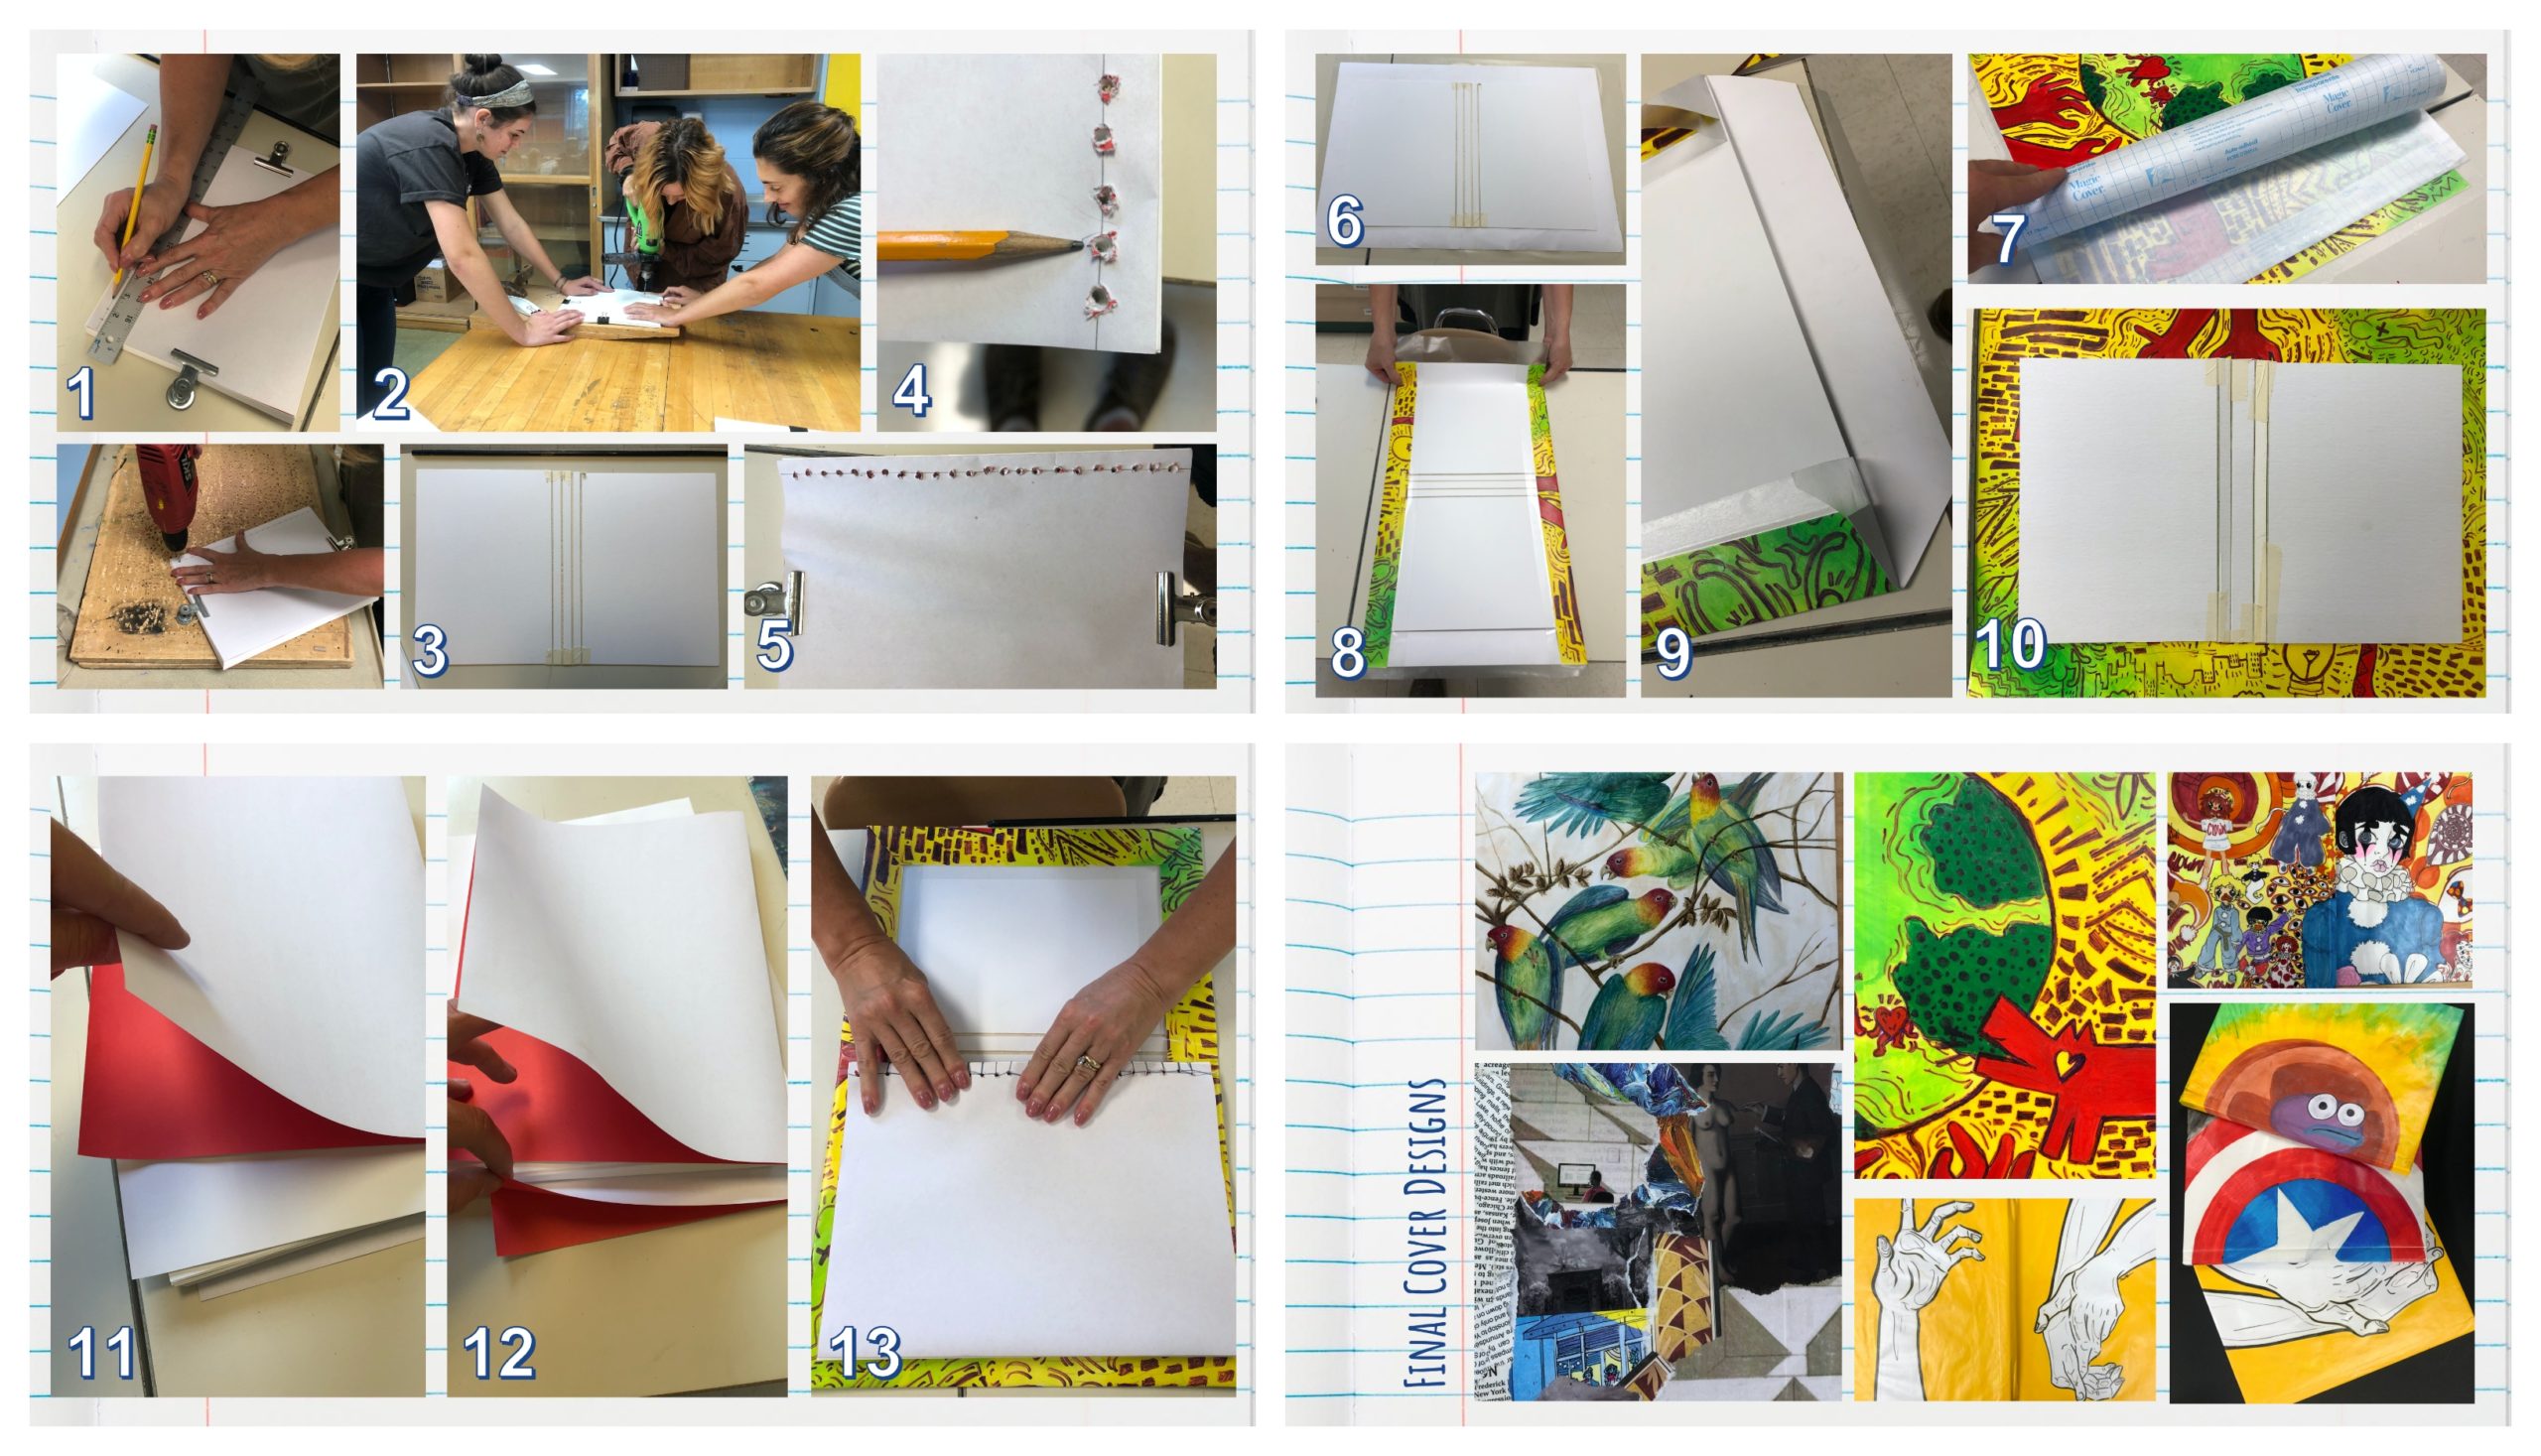
Every student I teach is responsible for having a 9” x 12” journal. In my introductory studios, students may purchase one from our classroom supplies, or can purchase one on their own. As students advance to Intermediate and AP Studio Art, students explore how to repurpose materials to generate their own journal. Using matboard, masking tape, clear protective sheets, white drawing paper, needle, and thread; students can create a journal that is entirely their own.
A special thank-you to veteran Art Teacher & newly retired PAEA Member, Diane Chisdak, for sharing this process with me and my students.
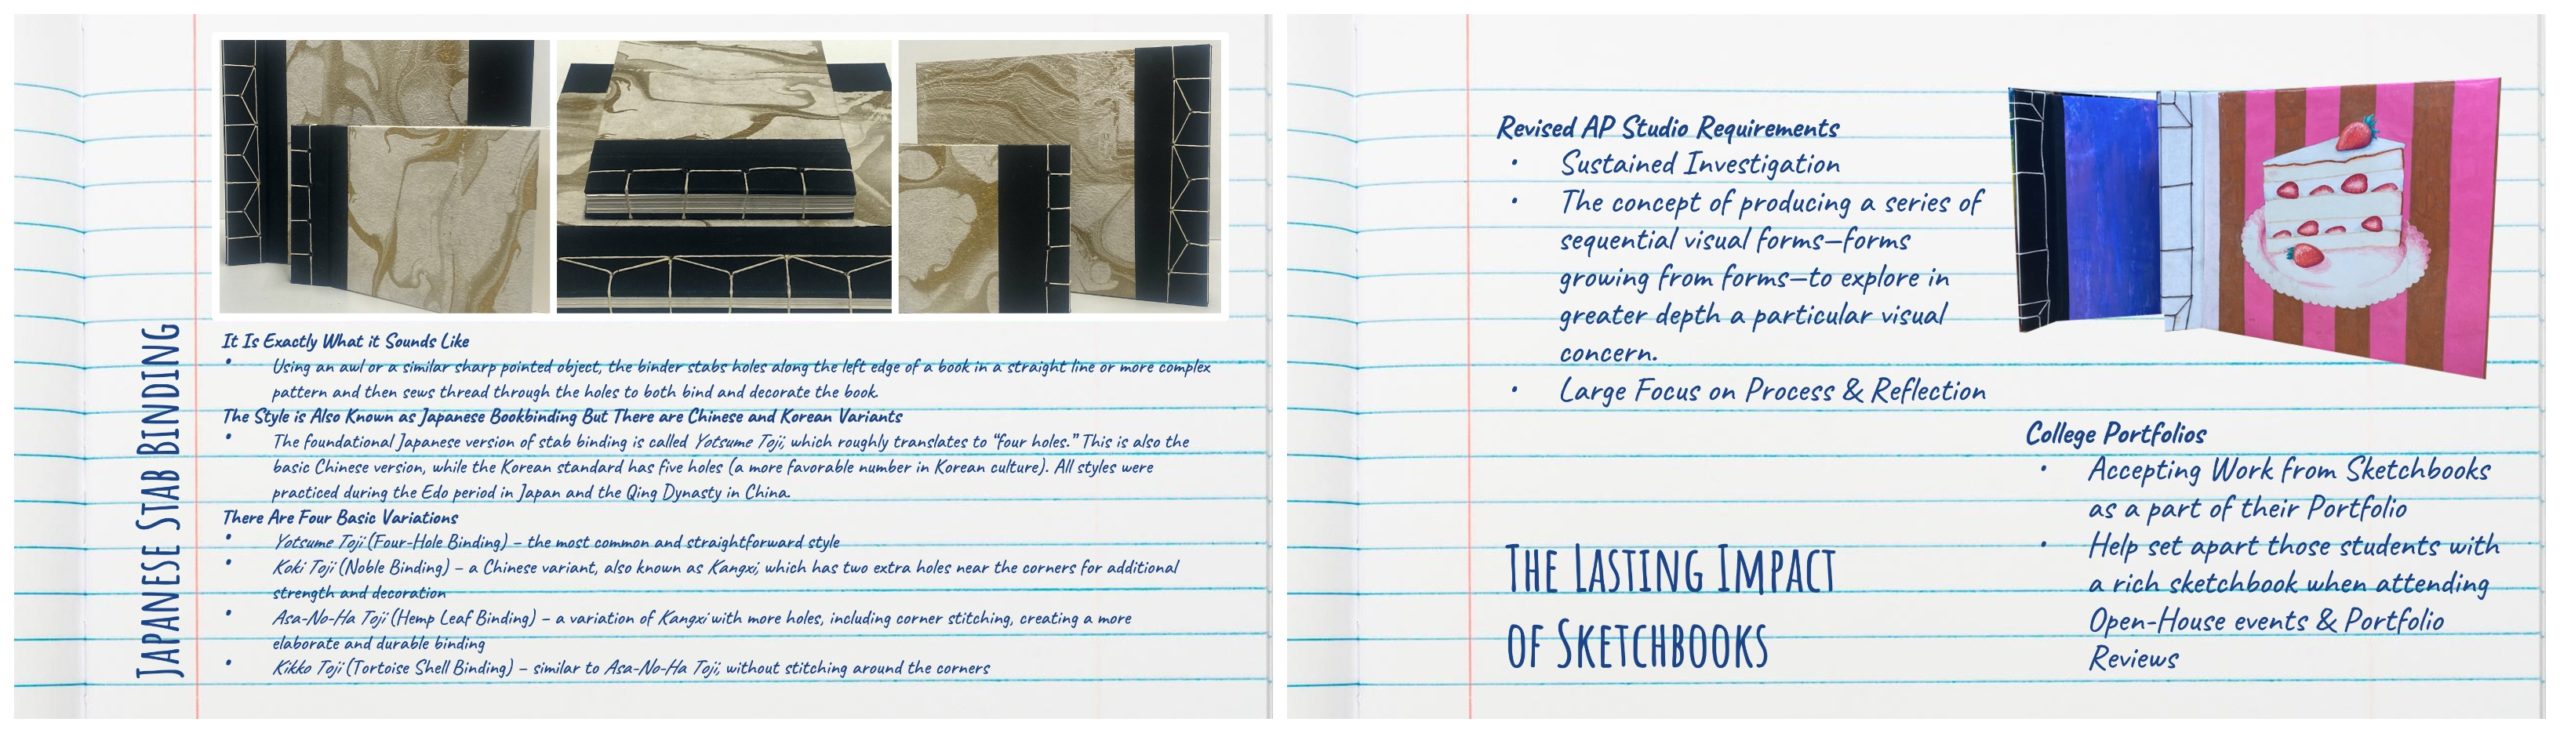
Recently, I had the opportunity to take a book-making class at Kutztown University and immediately gravitated to the Japanese Stab Bound technique. As an opportunity to further my own practice and provide new structures for students, we built the following journals.
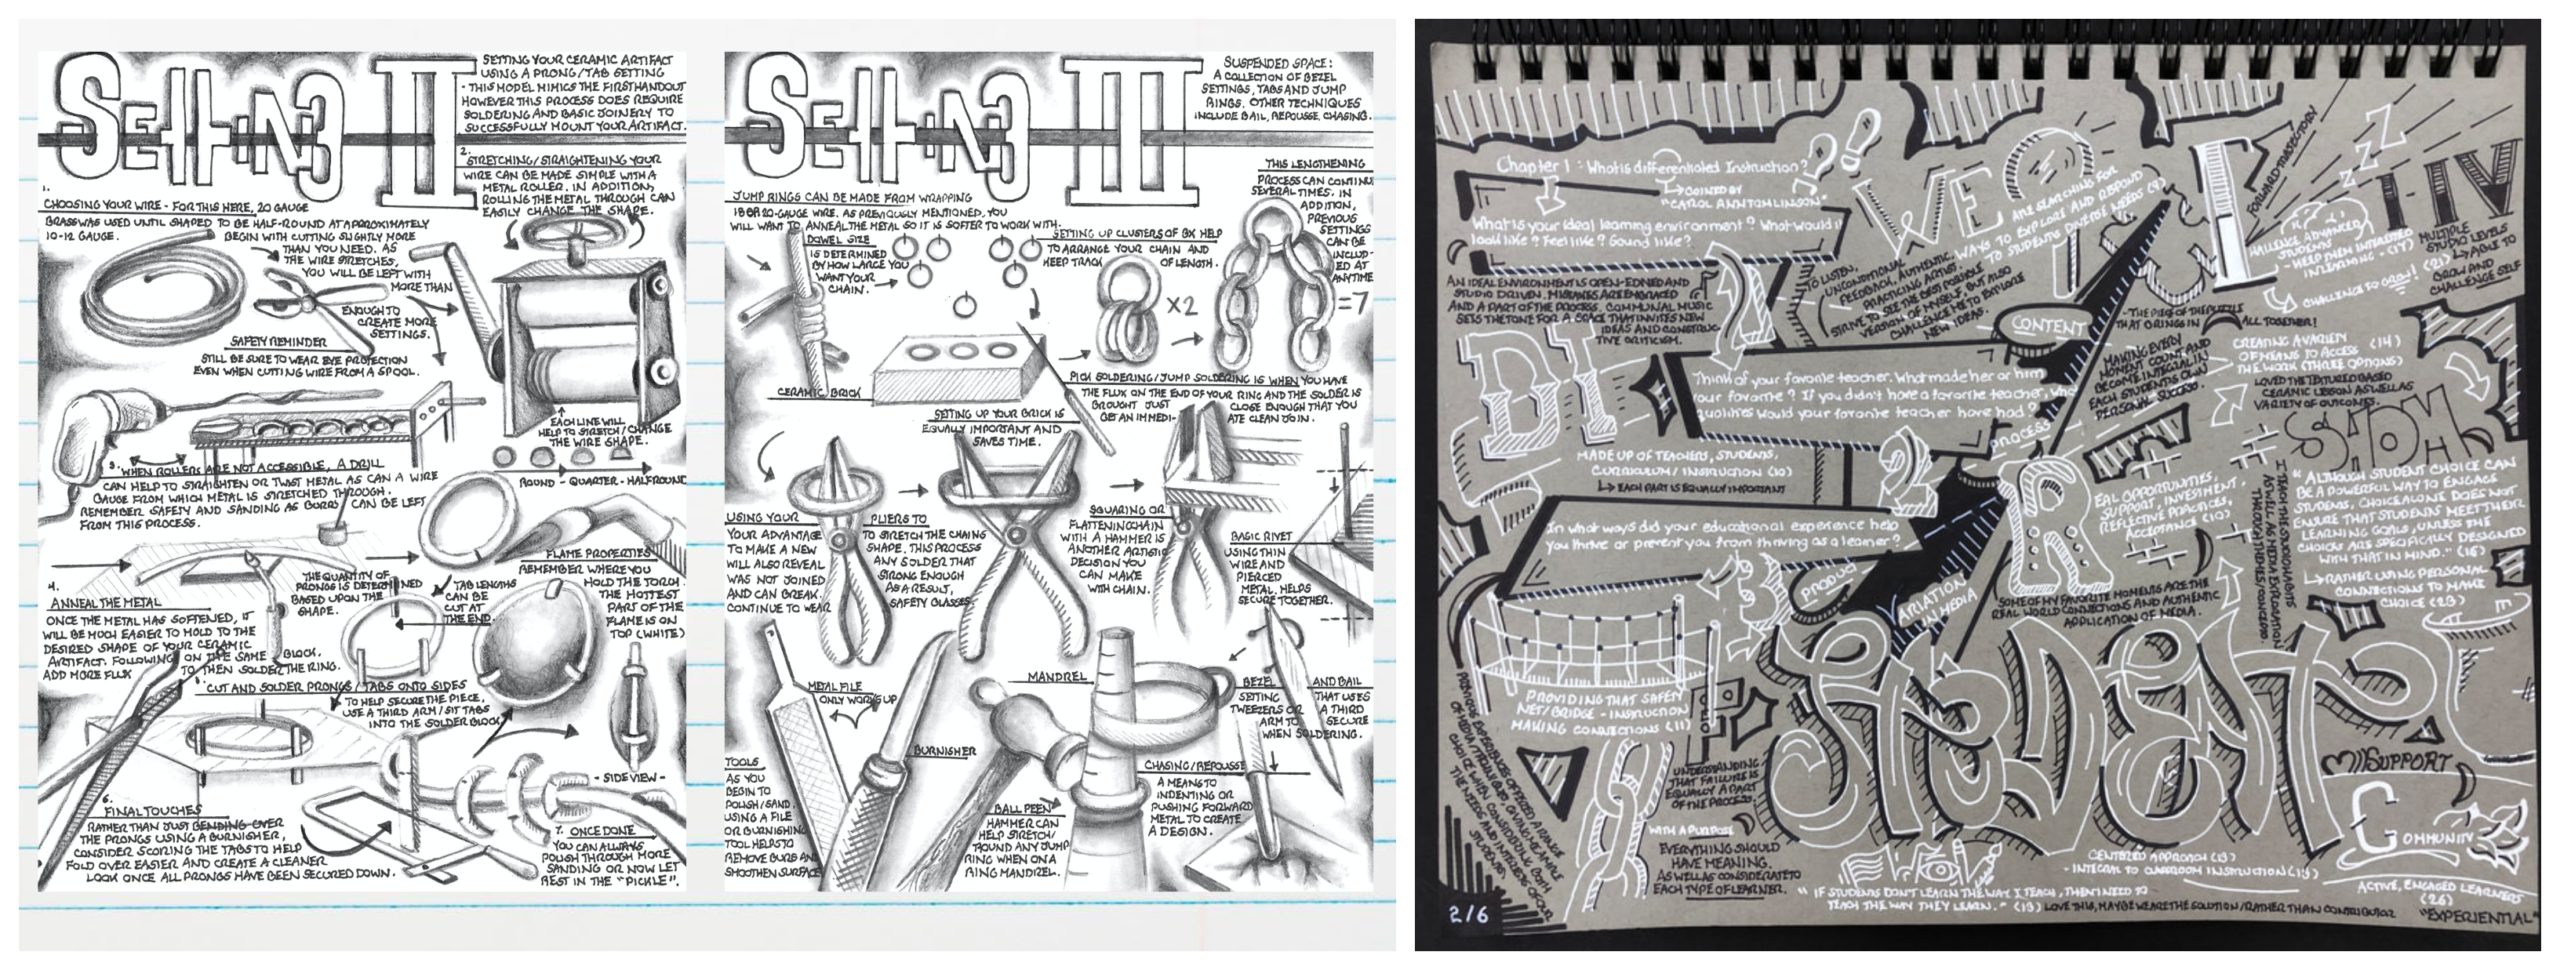
Visual Notetaking
Traditional notetaking is no longer the only way to record content. Today, there are opportunities for organizations to have notetakers visually annotate their conversation or presentation. What began as a phenomenon proved to be an impactful experience for the viewer, using the journal process as tangible content. Throughout a project or presentation, students are encouraged to journal. This includes referencing the main idea, including a reflective response, sharing a personal Inquiry, and extending the conversation. Knowing how and where to start can be challenging. To help combat this fear, students are encouraged to doodle, draw, mind-map, sketch, collage, take notes, or write. Students may add images and/or articles of interest to connect to what it is being explored in class and what is being discovered on their own. Reflective journaling does not only encourage a healthy connection to the visual arts but fosters an understanding of oneself and their interests and ideas.
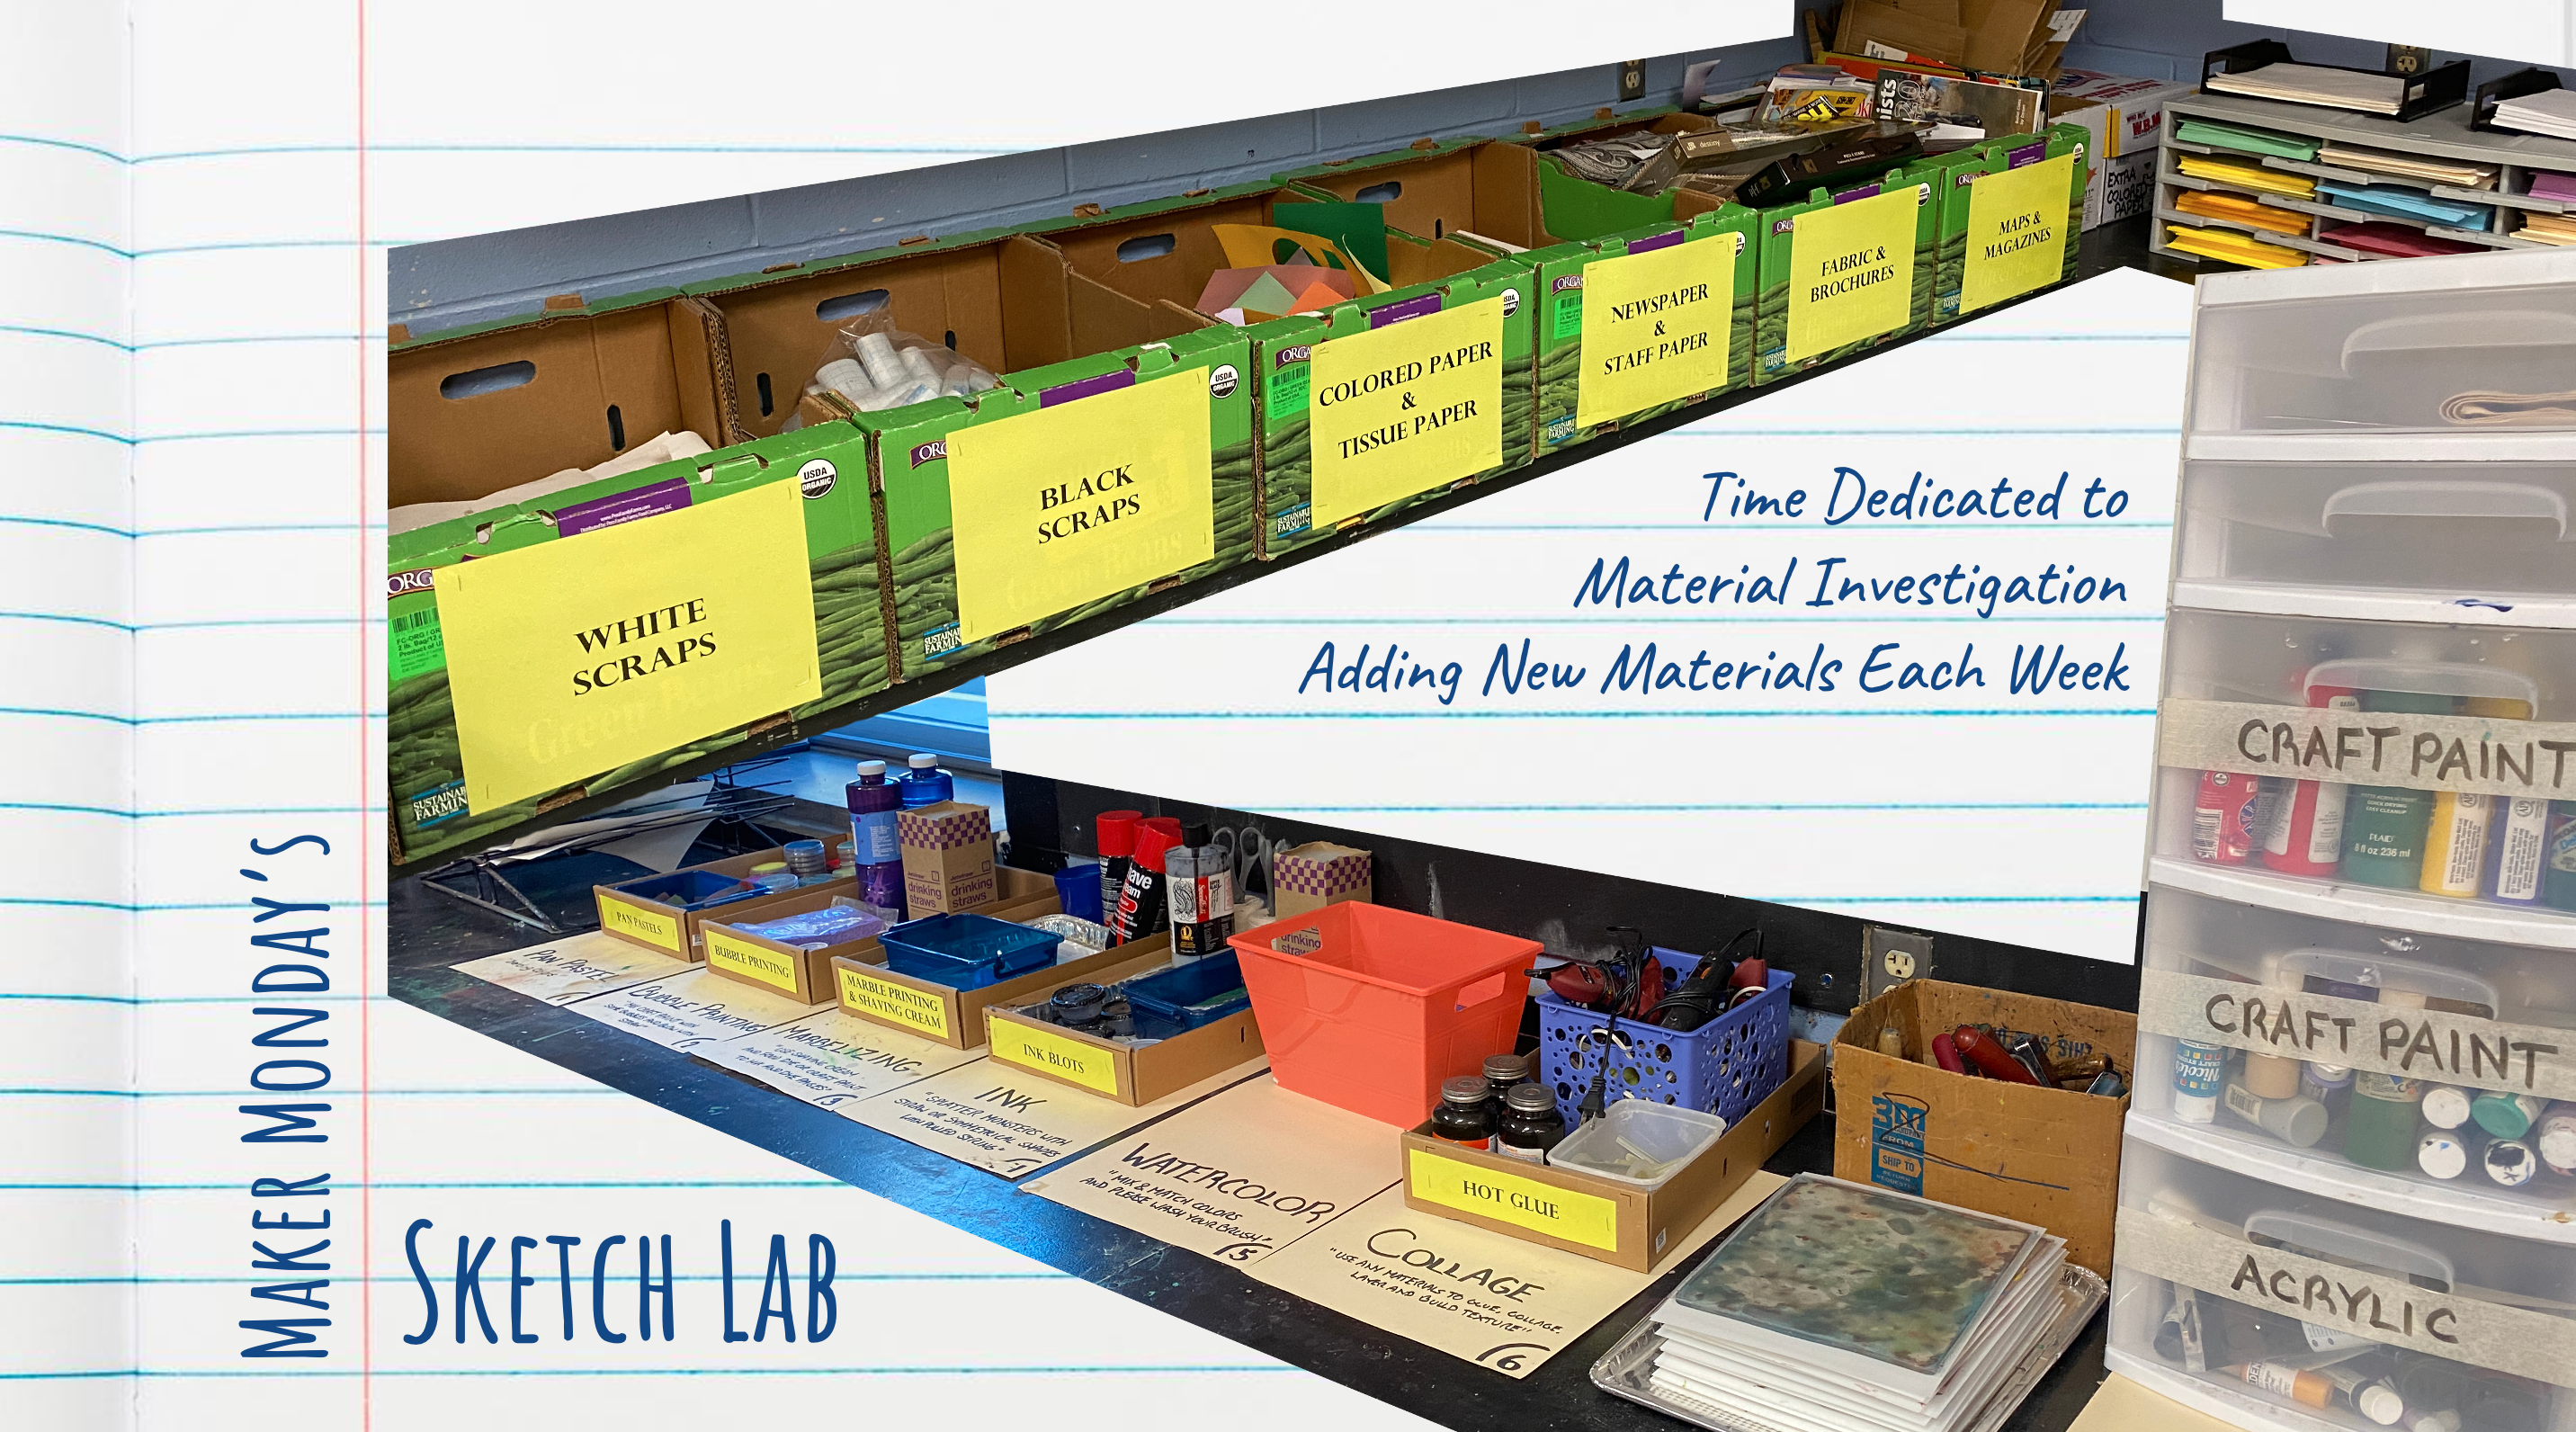
Our sketch lab is filled with materials that continue to grow alongside students. From Gelli printing, watercolor, pan pastels, and charcoal, there is something for everyone to explore. In our classroom, I reference visual notetaking as “Choosing Your Own Adventure.” When I introduce artists, topics, or techniques, I invite students to take notes. These can be written, drawn, or printed images that are later glued in. The goal is that every student is actively listening in the moment in the way that is most appropriate for them. To this day, I often have my head down during presentations, journaling. So, for that I ask, how do YOU stay engaged during presentations? How do your students learn best?
Weekly Prompts
This has been both the most rewarding and challenging practice to instill in my students. Whether virtual learning or hybrid instruction, this process has proven to engage students regardless of their setting and elevate students’ artistic practice. Every two weeks, students are assigned a topic to develop a journal spread about. Often, these topics directly relate to their work in class. Their journals should demonstrate a considerable amount of effort and thought, but I remind students that they do not need to take hours on end. It should be apparent that they are thinking through the creative process. Using any materials, students are encouraged to build layers over time. Whether doodling, mind-mapping, or collaging, there are no limits to what they may use. At the end of each week, students submit two images of their journal; documenting their progress and final journal spread.
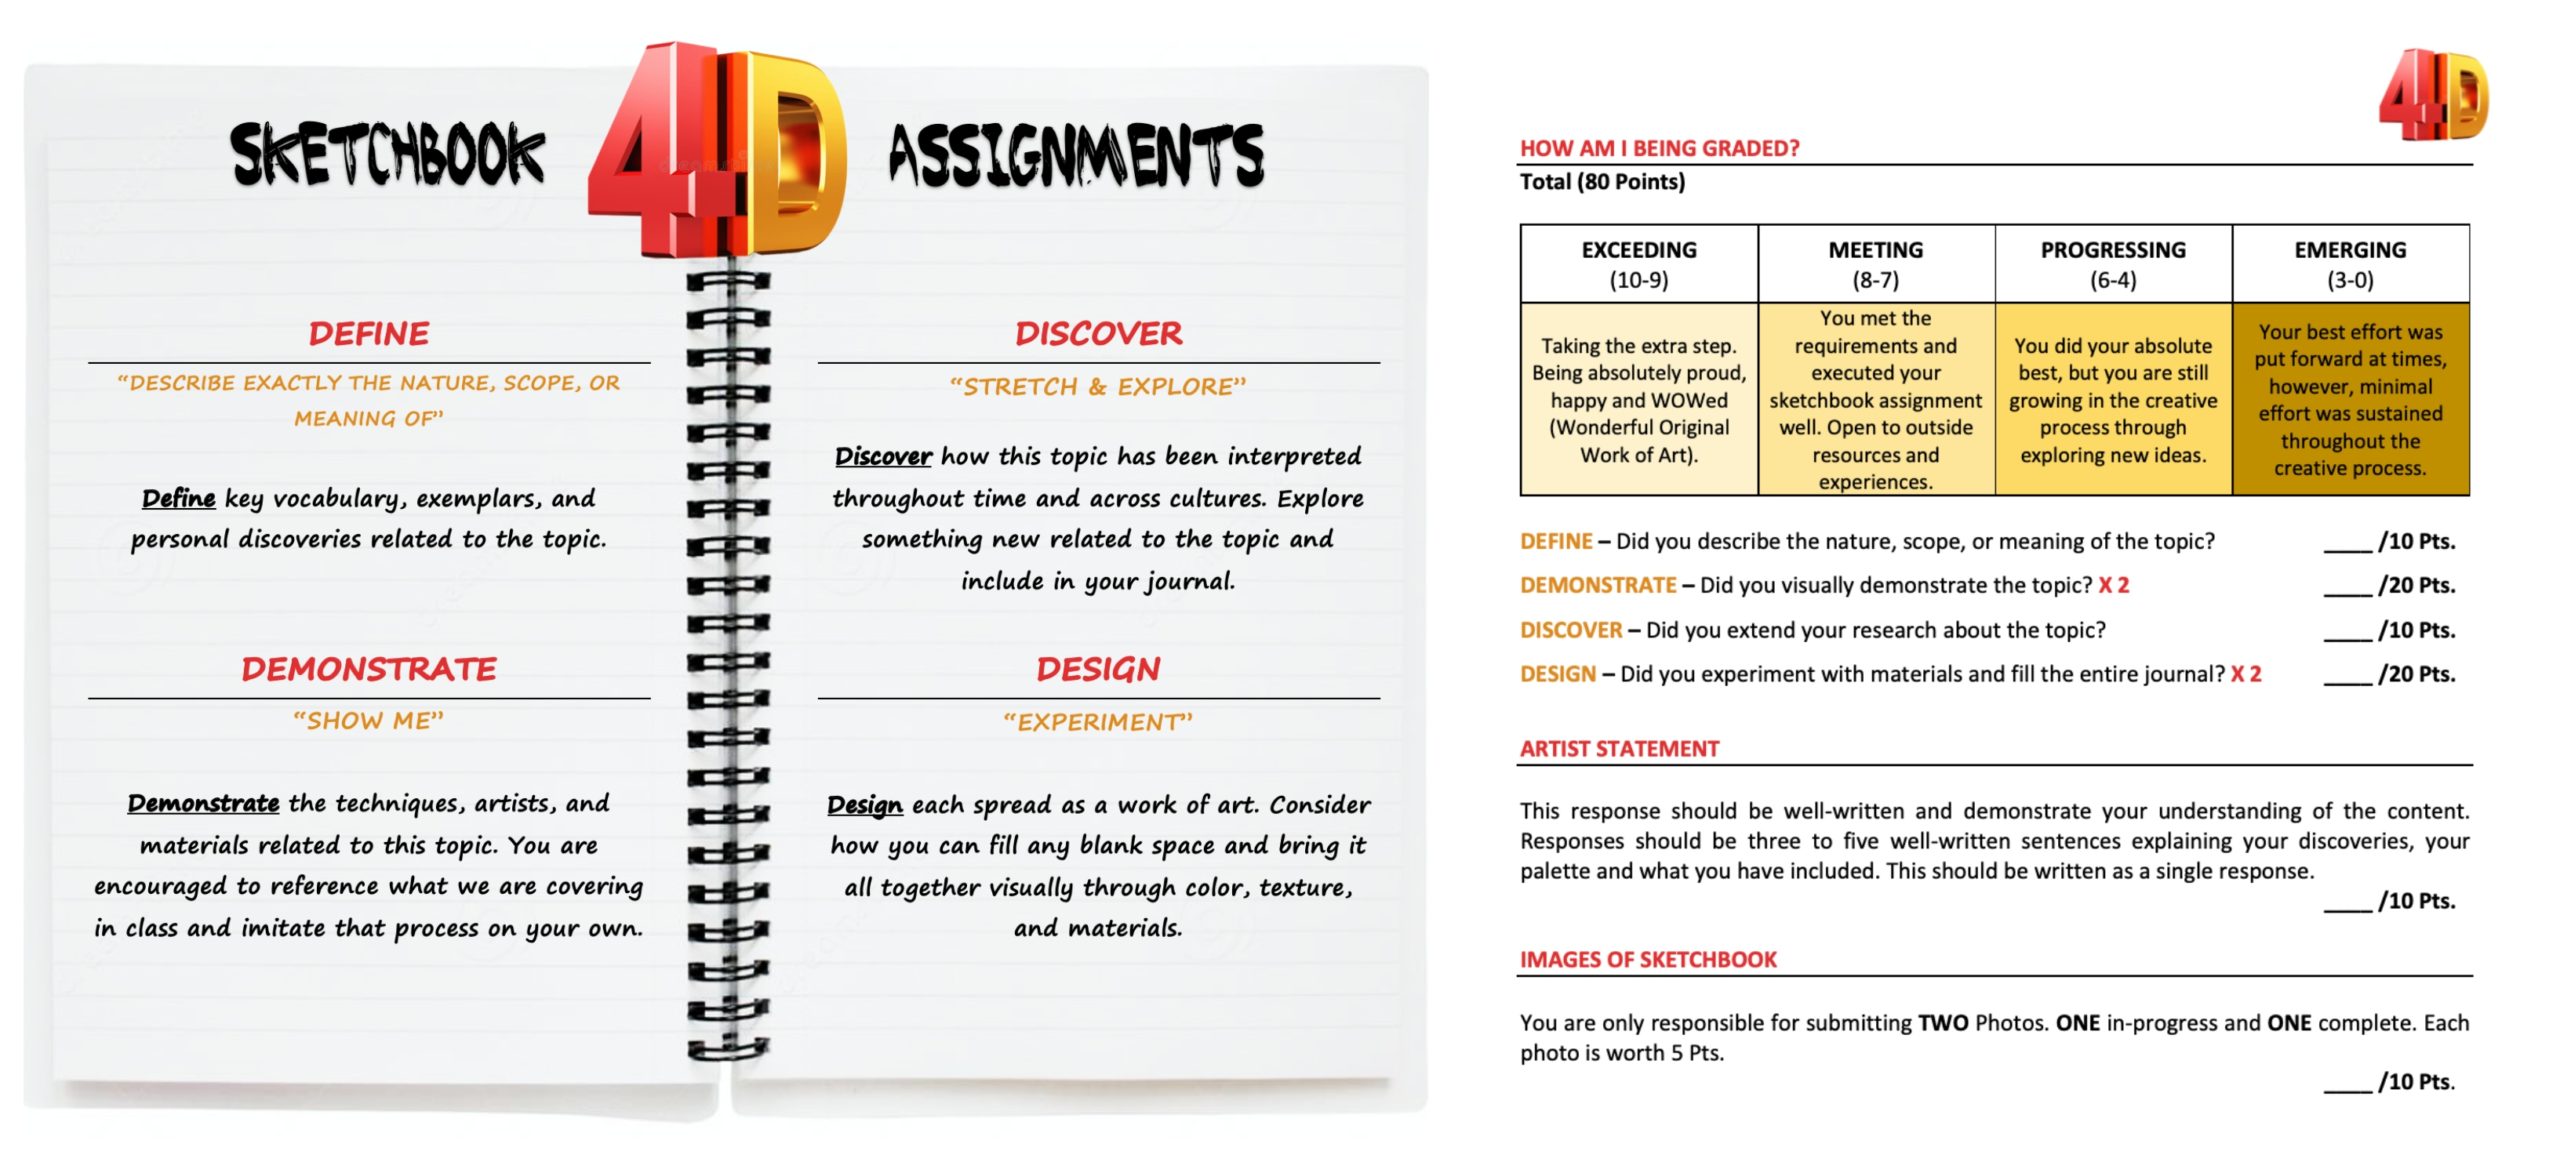
Everyone always asks, how do I grade visual journals? The process for me is simple. For every entry, students reflect and respond using the provided template and rubric. To keep things simple and to help students remember, I have coined, “4D Journals”. For each prompt, students should be able to answer or show evidence for each of the following: Define, Demonstrate, Discover, & Design.
Journal Prompts
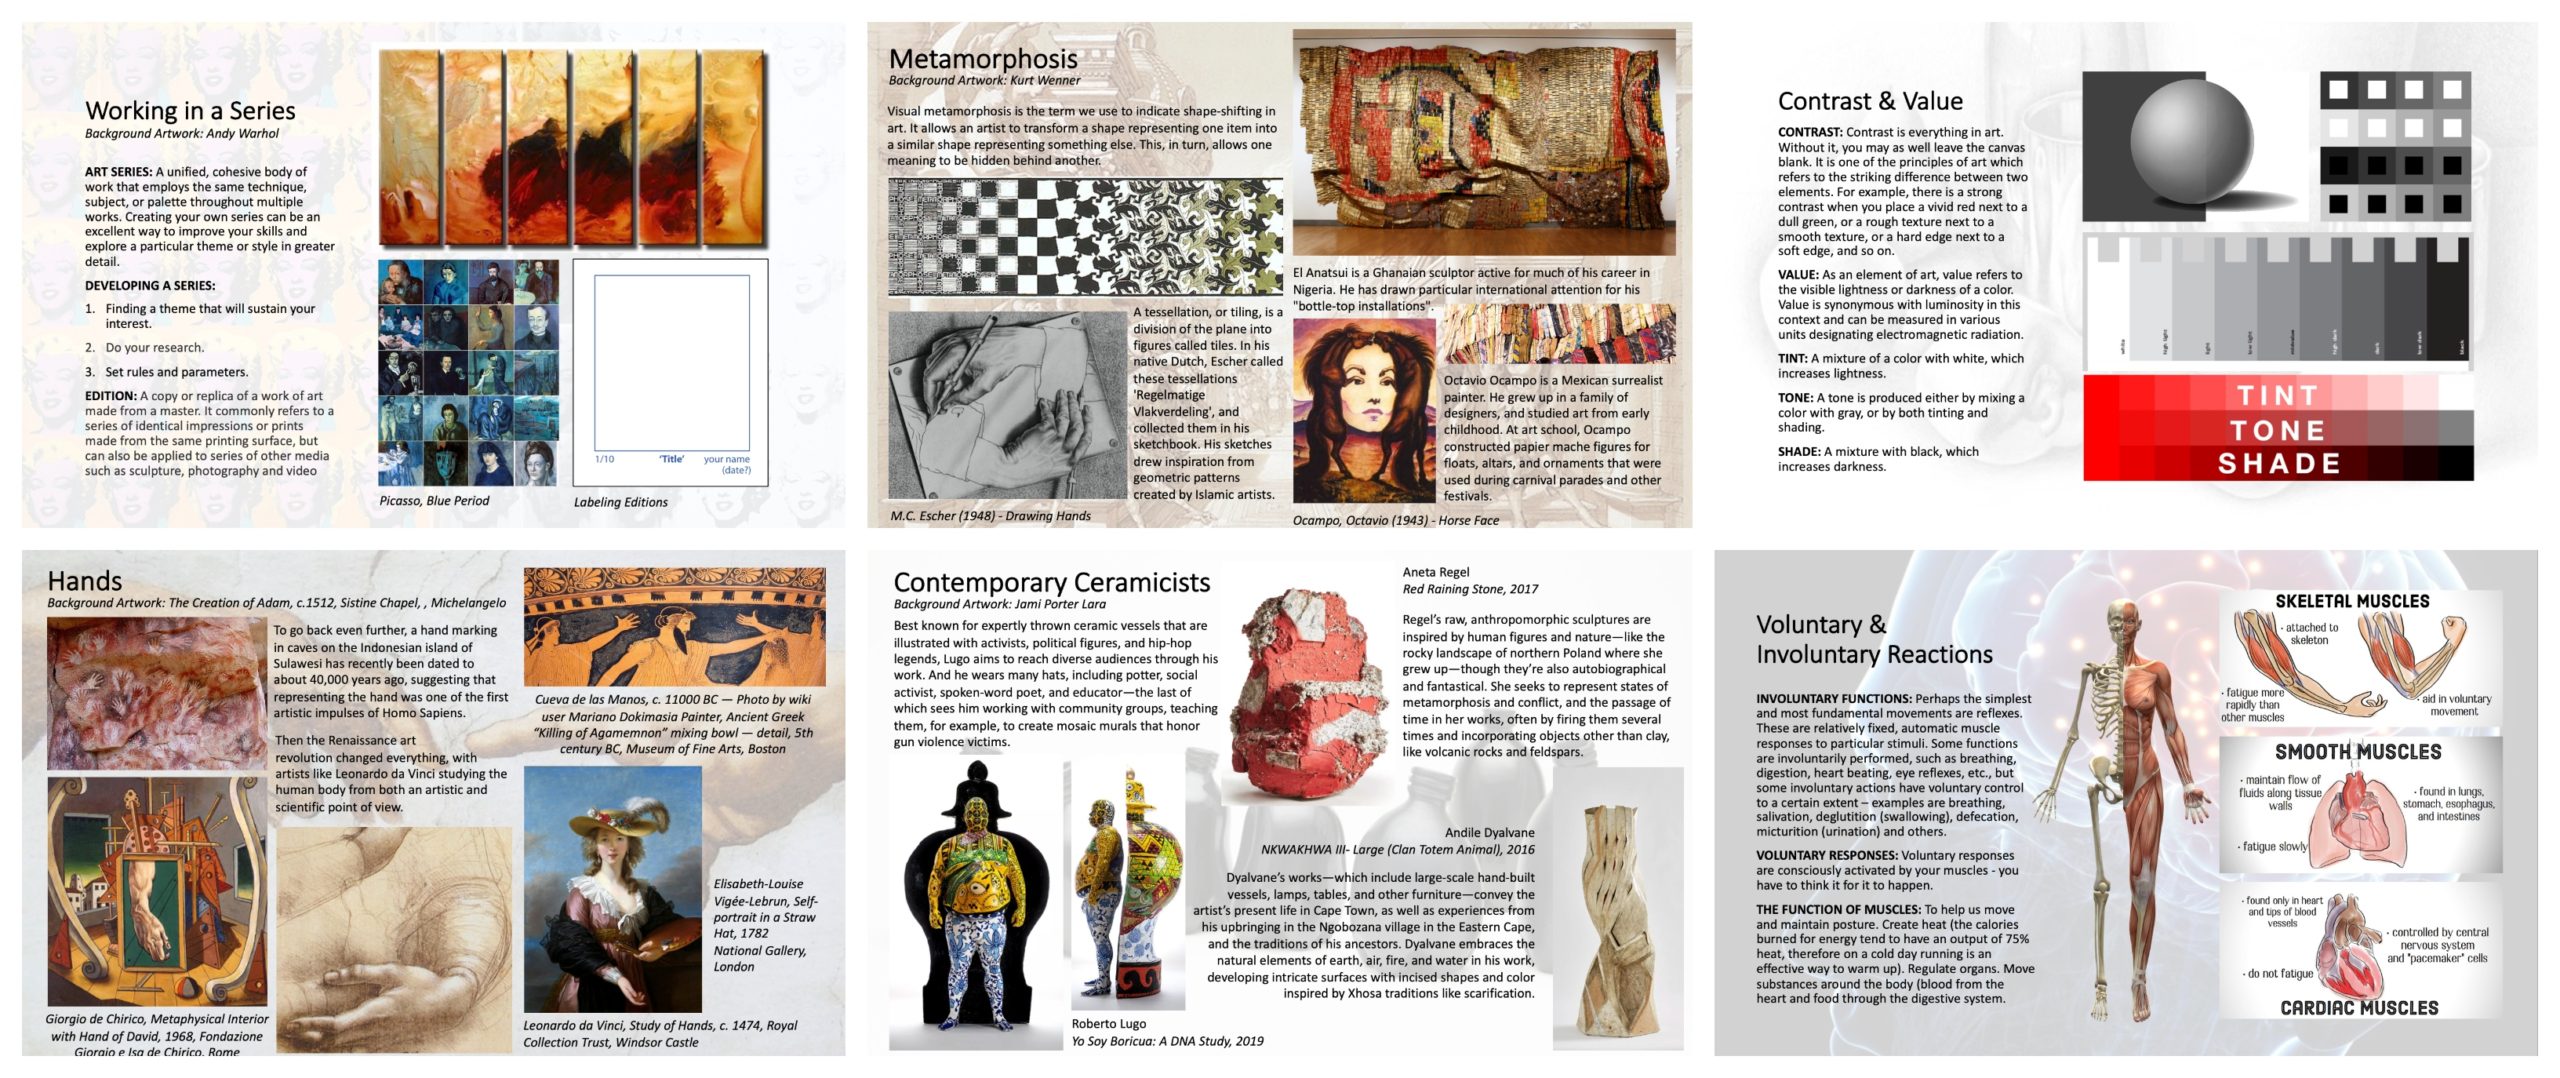
As a part of my SPM this year, I have been developing what I refer to as “Half-Sheets”. Every two weeks, students submit a visual journal. During that time, students are given two “Half-Sheets” and a day for exploration; “Maker Monday’s”. To cut back on the time it has normally taken me to introduce lessons and explore artists, these half-sheets have become a weekly fortune for my students, excited by the topics covered in class, the range of historical and contemporary artists, and the emphasis on equity, diversity, and inclusion. Our schedule looks like this:
- Start of Week 1: Assign Journal Assignment #___ & Journal Day “Maker Monday” – Students are given their first “Half-Sheet” that reviews their journal prompt for that period.
- Start of Week 2: Students are given the second “Half-Sheet” that explores artists who work in that particular style, technique, or genre of art. We review those artists together.
- Start of Week 3: Submit Journal Assignment #___ – Assign Next Journal Assignment & Journal Day “Maker Monday”.
All artworks and pictures referenced are for personal use and not to be reproduced for any profit or commercial use.
This journey has revitalized my own practice and has truly transformed our studio. No longer do I have students fearful that they cannot make art, rather asking when our next journal day is. I would be remised if I did acknowledge the several iterations of this process I have explored to get to this point. If you are considering introducing journals into your classroom beyond preparatory sketches, I would highly recommend it. I hope that you can find enjoyment in your own artistic practice and continue your journey as a reflective practitioner through visual journals.
For more information regarding visual journals, please feel free to reach out to bhoffman@kasd.org or visit www.benjaminhoffman.org. Thank you again.
10 tips for working with students with disabilities by a veteran teacher
Dr. Jessica Kirker teaches Grades 9-12 at Norristown Area High School in the Norristown Area School District. Jessica serves as the Secondary Division Director for PAEA and is an advocate for every student.
10 tips for working with students with disabilities by a veteran teacher
When I sign IEP documents, I do so under the section listed for “Regular Education Teacher.”
Regular? It doesn’t feel that way. As an art teacher of many students with various disabilities, I don’t feel that my classroom is catering to the “regular.” My frequent discomfort with the term allows me the opportunity to pause and consider what type of education I actually do offer.
Art class has the potential to be the space where EVERY student can find success. However, this takes careful attention to curriculum, facilities, IEPs/504s, adaptations, classroom/school culture, and each individual student’s physical, emotional, and intellectual needs. If it seems overwhelming to think of all of these things at the same time; don’t. Instead, I offer the following list of “10 tips for working with students with disabilities by a veteran teacher” to break some of the larger challenges down into manageable concepts. The following list is for new teachers to begin to build their understanding of all the nuanced components of teaching art to students with disabilities. For the veteran teachers, I offer this list as a chance to have your own moment to pause, reconsider, and possibly revitalize your practice.
- Evaluate your space
There is a natural tendency for art classrooms to be visually “busy” or even downright cluttered. In many cases, a busy art room is a productive art room. There are often multiple materials out and accessible to students. The walls are often bright, lively, and filled with student work. Bright, colorful posters bring a vibrant energy that can excite and inspire. However, the art room can also be overwhelming and overstimulating for some students.
I used to prefer a colorful, busy room. I tried to hang as many posters as my walls would allow and murals filled the spaces void of cork boards. Even the ceiling tiles were painted! However, as I became more in tune with practices that promote mindfulness, the overstimulating art room felt chaotic and wild. Little by little, the posters were reduced. Over the summer the ceiling tiles were replaced and I requested that walls have a fresh coat of paint that would cover the colorful murals.
The new, calmer feel of the art room has been noticed by everyone. Within a month, the classroom had earned the nickname “The Zen Zone.” The walls still have some posters, but the visual clutter has been drastically reduced. I spend much more time at the end of the day putting away all materials that don’t need to be out on countertops to keep the space clutter-free. Jazz or classical music is almost always playing in the background. Finally, the $20 essential oil diffuser that I bought online has been the single best investment of my teaching career.
Changing the learning environment in terms of physical space was a challenging task that required serious reflection as well as calling in for some serious favors (thanks, maintenance department!) However, the payoff was well worth it. The energy of the classroom has shifted and the space is now more welcoming for all students.

- Collaborate with other teachers
This may seem like pretty shallow advice. If you are part of PAEA, you already understand the value of networking and collaboration. However, working with students with disabilities requires a very focused lens when it comes to collaboration.
-Collaborate with your students’ teachers: I will never advocate for the art teacher simply serving as a supplement to “core classes.” When you collaborate with other teachers in your school, make it apparent that it is a reciprocal relationship. Great learning happens when connections are made across disciplines. Inform other teachers of your learning objectives and see how they can welcome multi-modality learning into their classrooms.
– Collaborate with other teachers of students with disabilities: Perhaps sometimes it feels like you are the only one working through these unique challenges, but there are plenty of art teachers out there with classes similar to yours! Even if you are not certified in Special Education, seek out conferences on Disability Studies and connect with teachers whose students’ needs are related to what you experience in your own classroom.
- Don’t assume!
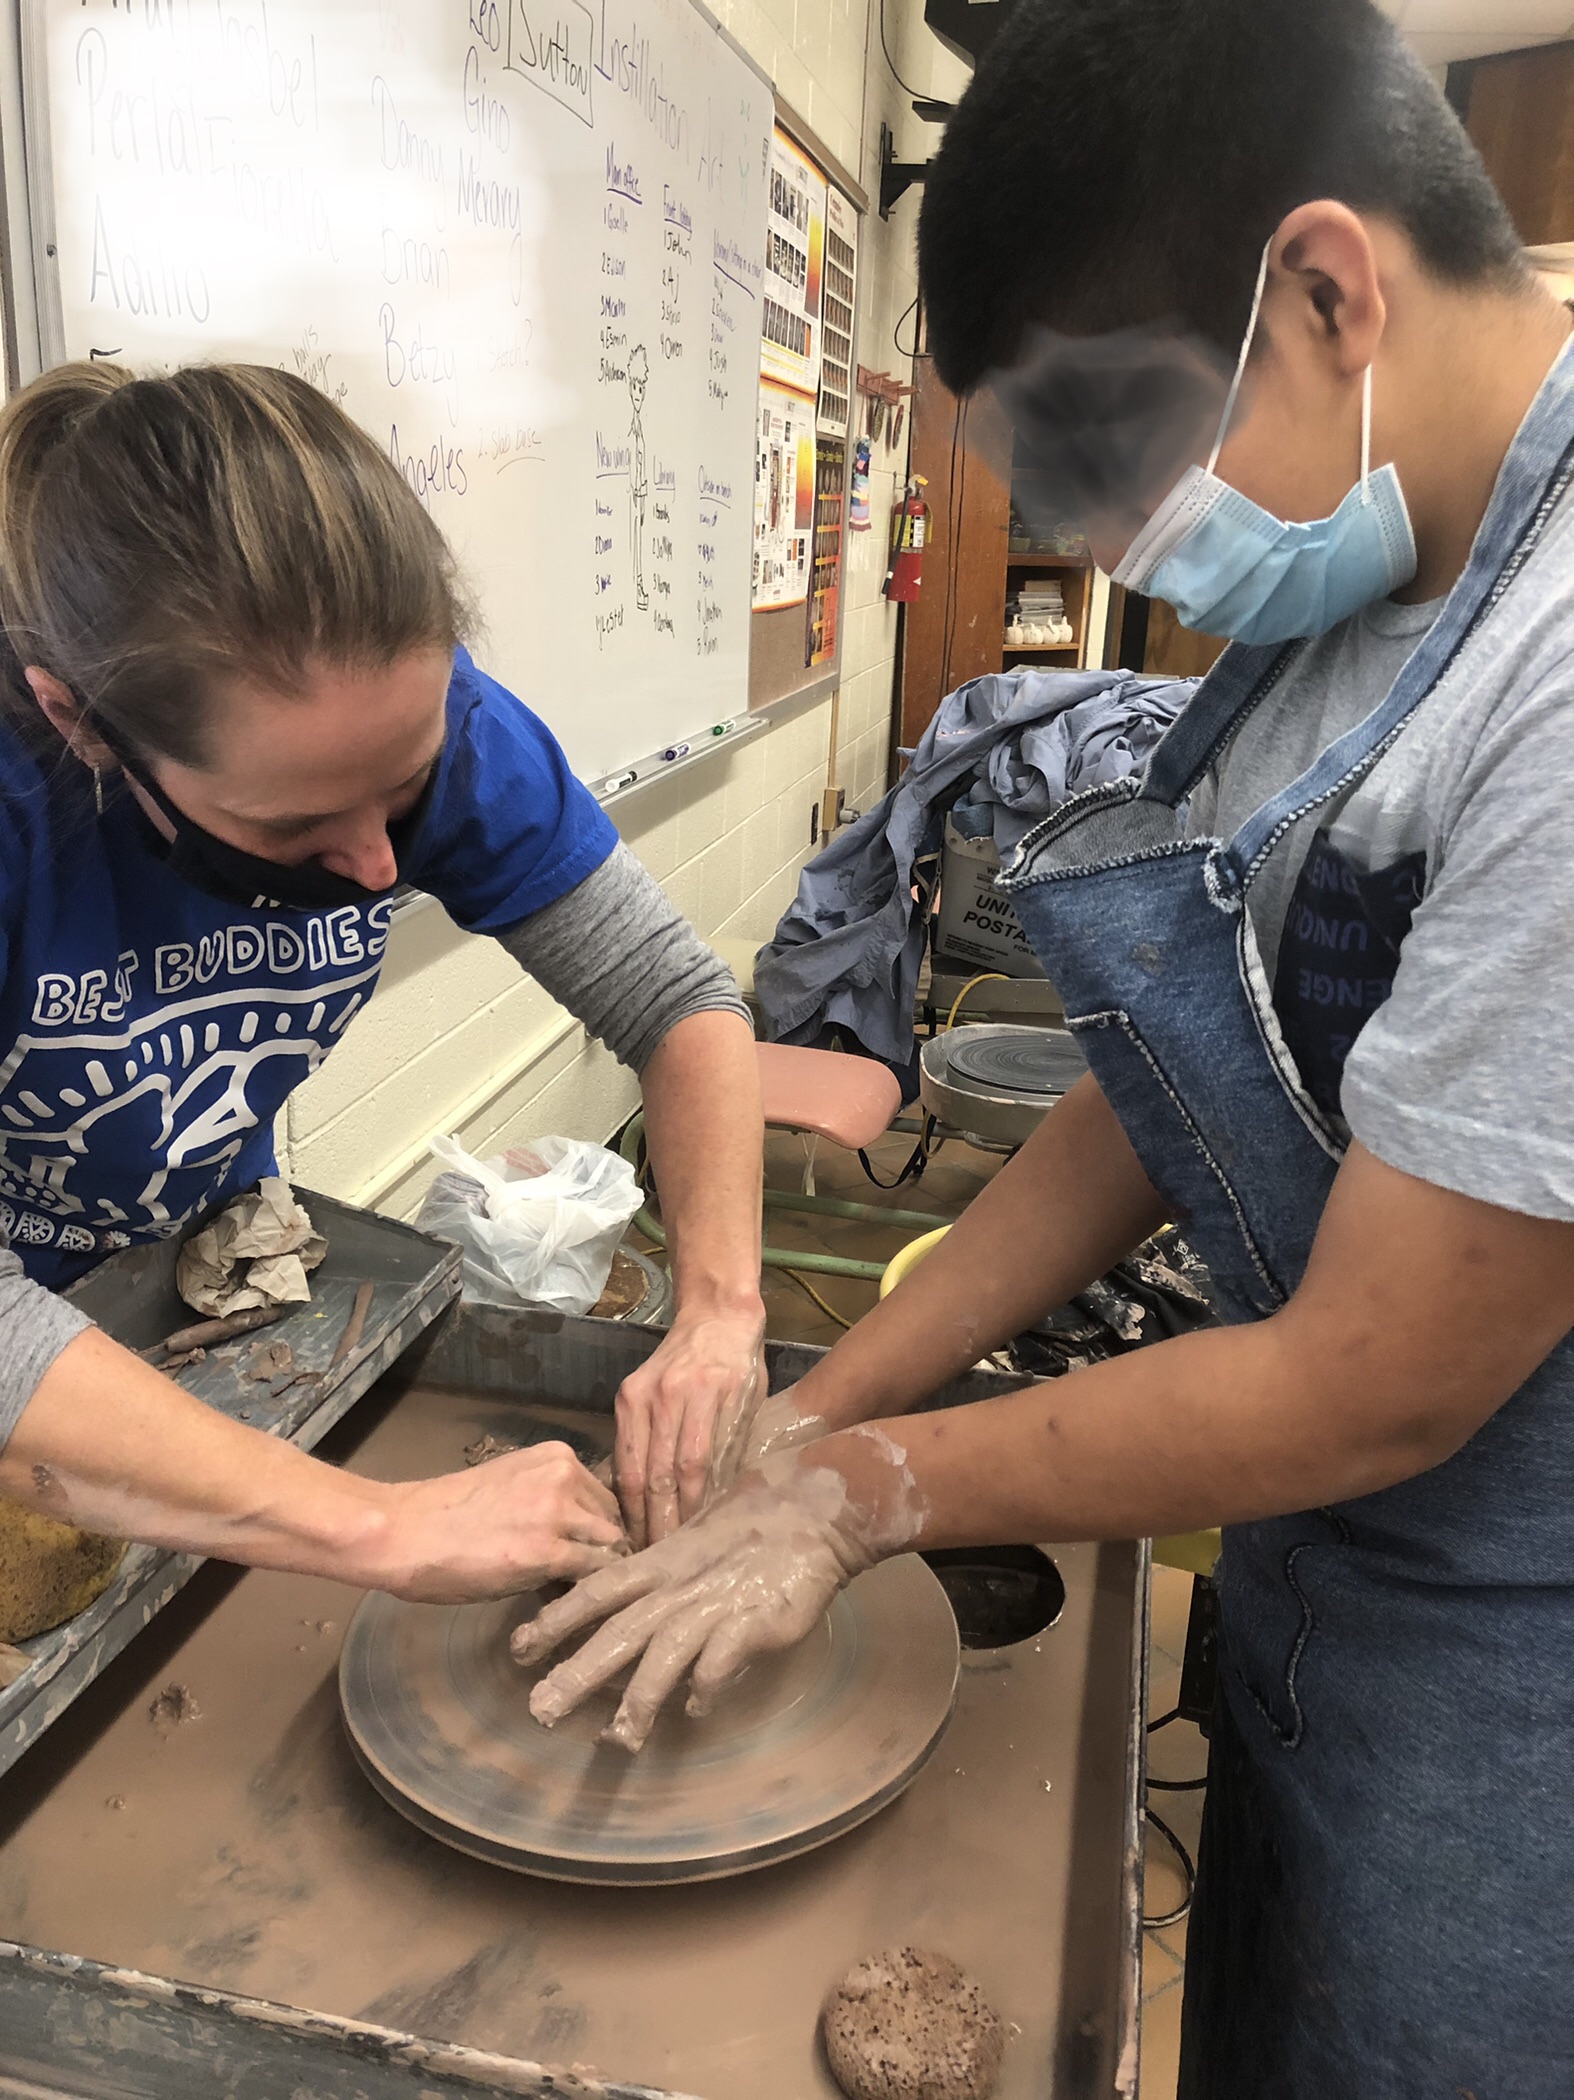
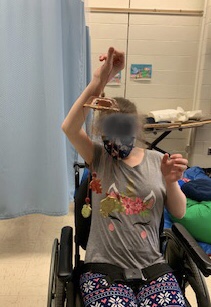
“Those kids can’t….” are the most damaging words I’ve heard in relation to my students with disabilities. It’s easy to focus on the challenges with disabilities and it takes constant reflection to keep your assumptions in check. In the times that I step out of my own comfort level, the students in my Life Skills class never cease to amaze me.
Last month, I led the students in a hand-over-hand wheel throwing activity. My biases and assumptions made me very nervous to attempt this. Some of the students don’t like having dirty hands, so surely this had the potential to go very poorly.
I was remarkably wrong. The smoothness of centered clay proved to be incredibly enjoyable for the students and some of them wouldn’t leave the wheel while others giggled with delight.
Never, ever stop yourself from trying something new or trying something that you think is too hard, too messy, or too challenging. Continue to push your own limits and biases to see some magical things happen in your classroom.
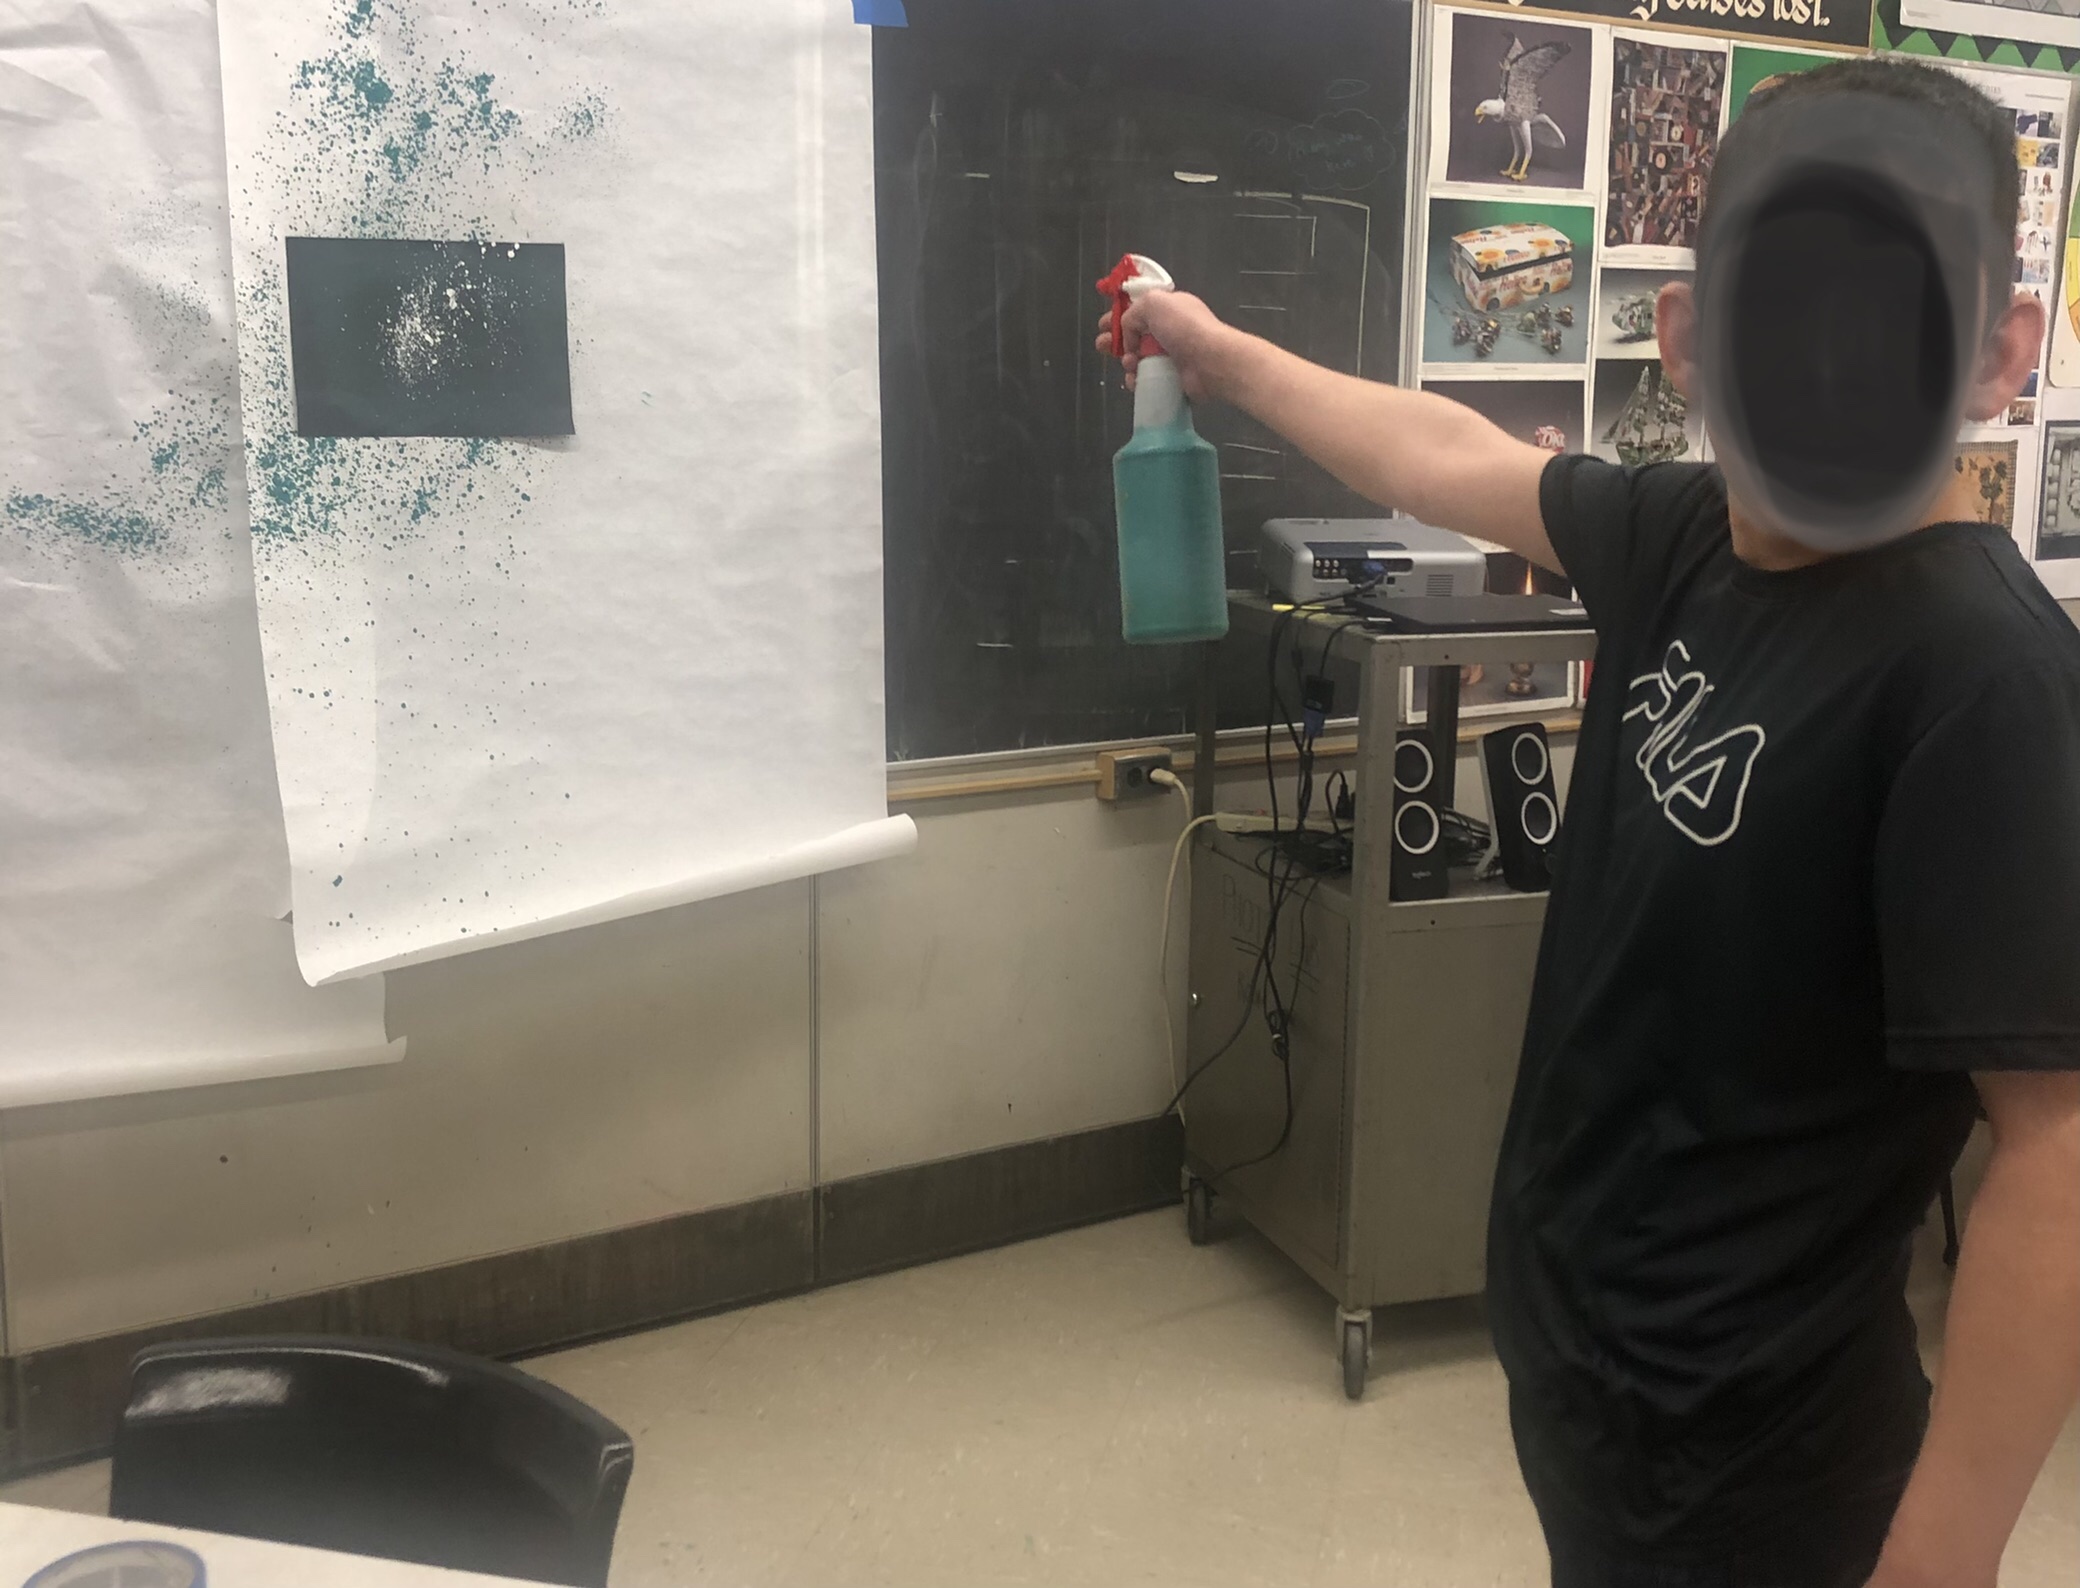
- Offer a variety of materials and methods
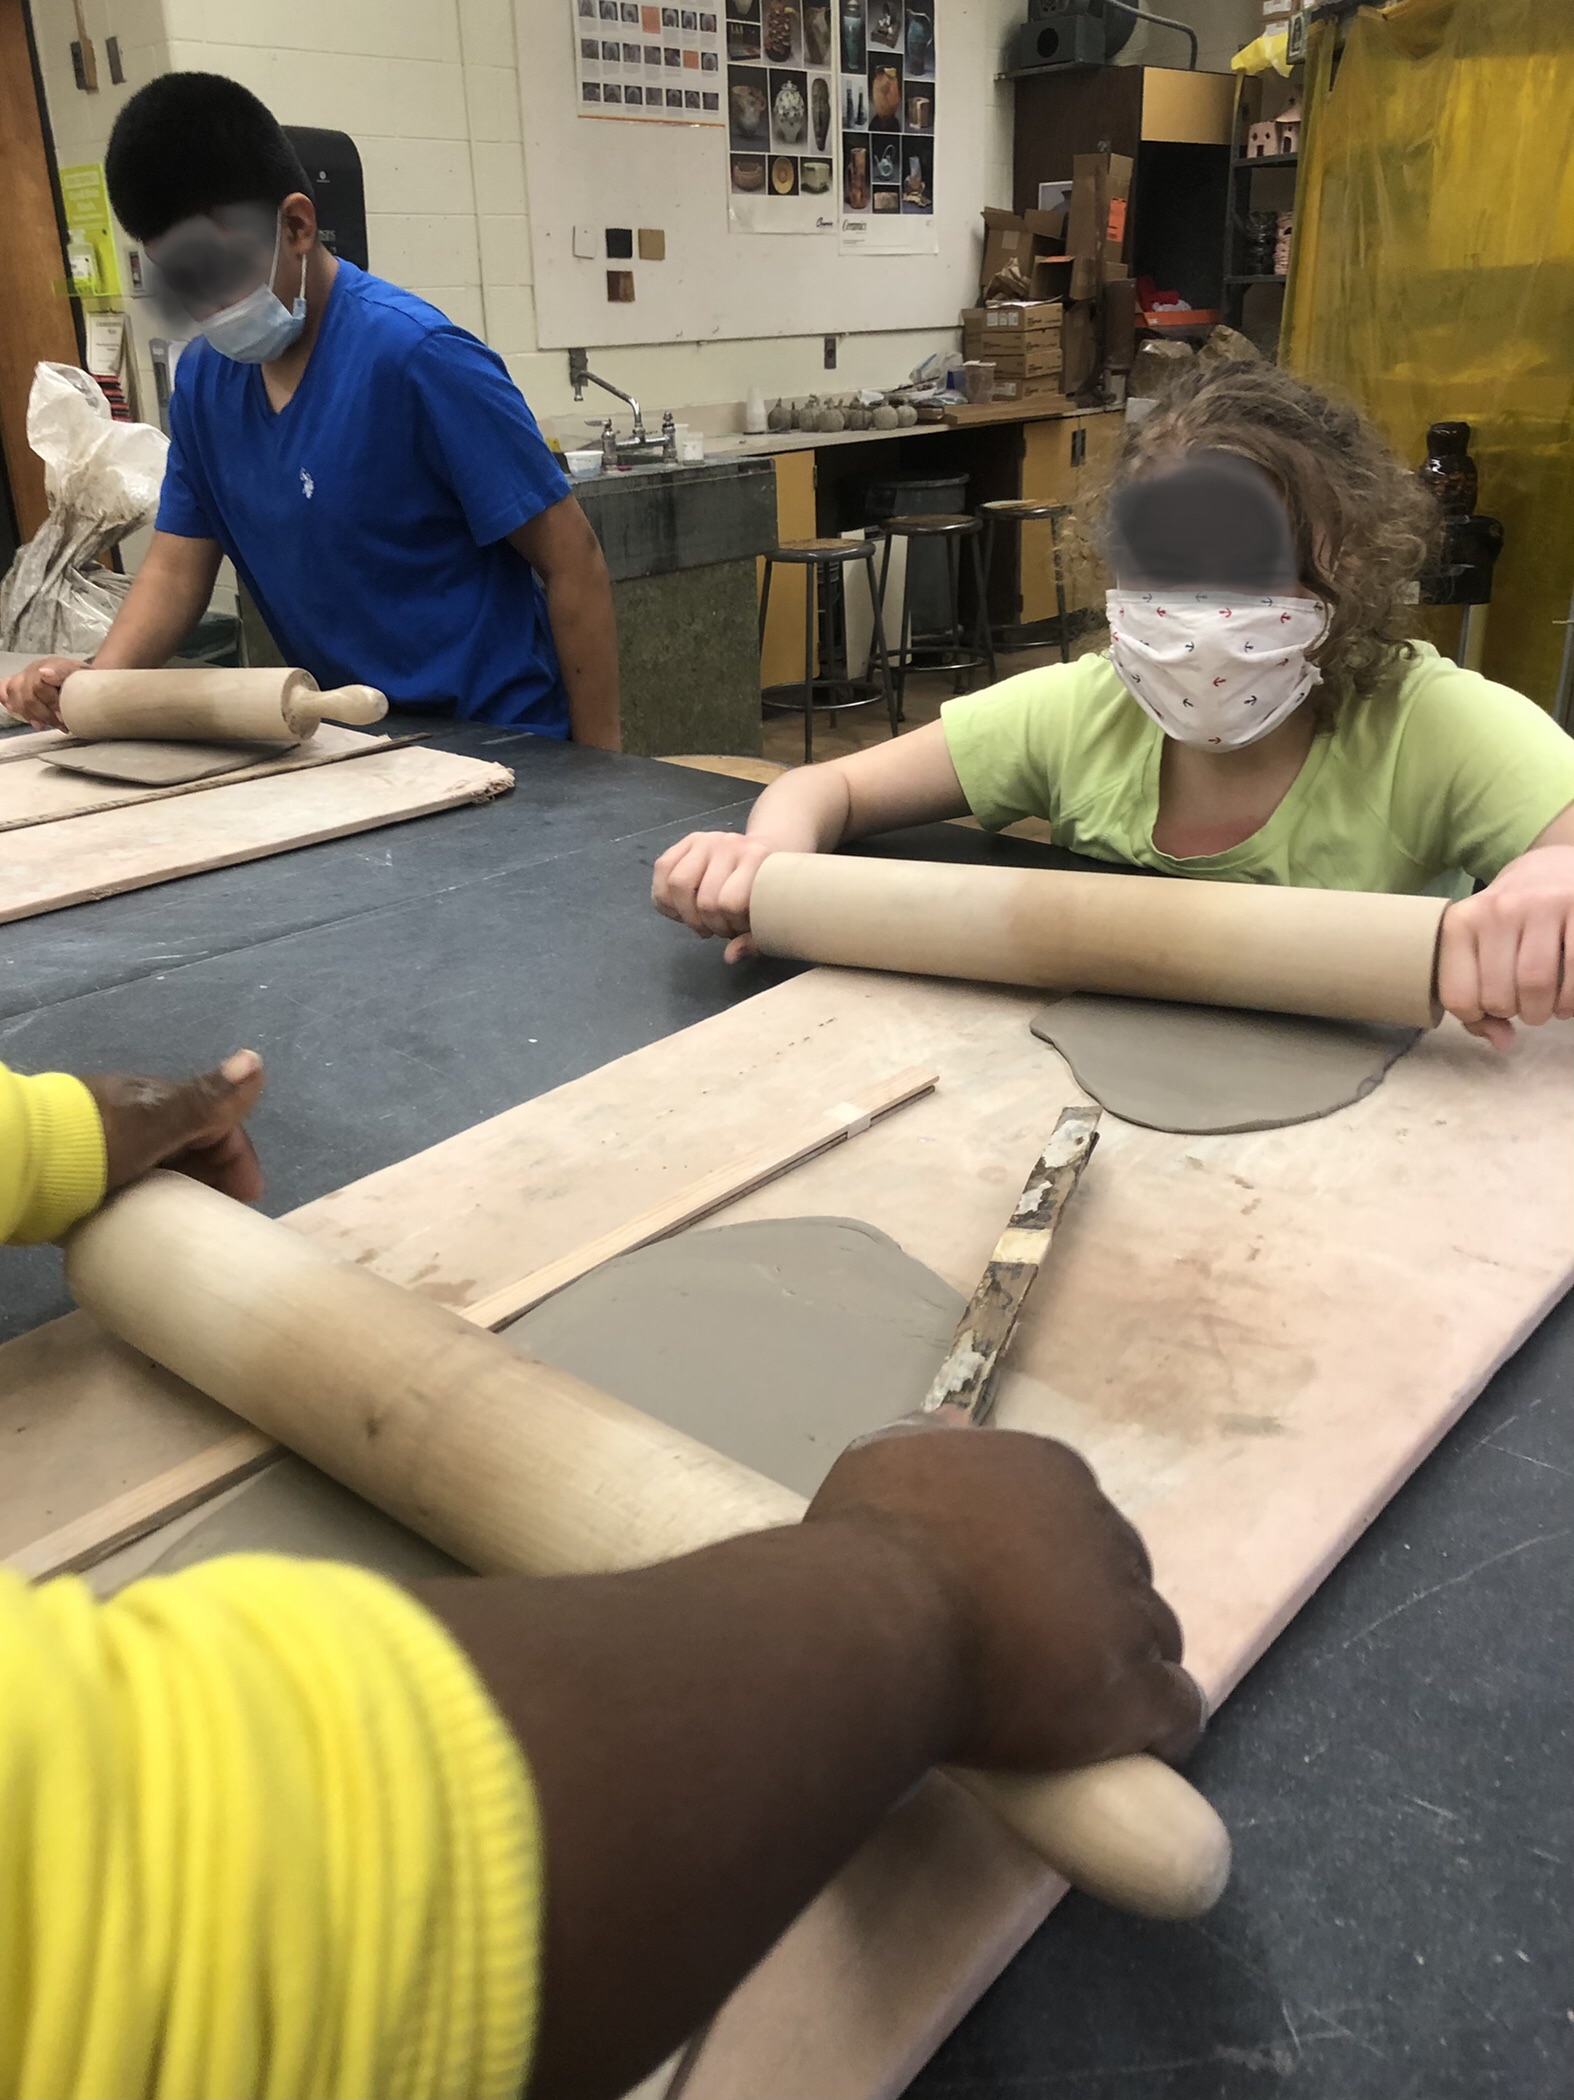
As a continuation of the last tip, always offer a variety of materials, tools, and methods. There are lots of great adapted materials available, and there are other resources to help you build your own adapted materials. Not all material or methods will work for every student so try it all and try it often. Sometimes it doesn’t “click” on the first try… that doesn’t mean it won’t “click” again later!
It’s hard to provide many different materials and opportunities without overstimulating some students or causing anxiety in others. When you introduce a new material, take it slow. Give lots of demonstrations. Show the different marks or methods to your students. Allow them to tactically engage in the material before they use it to create art. If the students become used to trying new things in a safe environment, they will likely be more receptive to taking the challenge you are giving them.
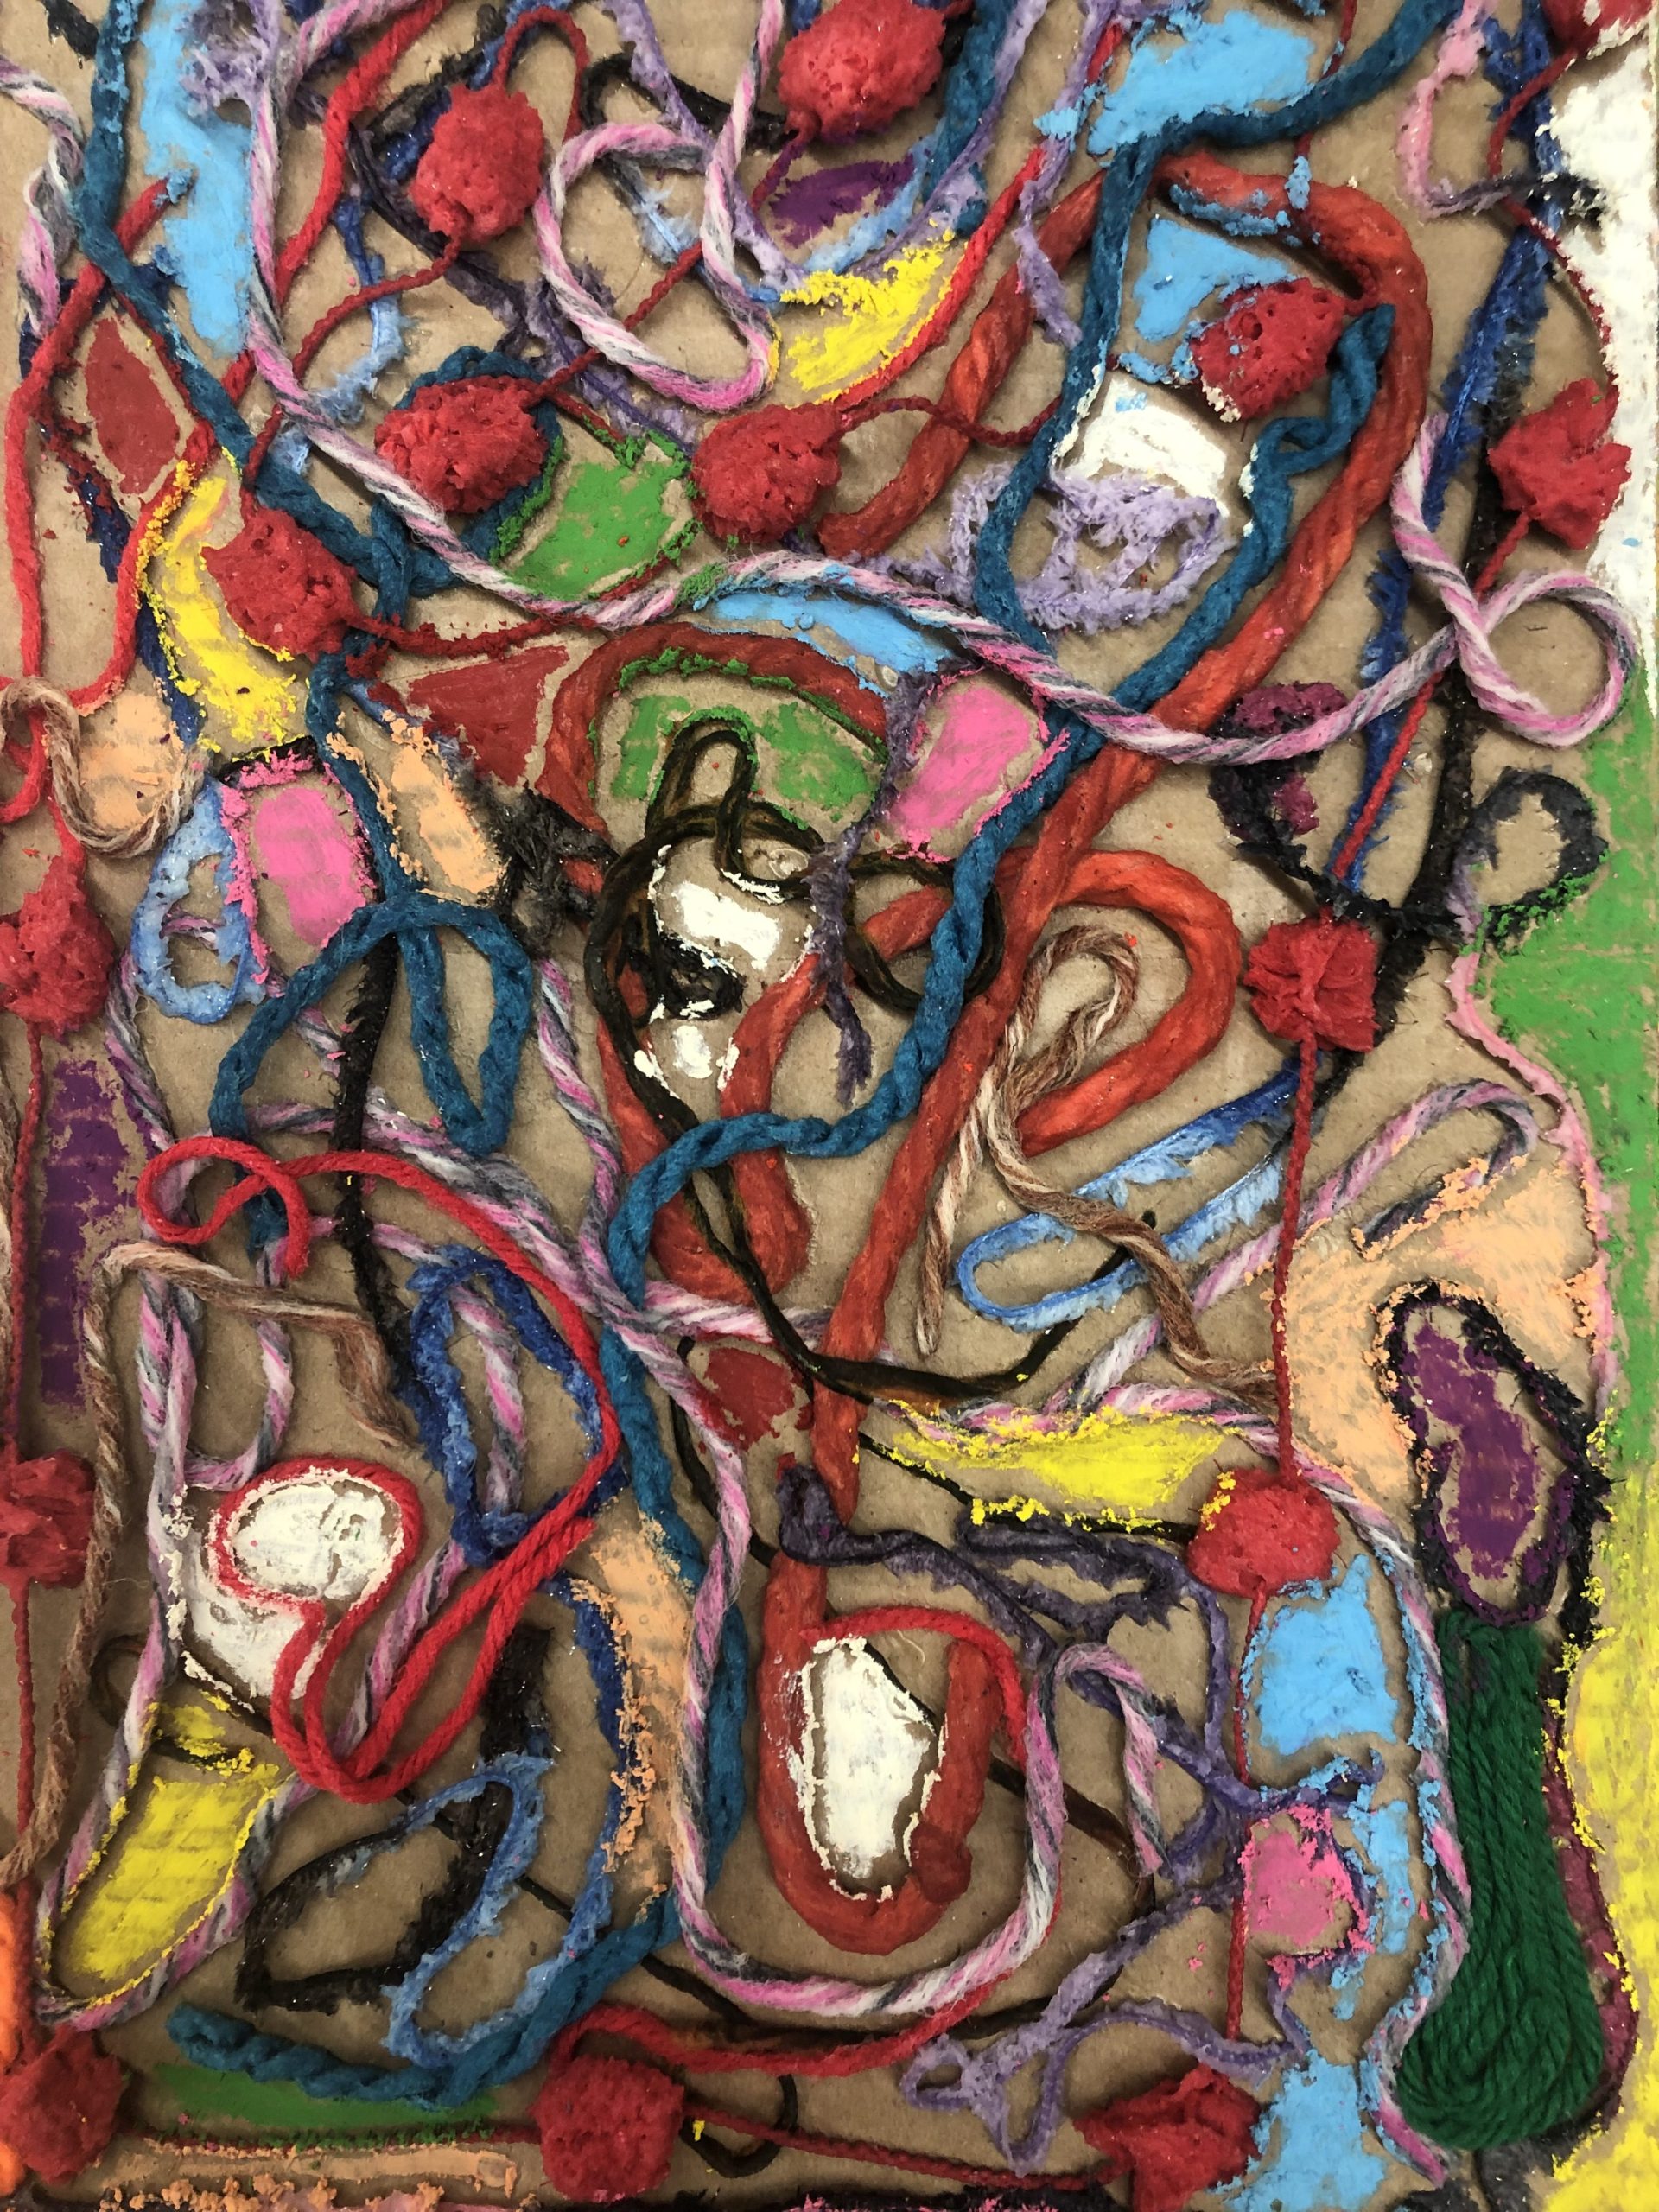
I’ll never forget a student several years ago that only made circular marks on paper. For weeks he engaged with markers, pencils, crayons, paint, and only created circular movements on his paper. One day he was given chalk pastels and he was captivated. Suddenly, his movements were controlled and intentional. He was deeply engaged in this material and he blew us all away. I would have never expected a chalk pastel to completely change one’s approach to art as drastically as it did. Opportunities for discovery exist everywhere so don’t leave any chances on the table!
- Take it slow and allow for deep exploration of concepts
Whether your curriculum is rigid or allows for lots of educator freedom, don’t try to cover too much material. This is harder than it seems!
Teachers have a lot of pressure on what they should cover and what their students should achieve. It’s extremely difficult to grapple with falling short of your own curricular expectations. However, your students will benefit greatly when you allow yourself to follow their lead, rather than the curricular documents that might not have been drafted with your specific students in this specific stage in mind. Accept that mastery might take longer and look different than you expected and embrace their pace. It is better to learn something thoroughly than be confused by many things!
- Pay attention to IEP goals
Empower yourself by becoming an active voice in the IEP process. In doing so, you will speak to your students from a lens that many others might not see. If you are not already invited to IEP meetings, ask to attend. This is a chance to hear all interested parties come together and you’ll end up seeing your student in a new light.
Pay attention to goals that may originally seem outside of your content. Functional or social goals are as crucial as any other academic-specific goals and all of them can manifest themselves in very meaningful ways in the art classroom. From counting out palettes to the proper pronunciation of new art terms, there are many ways that the art teacher can reinforce learning goals in very meaningful ways for the students.
I won’t claim that IEP documents aren’t daunting documents, but familiarizing yourself with each student’s IEP will help you reach your students in very significant ways.
- Fight for facilities adaptations
Are the students in wheelchairs able to move throughout the room? Are the tables/desks an appropriate height? Are your speakers loud enough for hearing impaired students to hear from anywhere in the room?
As you familiarize yourself with the IEP, it becomes more apparent where changes can be made to both your course and your classroom. While we can de-stimulate our classrooms and layout our furniture to better accommodate our students, some changes will require more support. Sometimes the changes can be small, such as using stools with narrow legs that don’t interfere with support canes but other times alternate seating such as balance balls or raised tables are needed. Don’t simply “accept the things you cannot change” and inform your administration of ways that student success can be impeded by facilities. In many cases, the administration might not be aware of the changes that you need, so do some research and state your cause!
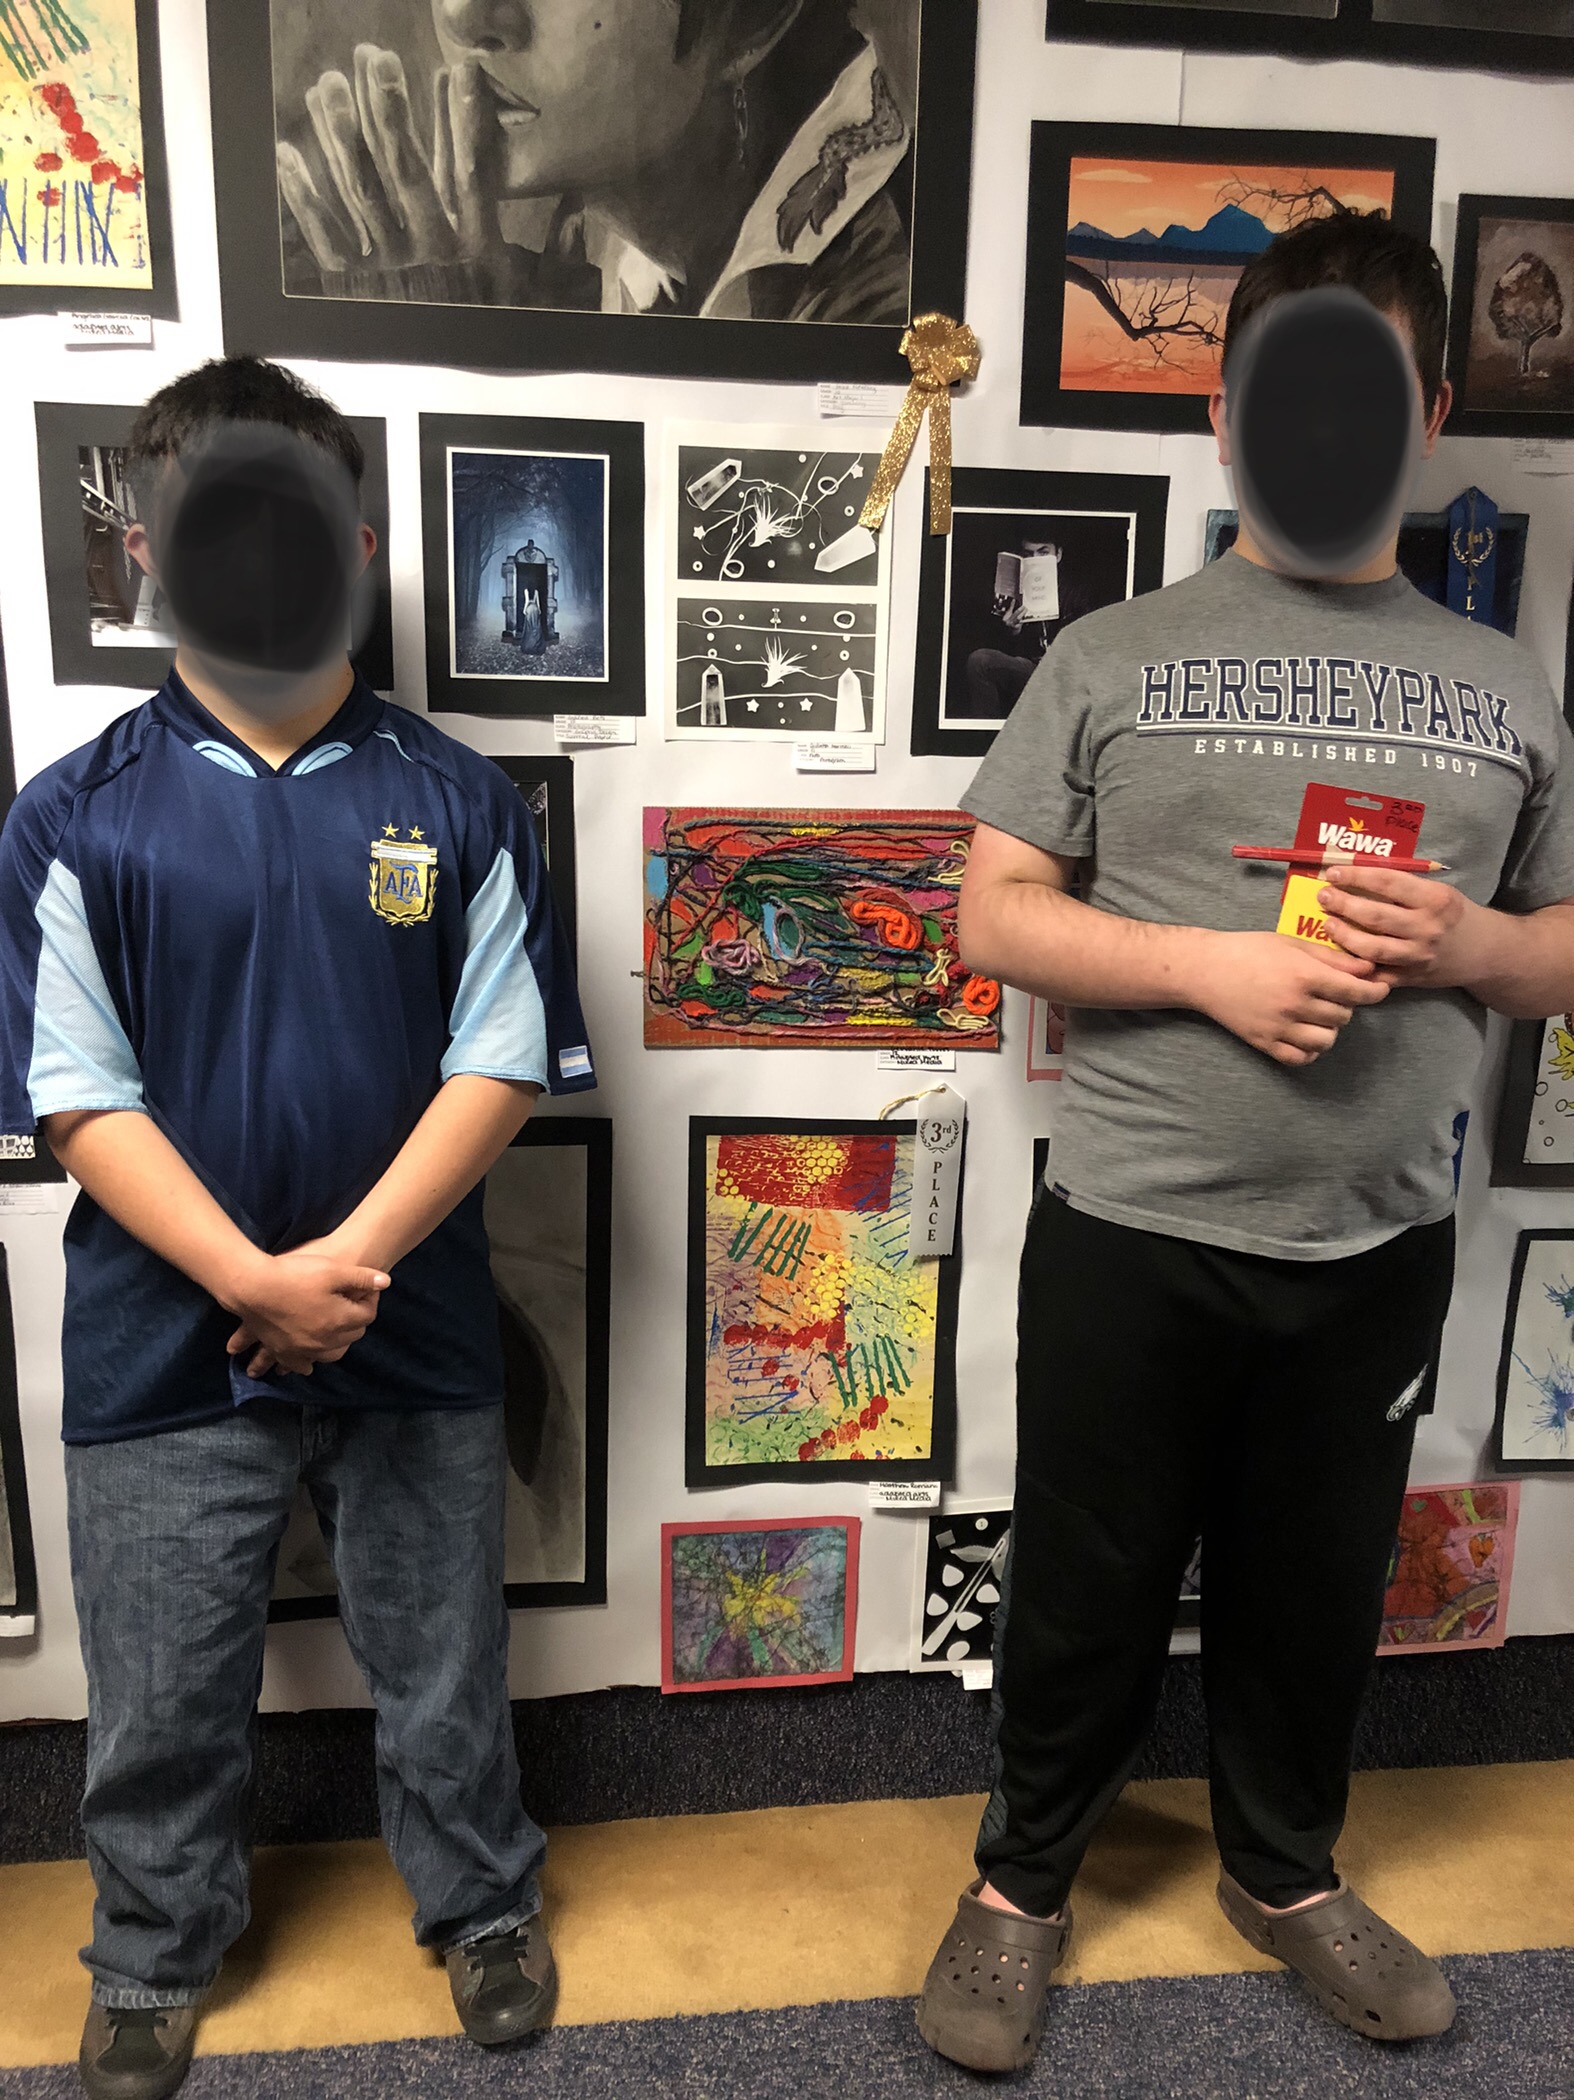
- Celebrate your students’ art within your community
This is another piece of advice that is more complicated in practice than it seems. In fact, I have talked with many other teachers of students with unique or multiple disabilities that have found the display and celebration of student work to be problematic.
Sometimes the finished product of your students’ work might not fit with the popular expectations of what age-appropriate school artwork might look like. I once had a display of Life Skills student work outside of my classroom and a visitor commented about the elementary art being displayed in a high school. That moment called for reflection for myself as well as our arts visitor.
I have struggled with how to frame my students’ work that doesn’t appear to mesh with the work of many public school art celebrations. Frankly, I find this to be a flaw in many juried shows. My students might not display the art skills that serve as exemplars for their grade levels, but they still show individuality, growth, and accomplishment and are worthy of display. At the same time, labeling the work as the product of a student with disabilities places the art in a category of Otherness.
The piece of advice to offer in this case is to start to carve out ways of changing the culture surrounding art by students with disabilities in your community. Consider how you label all student work to see if it categorizes students by age, ability, or disability. Educate your community about your program and continue to offer age-appropriate subject matter to your students with disabilities. Move to the freedom to proudly display your students’ work without disclaimers and labels so that all students feel more welcome to create and celebrate their creations in your classroom and beyond.
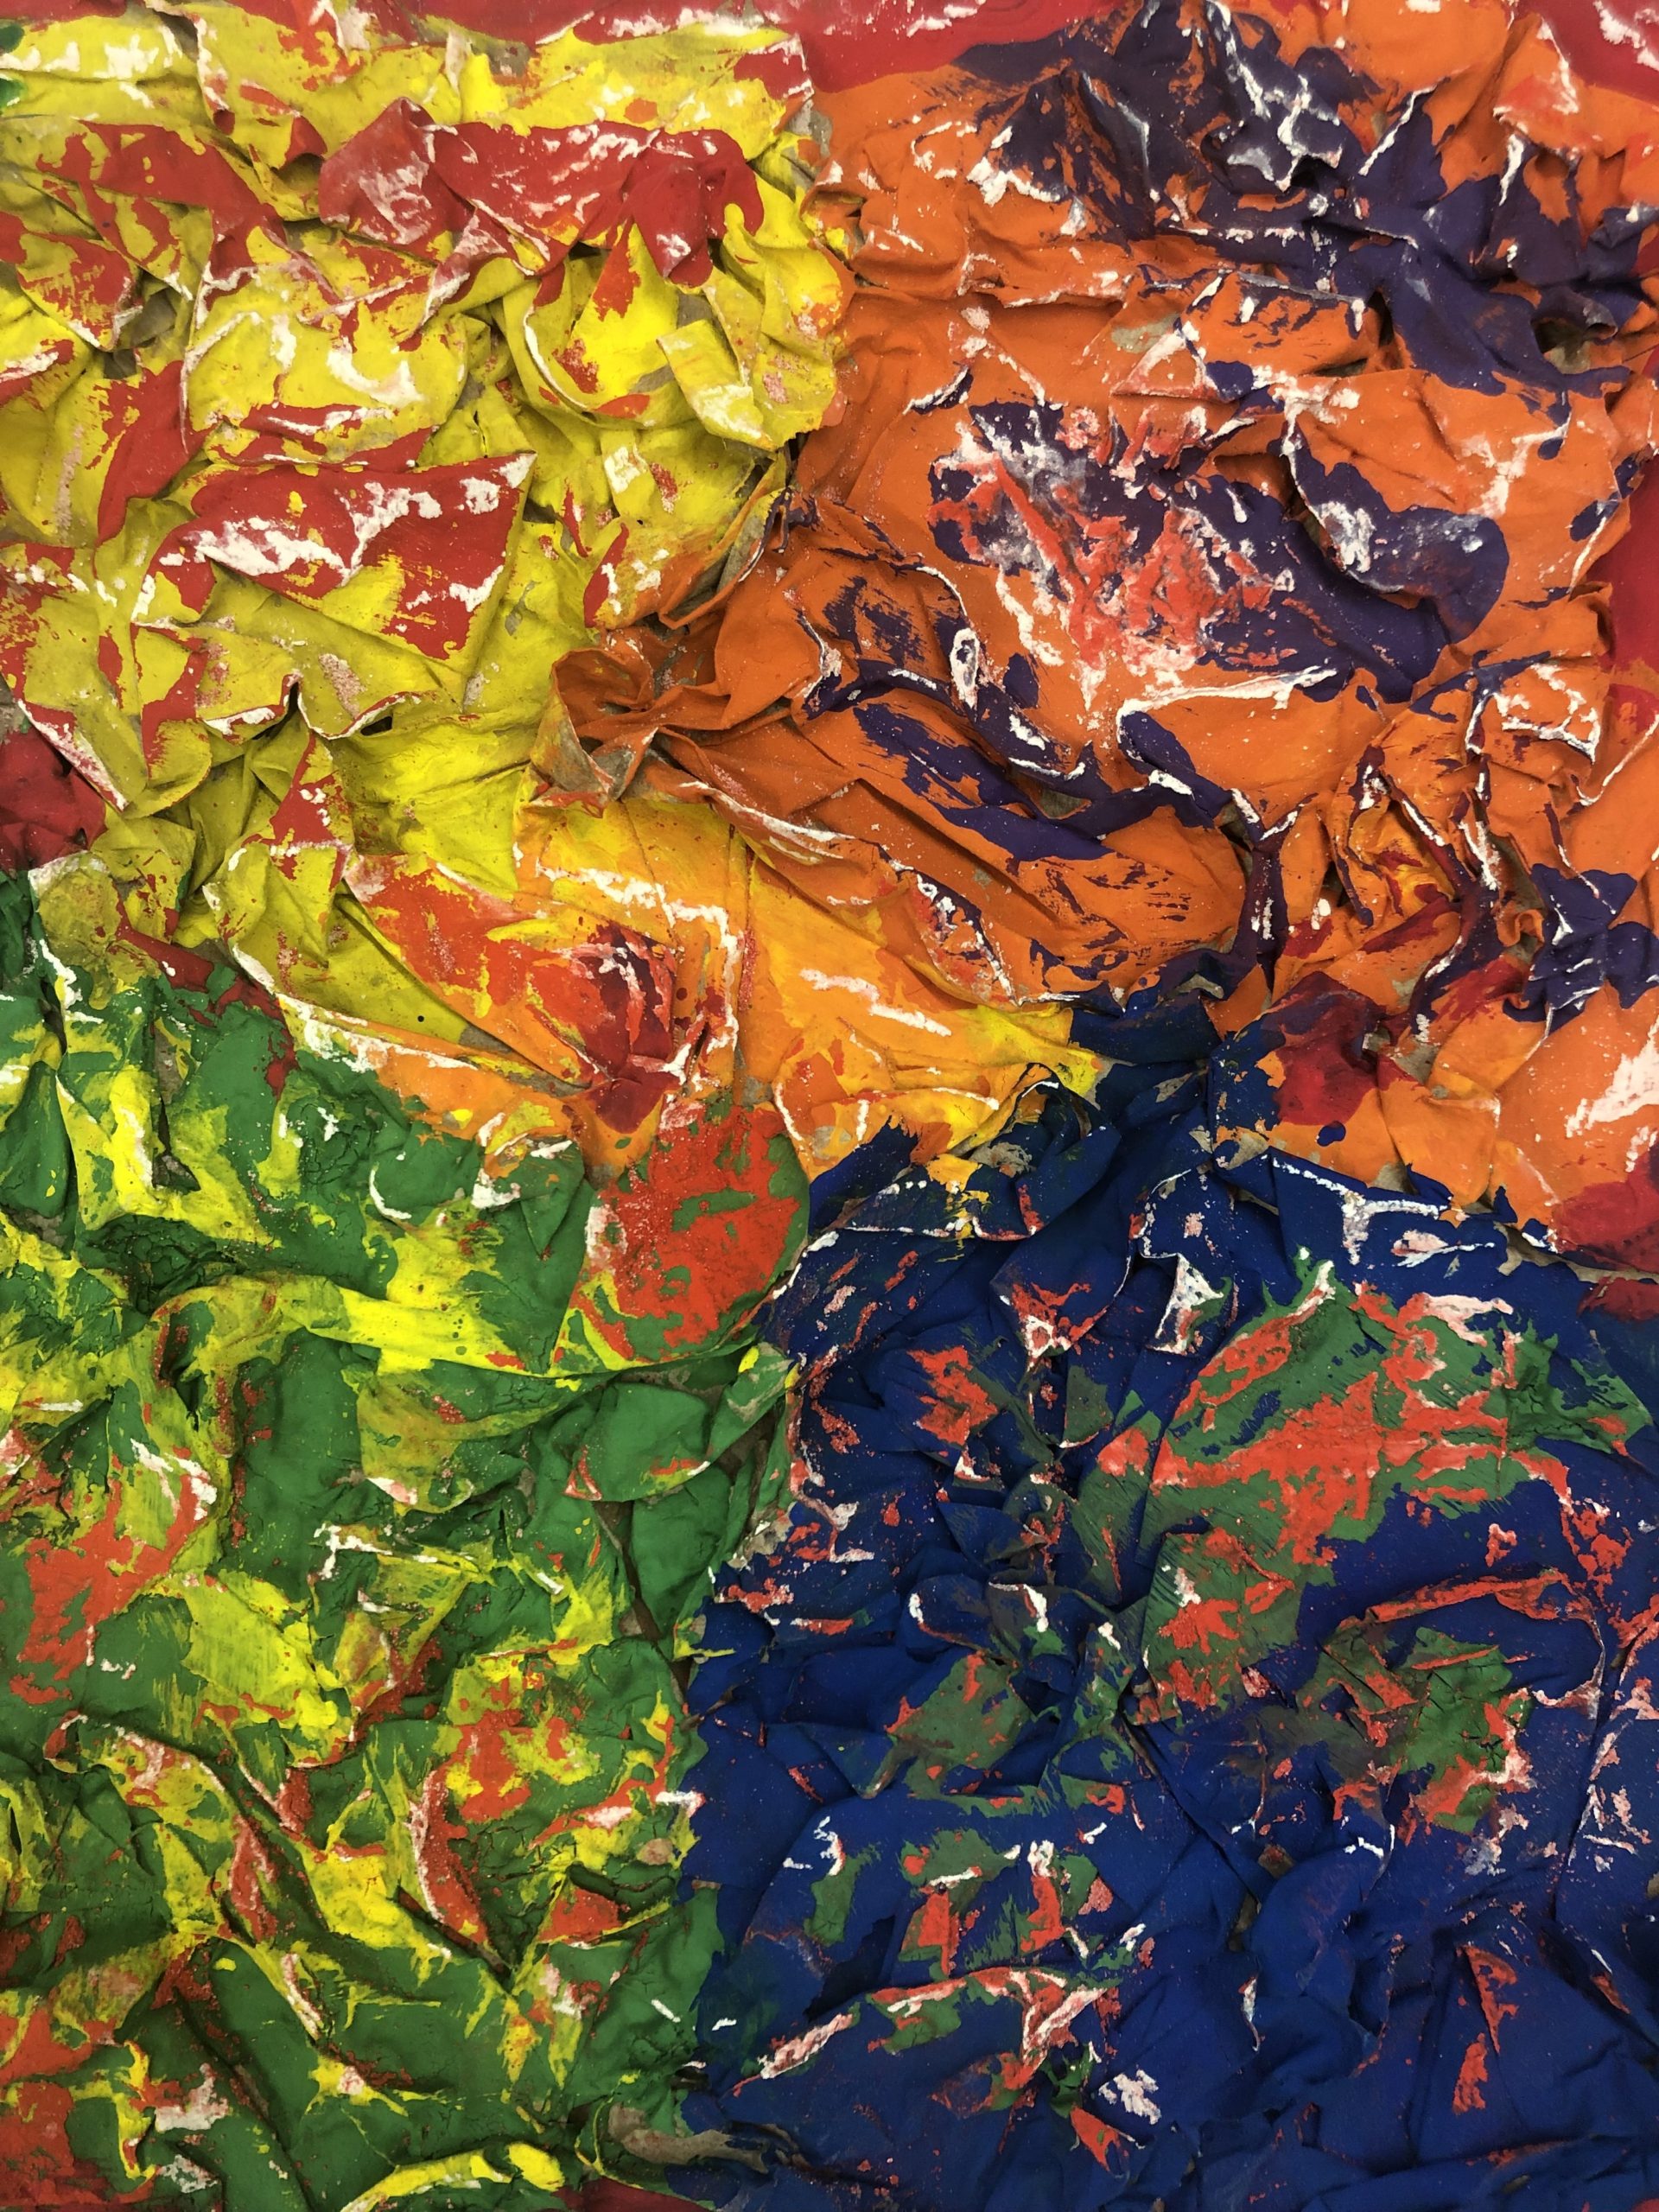
- Embrace authenticity
If we are going to celebrate the art that our students make, we must ensure that the work is exclusively theirs. If we are going to use their work as data in structuring IEP goals, we must make sure that the work we are evaluating is authentic.
There is a natural tendency to want to help our students. As a result, well-meaning adults often aid students in doing work that they can do themselves. The child might be capable of making marks on the page with the paintbrush, but they might not look like the representational landscape painting that others might be working on. As a result, sometimes adults will jump in and overly help or correct the students’ work. This is often done with the best intentions at heart.
It’s hard to stop yourself from “fixing” student artwork when it doesn’t turn out the way the project might have intended. It’s even harder to ask other adults (such as co-teachers or aids) to not interfere with the work. It’s incredibly hard when the other teacher or aid has a long and close relationship with that particular student.
Be firm in your role as an art educator. You are there to facilitate the childrens’ artwork and give them the space to grow. This growth might not look as perfect as the images that our biases create in our visions, but their artwork is unique to them, and, as teachers, strive to seek beauty in this authenticity.
- Consider your own curricular goals and philosophy of teaching
This job can be hard. It can be draining. It can be challenging and push you beyond what you thought you could (or should) have to do. But the small rewards that you achieve every day is likely the cause of why you chose this important and rewarding profession. Don’t let the mountains of paperwork and standardized assessments blur your vision of what you want to achieve with your students. If you ever feel stumped, frustrated, or depleted, remember what you wrote as your philosophy of art education before you accepted this job. How has this evolved as you’ve grown as an educator? Revise this statement often and reflect on the essentials of what you want to teach. Pause and remind yourself to be the teacher that you want to be. This job only feels challenging if you care deeply about the work you are doing, so embrace the journey and reward yourself for the growth you are making as an educator!
Further reading for consideration:
https://www.usatoday.com/story/life/health-wellness/2021/06/11/disabled-not-special-needs-experts-explain-why-never-use-term/7591024002/
Flipping the Art Classroom

Jillette Smith is a Grades 4-6 Art Educator at the Andrew G. Curtin Intermediate School in the Williamsport Area School District. Jillette serves as the Region 8 Representative for PAEA. Reflecting on her experience in flipping the art room, Jillette offers insight from her case study, sharing the achievements of students as well as her instructional practices.
What a typical art class looks like for me:
Students log into their Schoology art course that is pre-assigned via our district’s technology and administration staff. Upon reviewing objectives, each student can see assignments in the published lesson folder by clicking on the folder and description. Once the students enter a folder, they will begin at the top and work their way down. I always start a lesson with a hook, and this is either an external video clip or an article. Afterward, students either receive information as a whole group through a PowerPoint or a pre-recorded video. As students move throughout the lesson, they complete a short quiz or discussion board prompt to check for understanding. Then, students can review the assignment expectations, including written instructions, a rubric, a demonstration video, and a place to submit their work. To submit student work, they must take a photo of their work and upload it to the assignment. After students submit their projects, they save a copy to their digital portfolio. Using digital portfolios helps me track students’ cumulative progress. Students who work quickly have access to enrichment activities. Flipping the art room keeps each student engaged in an art activity at all times, which has notably decreased student behavior issues within the classroom environment and strengthened student accountability as they have immediate access to their grades and progress throughout each quarter.
Purtee, M. (2016, October 14). How to Flip Your Classroom Without Making Videos. The Art of Education University. https://theartofeducation.edu/2016/10/14/flipped-instruction- beyond-video/.
Zheng, L., Kaushal Kumar, B., Zhen, Y., & Zhang, X. (2020). The Effectiveness of the Flipped Classroom on Students’ Learning Achievement and Learning Motivation: A Meta-Analysis. Journal of Educational Technology & Society, 23(1), 1–15.
The Practical Guide to Flipping the Classroom. (n.d.). Retrieved May 04, 2021, from https://www.panopto.com/resource/practical-guide-to-flipped-classrooms/
Resourceful: Re-source-full
Meg Barney is a retired art educator and serves as the Chair for the PAEA Fellows.
Are you re-source full? Do you have ways to re-source what you need?
At this time of year, nature is making the transition from summer to winter with the season of autumn. The weather has finally turned colder yet again with rain and wind. The critters are very active now and are very resourceful. The grey squirrels, black squirrels, chipmunks, and rabbits are each foraging for food in their own ways – squirrels in the dogwood and Hawthorn trees, chipmunks getting fallen beech nuts from the ground, and rabbits enjoying the late-season clover. Pigeons and doves fill in the spaces by walking along the driveway edges looking for fallen maple seeds. Yes, the wildlife is thriving and active in the autumn weather.
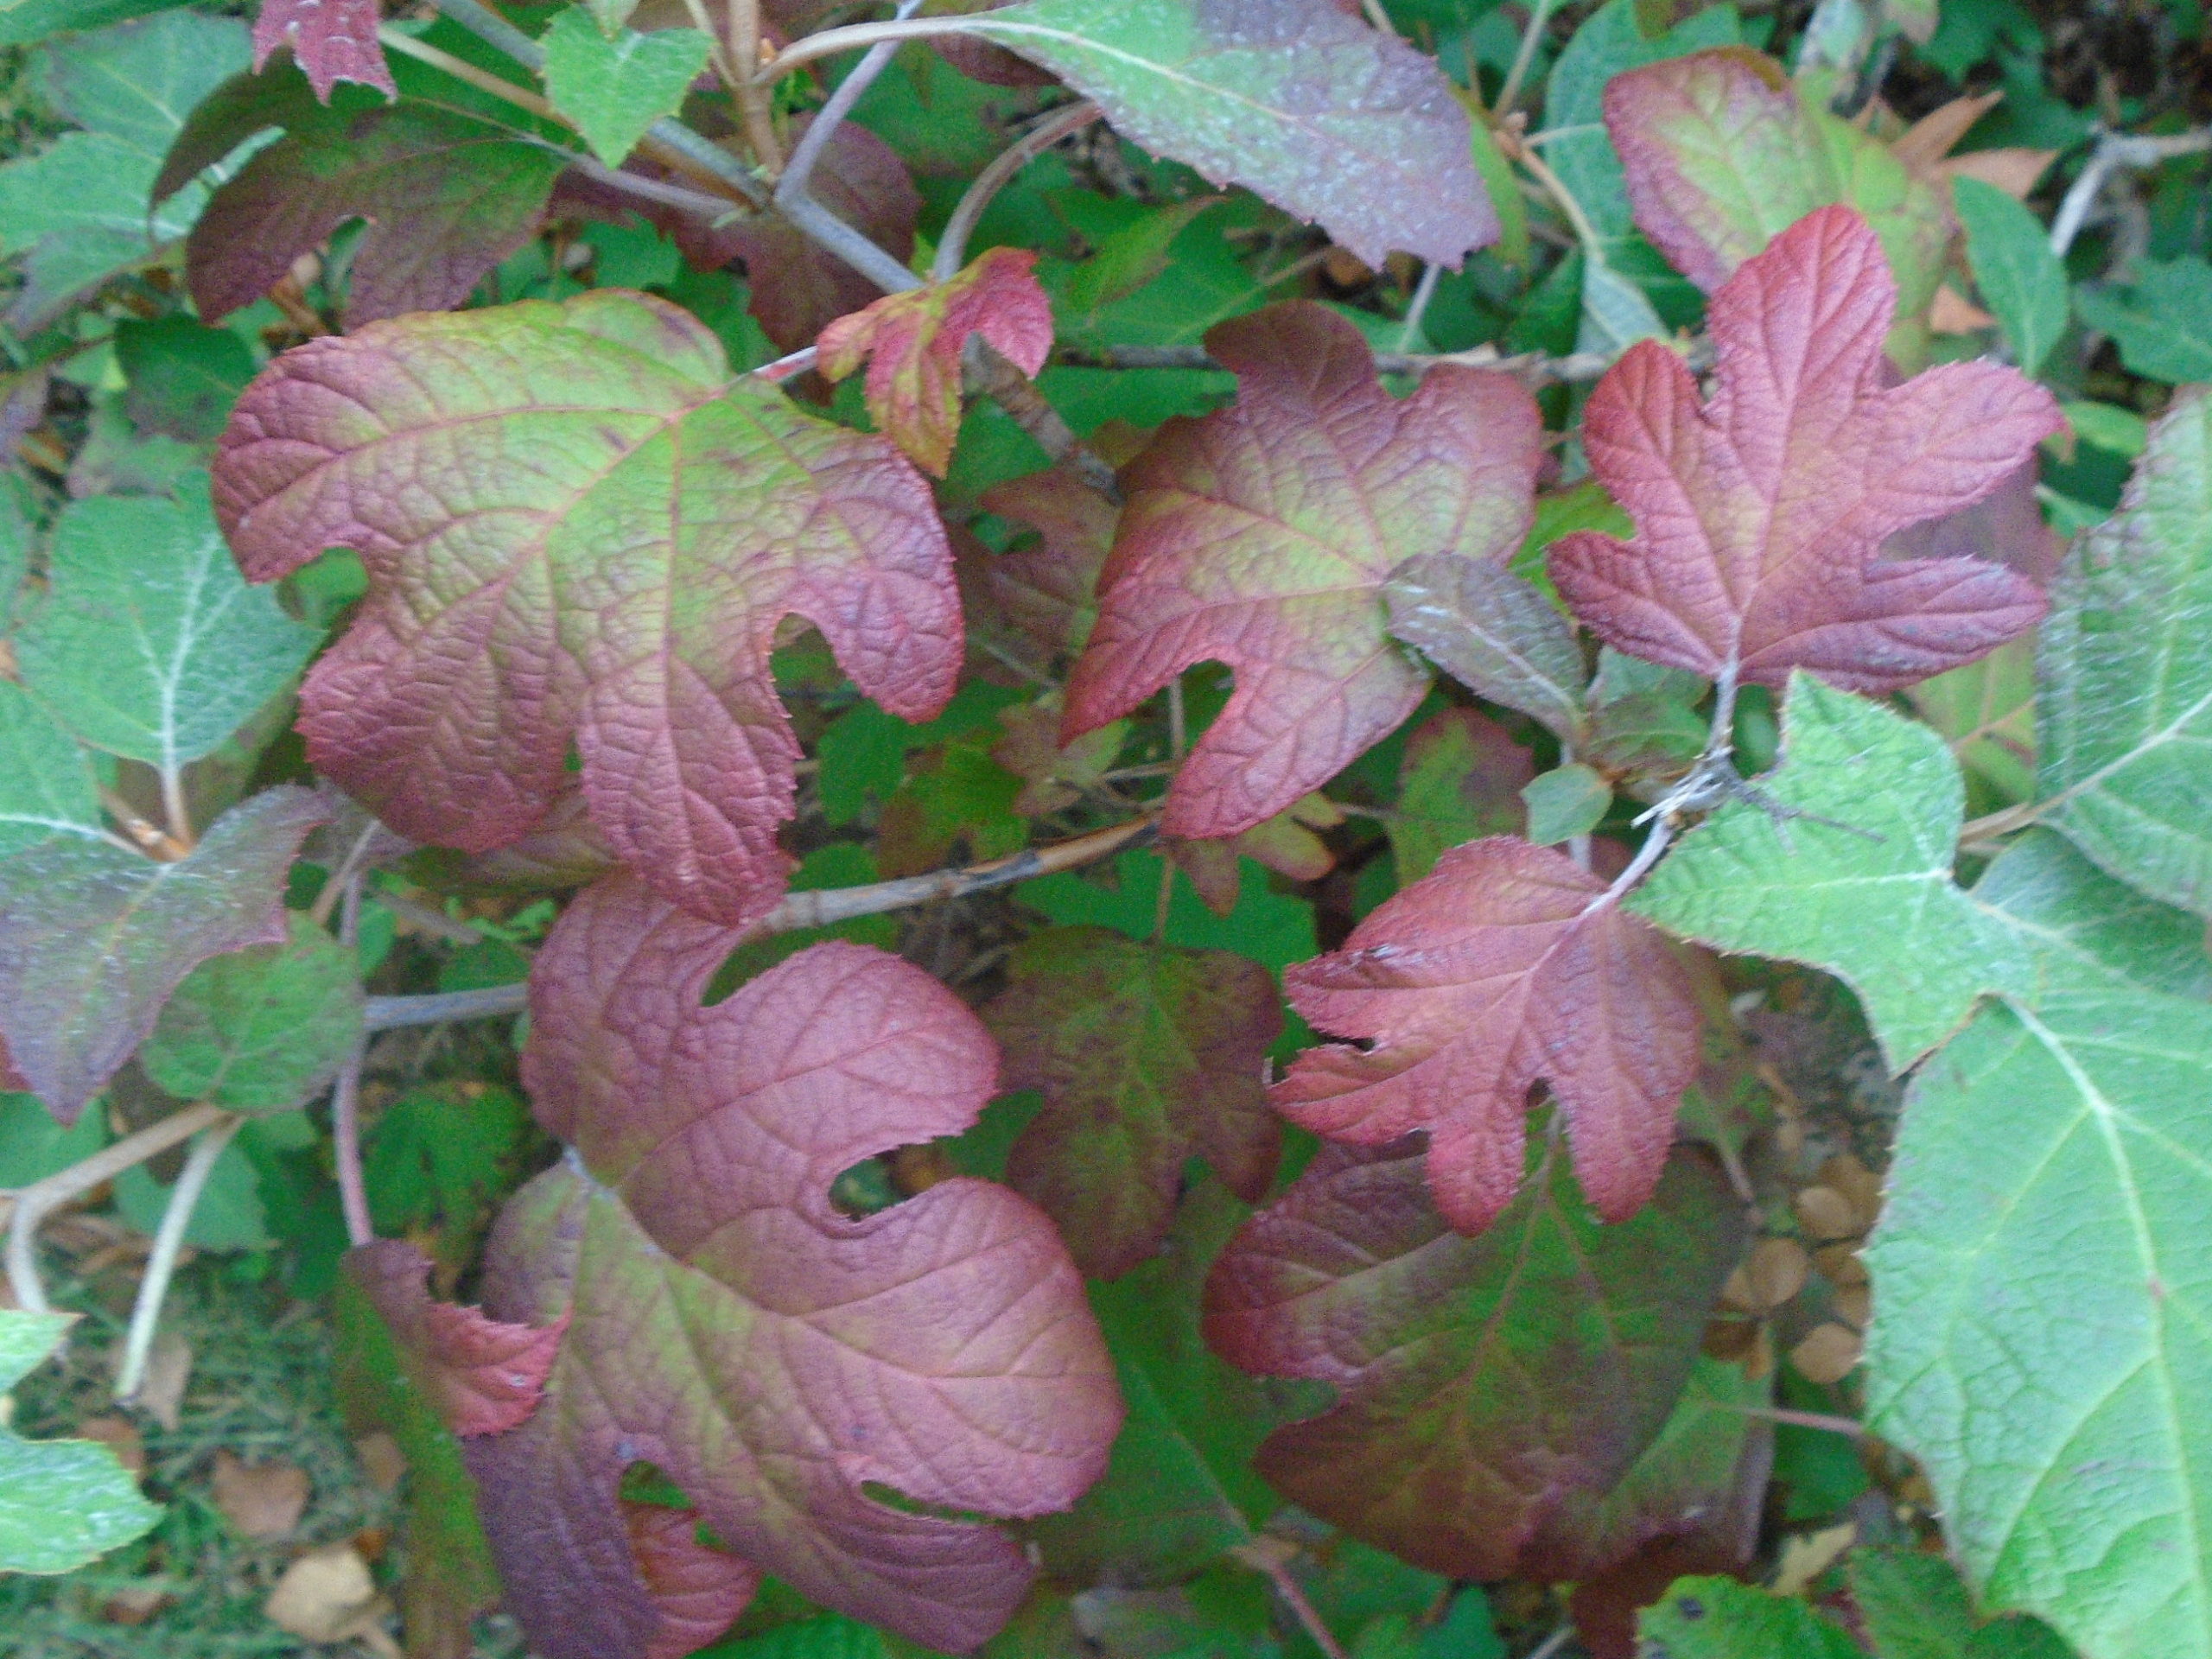
The trees and plants are active also. Seemingly from nowhere, colors begin to be revealed as the chlorophyll is being retrieved and sustenance stored underground for the winter. Brilliant colors all combine to create a beautiful landscape before our eyes.

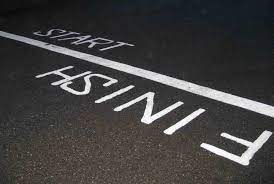
None of these transitions require money or status. None of the changes require laws or words. They all require action on the part of the plant, tree, or critter. Each life form quietly yet steadily works on the task at hand. Each finds ways to re-gather the resources they need before winter arrives. Each works to put full ‘store houses’ in place before the snow and ice come again. Sometimes they work together, sometimes they work alone. All are focused, all take action.
So what can we learn from these observations? What are the trees, plants, and critters revealing to us?
In nature, each tree, plant, and critter stays focused on the task at hand. They find benefit in channeling their energies into the specific task that must be accomplished, for they have deadlines just as people do. Frost will come and kill the plants. Snow will come with its cold insulation. Sunlight will shorten and nighttime will lengthen. All the changes are temporary, and the trees, plants, and critters know this. Yet they also know that preparation, being resourceful, and planning ahead will help make the wintertime seem shorter and be easier to endure.
Art educators are often just as resourceful in taking care of the students in their classes and in promoting their programs in their educational settings. Art educators who observe closely can see what is available.
They then take action while staying focused on both the needs of their students and the end results. To re-source what is needed for a full and strong art education program, sometimes the art educator finds and gathers the resources that are present in both expected and unexpected places. For example, the PAEA conference provides an abundance of resources for a wide variety of interest groups. Some resources are gained while attending the conference in person while others are found on the conference website and larger PAEA weblog site. This year’s conference just ended, and a wealth of tips and information can be found on our website. NAEA offers a wider range of resources for art educators of all levels. Reading through the pages to be found at arteducators.org reveals helpful and practical information including the Art Educator Toolkit.
Being resourceful requires action and hard work, yet it also provides benefits and rewards that are priceless. And before long, the evidence of things unseen comes into view. And just like the trees, plants, and critters of nature, the art educator can seem to create something from nothing.
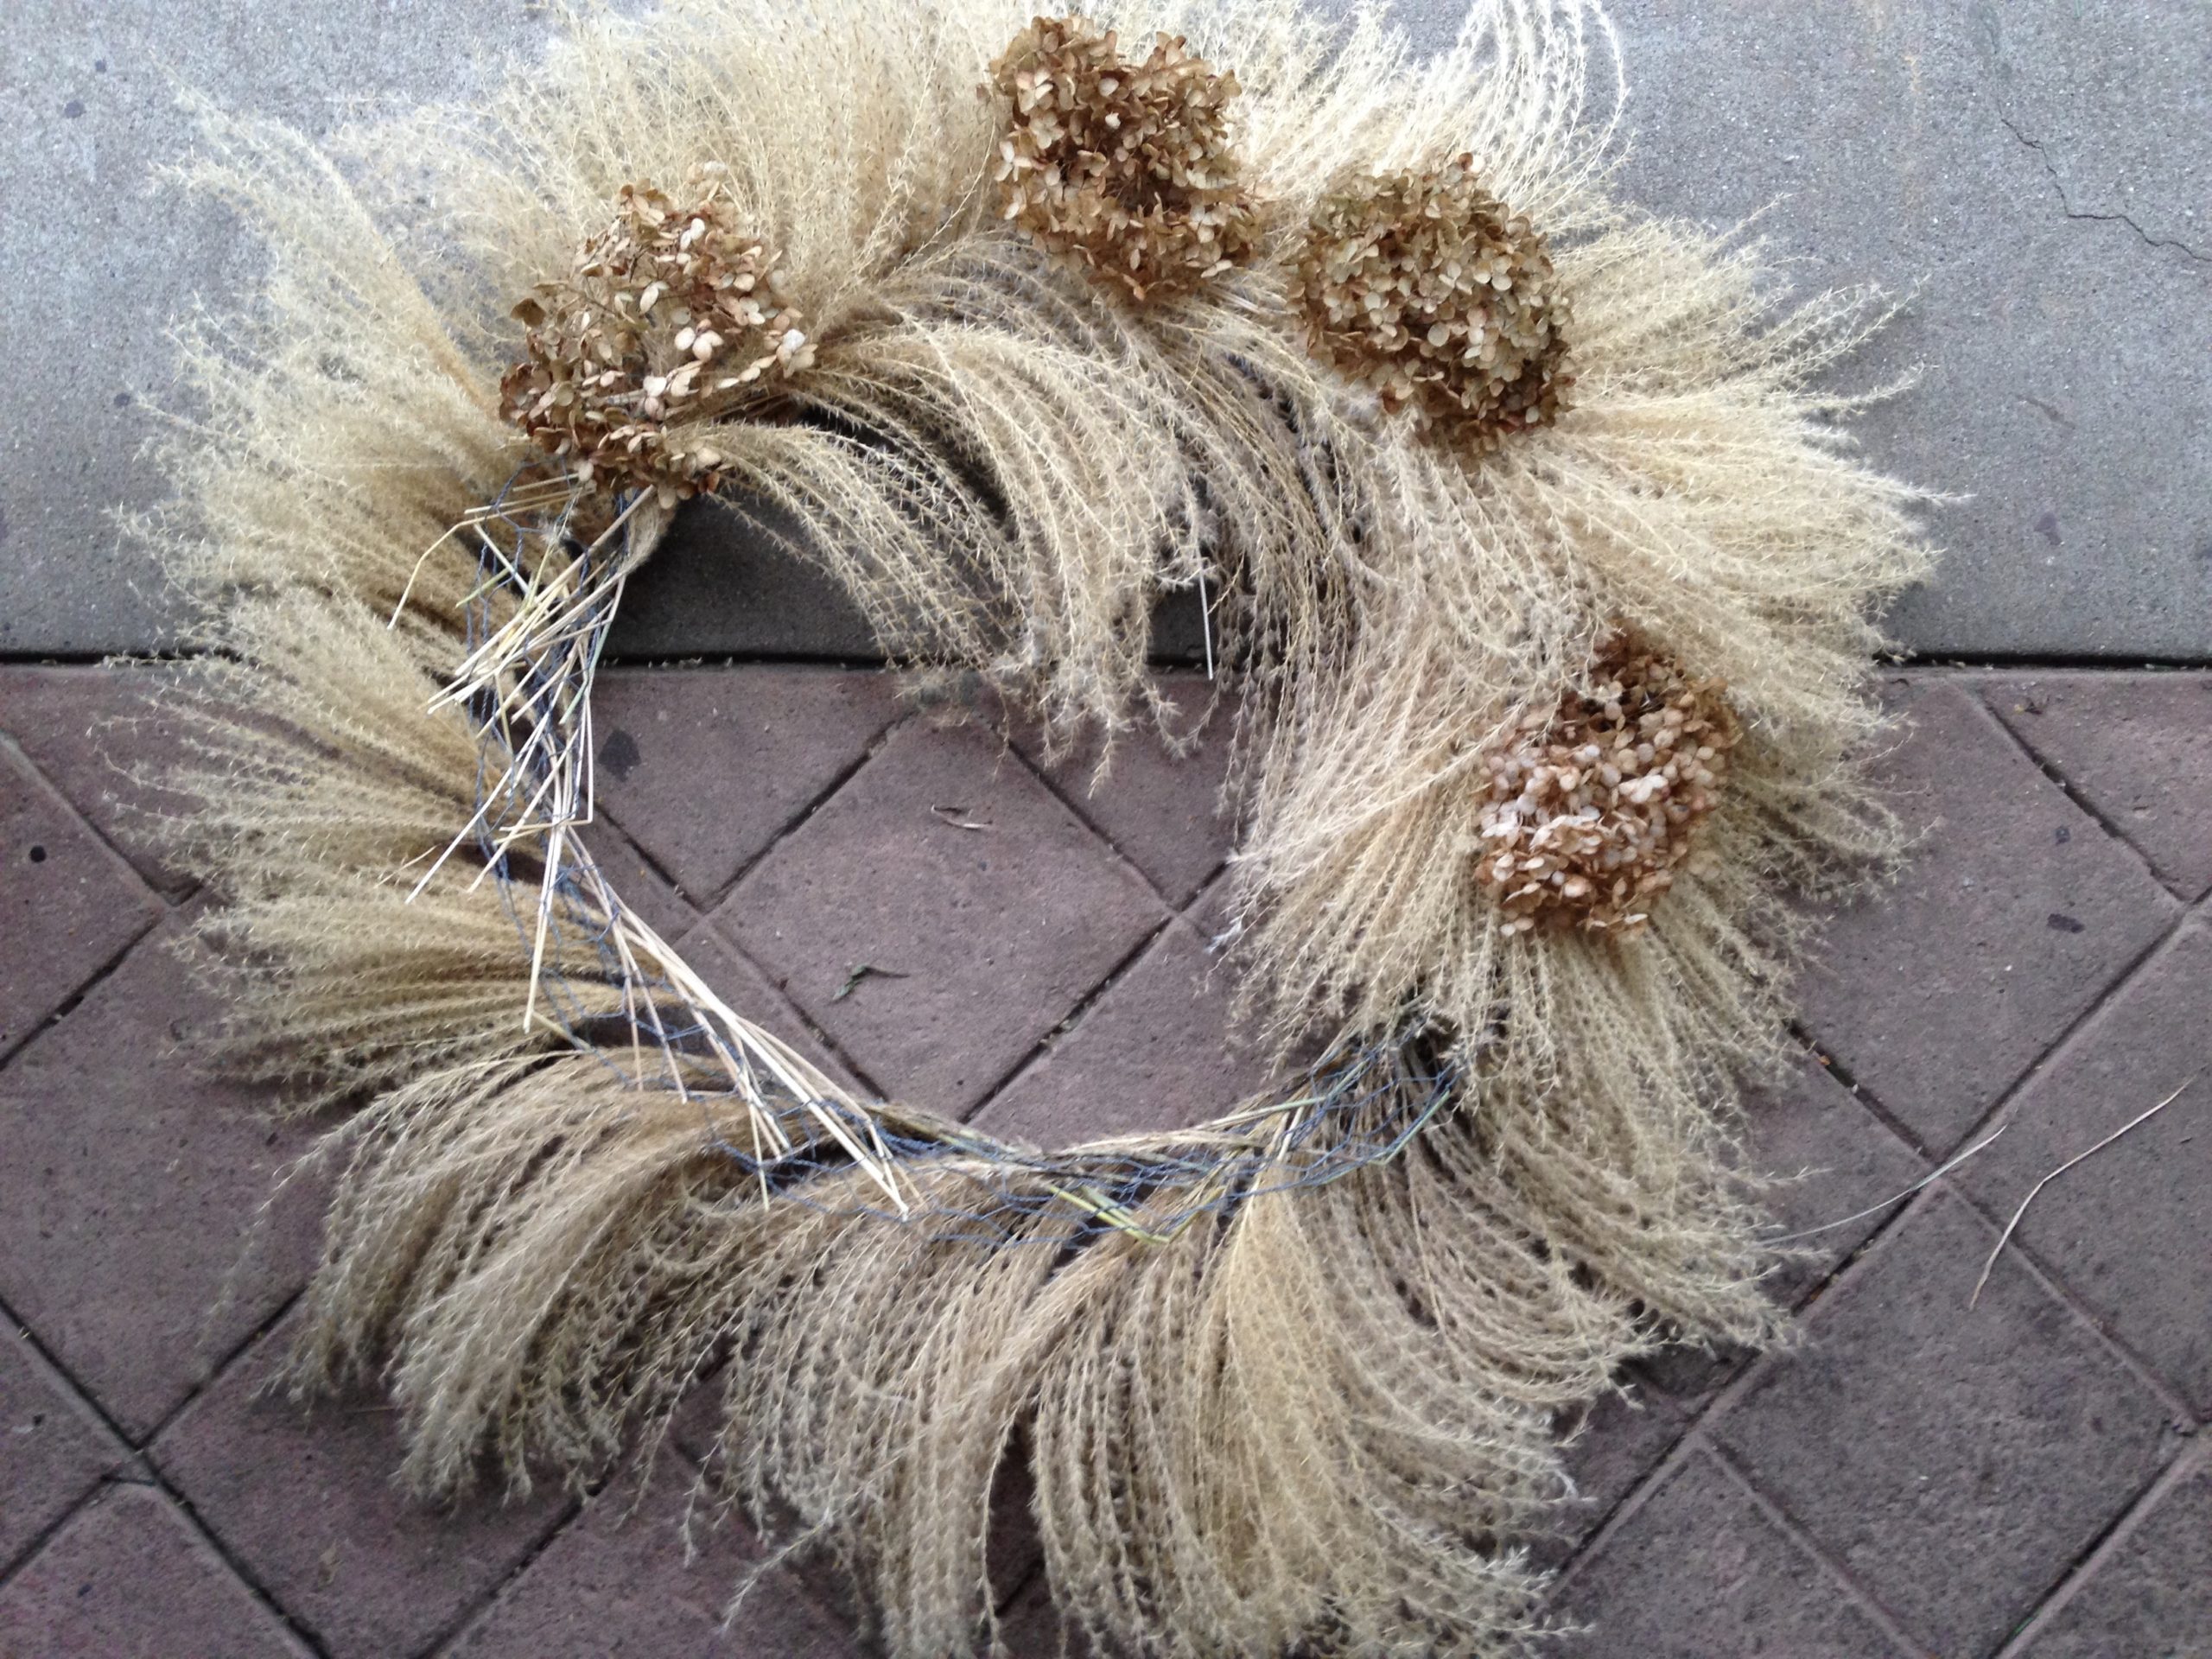
Sometimes the gathering of resources happens without fanfare, without bright lights or loud shouts. At other times, it happens with dancing and singing and movement. Almost effortlessly, the sources can come together, and the fullness and abundance of what is available are almost overwhelming. We find happiness in the creating, satisfaction in the re-sourcing as our ‘store houses’ become full again, and our lives fill with what has been found, our hearts swell with what has been revealed, and we find joy in sharing that abundance with others.
May you be re-source-full this autumn and beyond.
In Fellowship, Meg Barney.
Meeting Student Where They Are; The Center of Lesson Design and Assessment for Learning

Holly Meade is a Middle School Visual Arts Teacher at Downingtown Middle School. Degrees include BFA, M.Ed. ( certifications in Art, Elementary Ed, Social-Emotional Learning, and Behavioral Wellness (Drexel University), and has completed the PA ELL program at Cabrini University. She is the PAEA Middle-Level Director. Holly has 2 children of her own, is a gentlewoman farmer, avid gardener, and an artist at the core of it all.
Meeting Student Where They Are; The Center of Lesson Design and Assessment for Learning
We are off to another strange start to the school year, but hopefully, we have all spent some time this summer shedding a little of the skin from the last year and a half. I know I spent some time trying to give my curriculum a bit of a glow-up (I tried several times on myself but it was not as successful as I had hoped); re-creating some lessons, updating some slides, and adding some new units. But it sort of seems like we’ve been at school for the last 18 months. As I sat down to write my new lesson plans-I pulled out my UbD plan templates, that I have not used since 2019, and I really sat with the weight of the last 18 months. Although I know where I want them to be at the end of the unit, where are they? Do they feel as if it has been a perpetual school year since March 2020?
Yes, while analyzing my Back-to-School activities this year, most students felt as if they had not been creative and a large majority had not had art since 5th grade, and now they are in Middle School.
Back to the drawing board, literally and figuratively. How do I design lessons that are engaging, have rigor and engagement, and are equitable? It’s time for not only reformulating my lessons but also my assessment. Time to re-examine assessment as an assessment for learning so I can meet the students where they are at and build upon it.
What is assessment for learning? Assessment for learning is a process that includes data collection, planning, gathering information for a specific purpose, and using the evidence to improve learning. Pre-assessment at its finest. Assessment for learning is teacher-driven and the way to develop a starting point for our students when planning curriculum, instruction, and whatever assessment of learning we create.
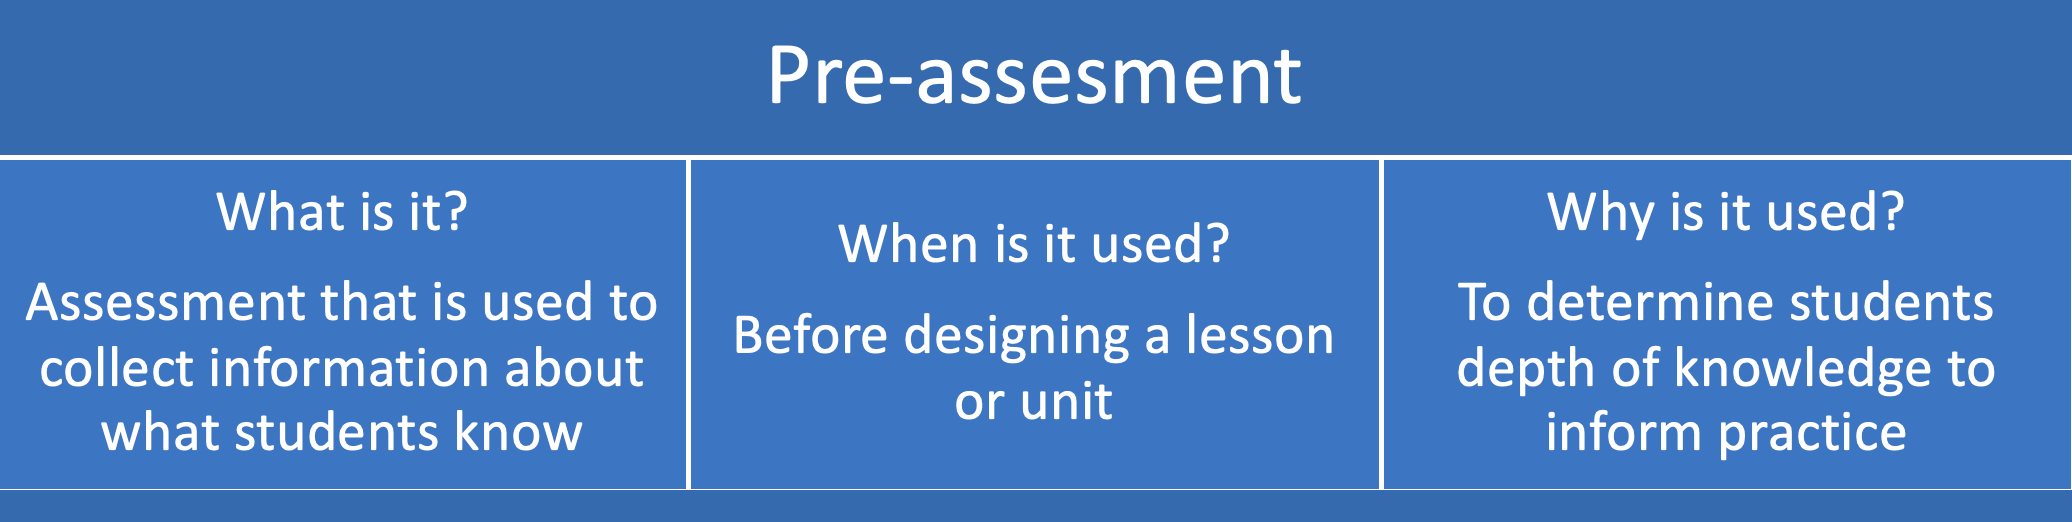
I know this is not easy, for example, it stopped me from going as far as I wanted in designing new units because I didn’t know what knowledge and skills the students had, due to the last 18 months and therefore, I realized I must pre-assess the students in order to meet them where they are. There are 2 forms of assessment for learning, informal and formal.
Informal pre-assessments are completed during instruction and are pretty quick to do. You can give immediate feedback. This process lets you get to know your students’ level of content knowledge and can occur in such an organic manner that it may also help you get to know your students’ interests.
Formal pre-assessments have standardized administration in the classroom and have mainly correct or incorrect answers. The results can be used to develop norm-referenced results. This should only ever be used to guide instruction or mark growth, not to use the scores in any other manner.
I always use informal pre-assessment, just because this works best for my classroom environment. I like a more relaxed structure. For instance, when updating a Graffiti unit, I used a Graffiti Wall for my preassessment. I had my whiteboard set up with an array of colored expo markers and asked them to show me what they know by graffitiing my whiteboard.
Some other strategies are:
Four Corners: Great for developing essential questions. Assign the 4 corners of the room as strongly agree, agree, disagree, and strongly disagree. Make a statement such as, “Artists have a responsibility to their audience.” And let them move all around the room! Make sure they understand that there is no right or wrong answer. This really helps guide the Essential Questions’s for the unit!
Matching Games: Have cards that have a corresponding vocab or picture and have them find students that have the match. Great for color theory! You can use a deconstructed color wheel and use it in many different ways. Find the compliment, find your analogous friend, etc. Just be sure to float around to guide anyone who is struggling, remember it’s not a competition, it’s a way to gauge previous knowledge.
Super Sleuth: Give students paper or a google doc (or whatever platform you use) that describes questions related to a unit, or more than one unit, a great way to save yourself time, and have them interview students around the room to get the answers. Example: The heist-A Basquiat and a Warhol have been stolen, devise questions to see if students have seen the works while asking things like; What did the images look like? Have you ever seen a Warhol? Have the students put initials in the question areas so that you know each student had a chance to play.
See-Run-Do: Great for teaching observational drawing and critical response. Do by tables or groups of 3. Hang an image away (I use the hallway) from the classroom. Have a paper and pencil at the table. Divide the group into a See-er, a runner, and a doer. The see-er goes to the hall and has a set amount of time to observe the picture, they ten meet the runner at the door (out of sight of the picture) and have to describe the image to them. The runner then must go to the table and describe to the do-er what the image is and they must draw it. All players stay silent except for one interaction. After, hang the pictures and the images drawn by the students and compare. Discuss and create a list, Venn diagram, anything you choose, and discuss why observation is important, how it ties in with art analysis, etc. It’s very fun!
Warm-Ups: A great low-stakes form of preassessment that you can tailor to any topic and keep to 10 minutes or less. Example: draw an object from nature that displays radial symmetry.
Stick it to me: Give the students a prompt and have them draw the concept or write about it on a sticky note and slap it on the wall or door as they leave class. I have a giant easel set up with an old whiteboard on it that I’ll draw a funny picture on or put up a meme and they love slapping that post-it on there as they leave.
Of course, I’m sure you all have your own form of fun activities you can tailor to use as an informal assessment for learning, but these are just a few that I have done and know kids really enjoy.
Keep in mind that assessment for learning is the foundation for Understanding by Design The framework begins with outcomes and posed essential questions, but teacher preparation for student learning is the key and the core of the learning cycle.
Have a GREAT year! Happy Planning!
PART IV: INTEGRATING VIDEO GAMES INTO ART CURRICULUM
Gaming your Pedagogy:
Taking inspiration from games, toys, and play in the art classroom
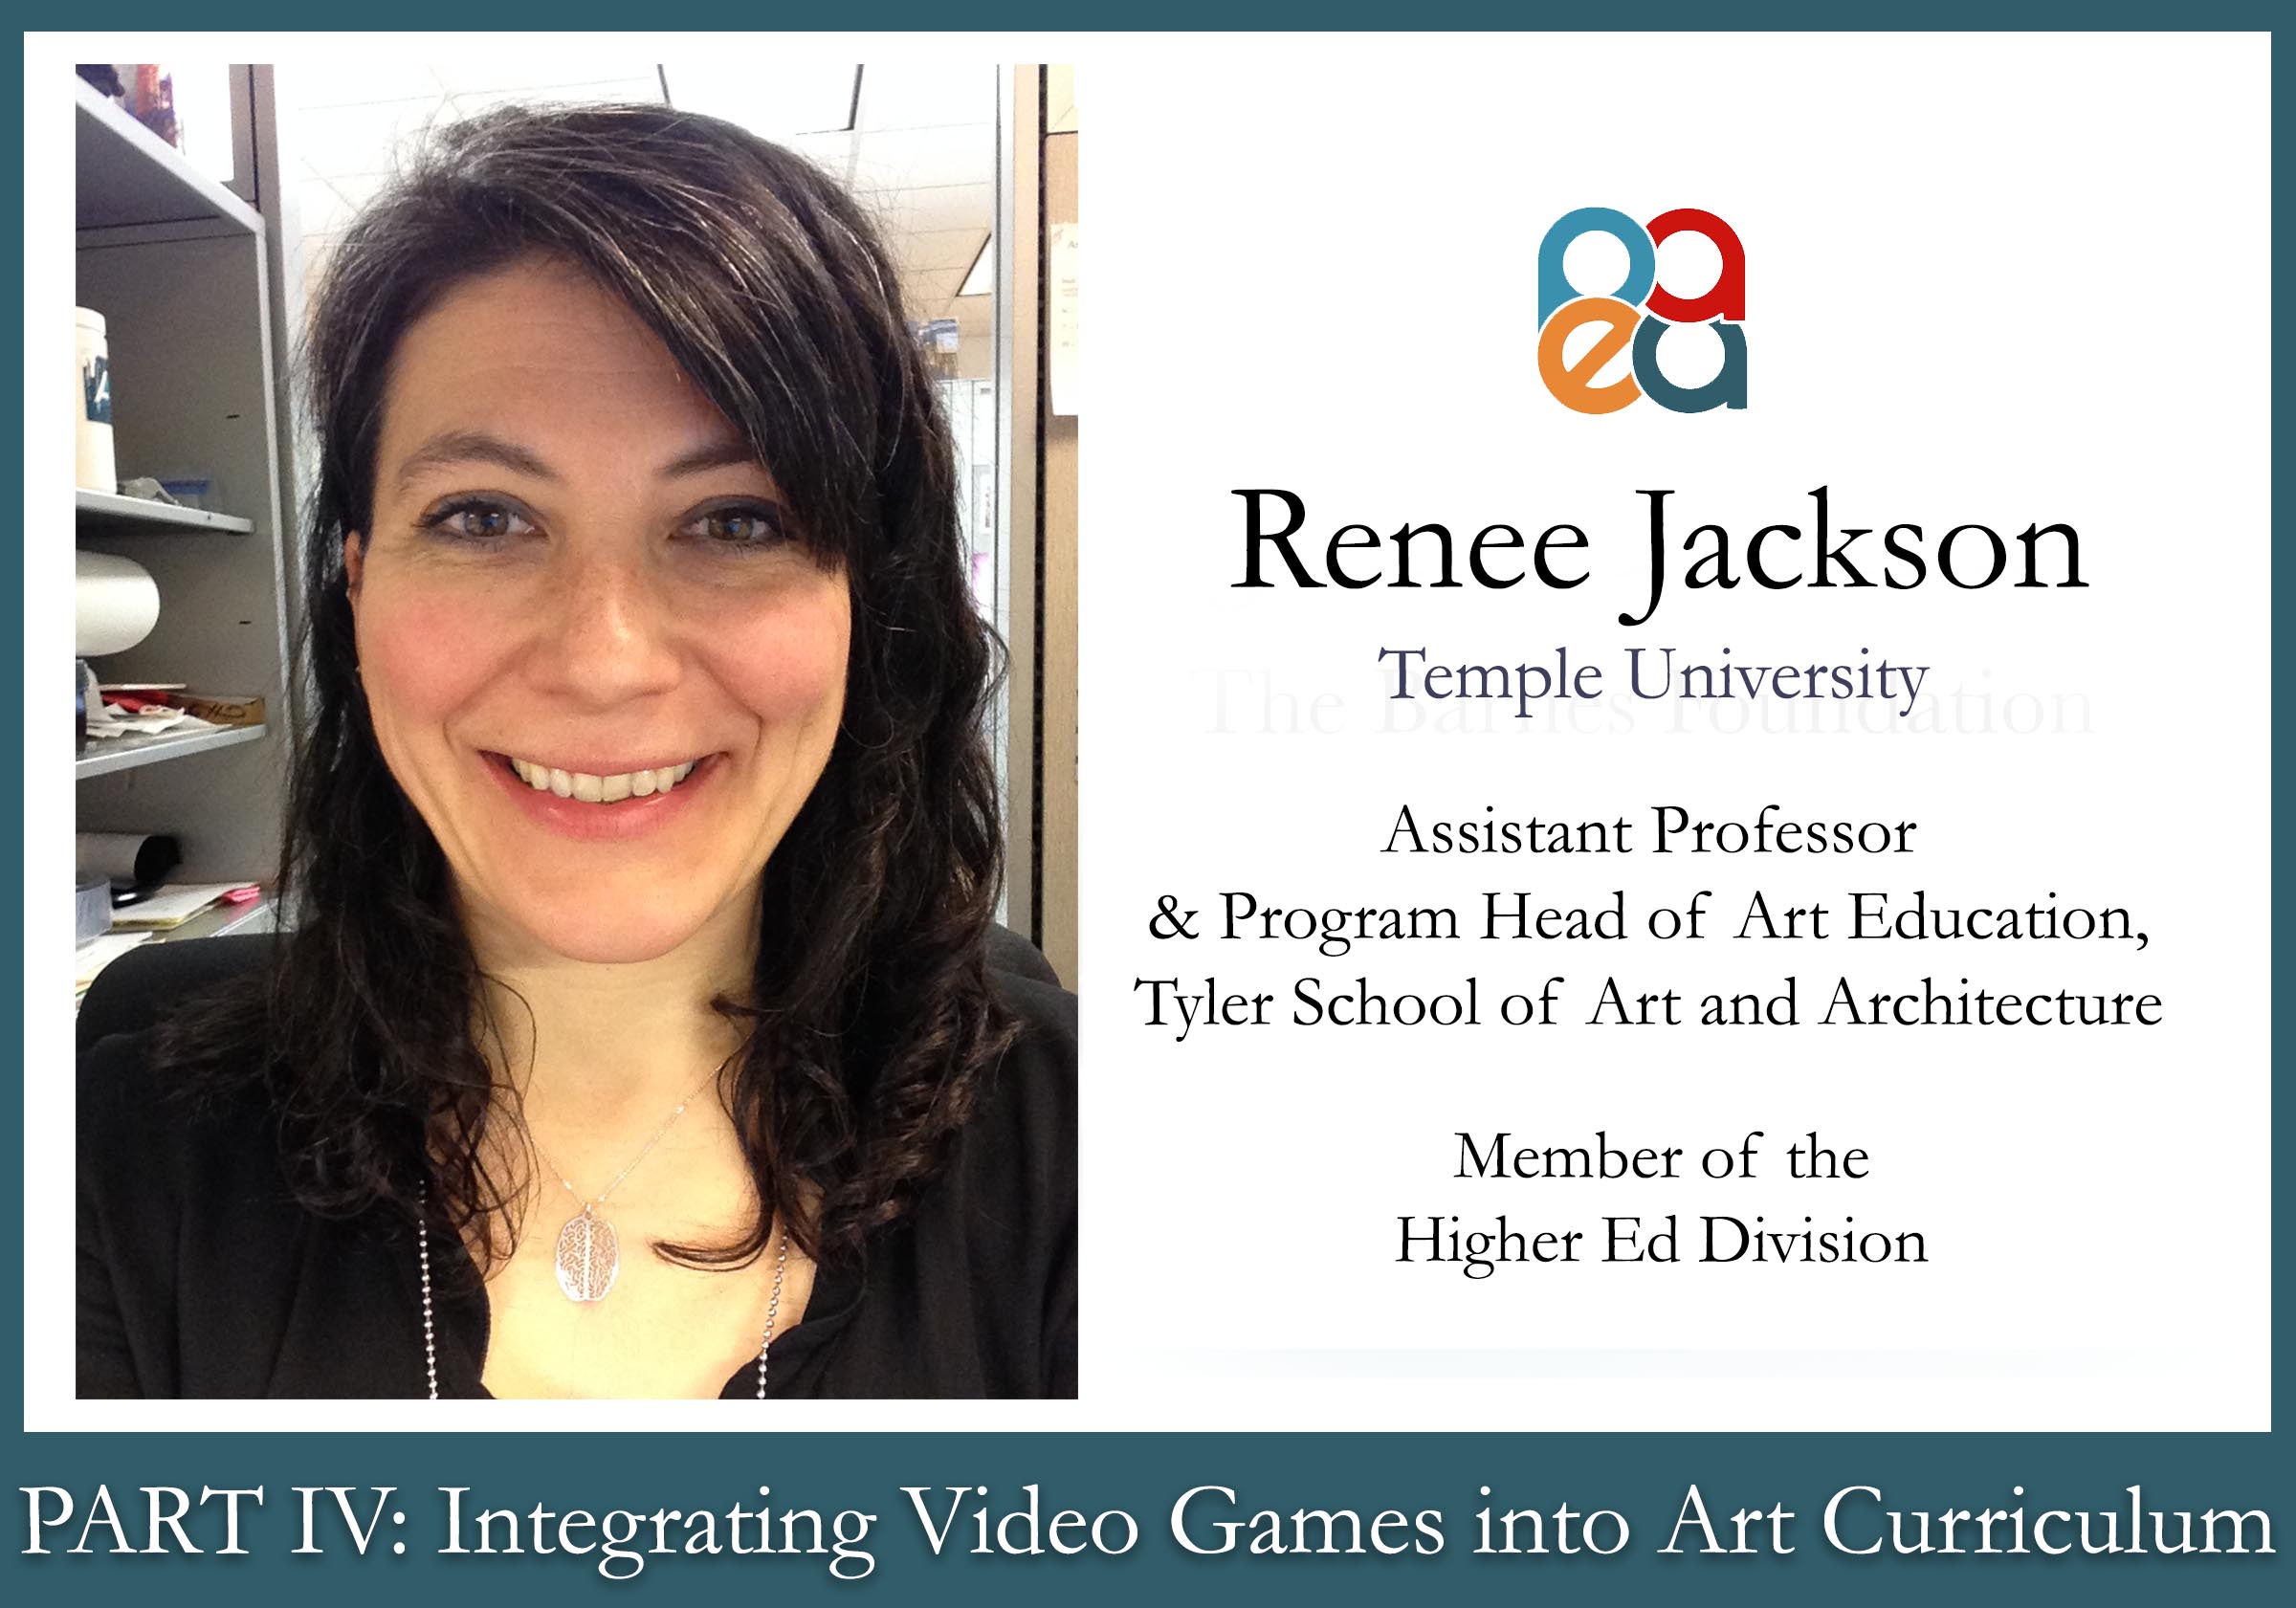
Renee Jackson is an Assistant Professor and Program Head of Art Education at Tyler School of Art and Architecture, in the Art Education and Community Arts Practices Department at Temple University. She is an artist, critical feminist pedagogue, and scholar, whose research interests relate to the disruption of oppressive mechanisms in education and the integration of game design and game-play as collaborative art forms and learning tools, in support of this goal. Jackson has worked as an art educator for 21 years at all levels and in various contexts.
Part 4: Integrating Video Games into Art Curriculum
My research is about what is referred to as social impact or social change games. These are games made with the purpose of doing more than simply entertain – the idea of course is to engage players with issues and stories around social issues related to poverty, immigration, the climate emergency, gender, LGBTQ2+, gun violence, and cultural understanding, to share just a few examples. Specifically, I am currently looking at how learning happens through collaborative social impact game design within the framework of critical pedagogy. I have been learning that the process of co-constructing the narrative of a game is a great way to learn and share knowledge collectively while also providing young people with access to learning practical skills about game design itself, in a world where the industry is dominated by straight, white, cisgender men (Weststar & Legault, 2015).
Looking at the big picture, 91% of children and youth ages 2 – 17 play video games (Reisinger, 2011), and in 2012, video games were officially deemed works of art protected under the first amendment (Tucker, 2012). It makes sense then to provide opportunities, in various ways, for our students to engage critically with games, and to play and talk about the types of games they may not ordinarily come across on their own, and to take inspiration from games in various ways by integrating them into our teaching. For this blog, however, since the beginning of the school year is upon us, I would like to keep things simple and talk about the most obvious approach for video game integration, which of course is literally to play them in the classroom. This can be daunting, particularly for teachers who are not necessarily gamers.
Social impact games are great for this purpose as they tend to be easy to play, free or low cost, and not necessarily epically long in terms of gameplay, so they can fit more easily into classroom time. They can provoke questions and support conversations around social justice-related issues. If you plan to create social justice art, these are great resources for introducing topics and initial discussion. They also provide inroads towards engaging with the role of video games more broadly. What are video games for? What can they do? Is it problematic to make serious issues like poverty and climate change into games? Aren’t the terms “social justice” and “game” contradictory? Here are some great games to start with.

- Syrian Journey: choose your own escape route – This game is basically a choose your own adventure style. You are given options such as: where do you want to go, Egypt or Turkey? You are asked for a deposit of $3000, do you give or not? All options are based on real stories. This is a multi-platform digital project. You can explore the question what would you take if you were forced to flee your country? Beautiful photographs of objects along with their stories are also shared. By BBC, 2015. (Play Directly Online)
- Thoughts and Prayers – A satirical game about gun violence. You send as many thoughts and prayers as you can in a limited time while statistics flash around the country related to the number of people killed by gun violence. One quickly sees that thoughts and prayers make no difference / saves n0 lives. By Everyday Arcade, 2016. (Play Directly Online)
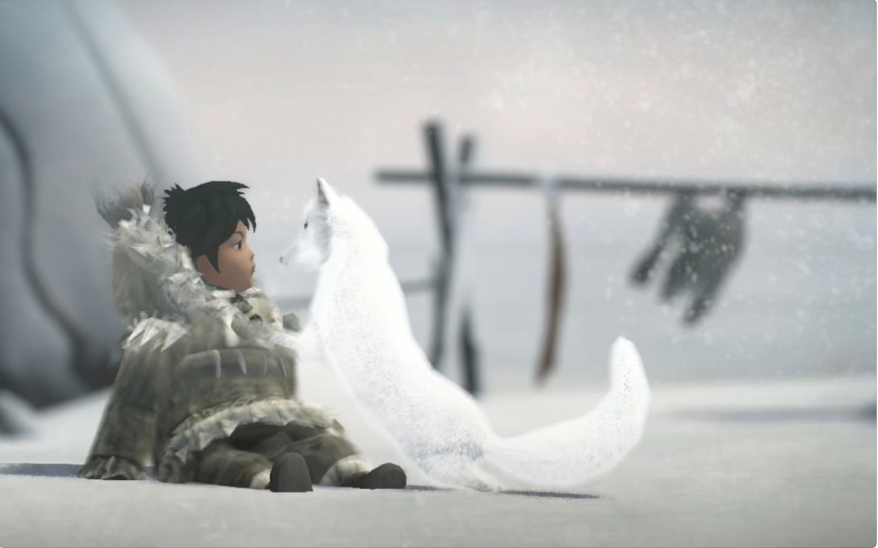
- Never Alone: An atmospheric puzzle platformer that explores the cultural folklore of the Iñupiat Native Alaskan culture. It is the first game developed in collaboration with the Cook Inlet Tribal Council, and Alaskan Native people, and nearly 40 Alaska Native elders, storytellers, and community members contributed to the development of the game. It costs $4.99, but it is certainly worth it! By MP digital LLC, 2014. (Ios; android; xbox; ninento wii; ps3 and ps4)
http://neveralonegame.com/buy-now
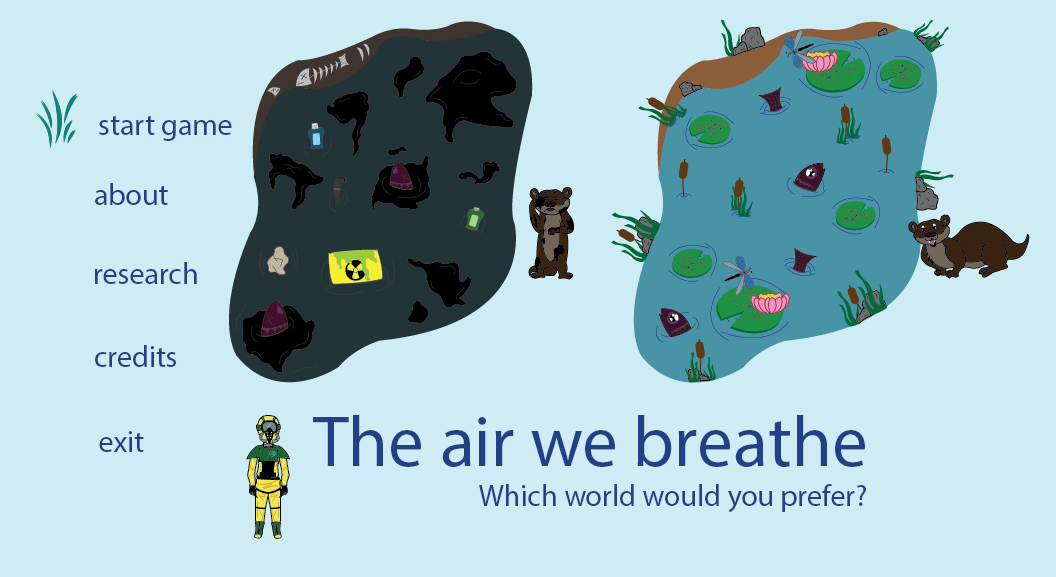
- The Air we Breathe: this game comes out of my research project, Arcade Our Way! It was co-designed with a group of 6 grade 8 students at AMY NW middle school. It is a game about climate change where the protagonist seeks to avenge their fire-figthing father’s death by fighting climate change. They gather information about climate change (strategies for helping + facts) and throw them at minions/agents of the state, transforming them into activists. The protagonist also helps scientists in various ways and wins boss fights by choosing accurate facts. By AoW, 2019. (Play Directly Online)
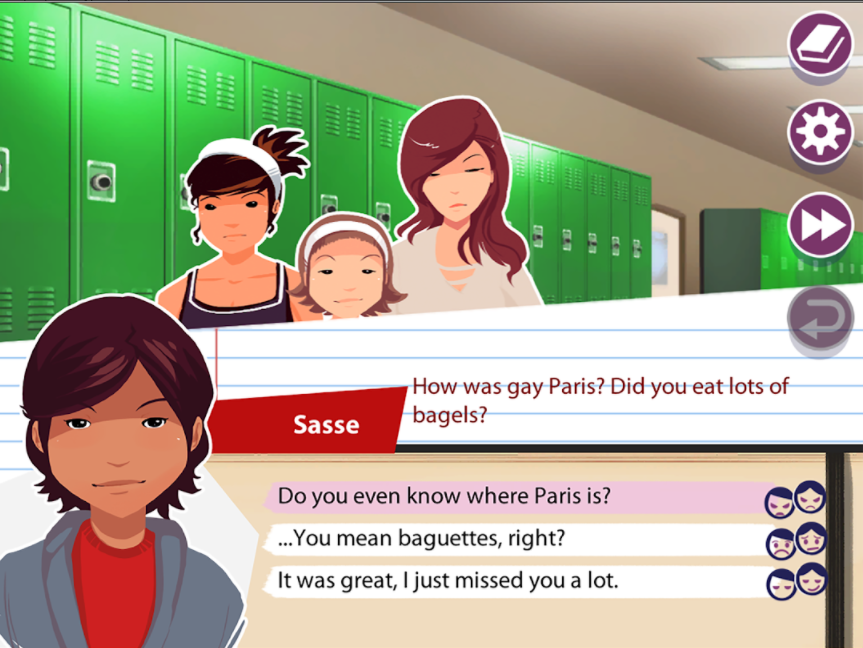
- The Long Story: A delightful progressive, LGBTQ2+ positive dating game for tweens and teens. This is a choose your own adventure type narrative game about a girl and her everyday life in high school dealing with bullies, high school dances, her kid brother and best friend. By Bloom Digital Media, 2014. (Google Store)
(Nintendo Switch, Android, Microsoft Windows, iOS, macOS, Mac operating systems)
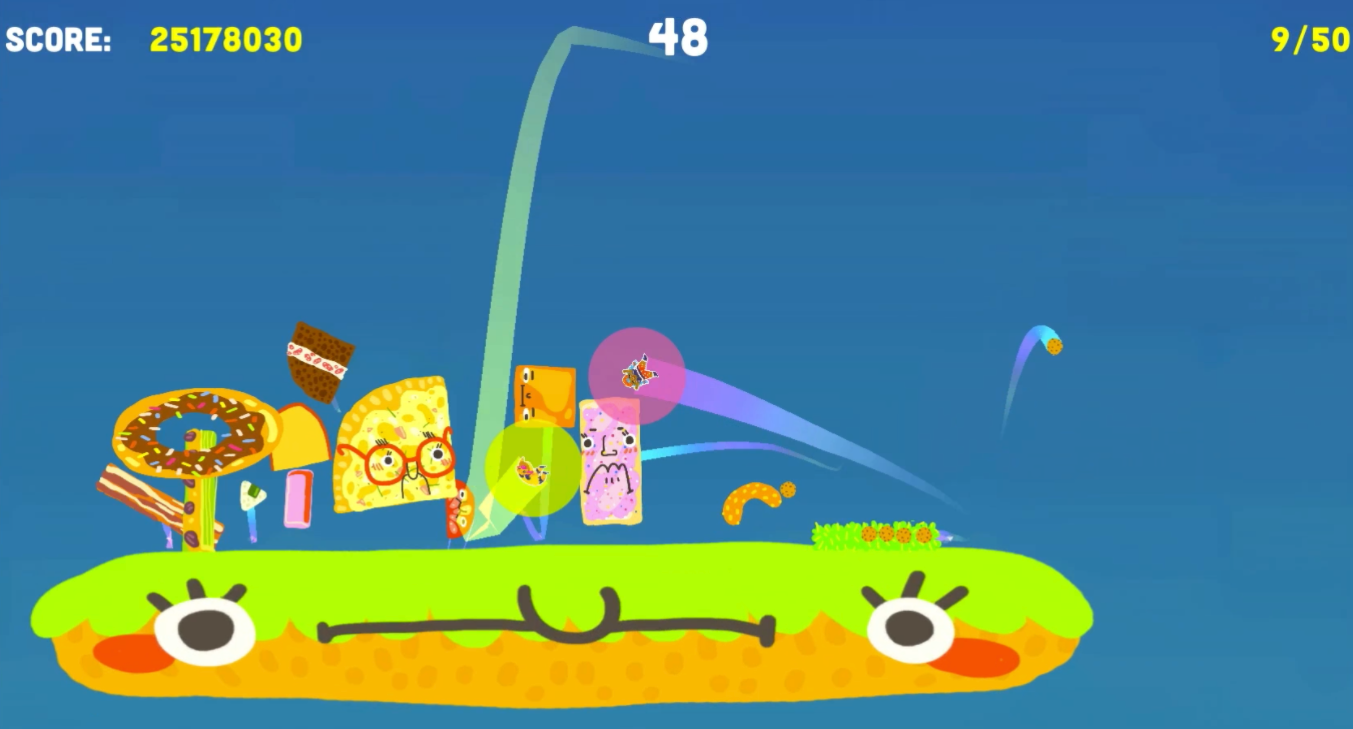
- Slam City Oracles: A cute, simple, energy-infused, counter-gender stereotype game where these girls just smash stuff up! By Jane Friedhoff, 2014. (Play Directly Online)
- SPENT: A game about making decisions when you are down to your last $1000 and you have lost your job and your home. The game share a few statistic about the number of unemployed people in the U.S.A. and confronts the player with the types of decisions that have to be made when trying to secure a job in such insecure circumstances. There is an option to donate “to help someone living SPENT.” By McKinney and Urban Ministries of Durham, 2011. (Play Directly Online)
For now, I am going to leave you with this list. I hope to be back with further strategies for integrating video games into the art classroom that go beyond simply playing them. Have a safe and rewarding semester!
References:
Desai, D. (2020). Educating for social change. Studies in Art Education, 61(1), 10 – 23. doi.org/10.1080/00393541.2019.1699366
Tucker, A. (2012, March). The Art of Video Games. Smithsonian Magazine. Retrieved from https://www.smithsonianmag.com/arts-culture/the-art-of-video-games-101131359/
Weststar, J. & Legault, M.J. (2015). IGDA developer satisfaction survey 2015: Summary Report [Report]. Retrieved from https://igda-website.s3.us-east-2.amazonaws.com/wp-content/uploads/2019/04/21174418/IGDA_DSS_2015-Summary_Report.pdf
SEL and the Arts
Dr. Stacy Potter is the Advocacy & Policy Chair for PAEA. She works at Neshaminy School District in Bucks County, PA. Dr. Potter is the District Art Lead Teacher and has taught K-12 for 18 years. She now has a new role as the school district’s SEL Coach and Responsive Classroom Coordinator. She is always available for a chat if you would like to discuss further ways to advocate for your programs. advocacy@paea.org
SEL and the Arts
Once again, we are getting ready to charter new seas as we enter a post-pandemic school year. Post-pandemic has ominous tones to it and hopefully, this year will exceed far beyond this namesake. Now is the time to consider your own well-being as well as that of your students. We may have all experienced some type of trauma over the last year, whether this is the stress of unpredictability, the fear of the unknown, or more. Now, more than ever, we must take into account the whole self as educators and the whole child, as ESSA reiterates, making sure to nourish our students not only academically but socially and emotionally as well.
The arts have always been a staple within the realm of Social and Emotional Learning. One of the great benefits we have as educators in this field is this opportunity to reach our whole student, academically and emotionally. We are masters of creating community and building confidence individually and socially. Students more than ever will need to feel safe, comfortable, and connected to their curriculum. Coming off of the craziest year and a half of education, we have the ability to become change agents within our schools. It is such a privilege to be recognized as an authority on the well-being of our school communities. This includes students, staff, and the families of both. This blog post will provide you with key resources to approach school administrators and offer your support.
There are many resources available that connect the arts with social and emotional learning. Here are a few noteworthy ones. Click on the images to access each resource. The first is from the PA Arts Education Leadership Coalition and the PA Department of Education. Both organizations collaborated on this extensive SEL PowerPoint presentation that can be utilized in its entirety or broken into smaller chunks. The resource is full of links and suggestions for application. SEL in the Arts Classroom
This resource can be used
- As a resource bank: Select appropriate resources to supplement SEL programs currently being implemented in your school or district.
- As a framework for professional development: Create professional development for visual art teachers that informs SEL learning through art-specific, standards-based instruction.
- As a self-paced training: • Learn the language of SEL through the lens of art education.
The next resource was recently released by the Center for Arts Education and Social-Emotional Learning, ArtsEdSEL. This organization created a framework of SEL competencies with the National Core Arts Standards and identified intersections of the two using common sense language. The framework is very user-friendly. Here is their description:
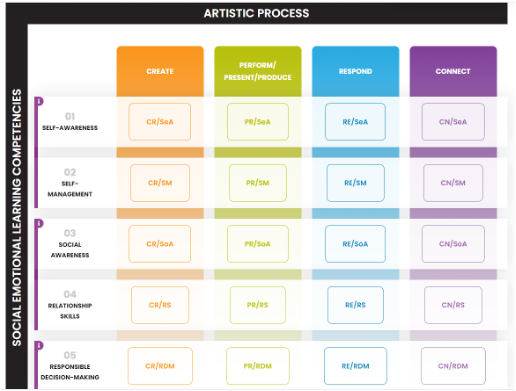
“Arts Education & Social Emotional Learning Framework is designed to illuminate the intersection between arts education and social-emotional learning to allow for the intentional application of appropriate teaching and learning strategies, with the overarching goal of enhancing art education.” This is a very valuable resource and provides a structure to assist with other crosswalk applications. ArtsEdSEL
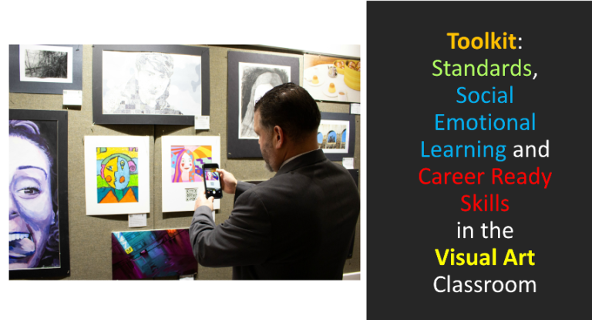
A final resource is from the PA Department of Education. This resource is not specifically targeted for Arts Education. However, the framework does advocate for our programs in the terms of providing a rich educational experience aimed at creating career readiness. The resource is the PA Career Readiness Skills Continuum.
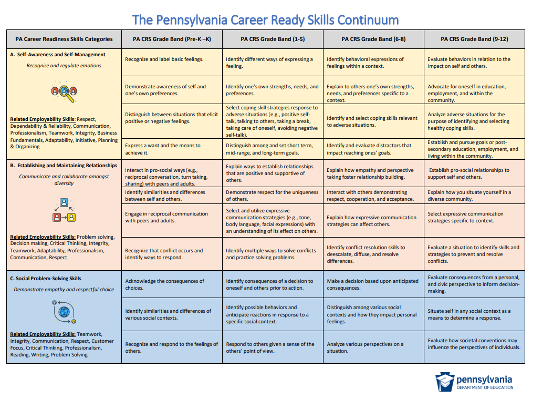
This resource focuses on three benchmarks: Self-Awareness and Self-Management, Establishing and Maintaining Relationships, and Social Problem-Solving Skills. Each of these benchmarks can be woven into the Pa Arts and Humanities curriculum. We can identify these links while advocating for our programs.
When reviewing these resources, consider the following:
- What do I need to recognize about myself as an educator that might impact my instruction?
- What do I need to recognize about my classroom structure or environment that may impact my students’ performance?
- What are my students needing at this moment in time that could impact their learning? (This will change, so re-assessing is key.)
Answering these questions is a step towards meeting the social and emotional needs of your practice and that of your students. Identifying these needs will benefit your well-being and that of your students. I wish you all the best start to an incredible school year.
For more information regarding Advocacy, visit http://paeablog.org/advocacy/.
Sketchbook Construction for Elementary Classrooms
CJ Matz (he/him) teaches elementary and middle school art in the Whitehall-Coplay School District (Region 10). He is a contracted writer for Davis Publications and PAEA’s Youth Art Month Chairperson.
I am a huge advocate for using sketchbooks in the art classroom! Aside from a canvas on which to work, sketchbooks provide a place for students to brainstorm, map, document, plan, draw, reflect, and communicate. In my classroom, they are an essential tool that students utilize daily in both my elementary and middle school classrooms.
In fact, the first project we complete each year is, you guessed it: a sketchbook.
As many of us deal with ever-shrinking budgets, purchasing sketchbooks for all of our students is often an impossibility. Creating a sketchbook is a great way to save money, but also a fantastic way to teach about book-making processes and engage students in constructing a resource they will need and use throughout the school year.
I have found, over the years, that many teachers view bookmaking as a very complex process unable to be incorporated into an elementary curriculum. As with any media, it most certainly can be complex, but it does not have to be. It can easily be explored with younger students. The sketchbooks I am introducing below are simple, quick ways to teach students about bookmaking while incorporating the practice into their skill set.
Additionally, as we face continued uncertainty with how and where students will be learning in the fall, I opted to include designs that can be created using minimal materials. Best of all, they are glue-free, so there is no need to wait for the books to dry between classes!
A few notes before we begin:
- For sketchbooks, I use 9×12” white drawing paper, but you can adjust the size and type to suit your needs.
- For books that are bound together with yarn, I use about 27” of yarn per student. It is often way more than they will need, but I recycle the leftovers in my yarn bin for other projects. You can play around with a length that works best for you.
- I usually have my students design covers for their sketchbooks. I believe that it is their book, so they should get to choose how it looks. For this blog post, I did not include covers. You may opt to add one or just have students decorate the outermost sheet!

Book 1: No-Sew Pamphlet Sketchbook
Supplies:
- A few sheets of paper
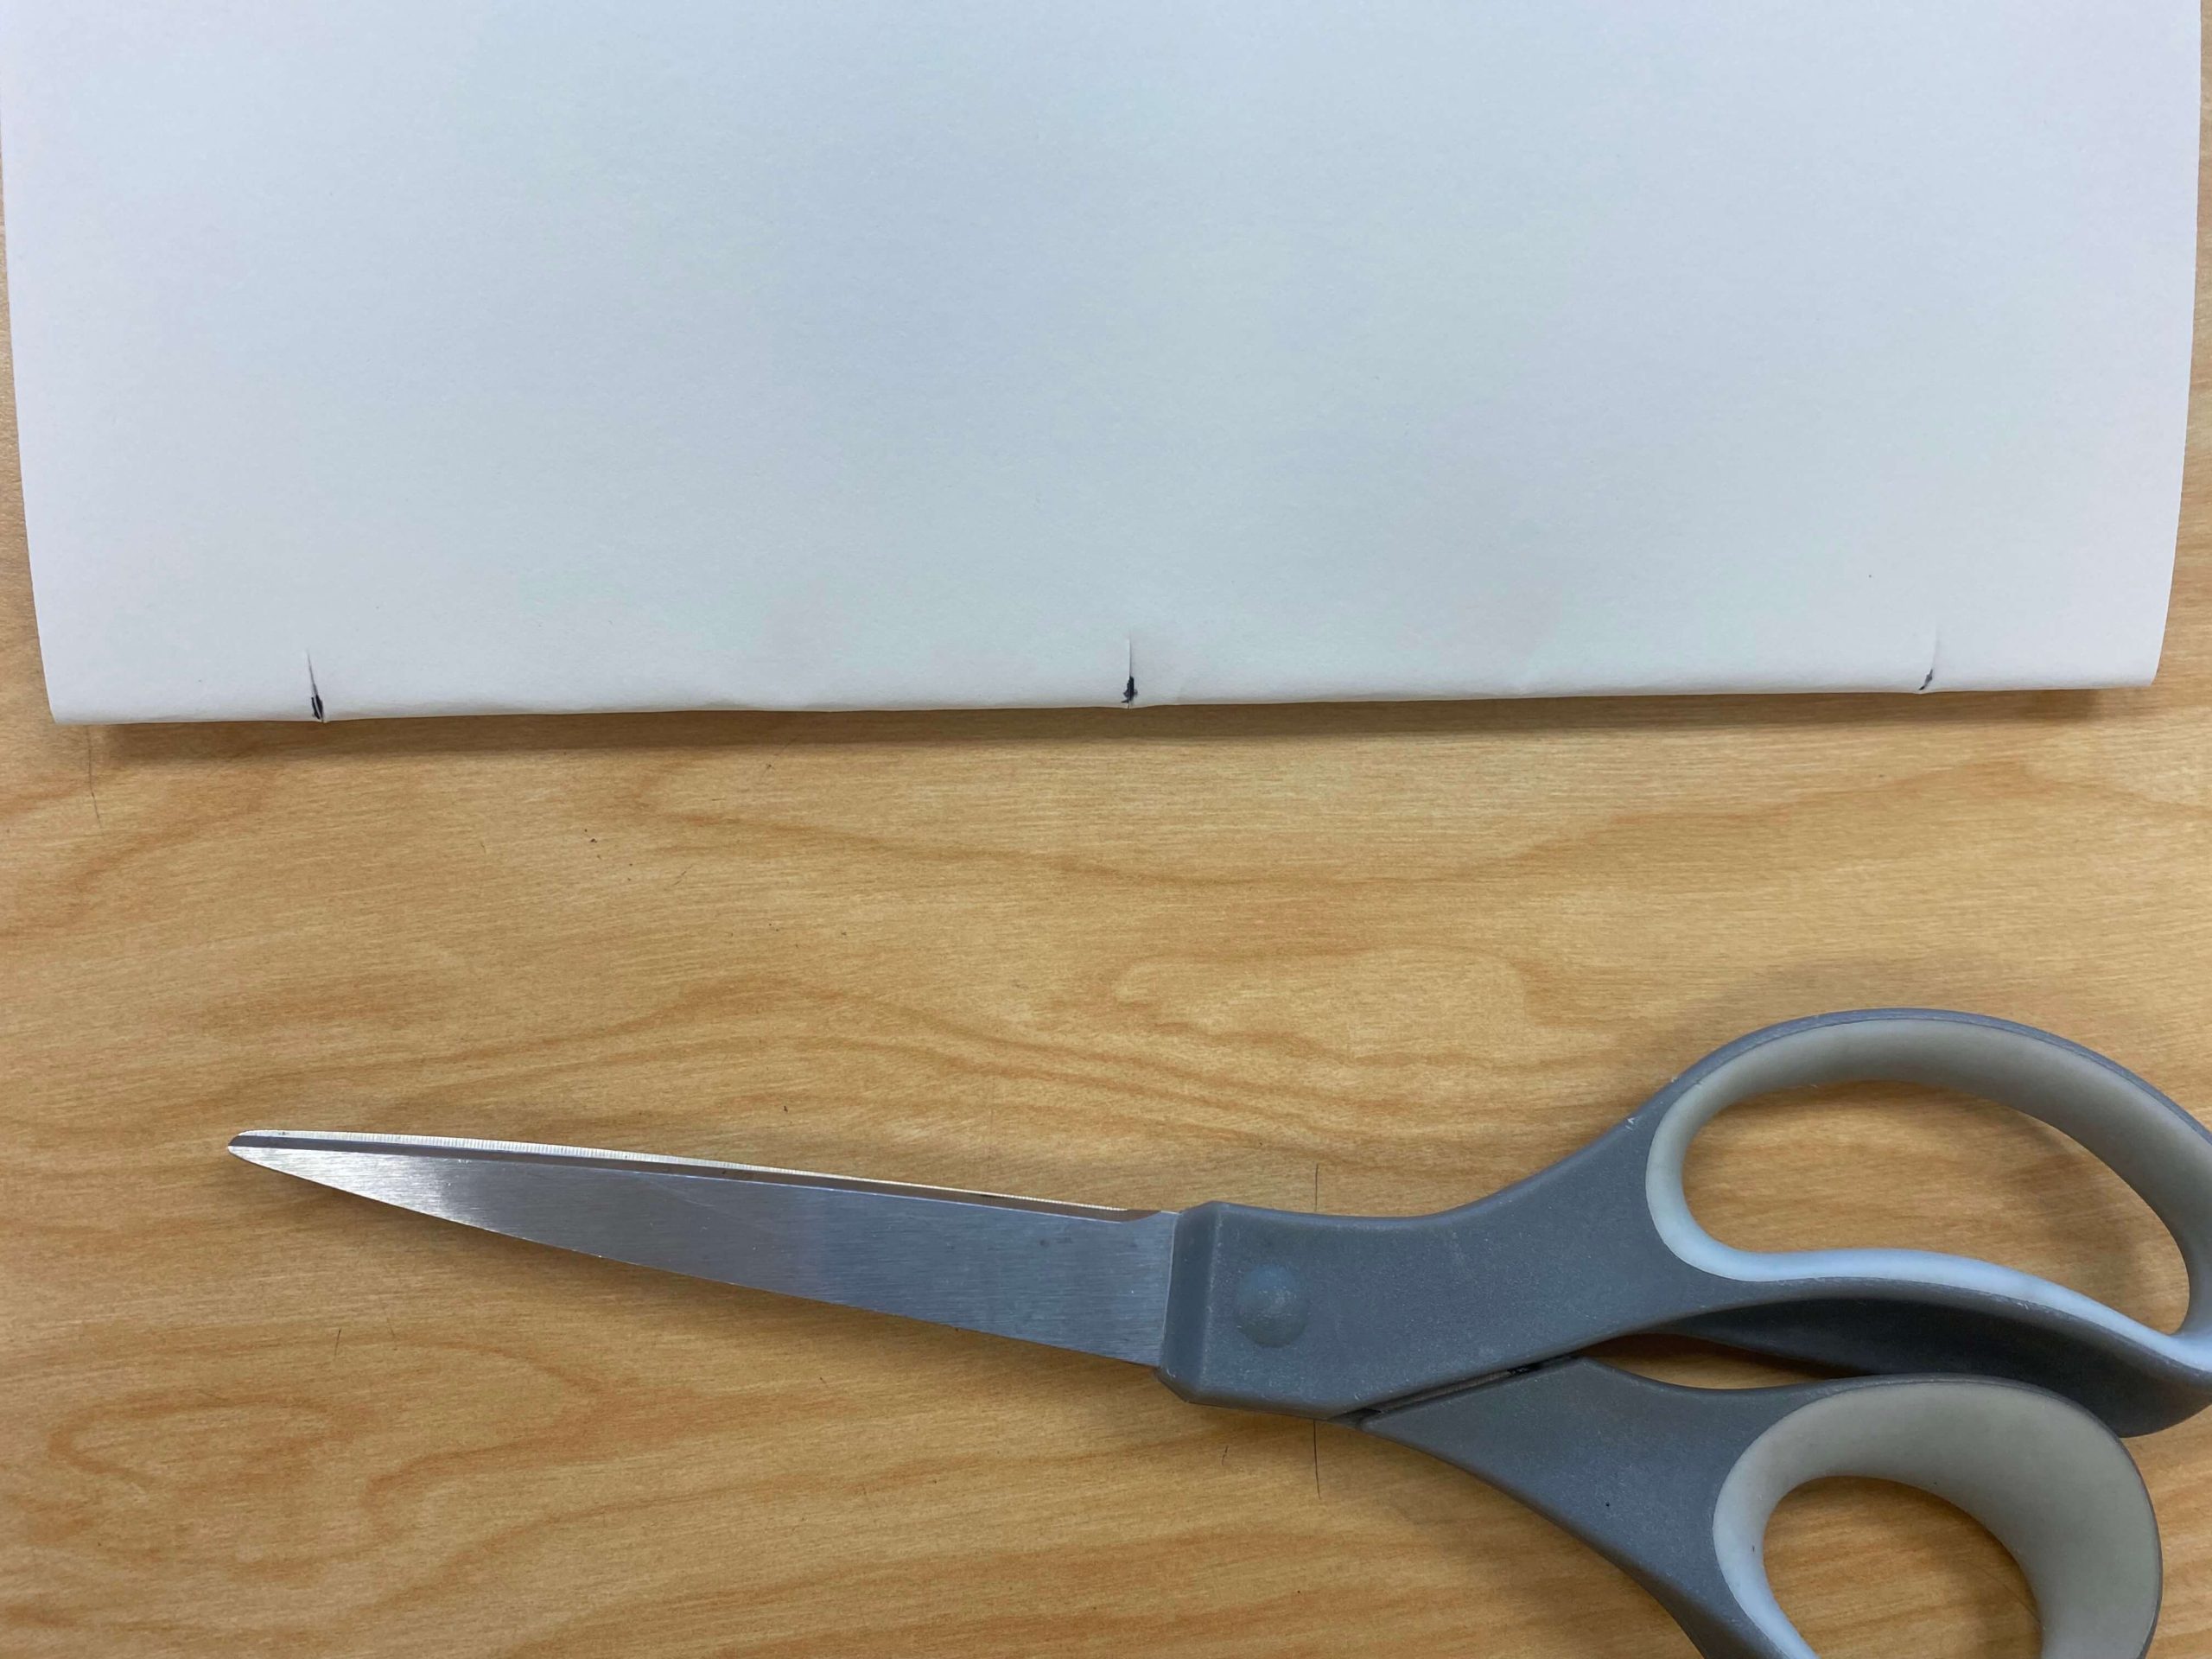
- Scissors
- Yarn
Steps:
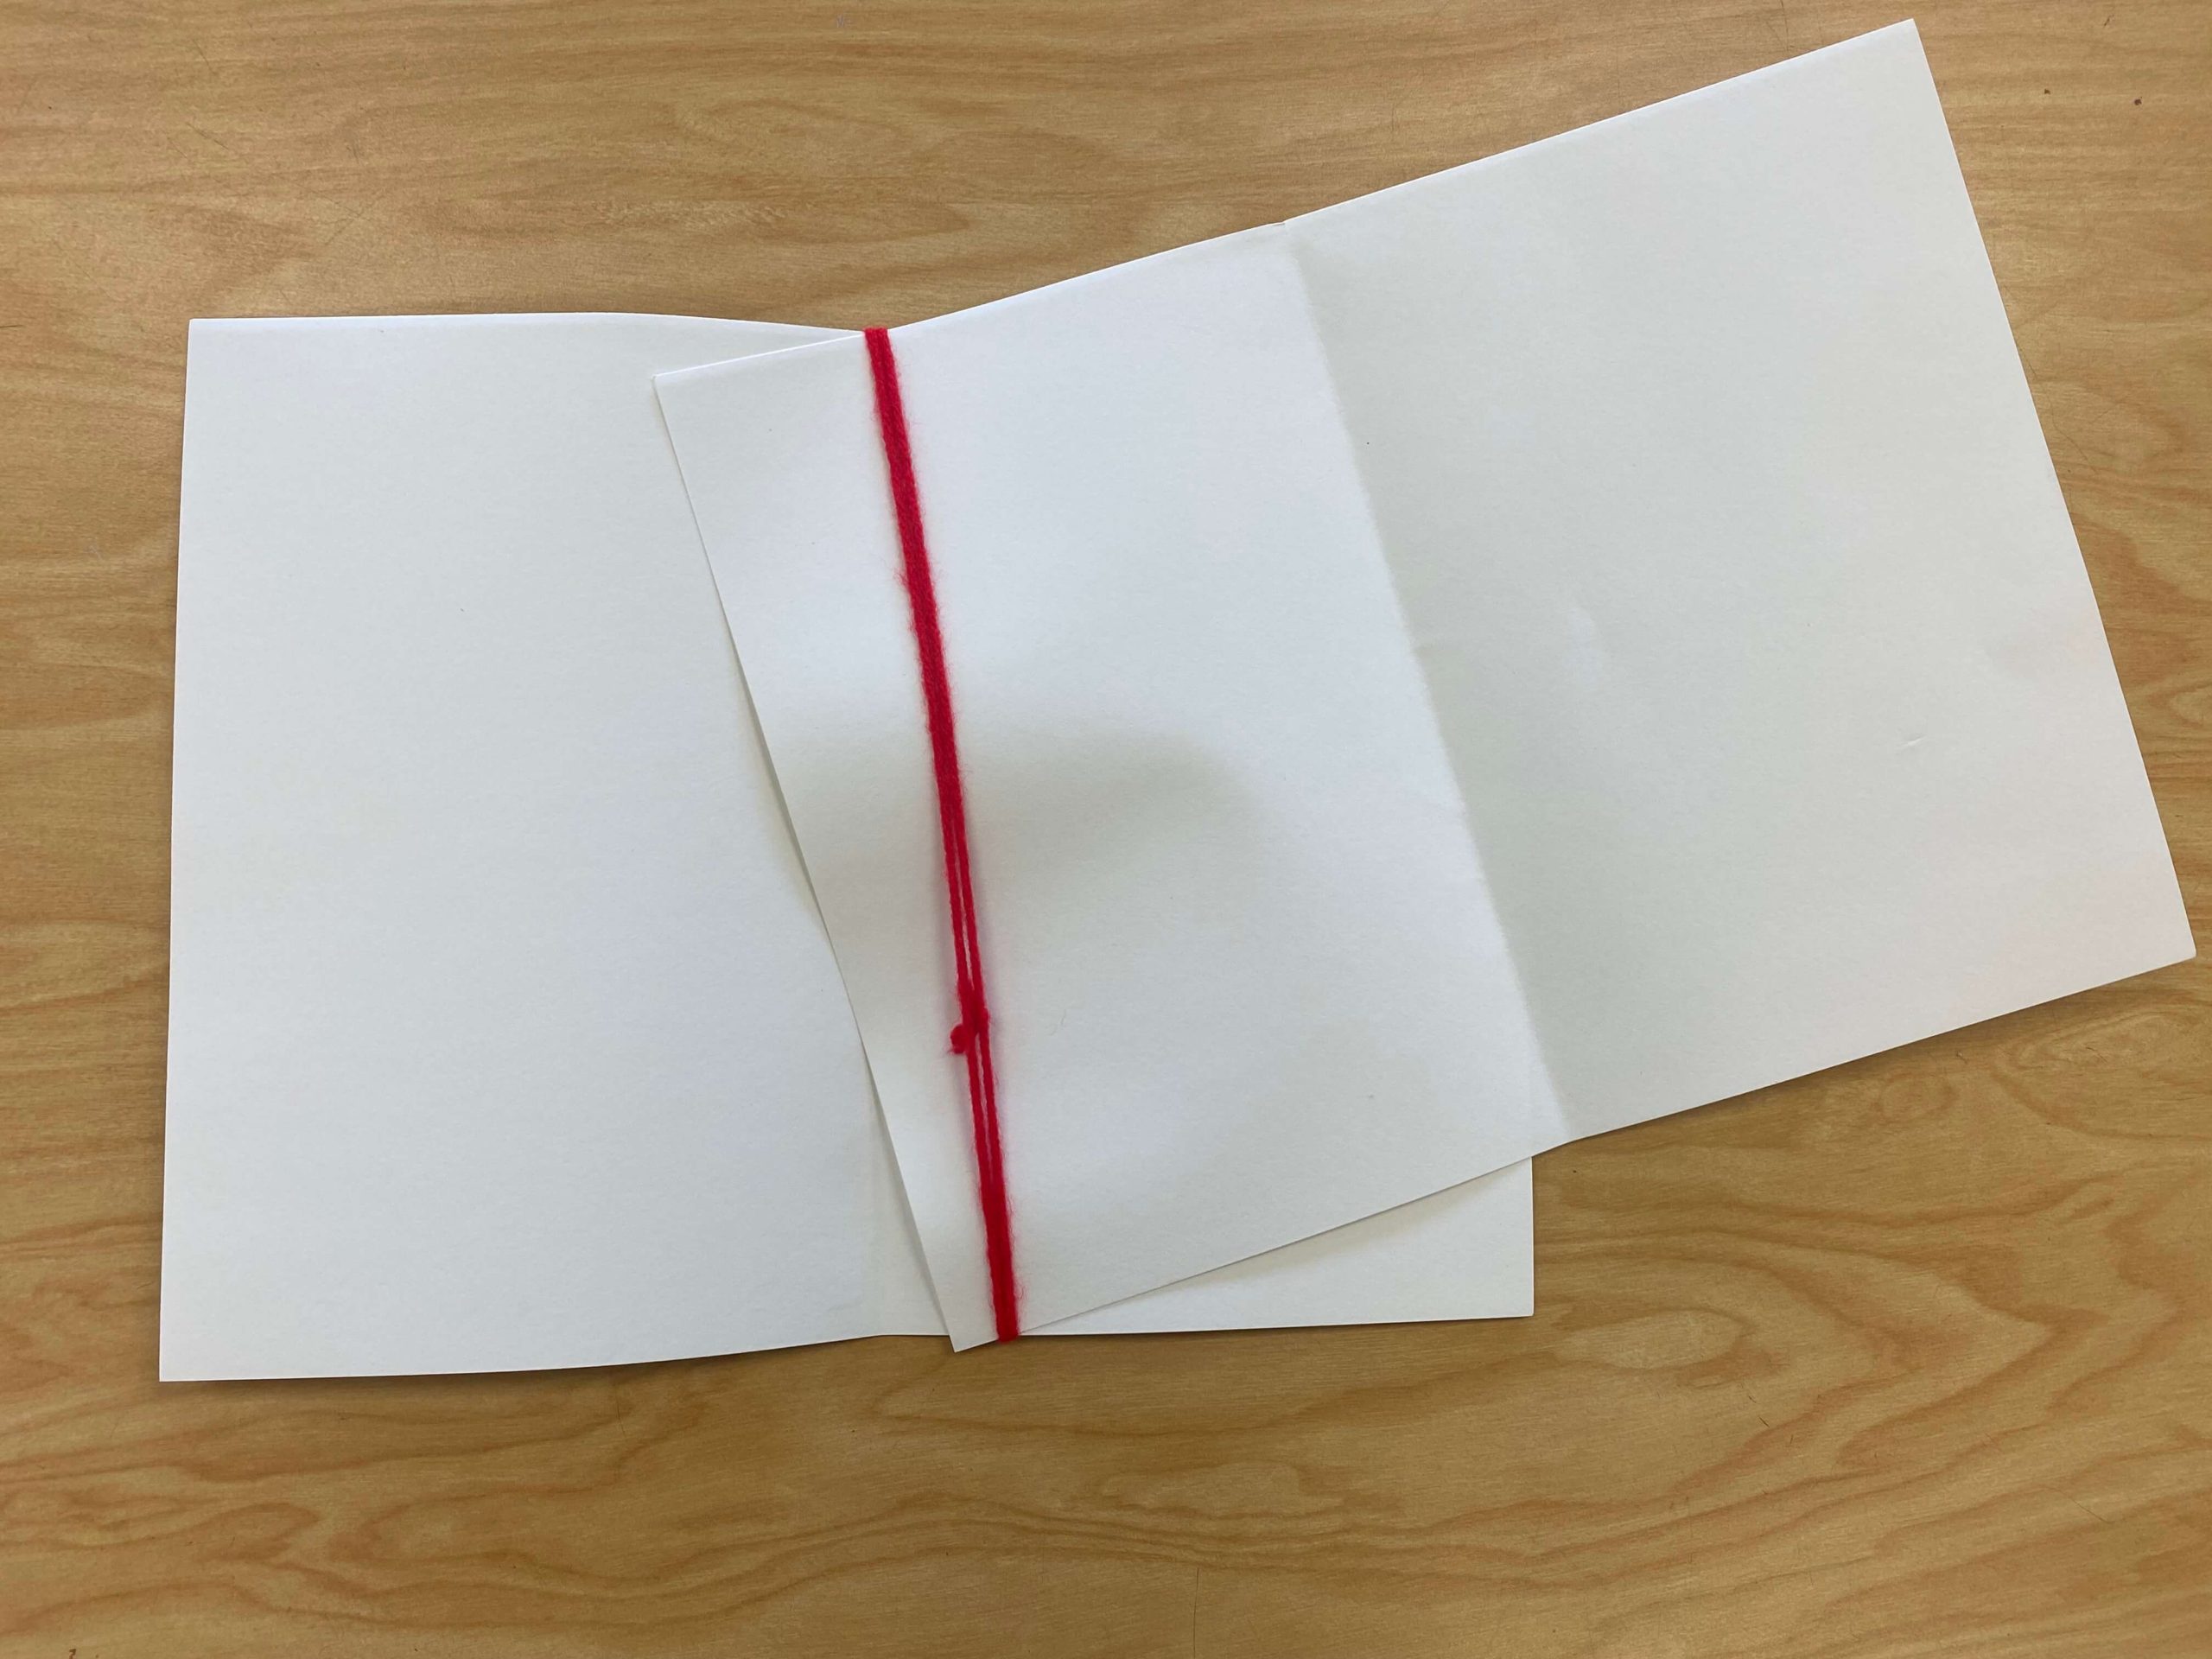
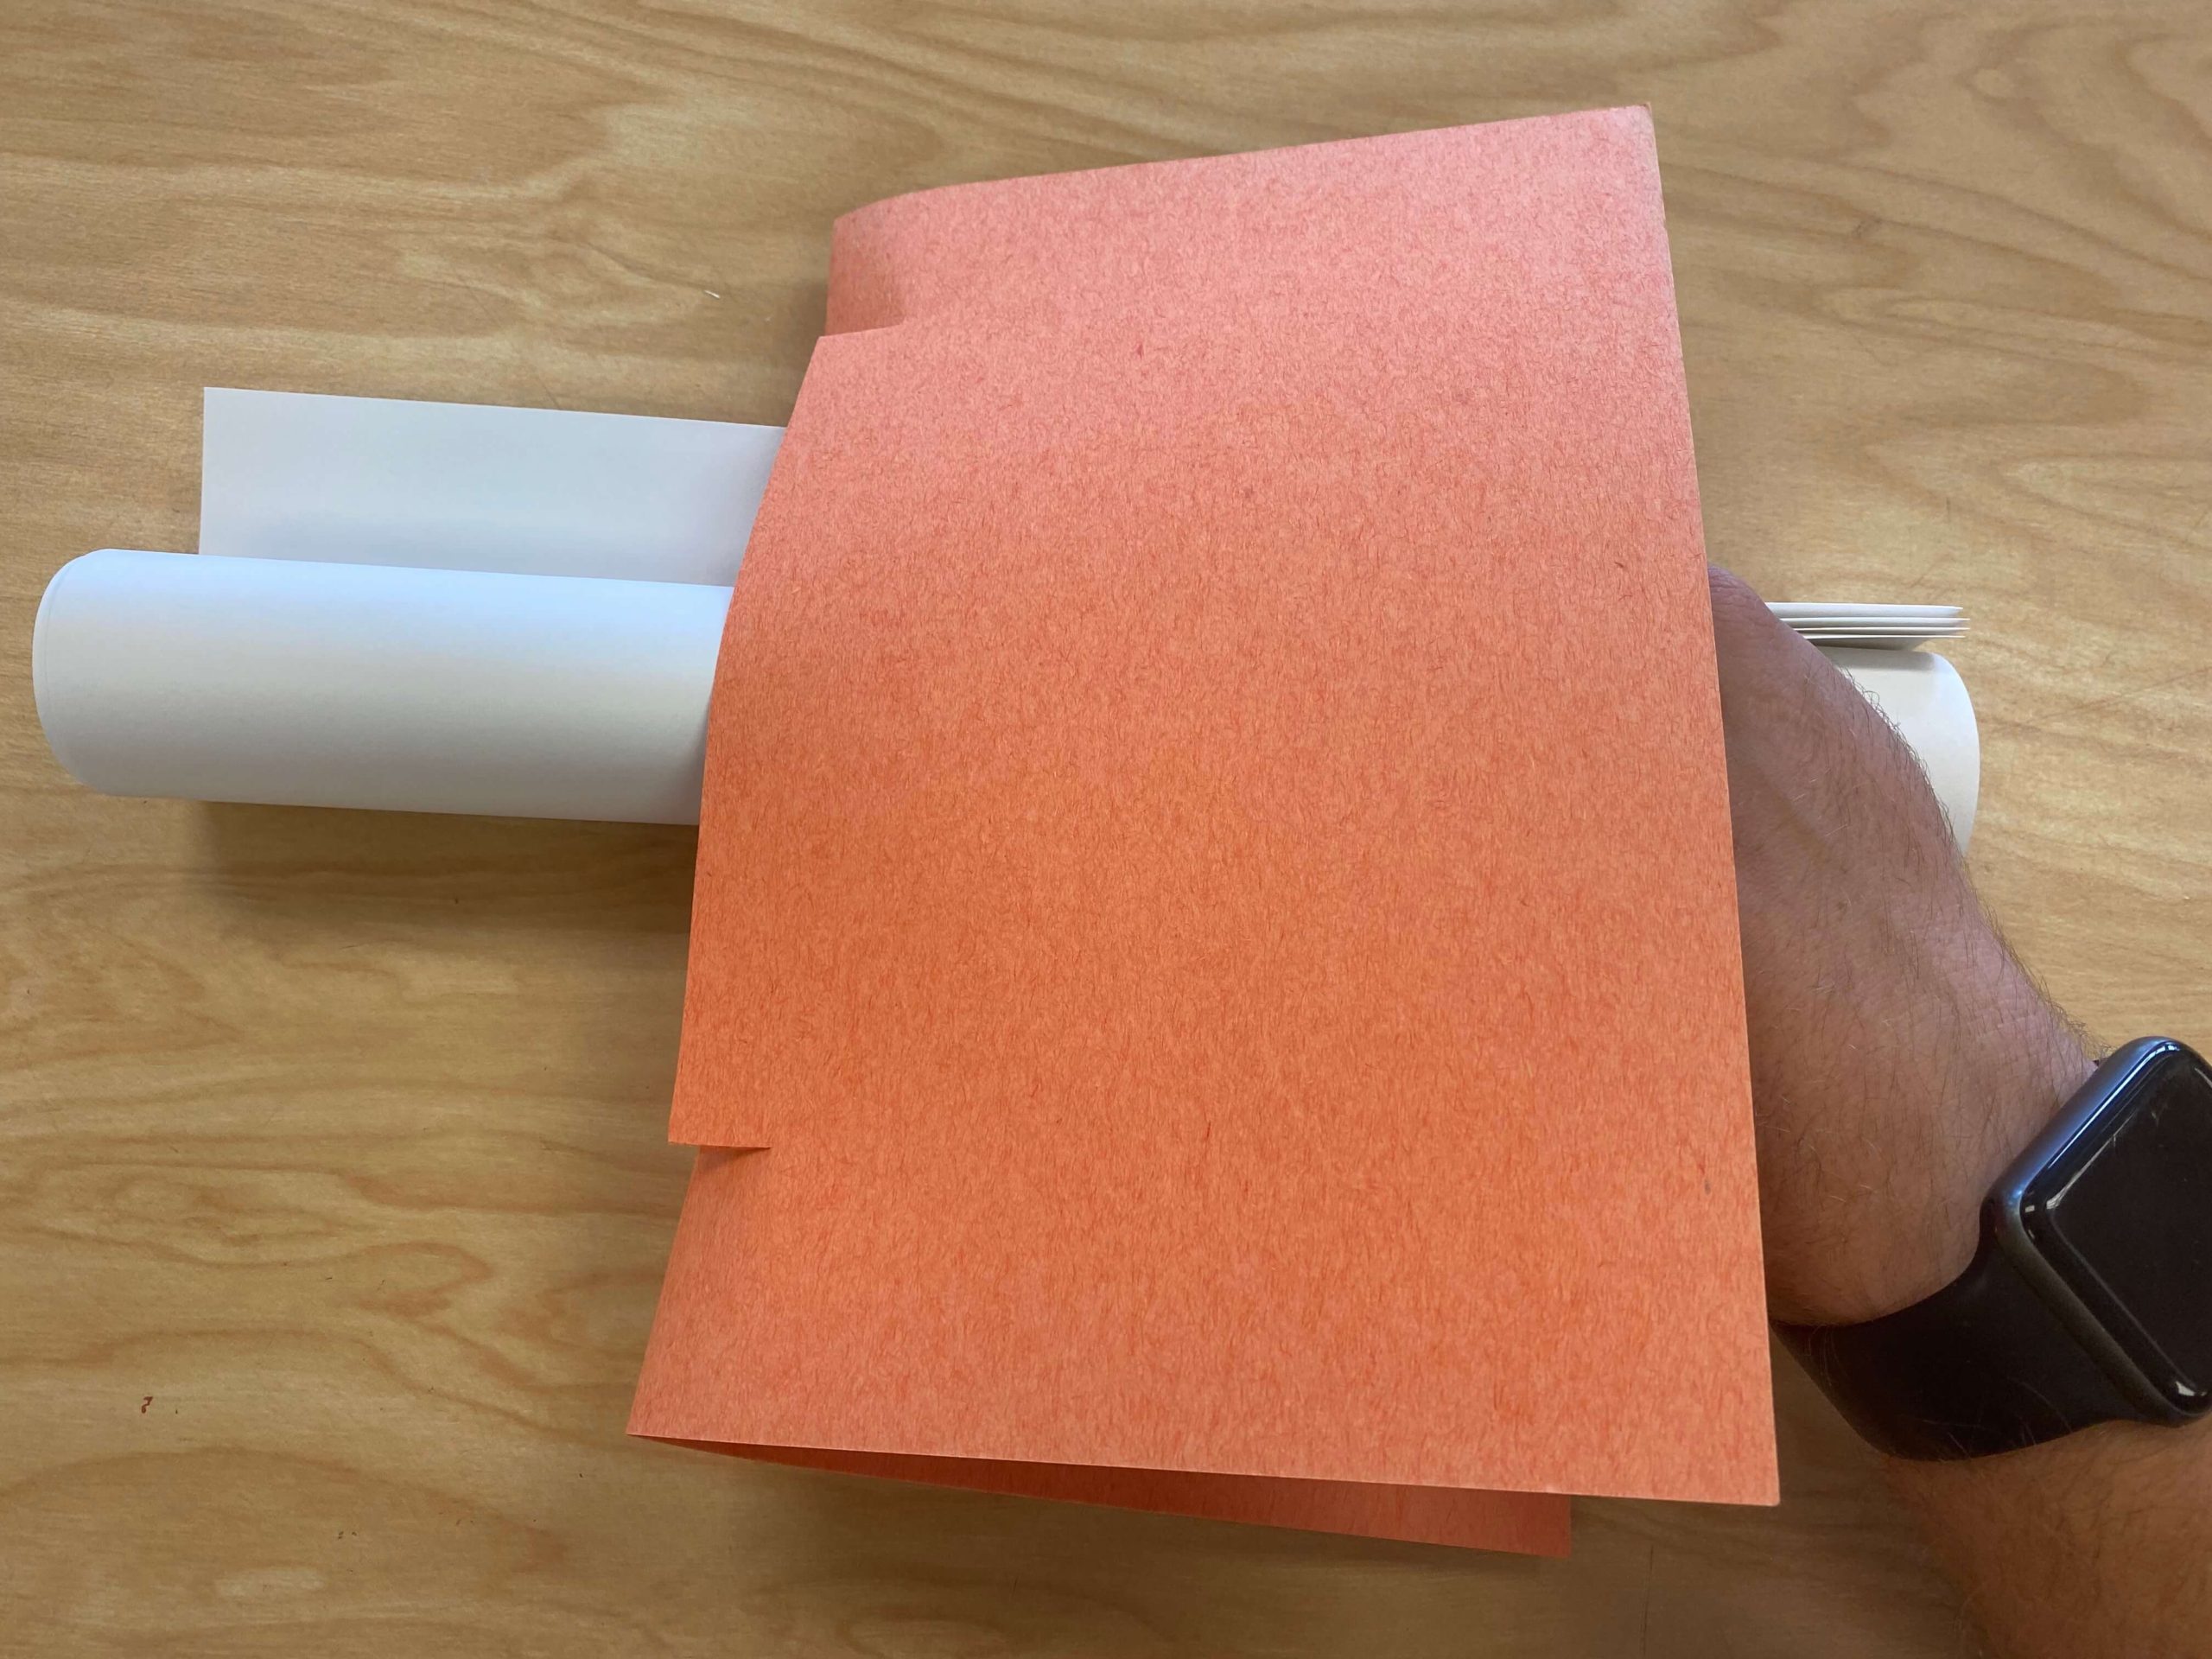
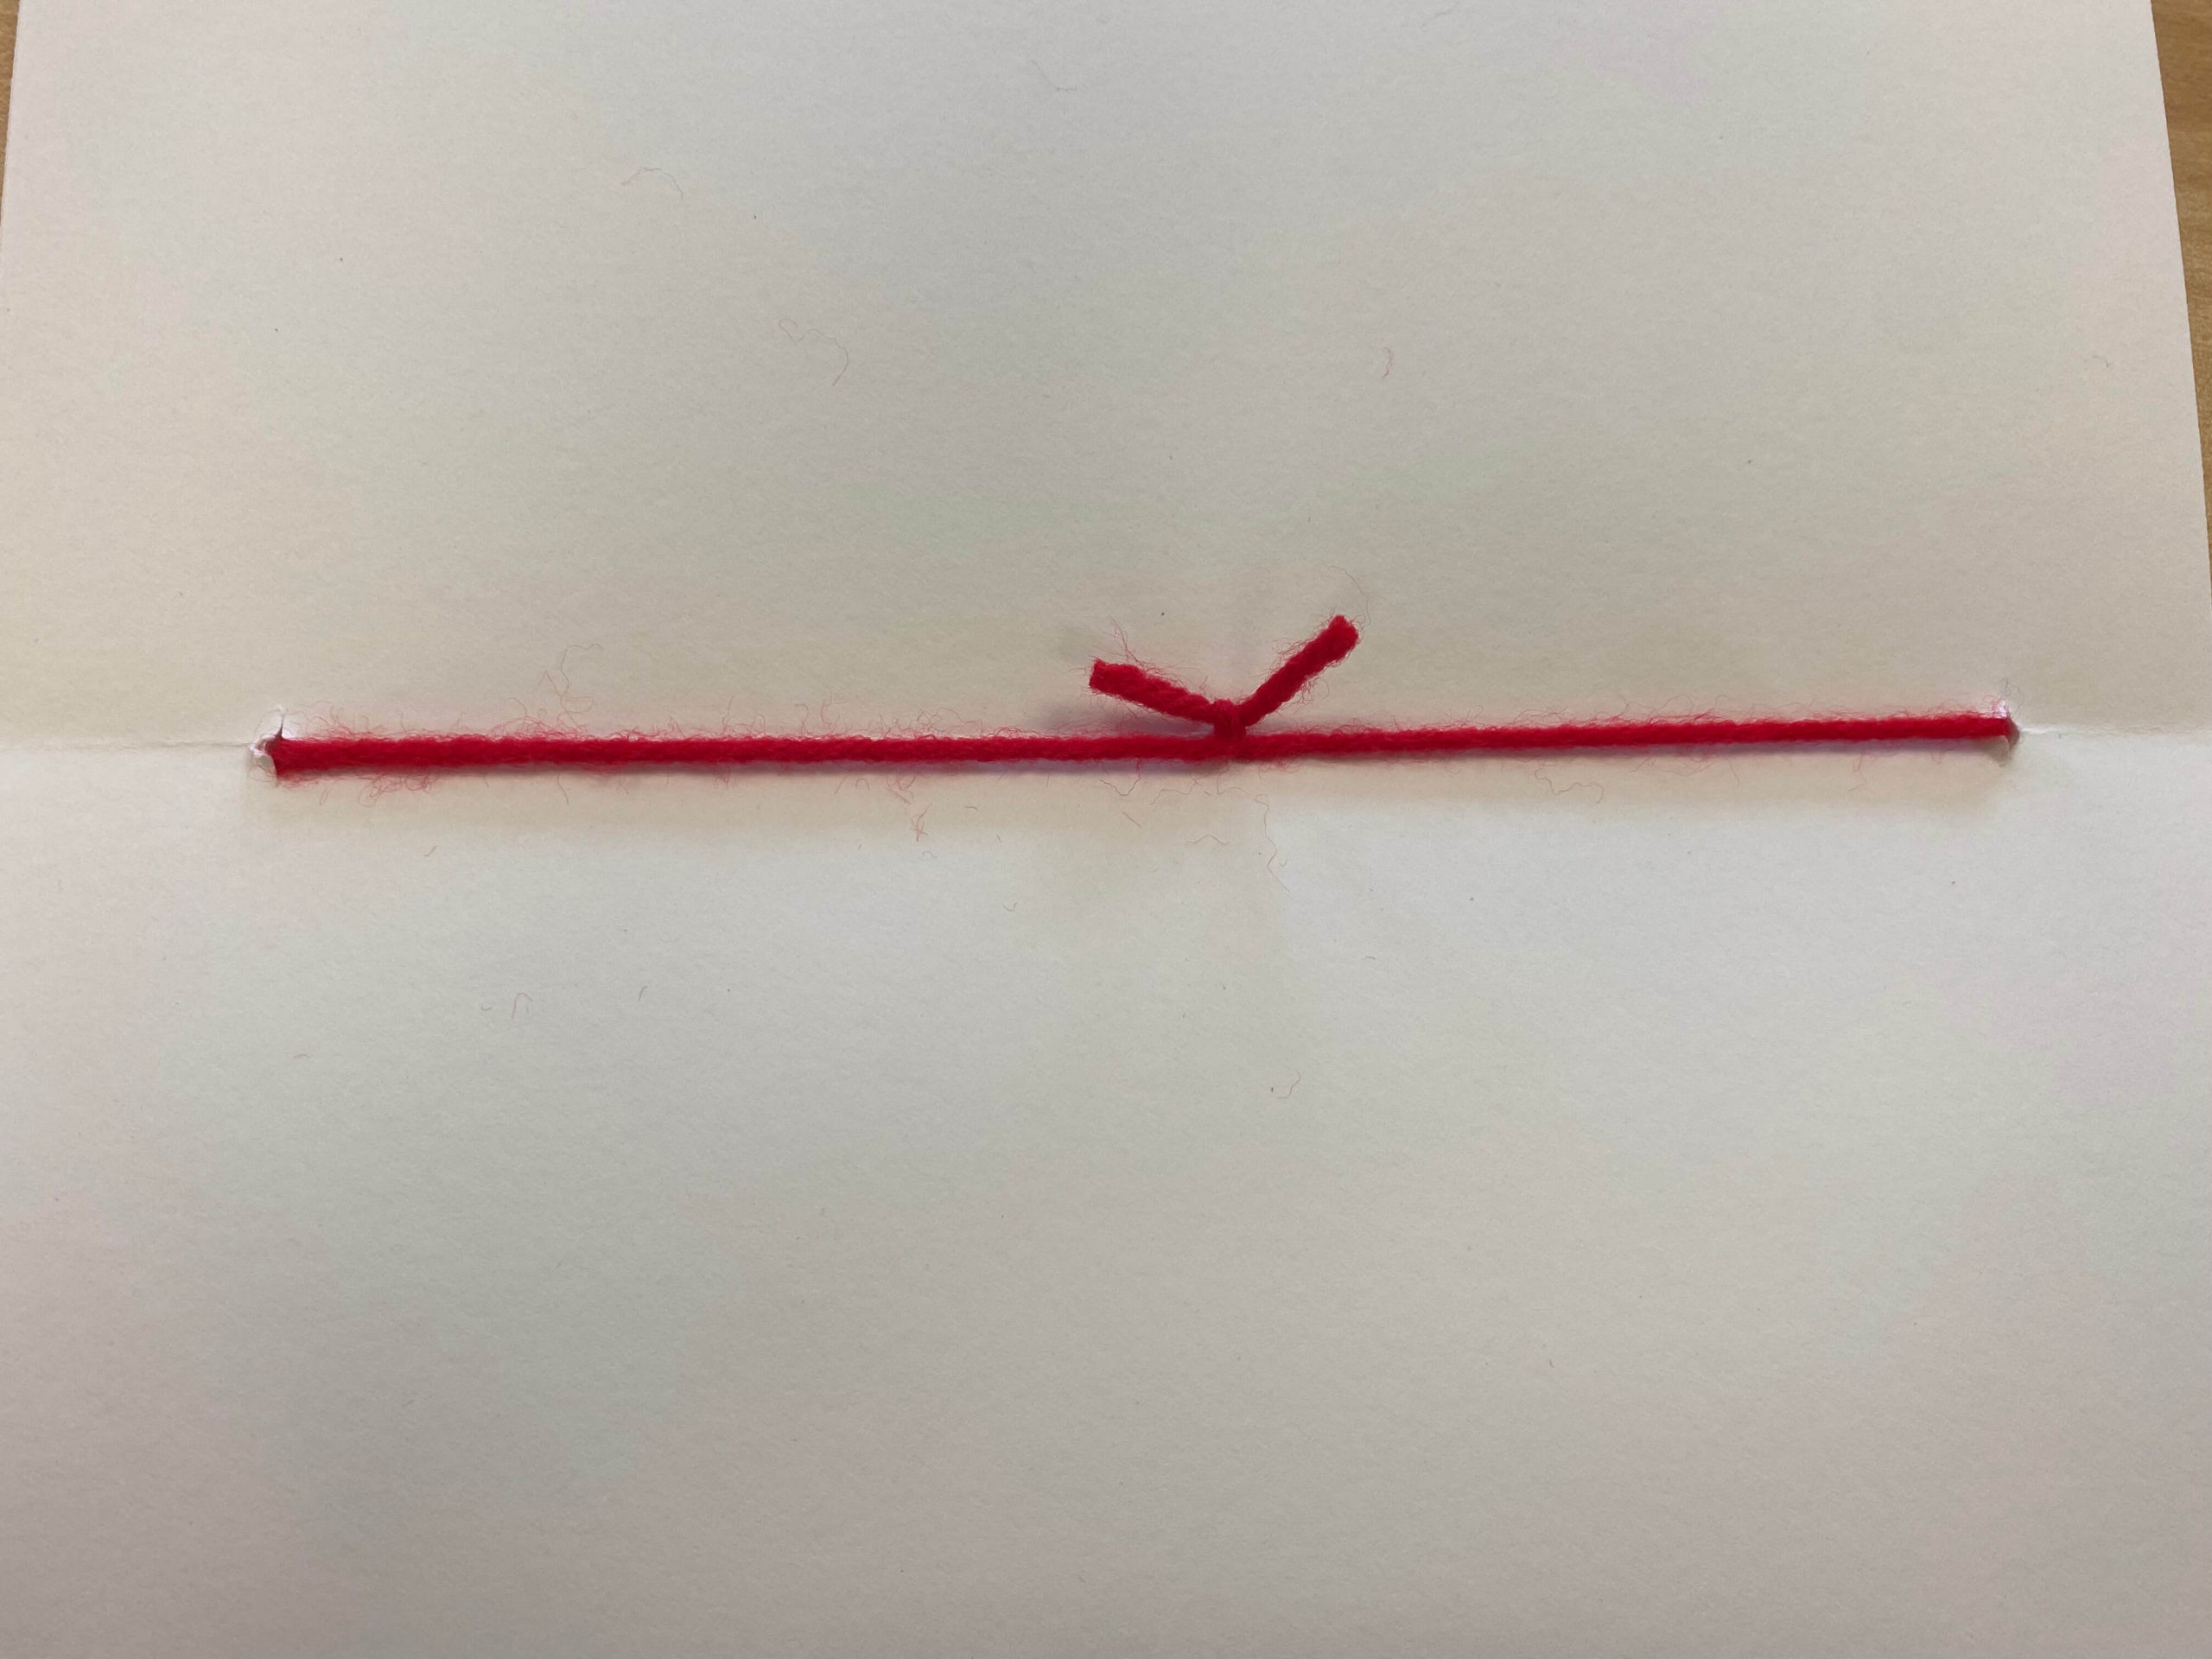
- Pile the papers together and fold them in half. I work with elementary students, so we still call it the “hamburger” way.

- Open the book to the very center. You will see the crease down the middle of the page.
- Tightly wrap the yarn around the book until you run out. I usually have my students hold (or tape) the end of the yarn with one hand as they wrap with the other.
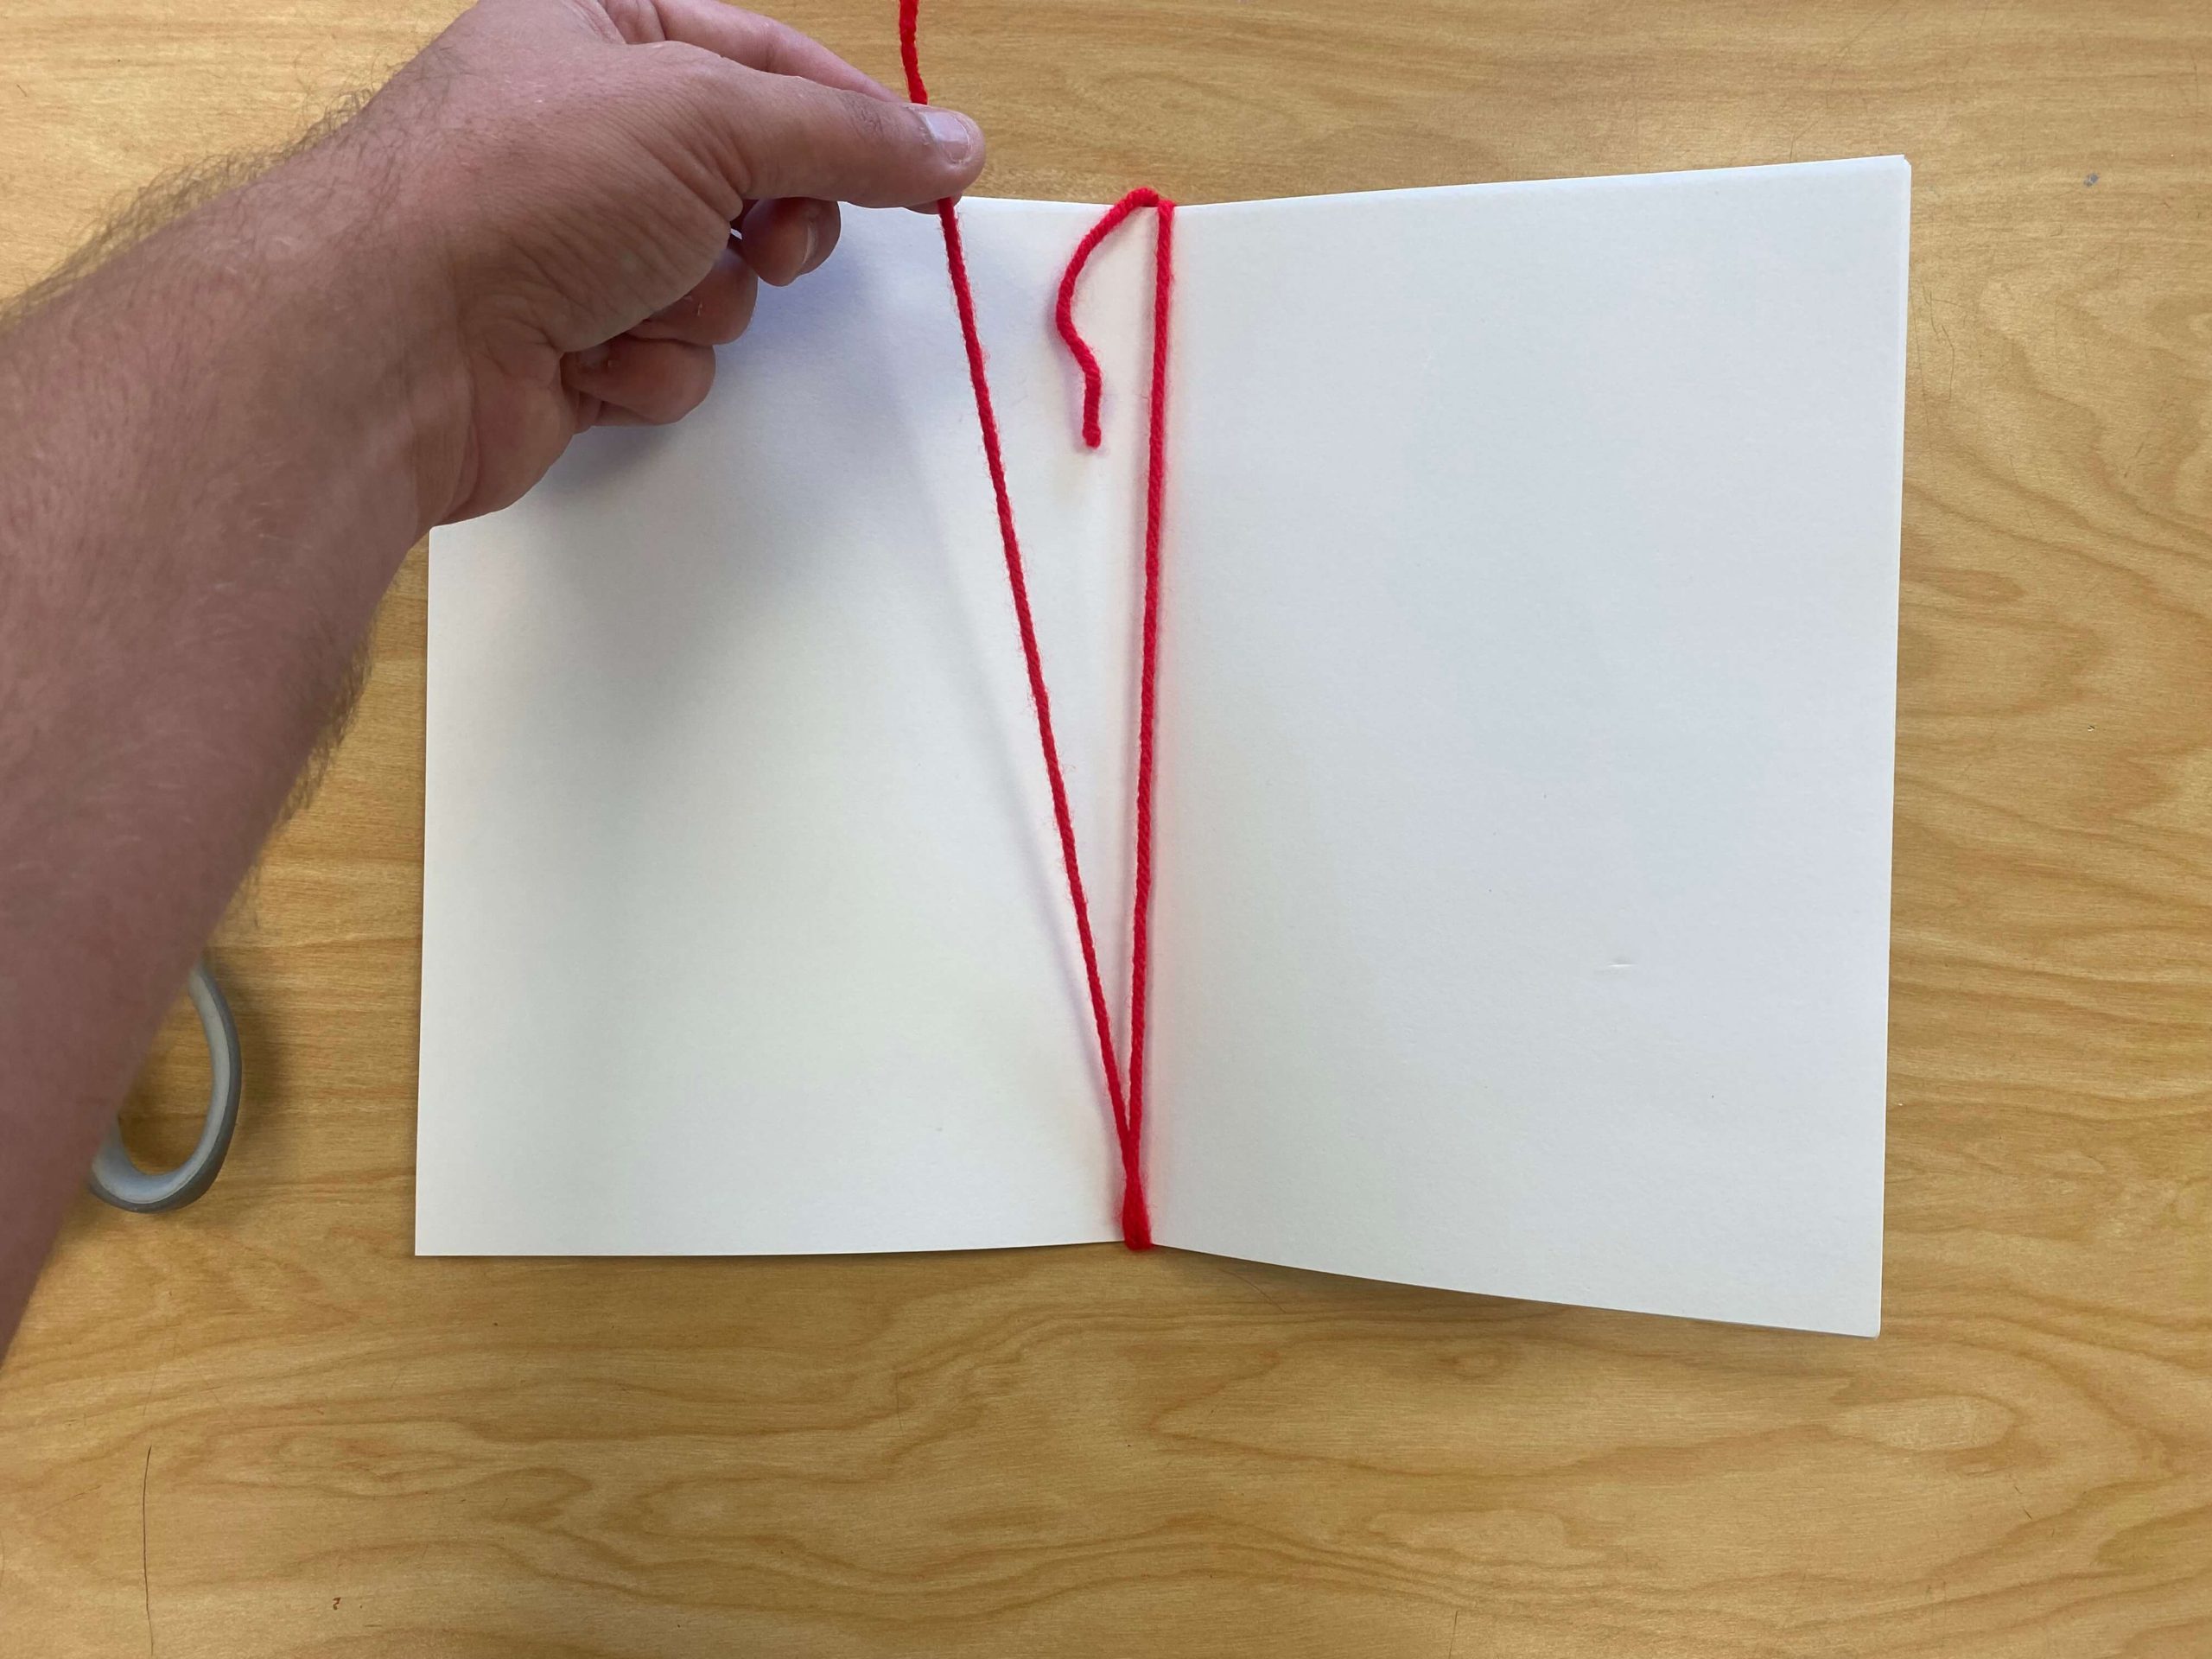
- The yarn should be tightly wrapped around the book, but not tight enough to bend the paper.
- Tie off the beginning and end of the yarn.
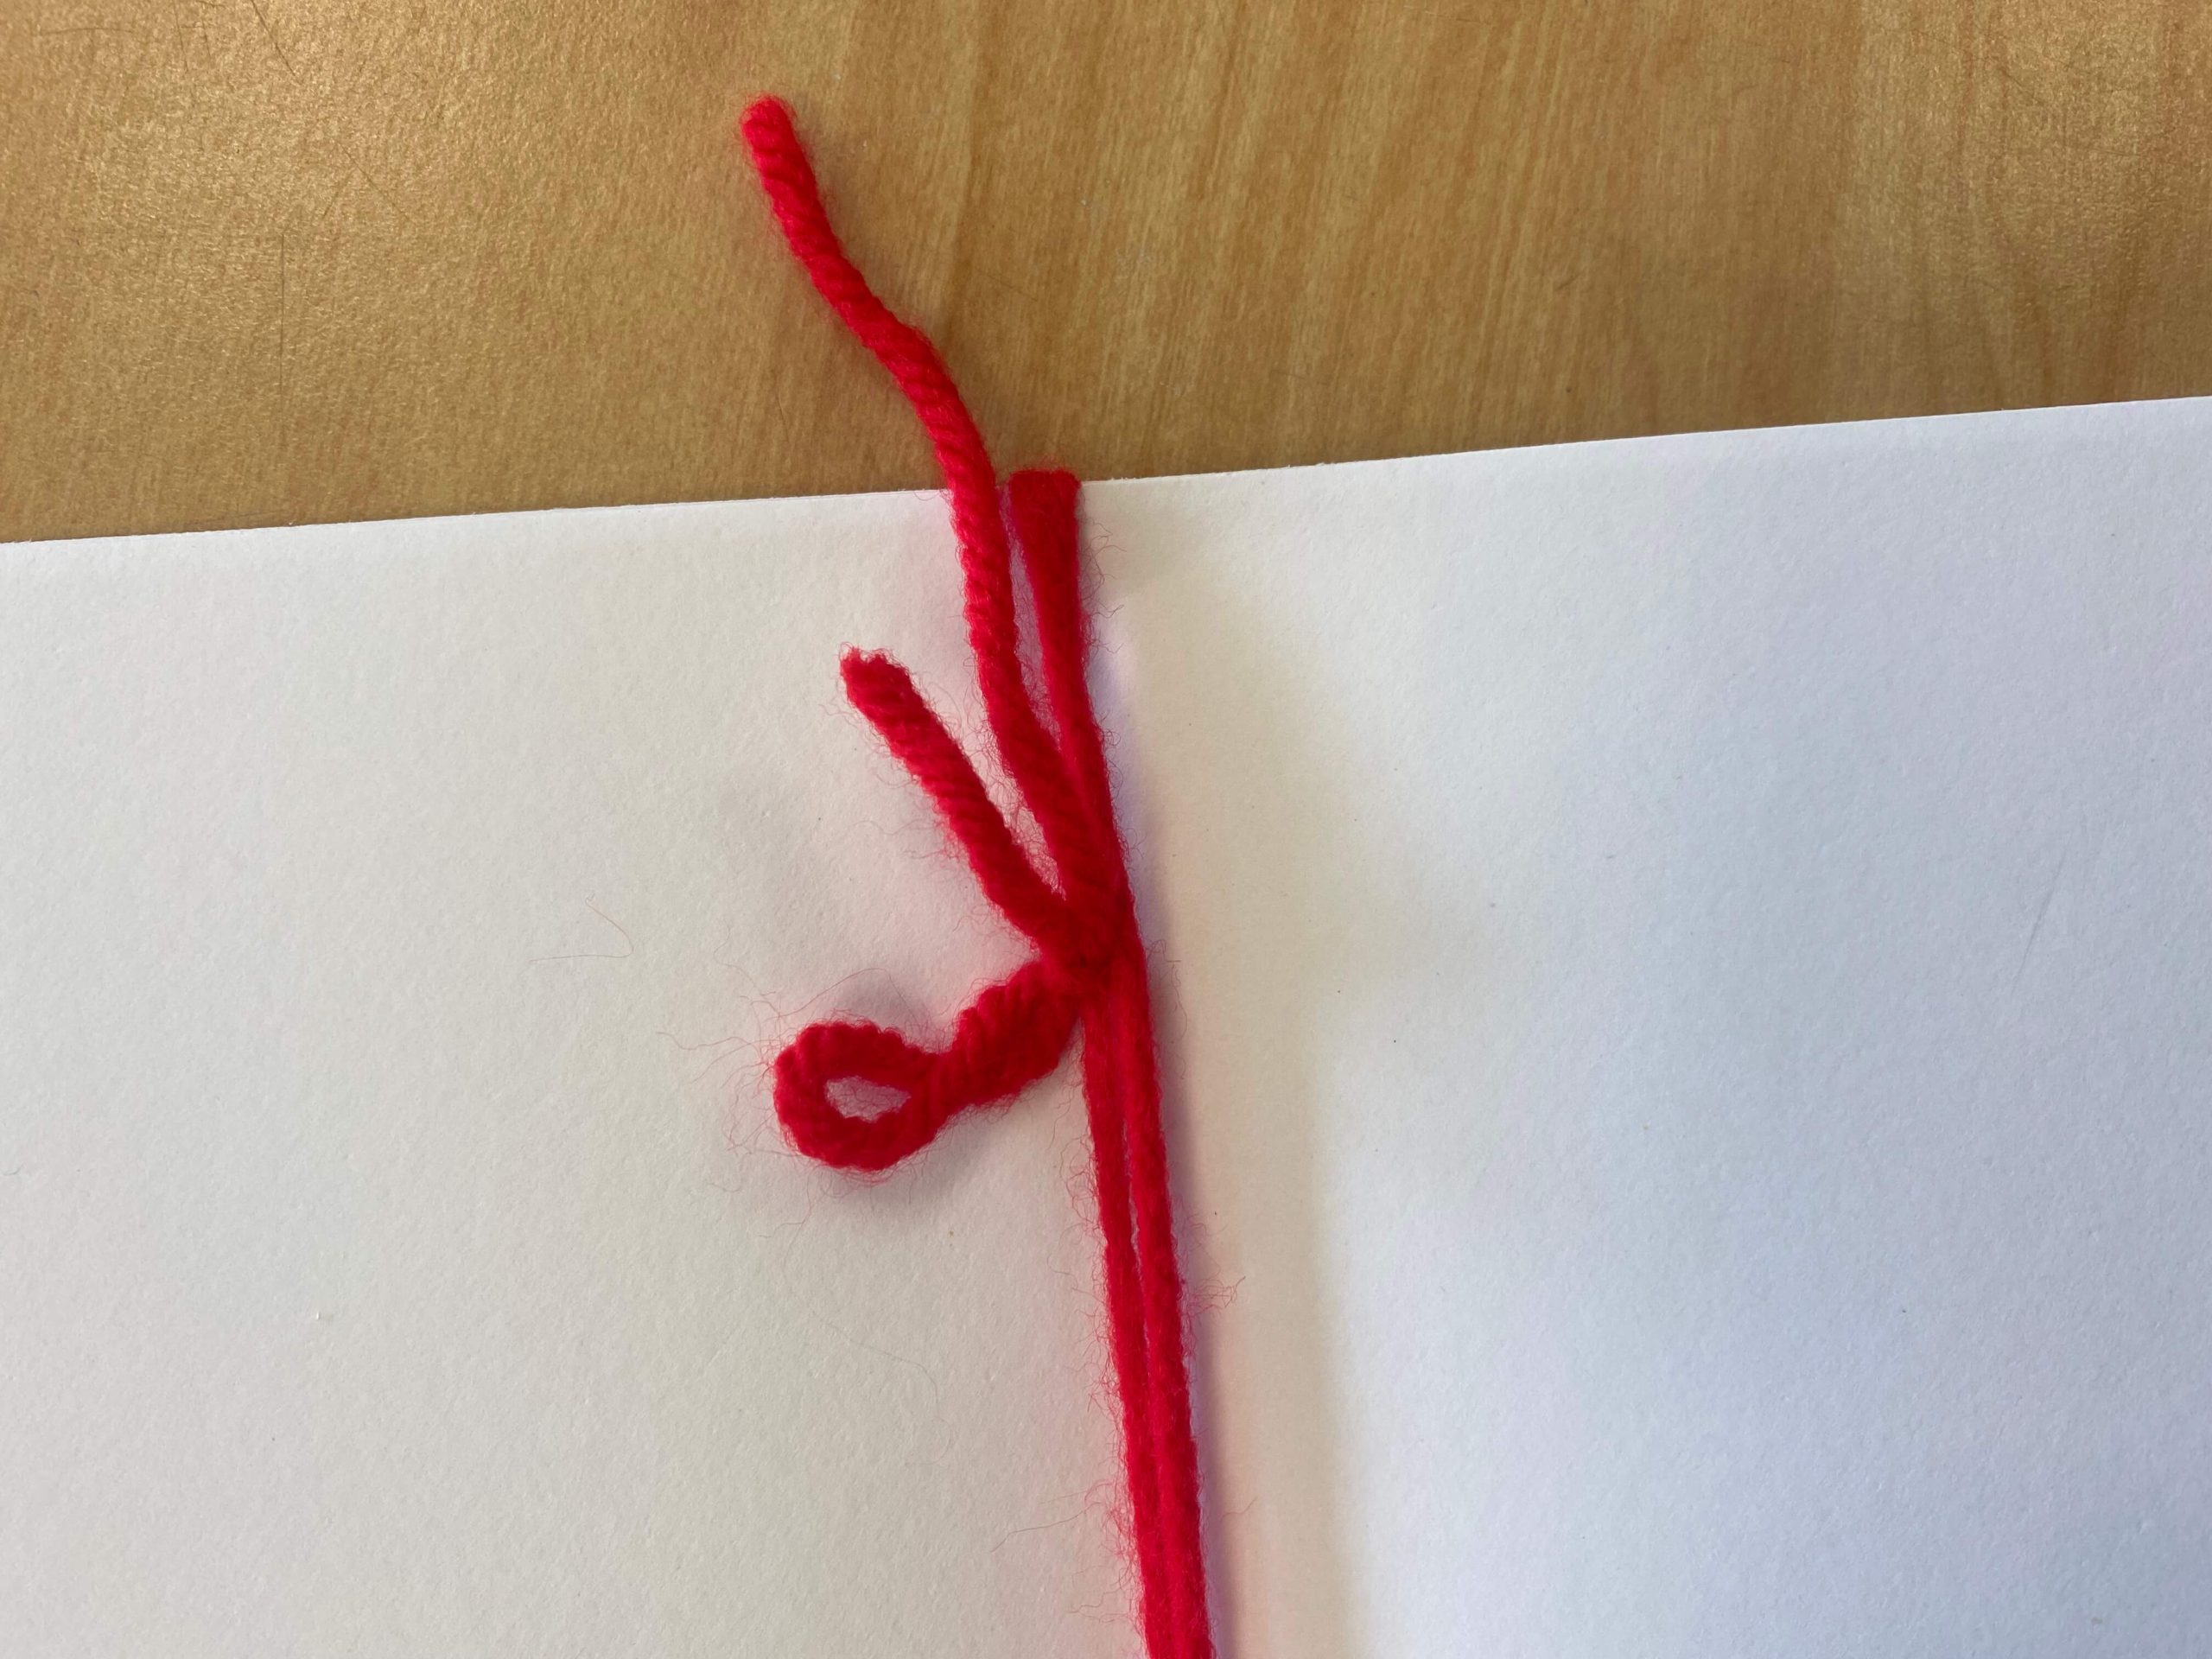
- Cut off the excess yarn.
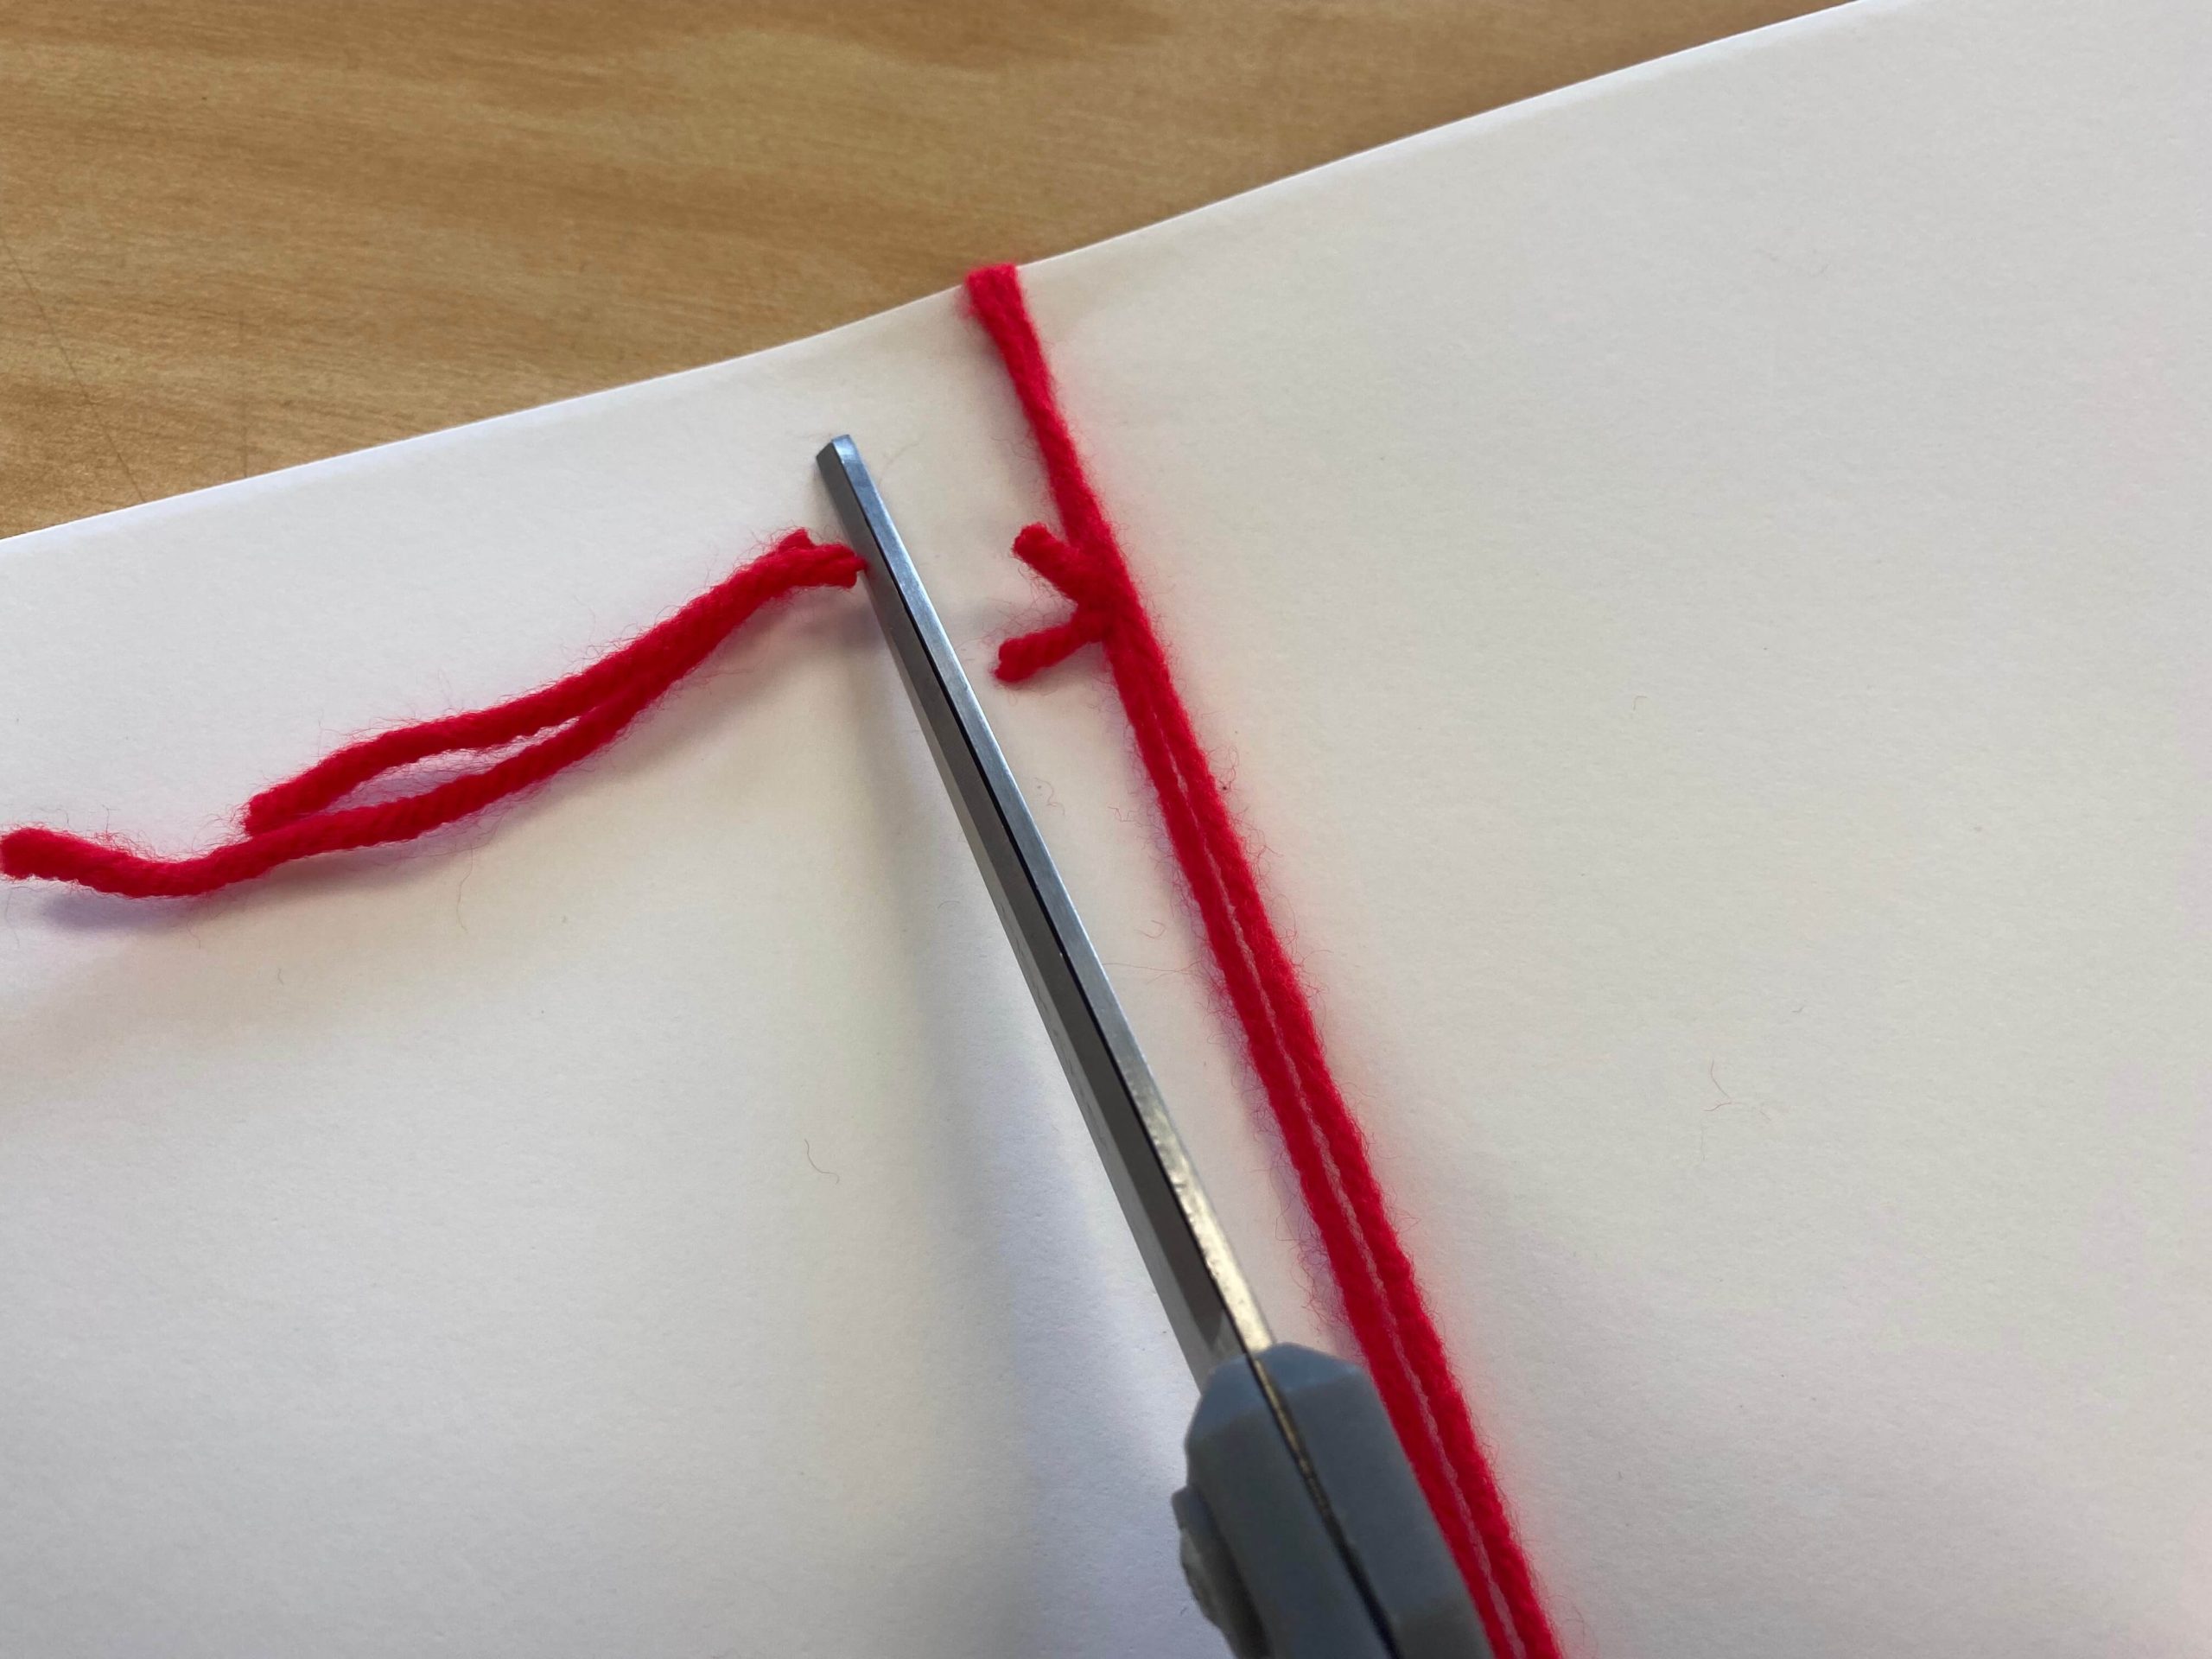
- Voila! You have a book!
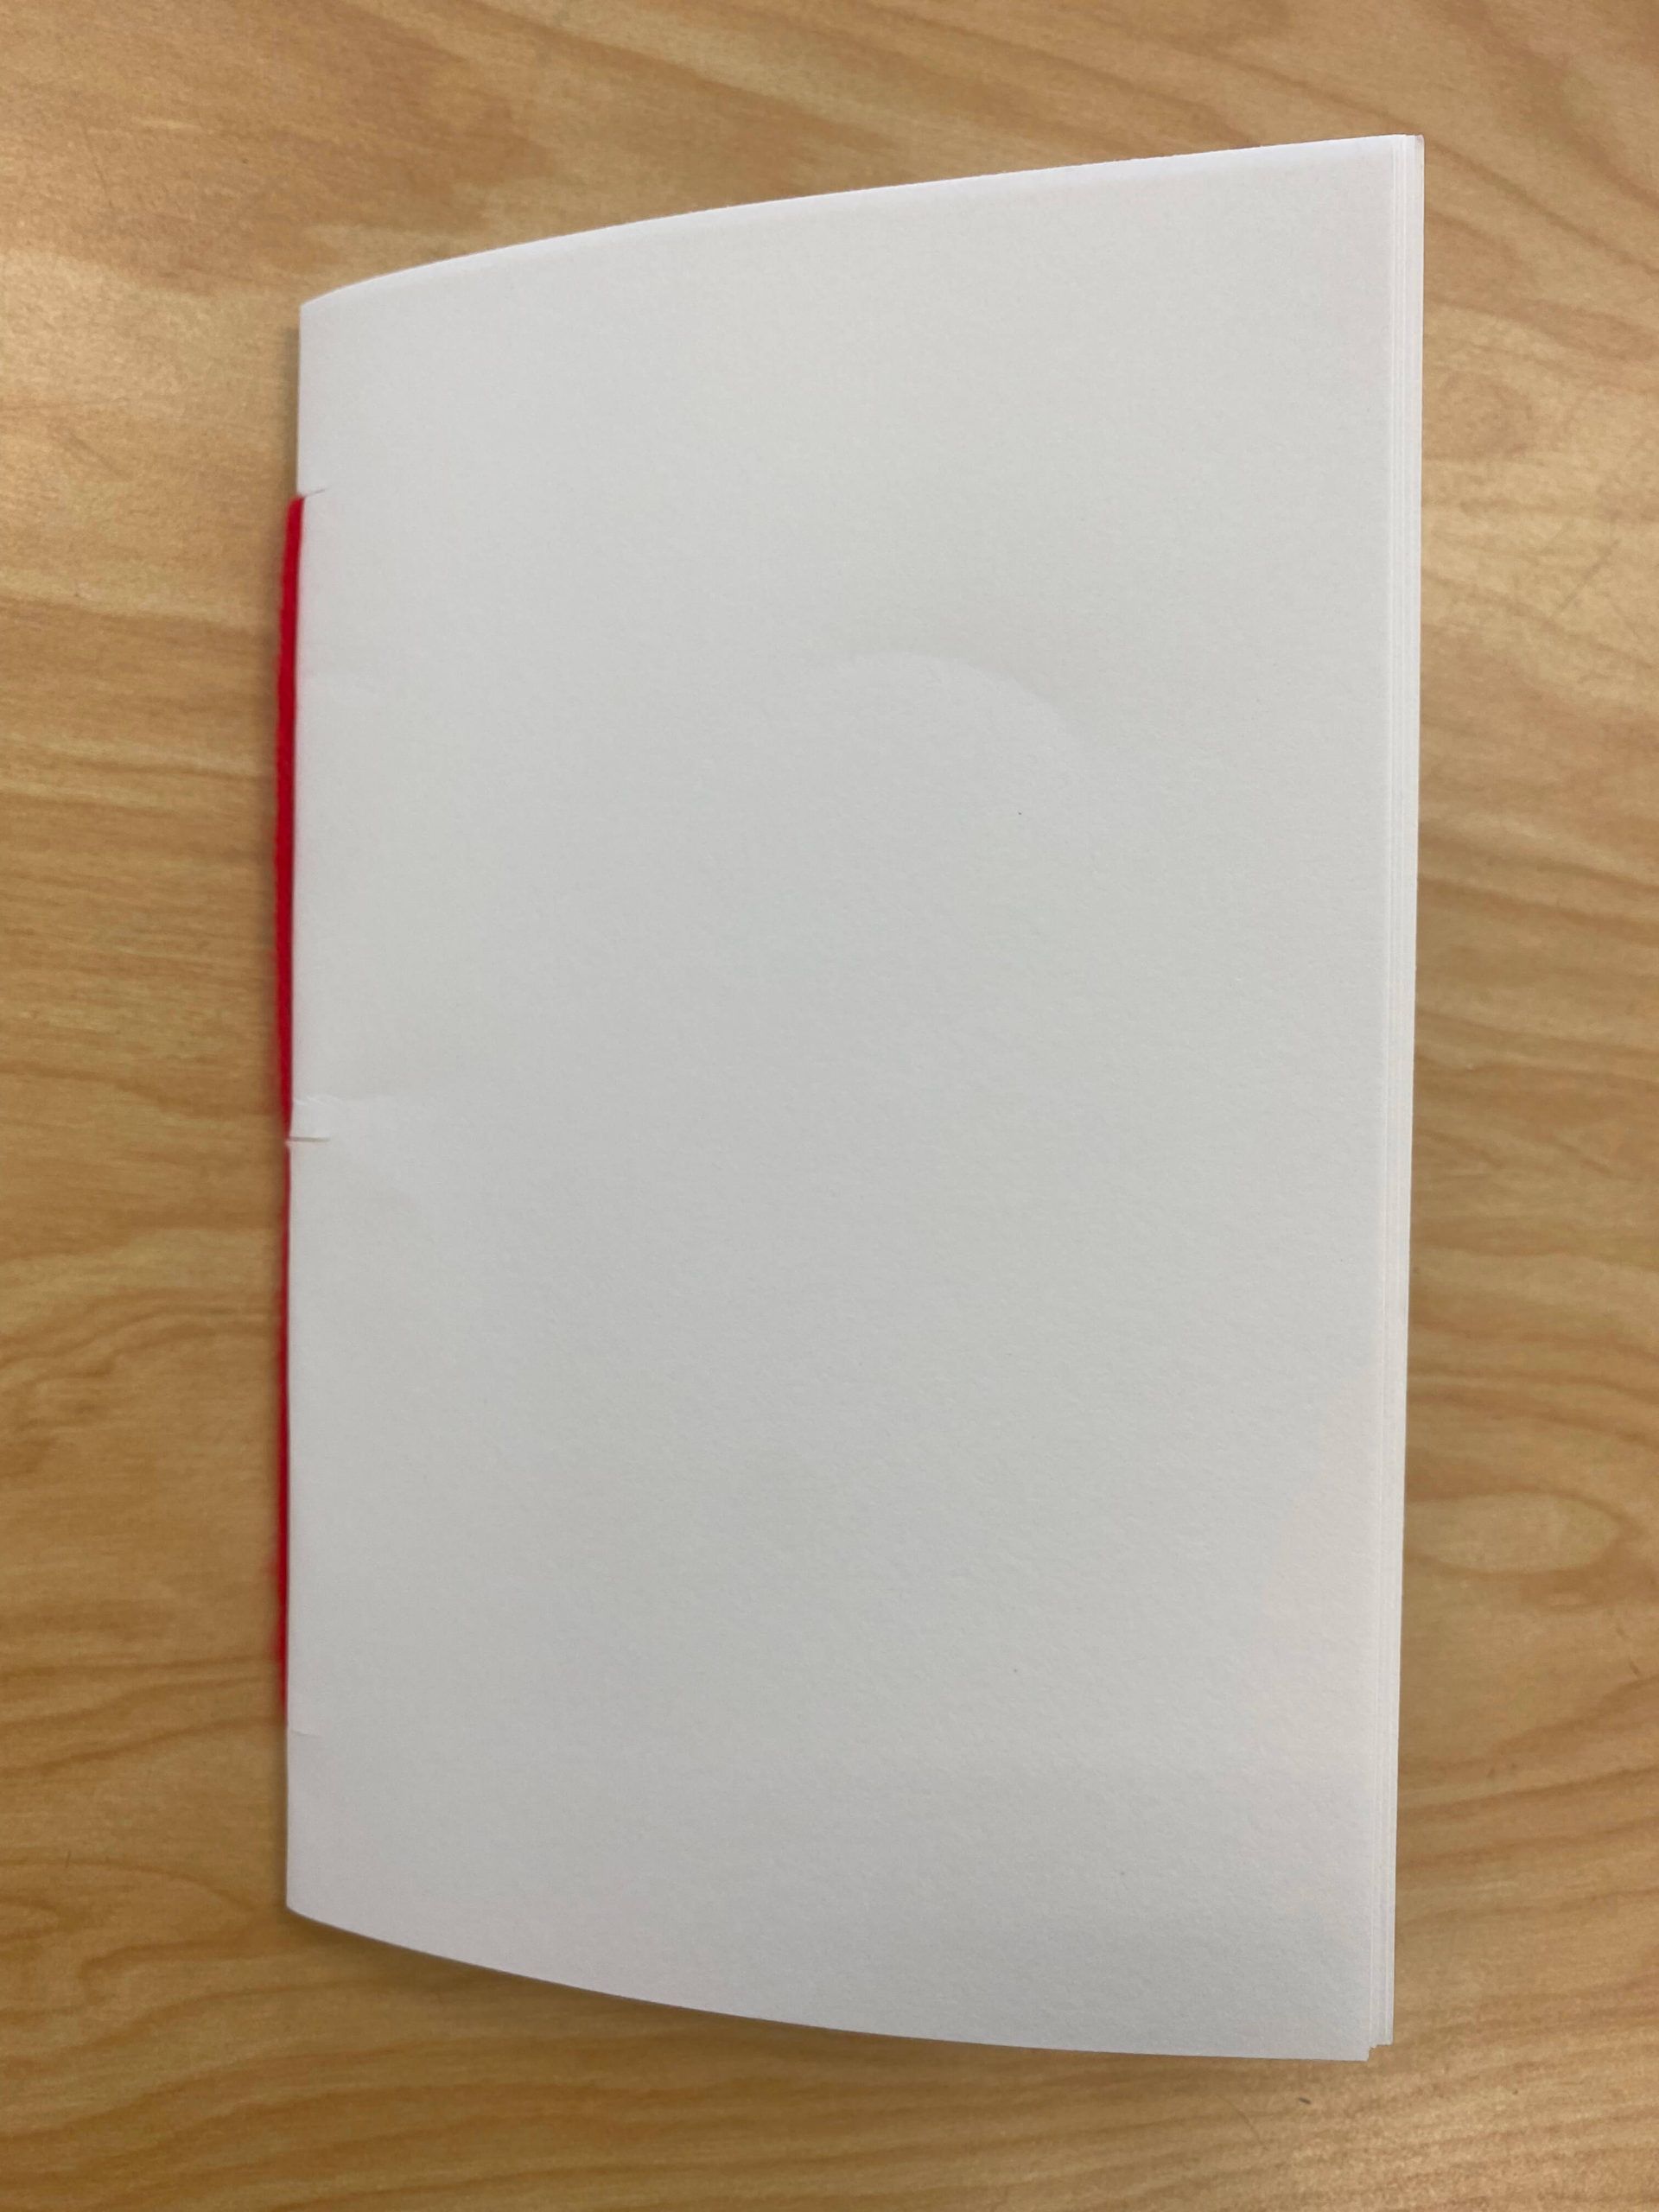
![]()
![]()
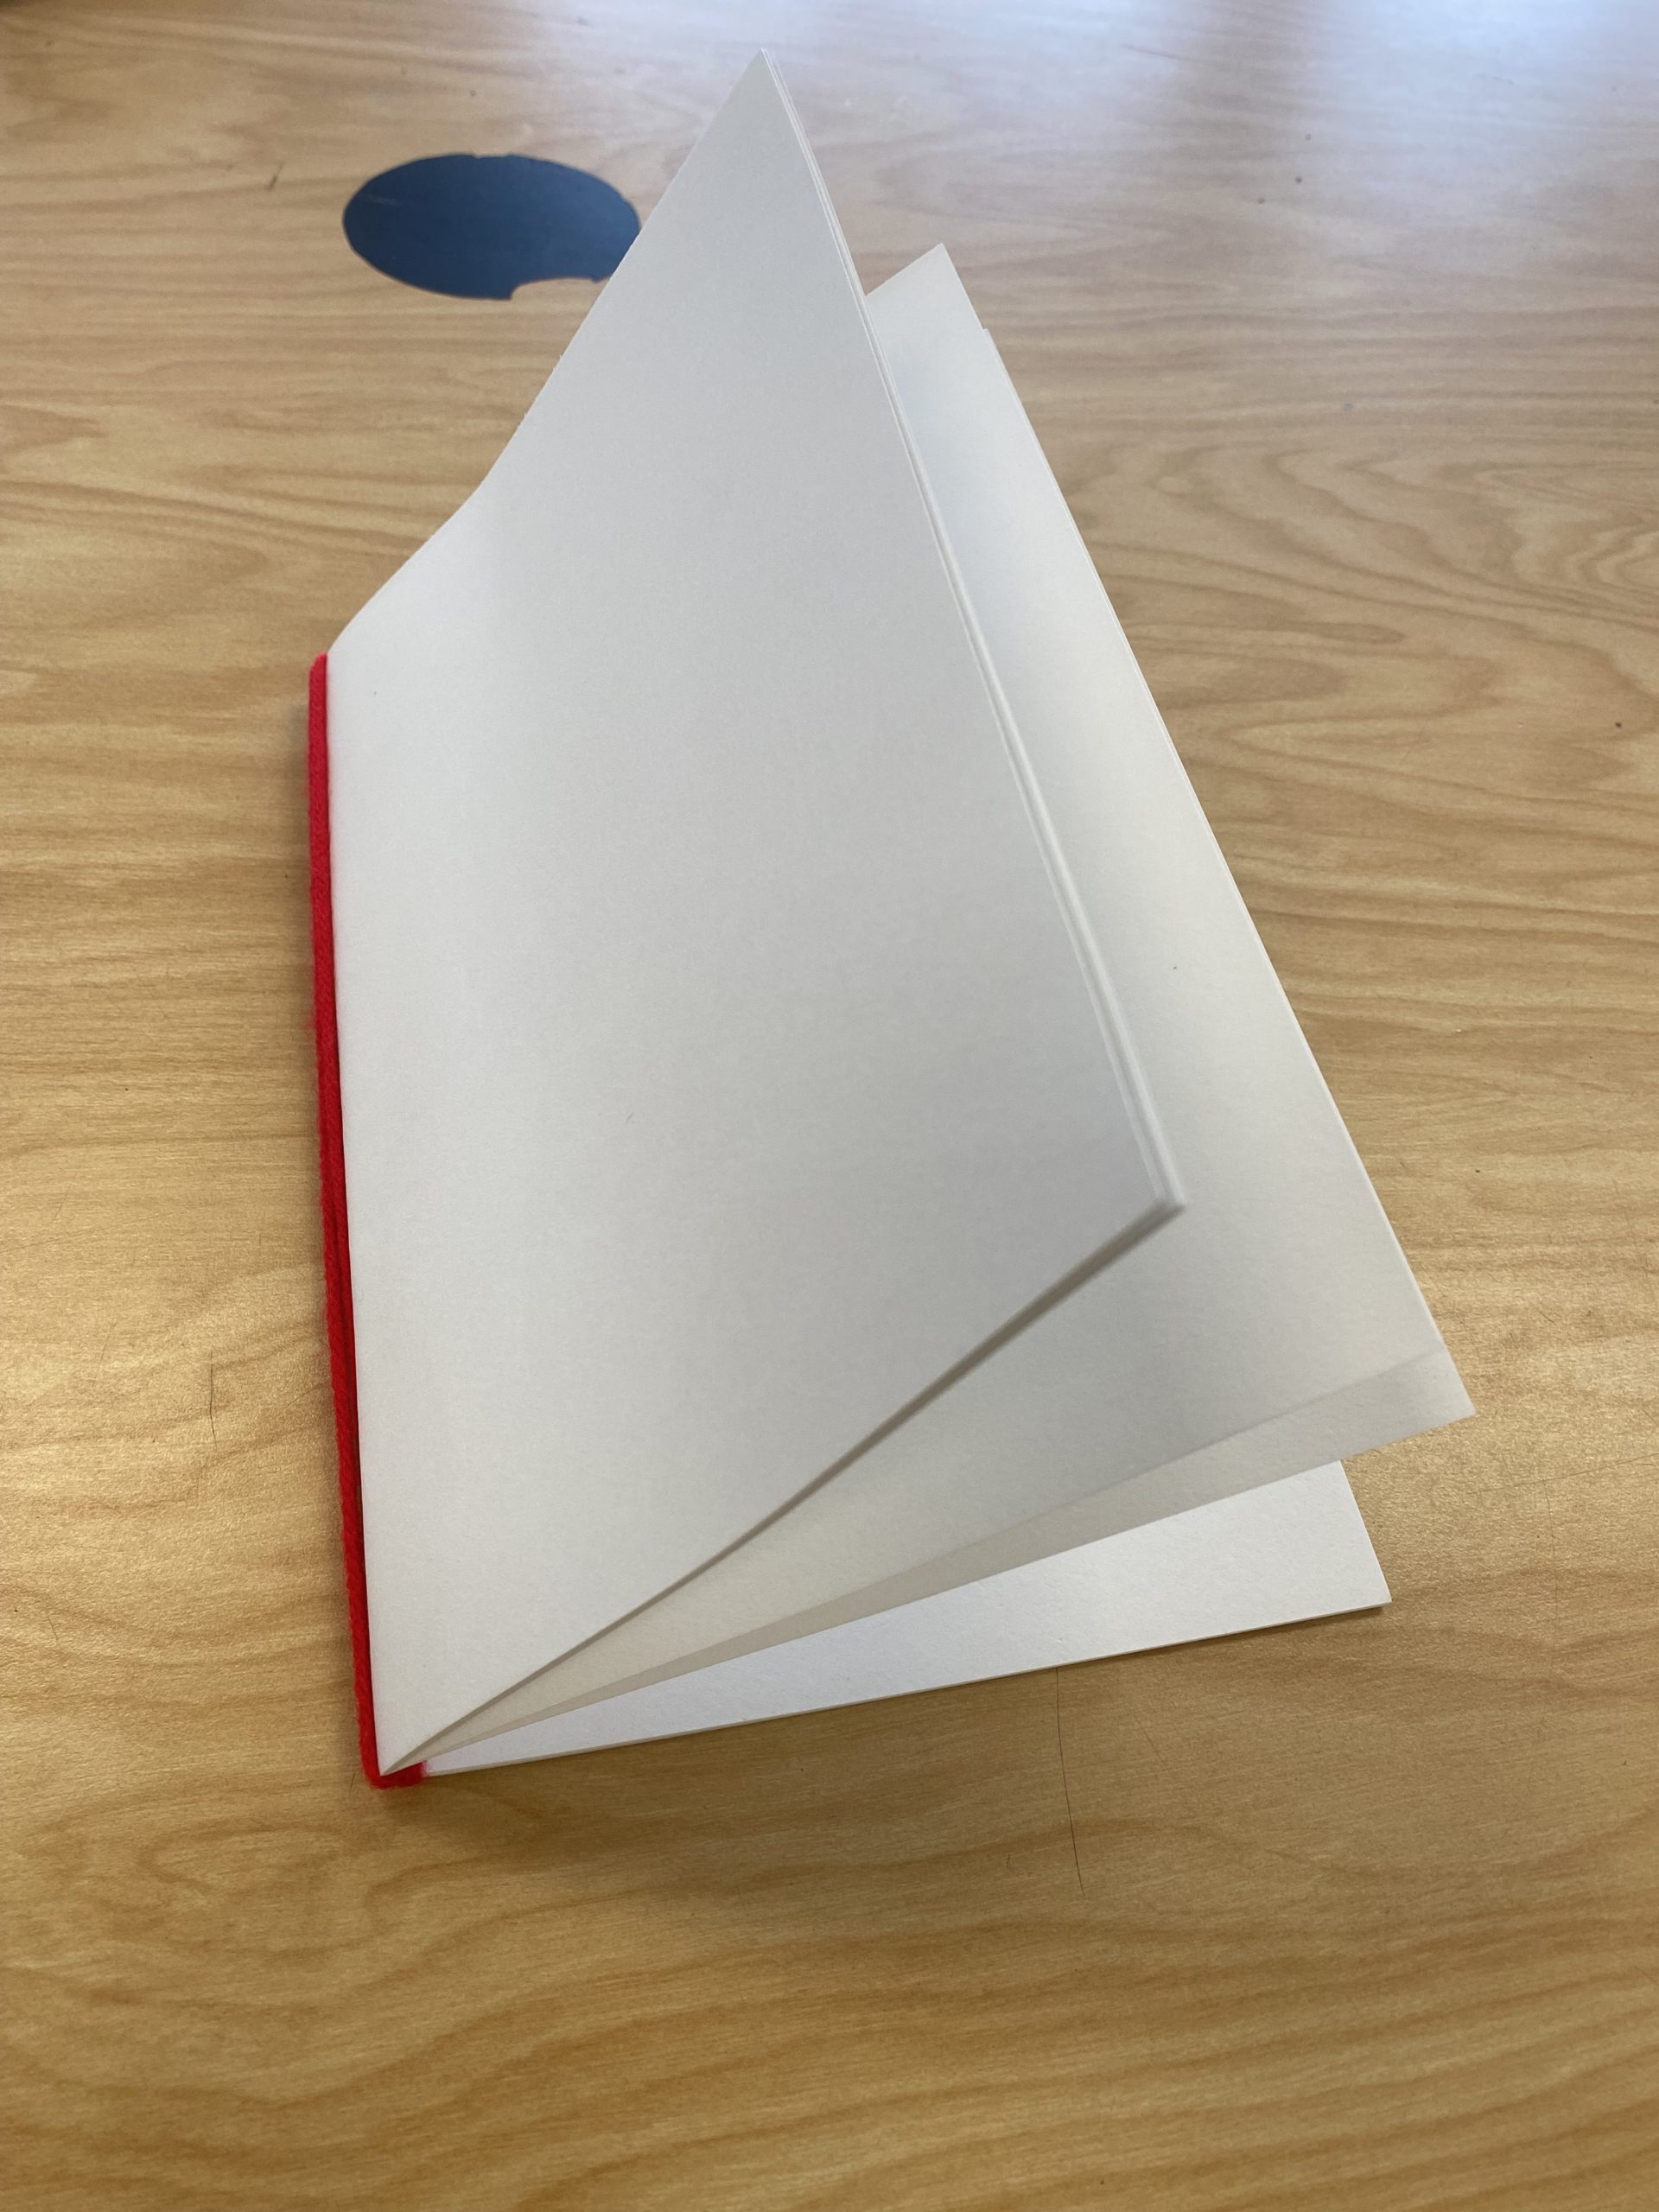
I have found this to be one of the simplest and most effective sketchbooks. It typically only takes them a few minutes to make, which is great when students are absent or have recently moved into the district. Within minutes these students are caught up, and you can move on with your lesson. This design also allows for easy removal or addition of new pages.
![]()
Book 2: No-Sew Puzzle Book
I refer to this as a puzzle book because of the way the cover and pages fit together.
Supplies:
- A few sheets of paper (I used a piece of construction paper to better illustrate the steps)
- Scissors
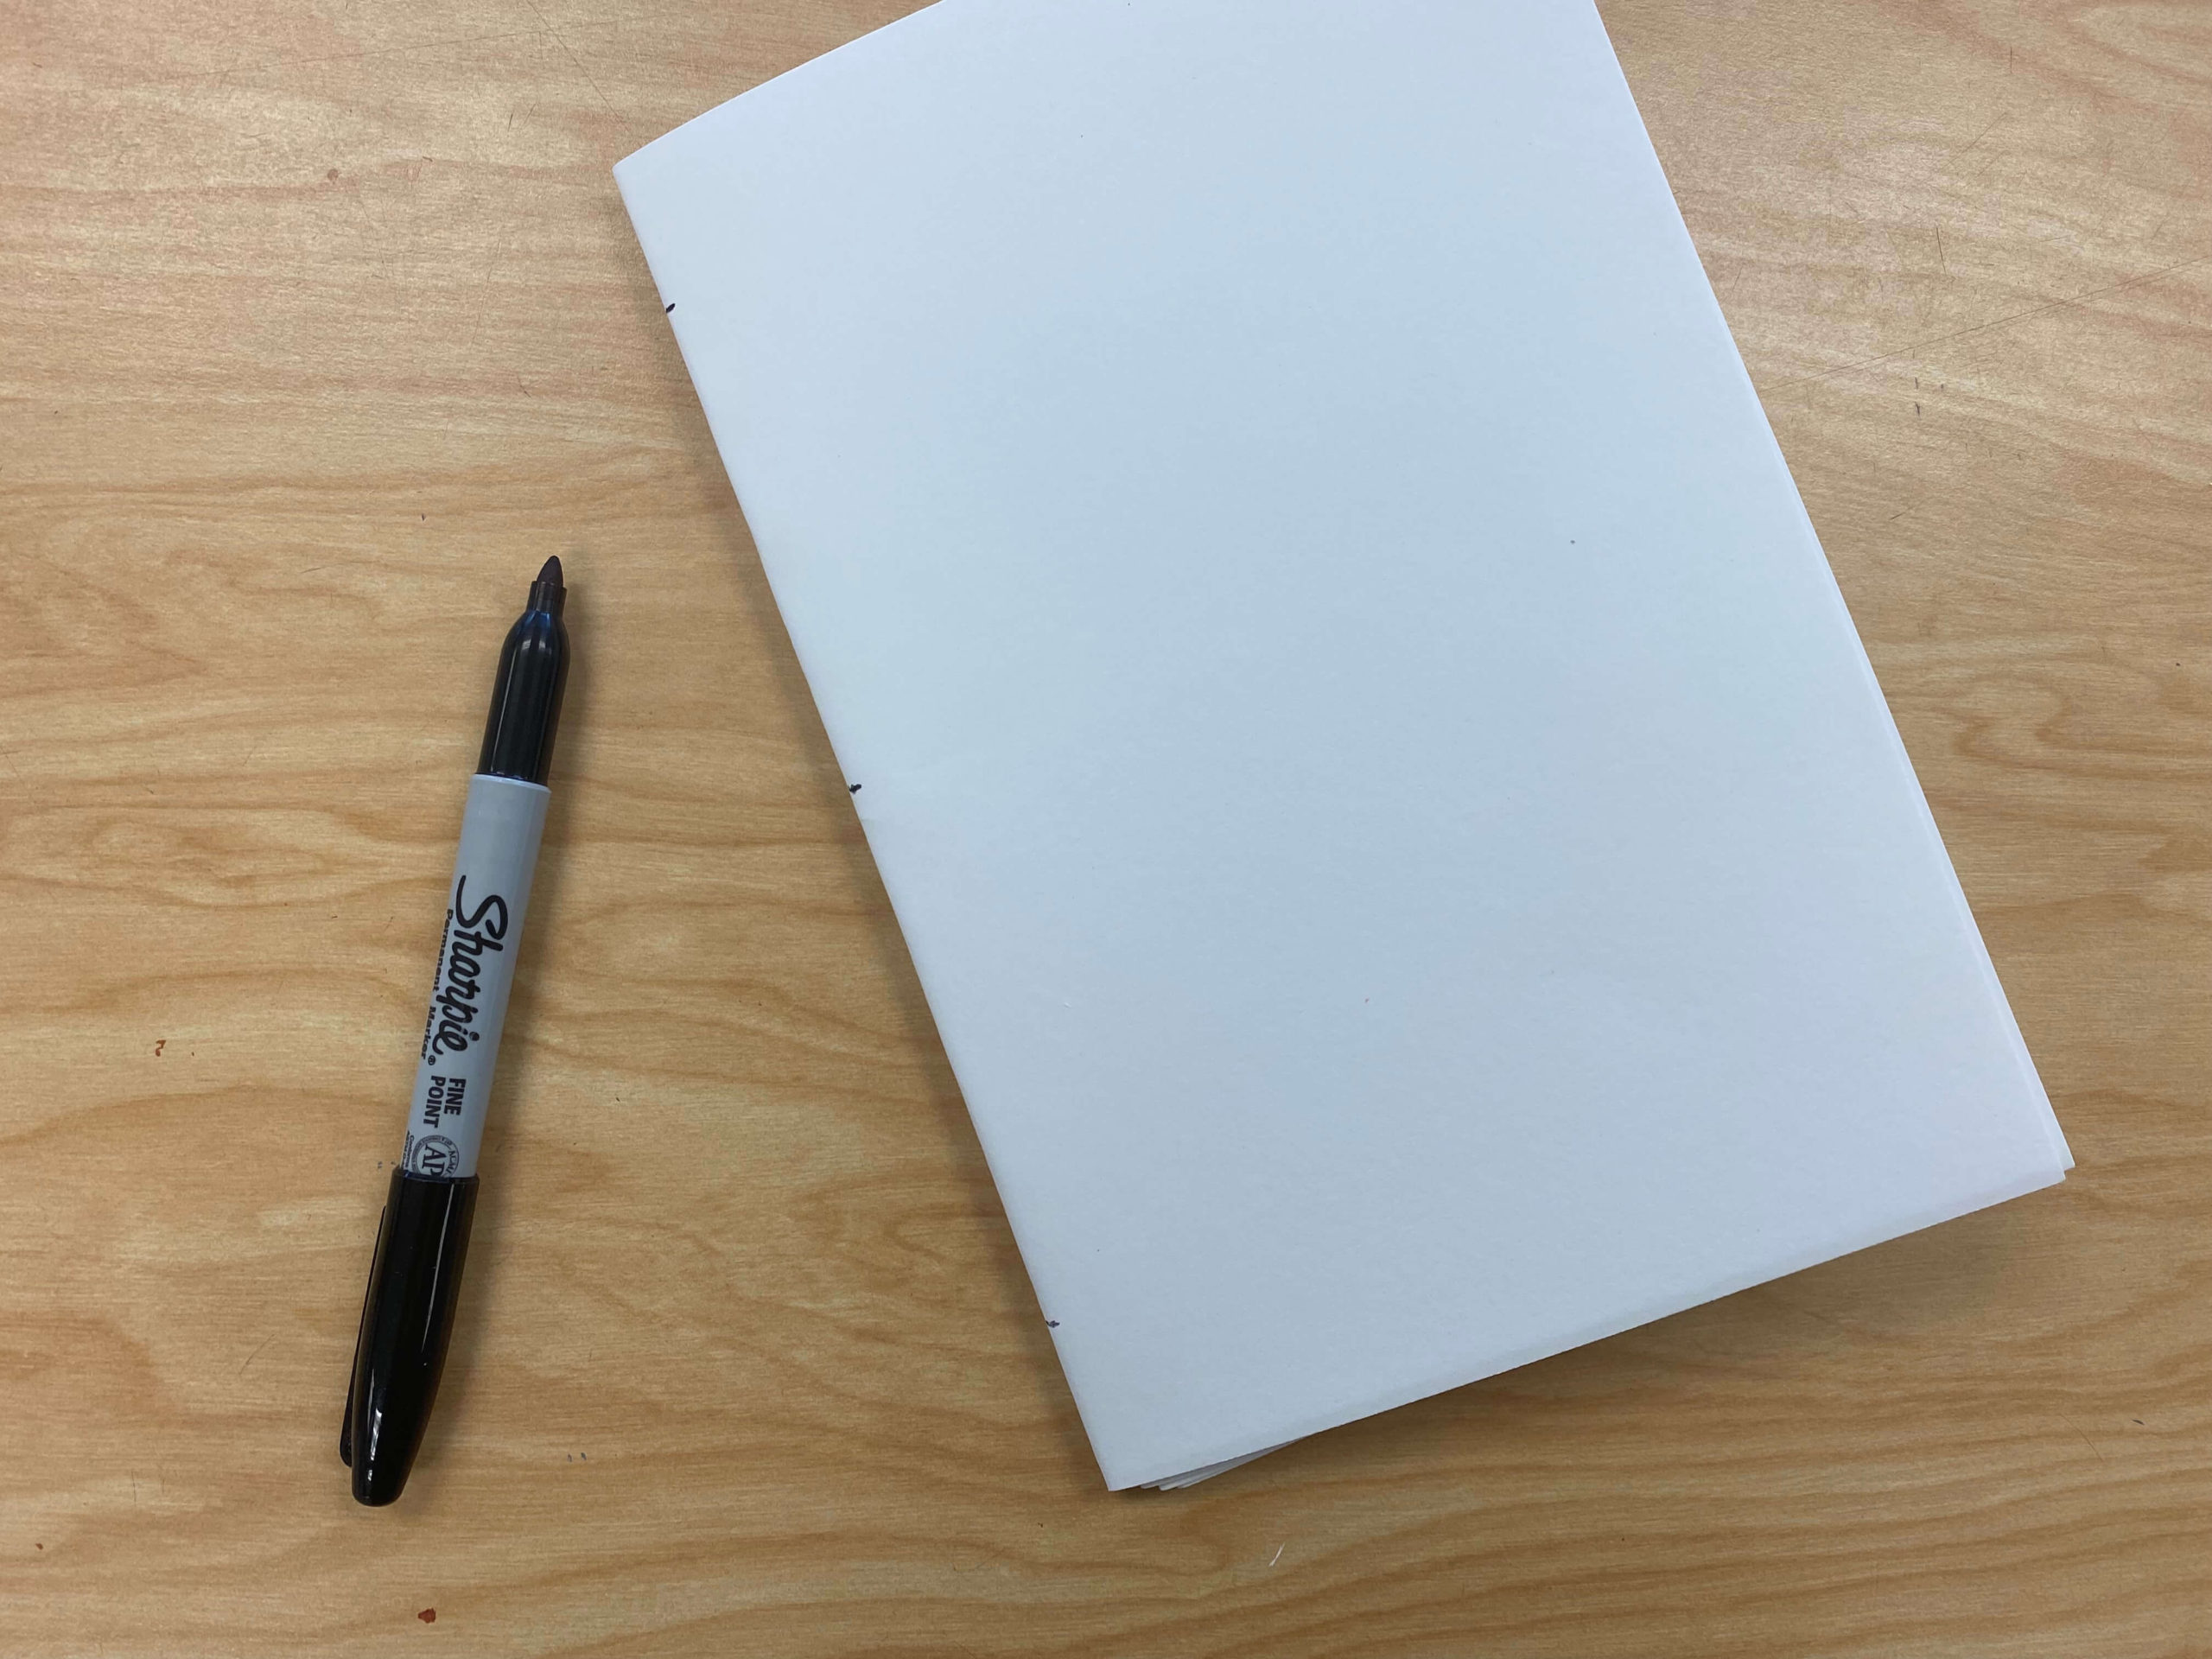
- Marker/Pencil
Steps:
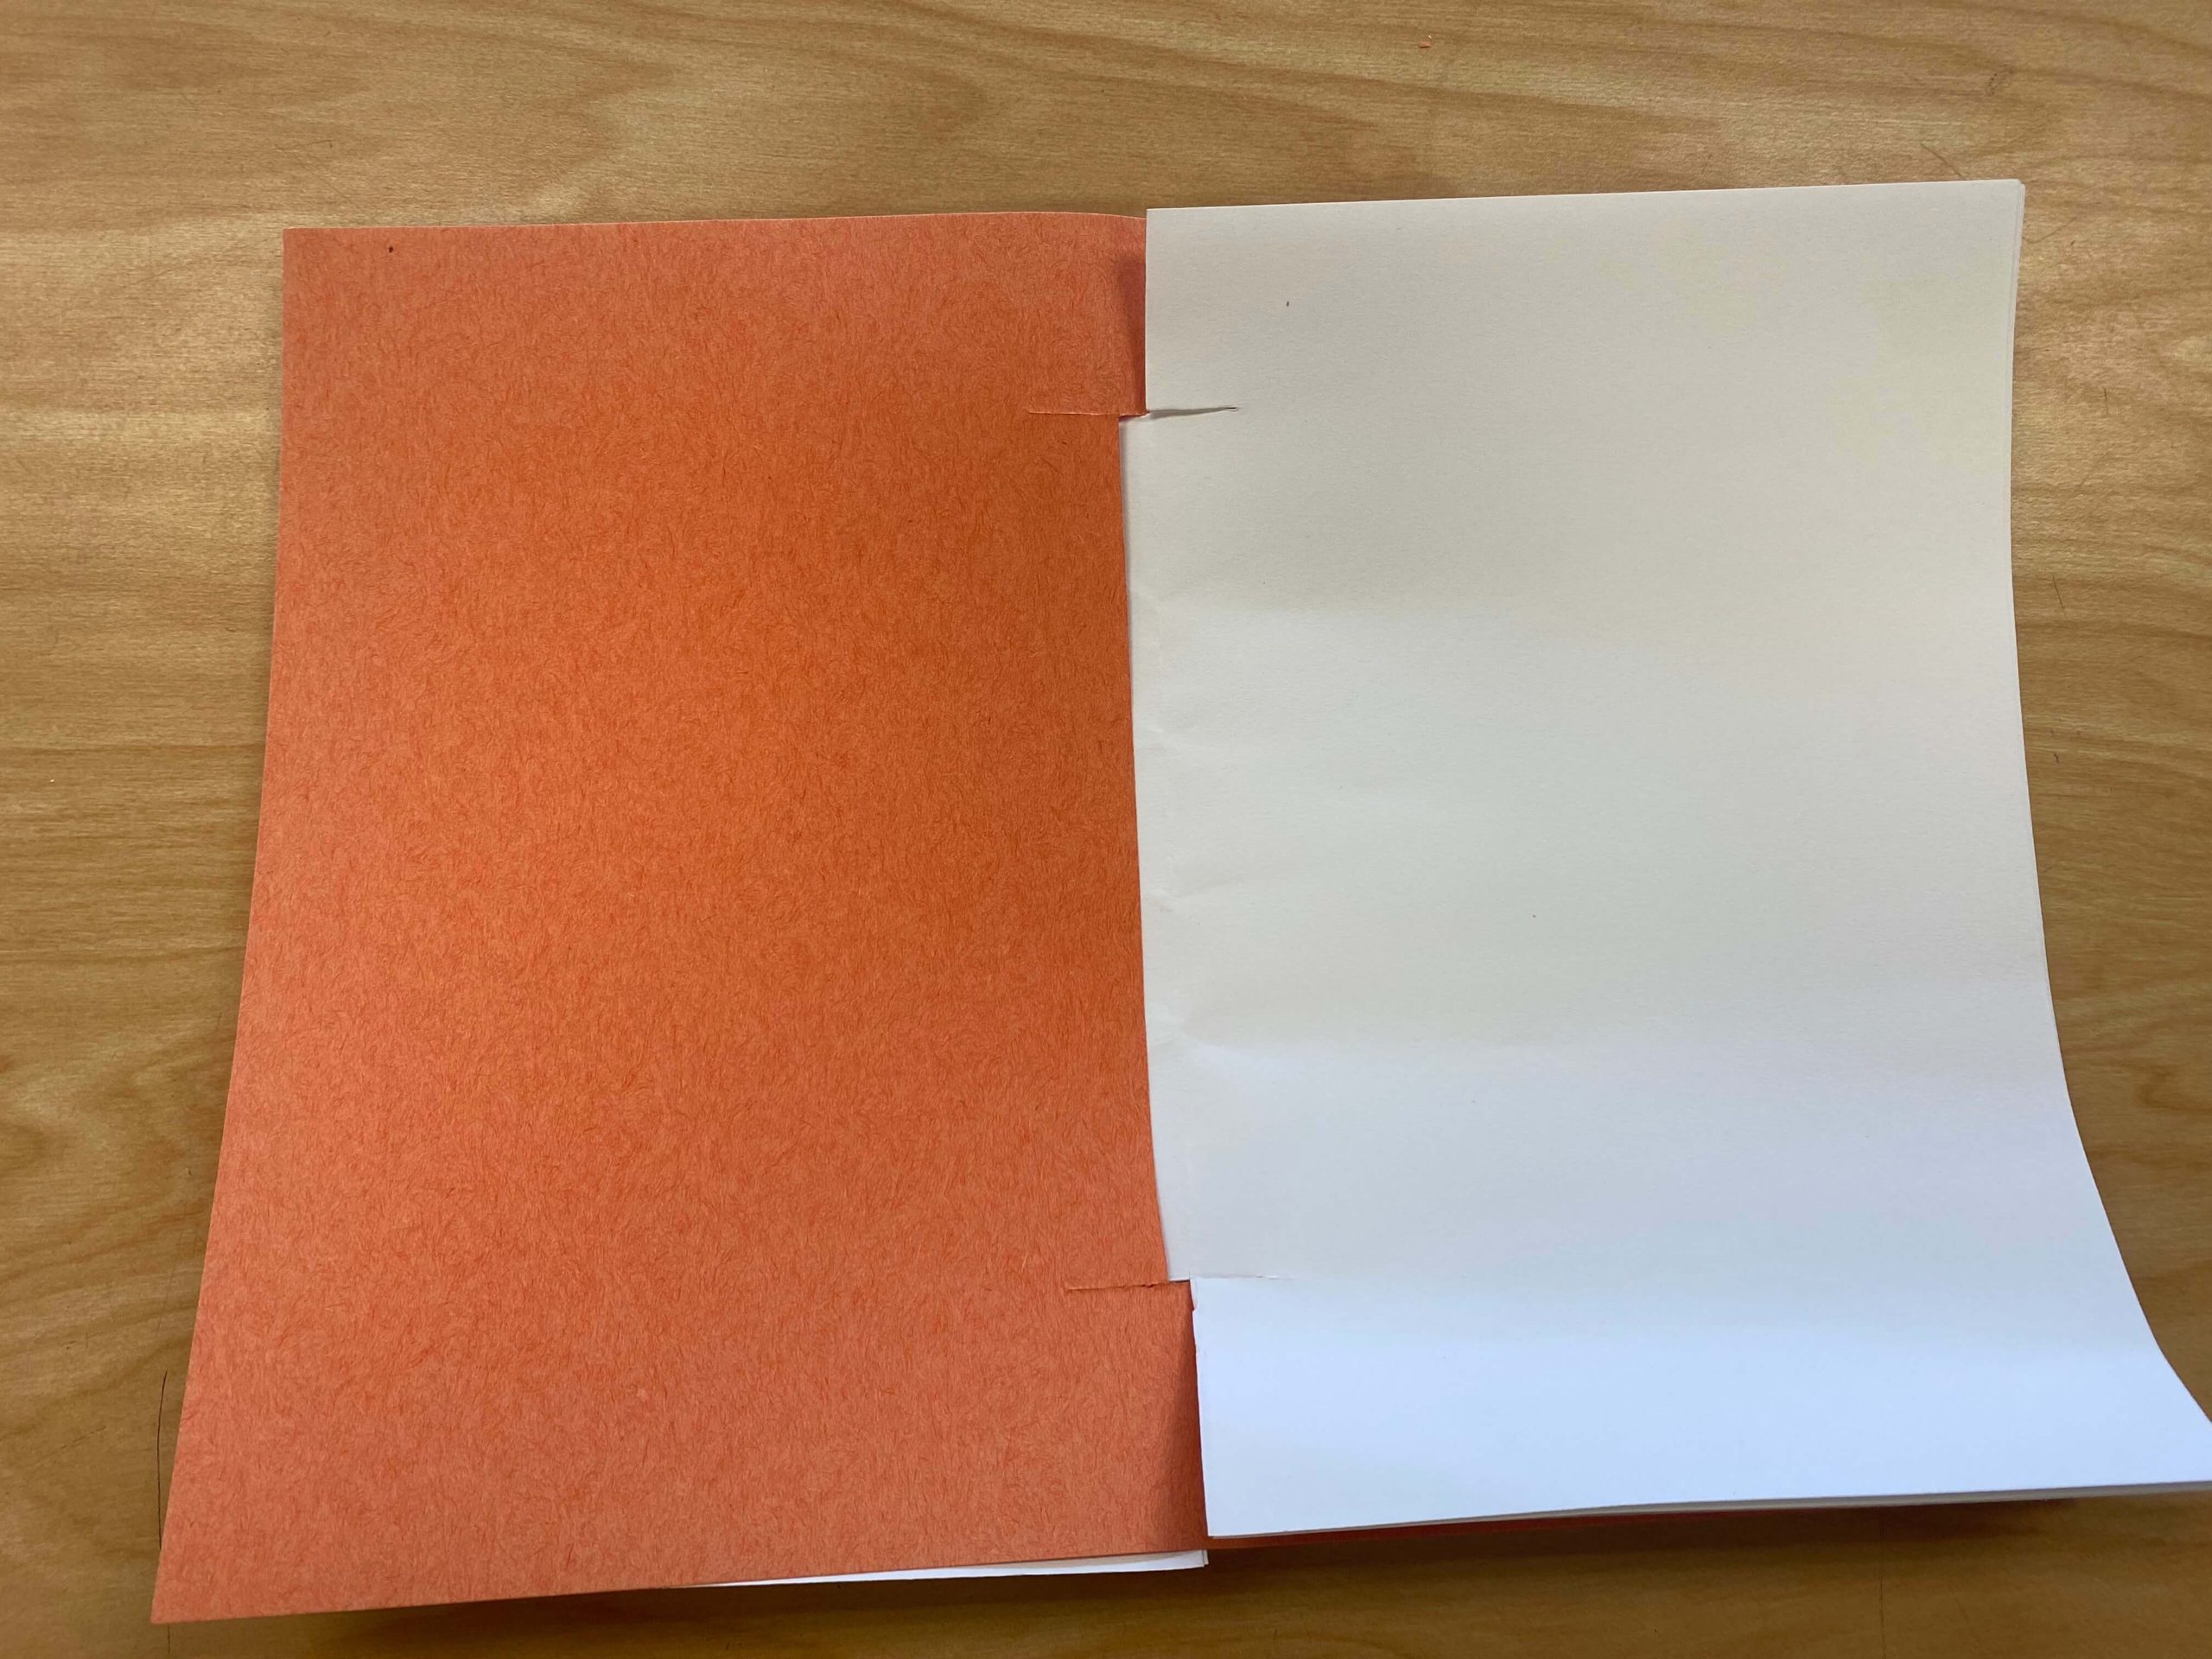
- Pile the papers together and fold them in half the “hamburger” way.
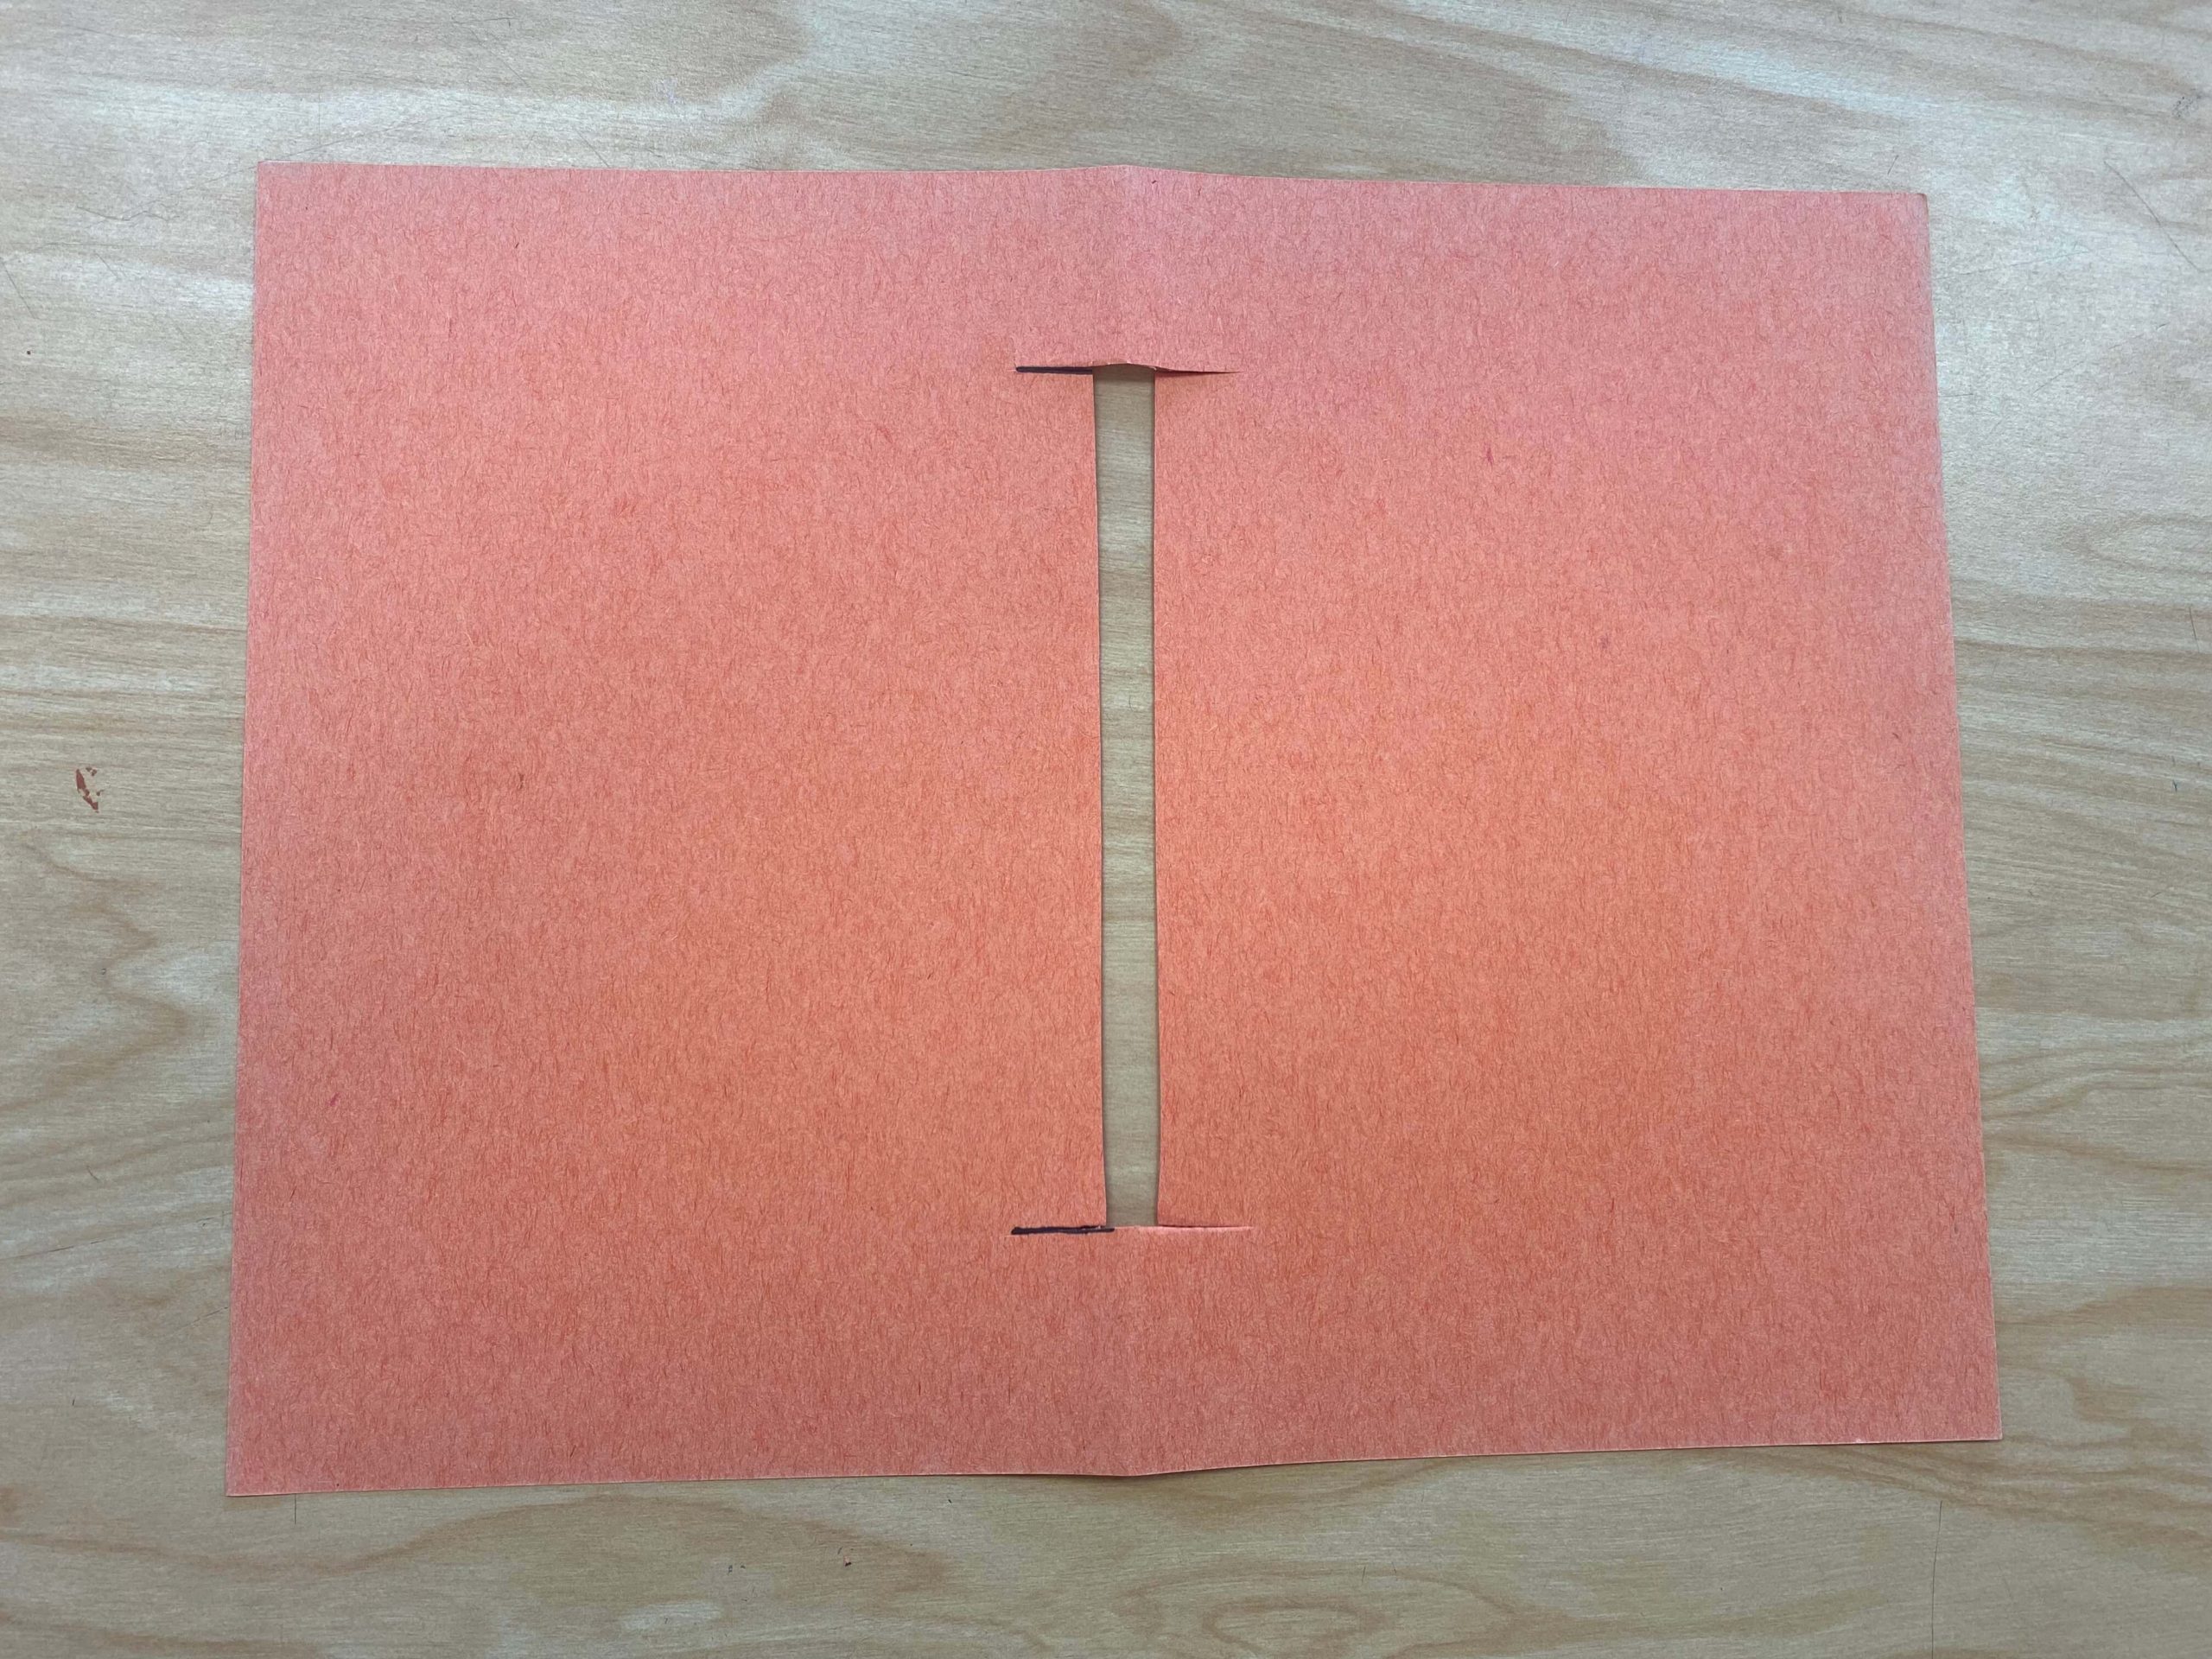
- Measure 1-1.5” from the top and the bottom along the folded edge and draw a small 1” line at each of those measurements.
![]()
![]()
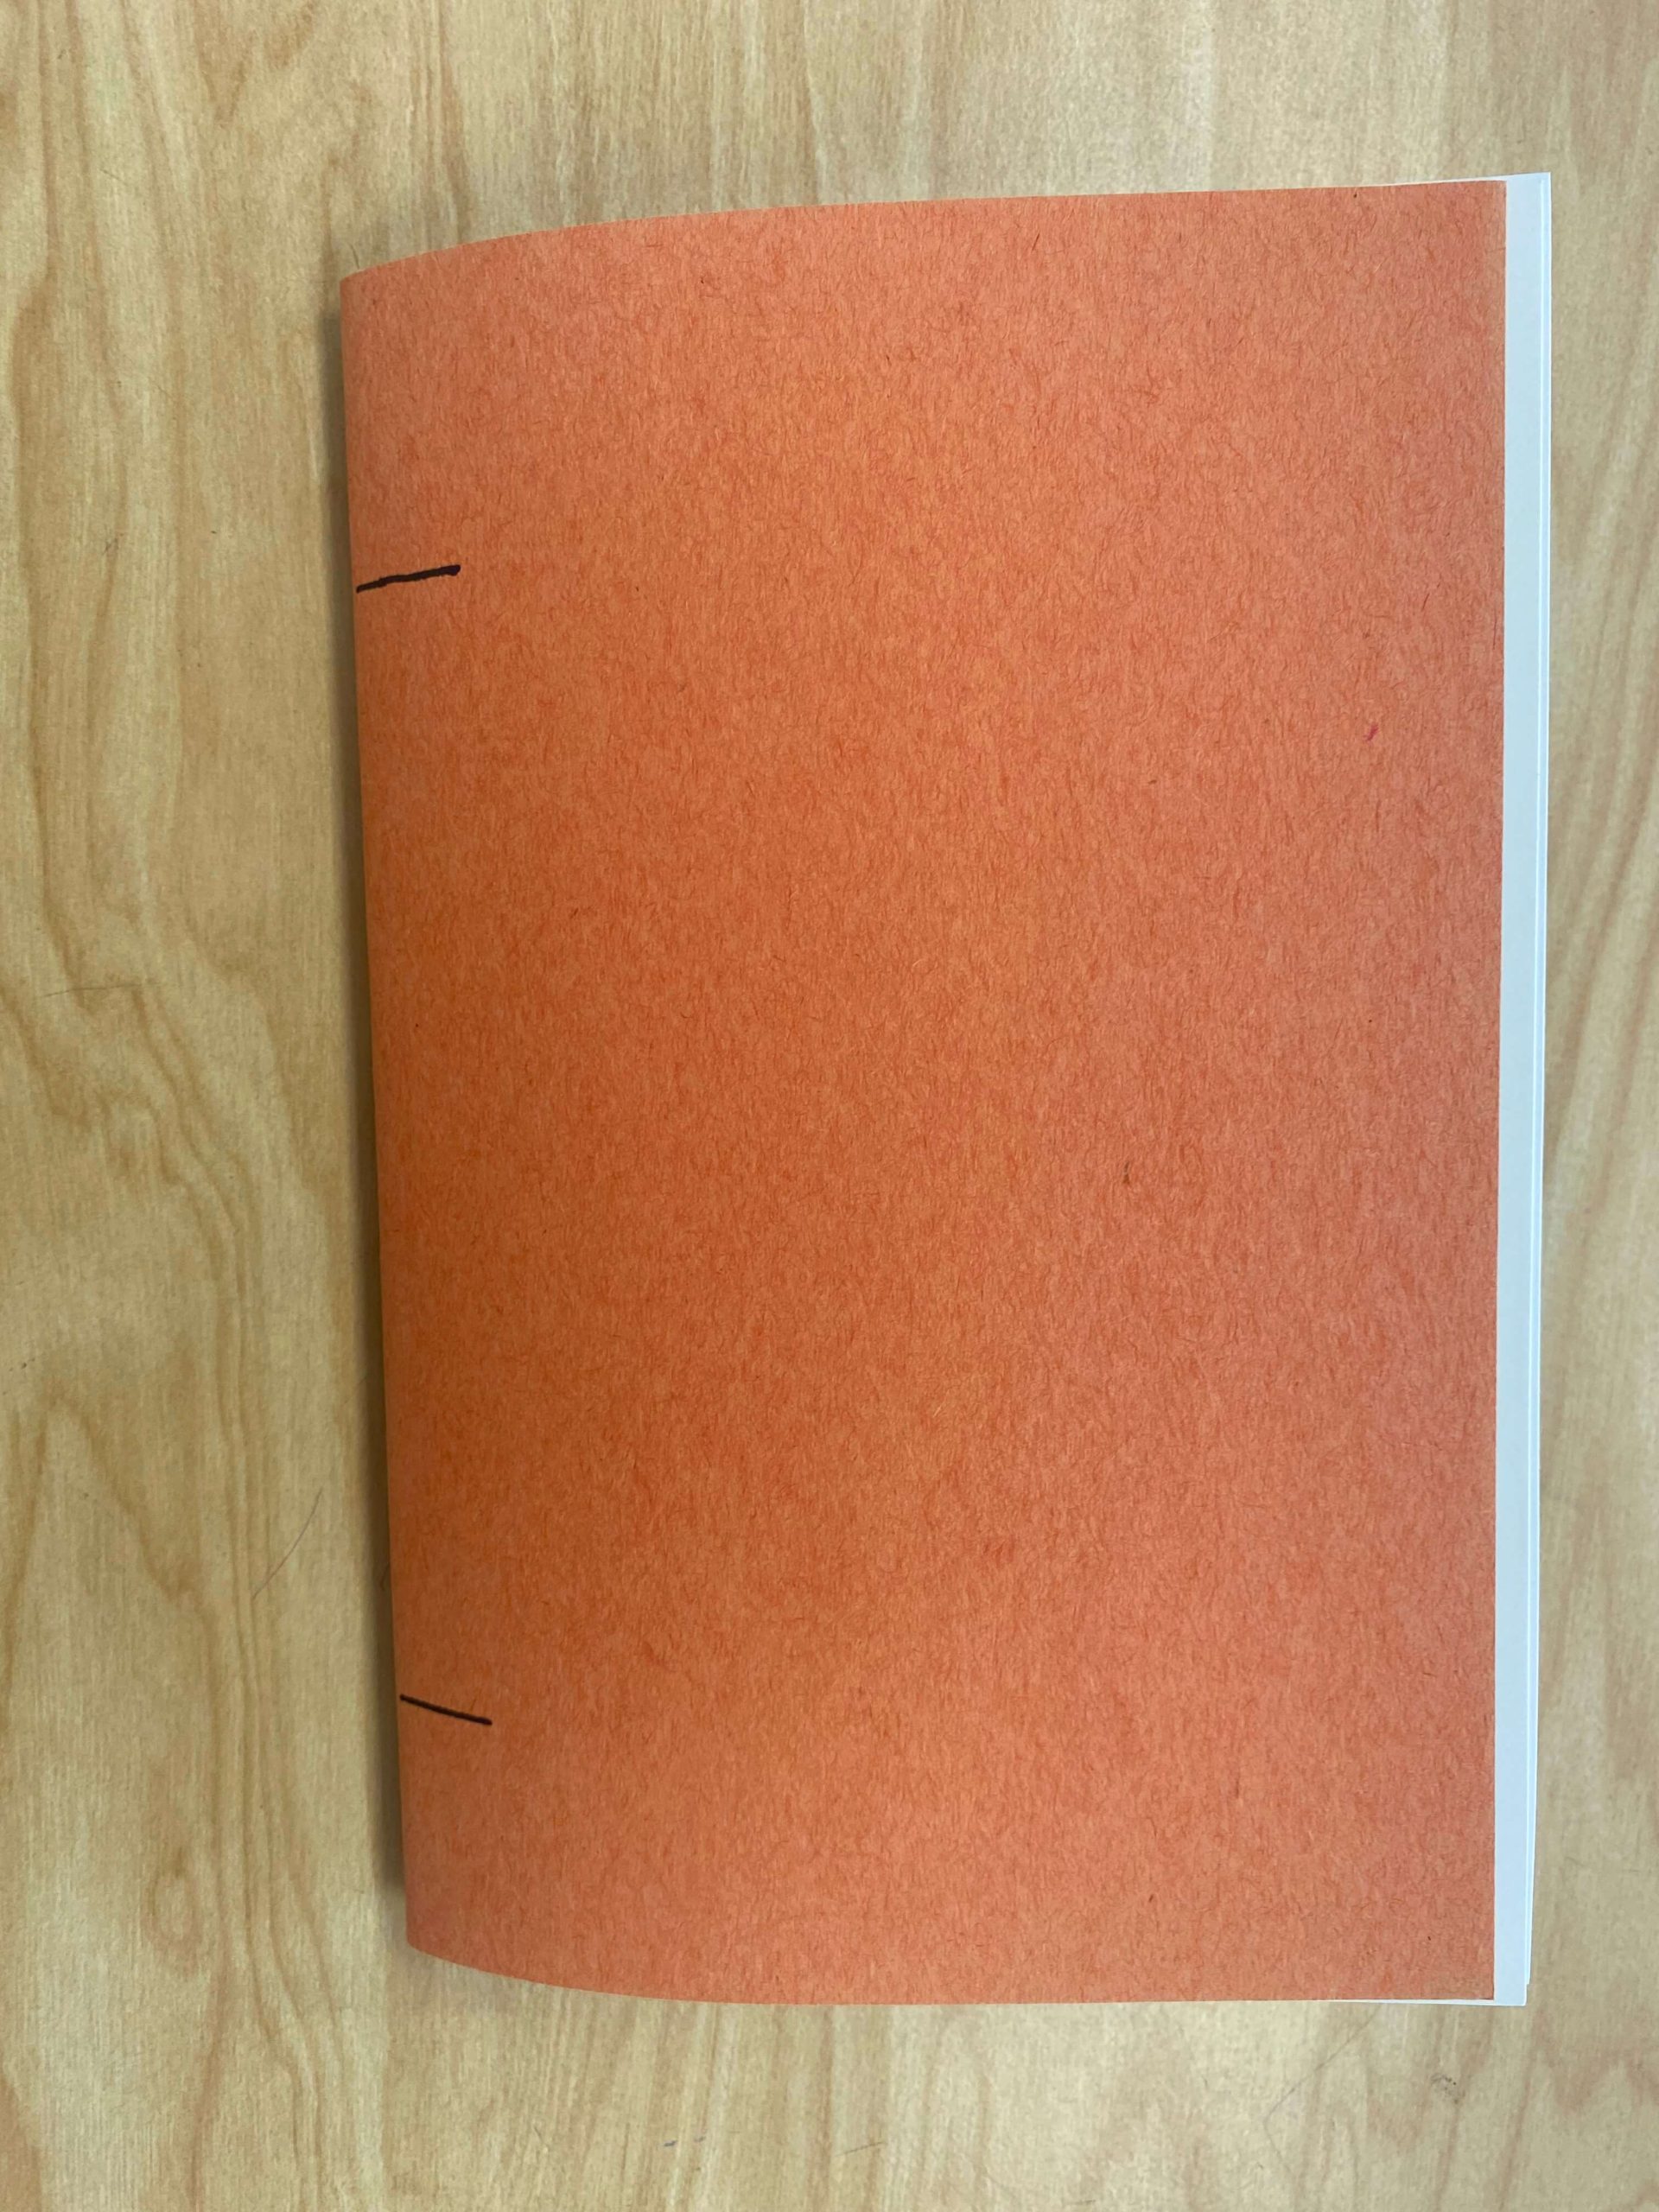
- Cut along those lines to form little slits.
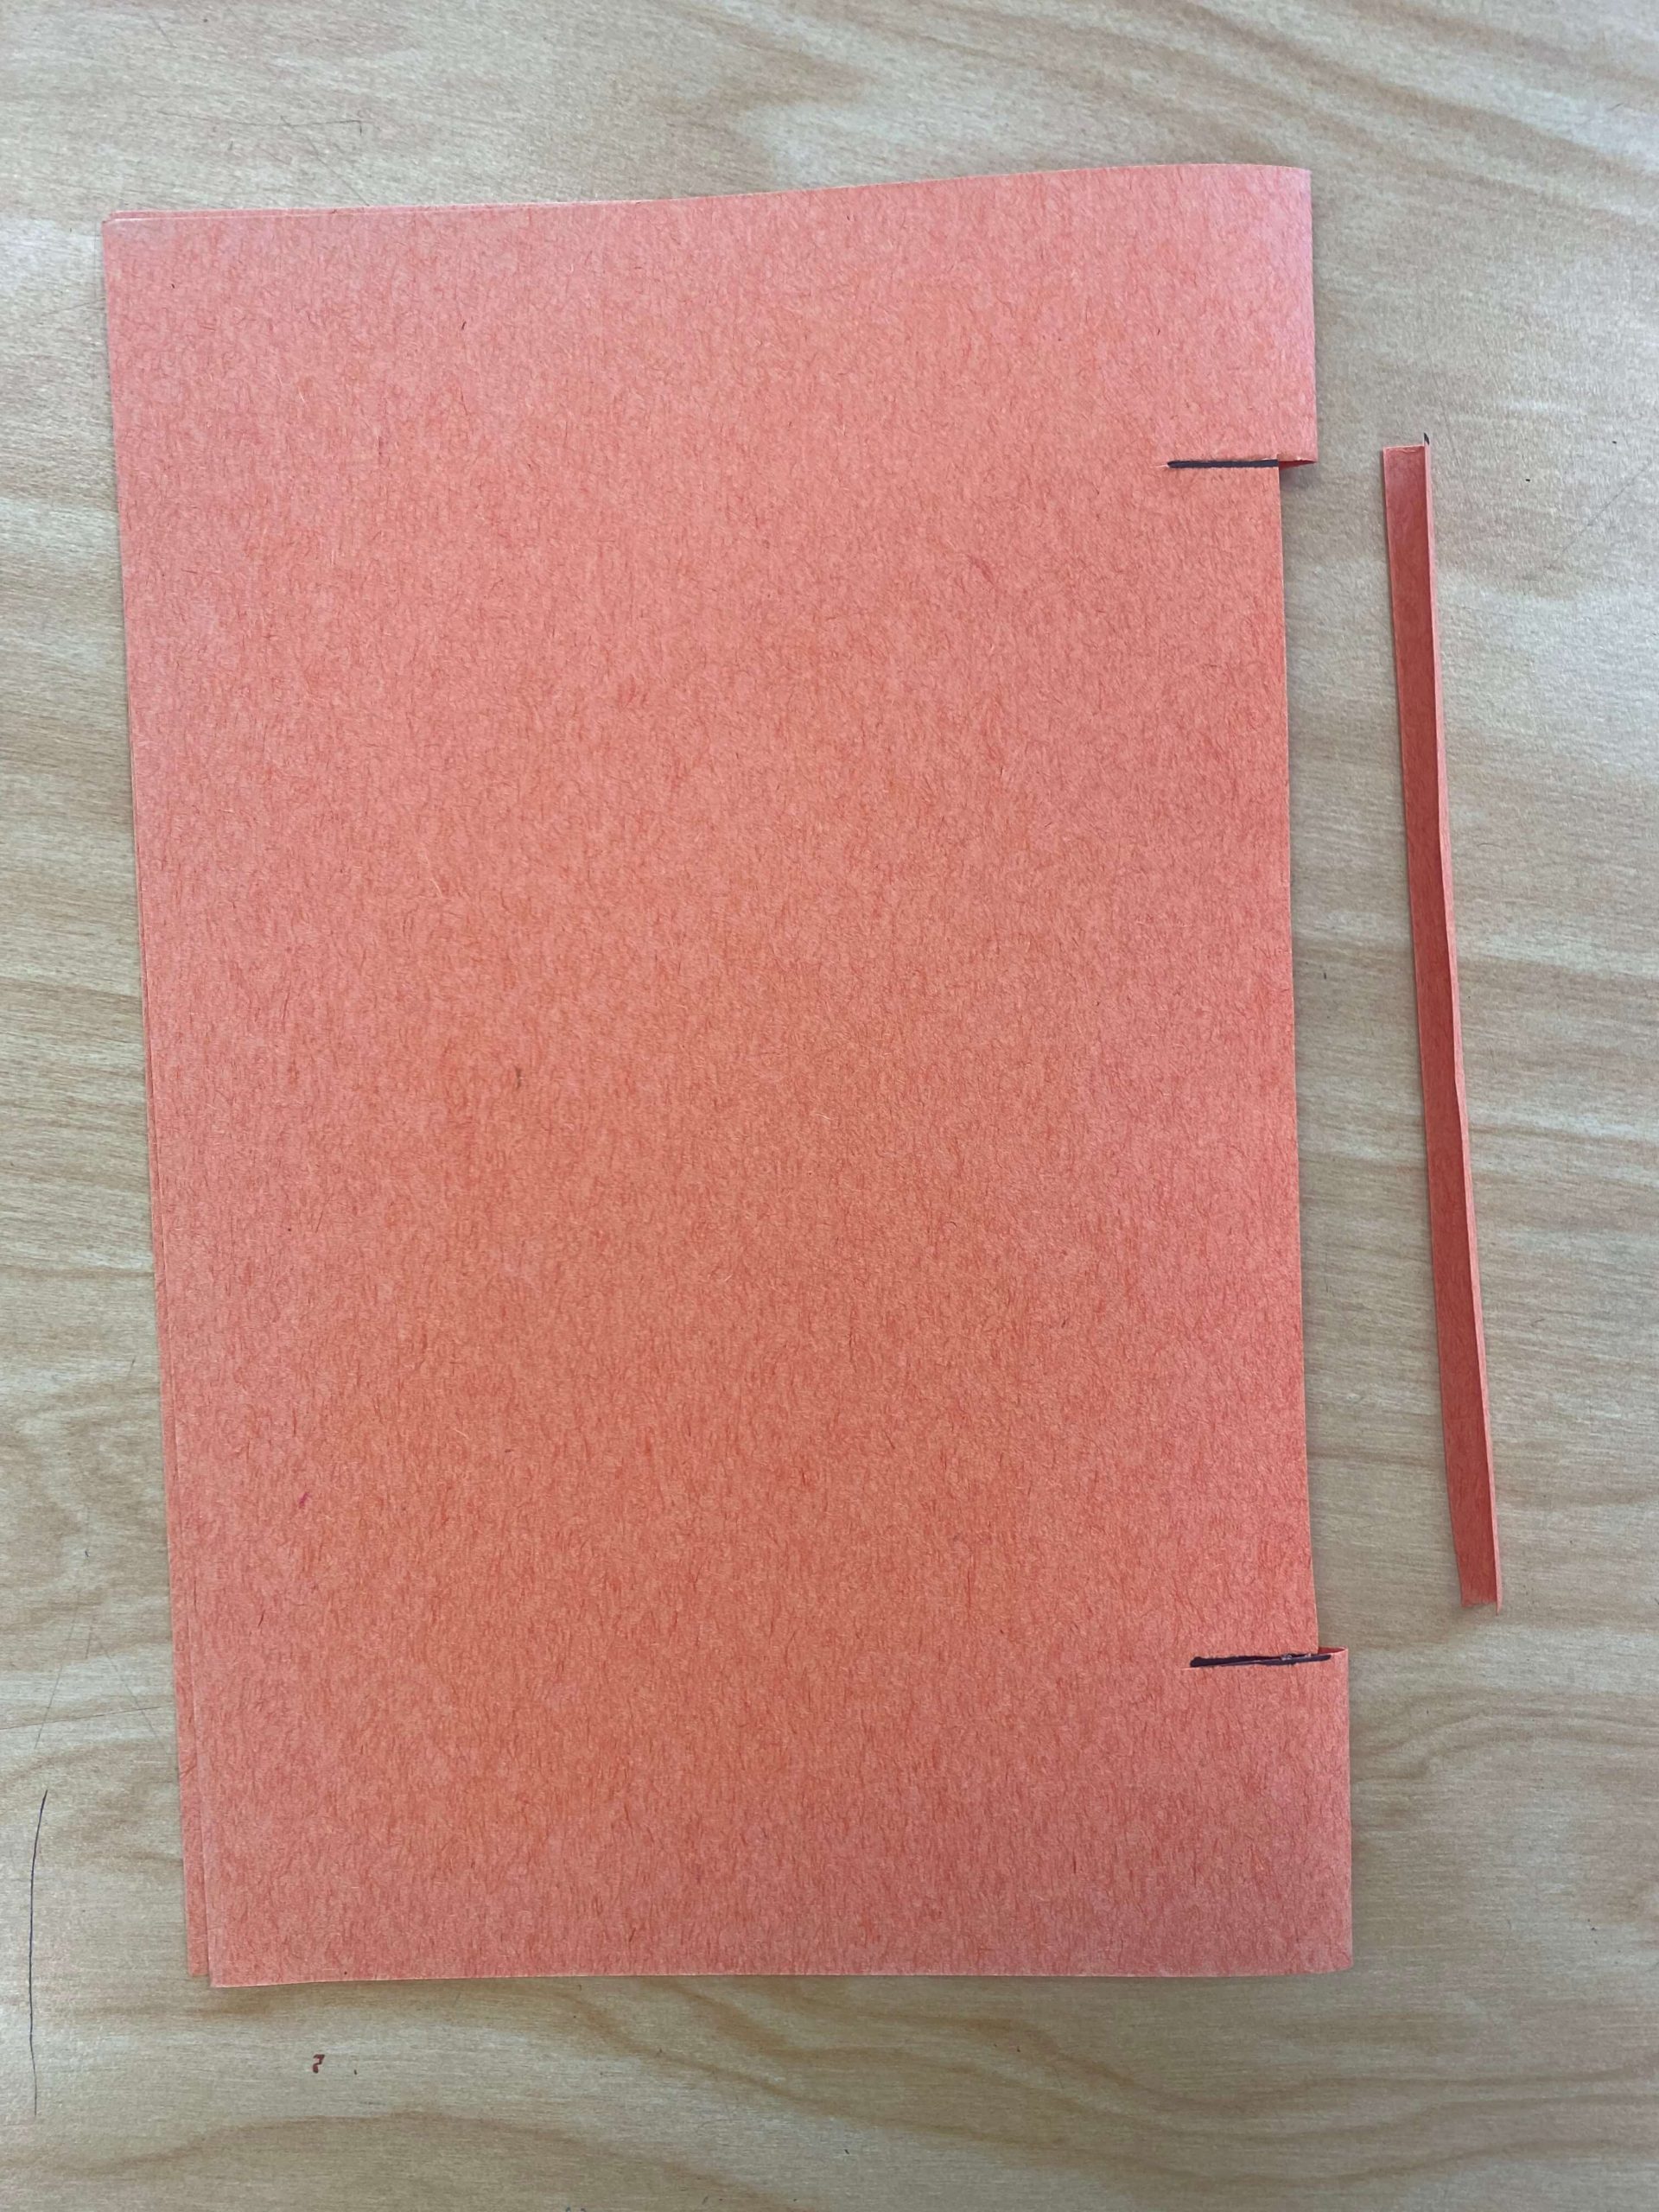
- Separate the top page (cover) from the rest of the pages.
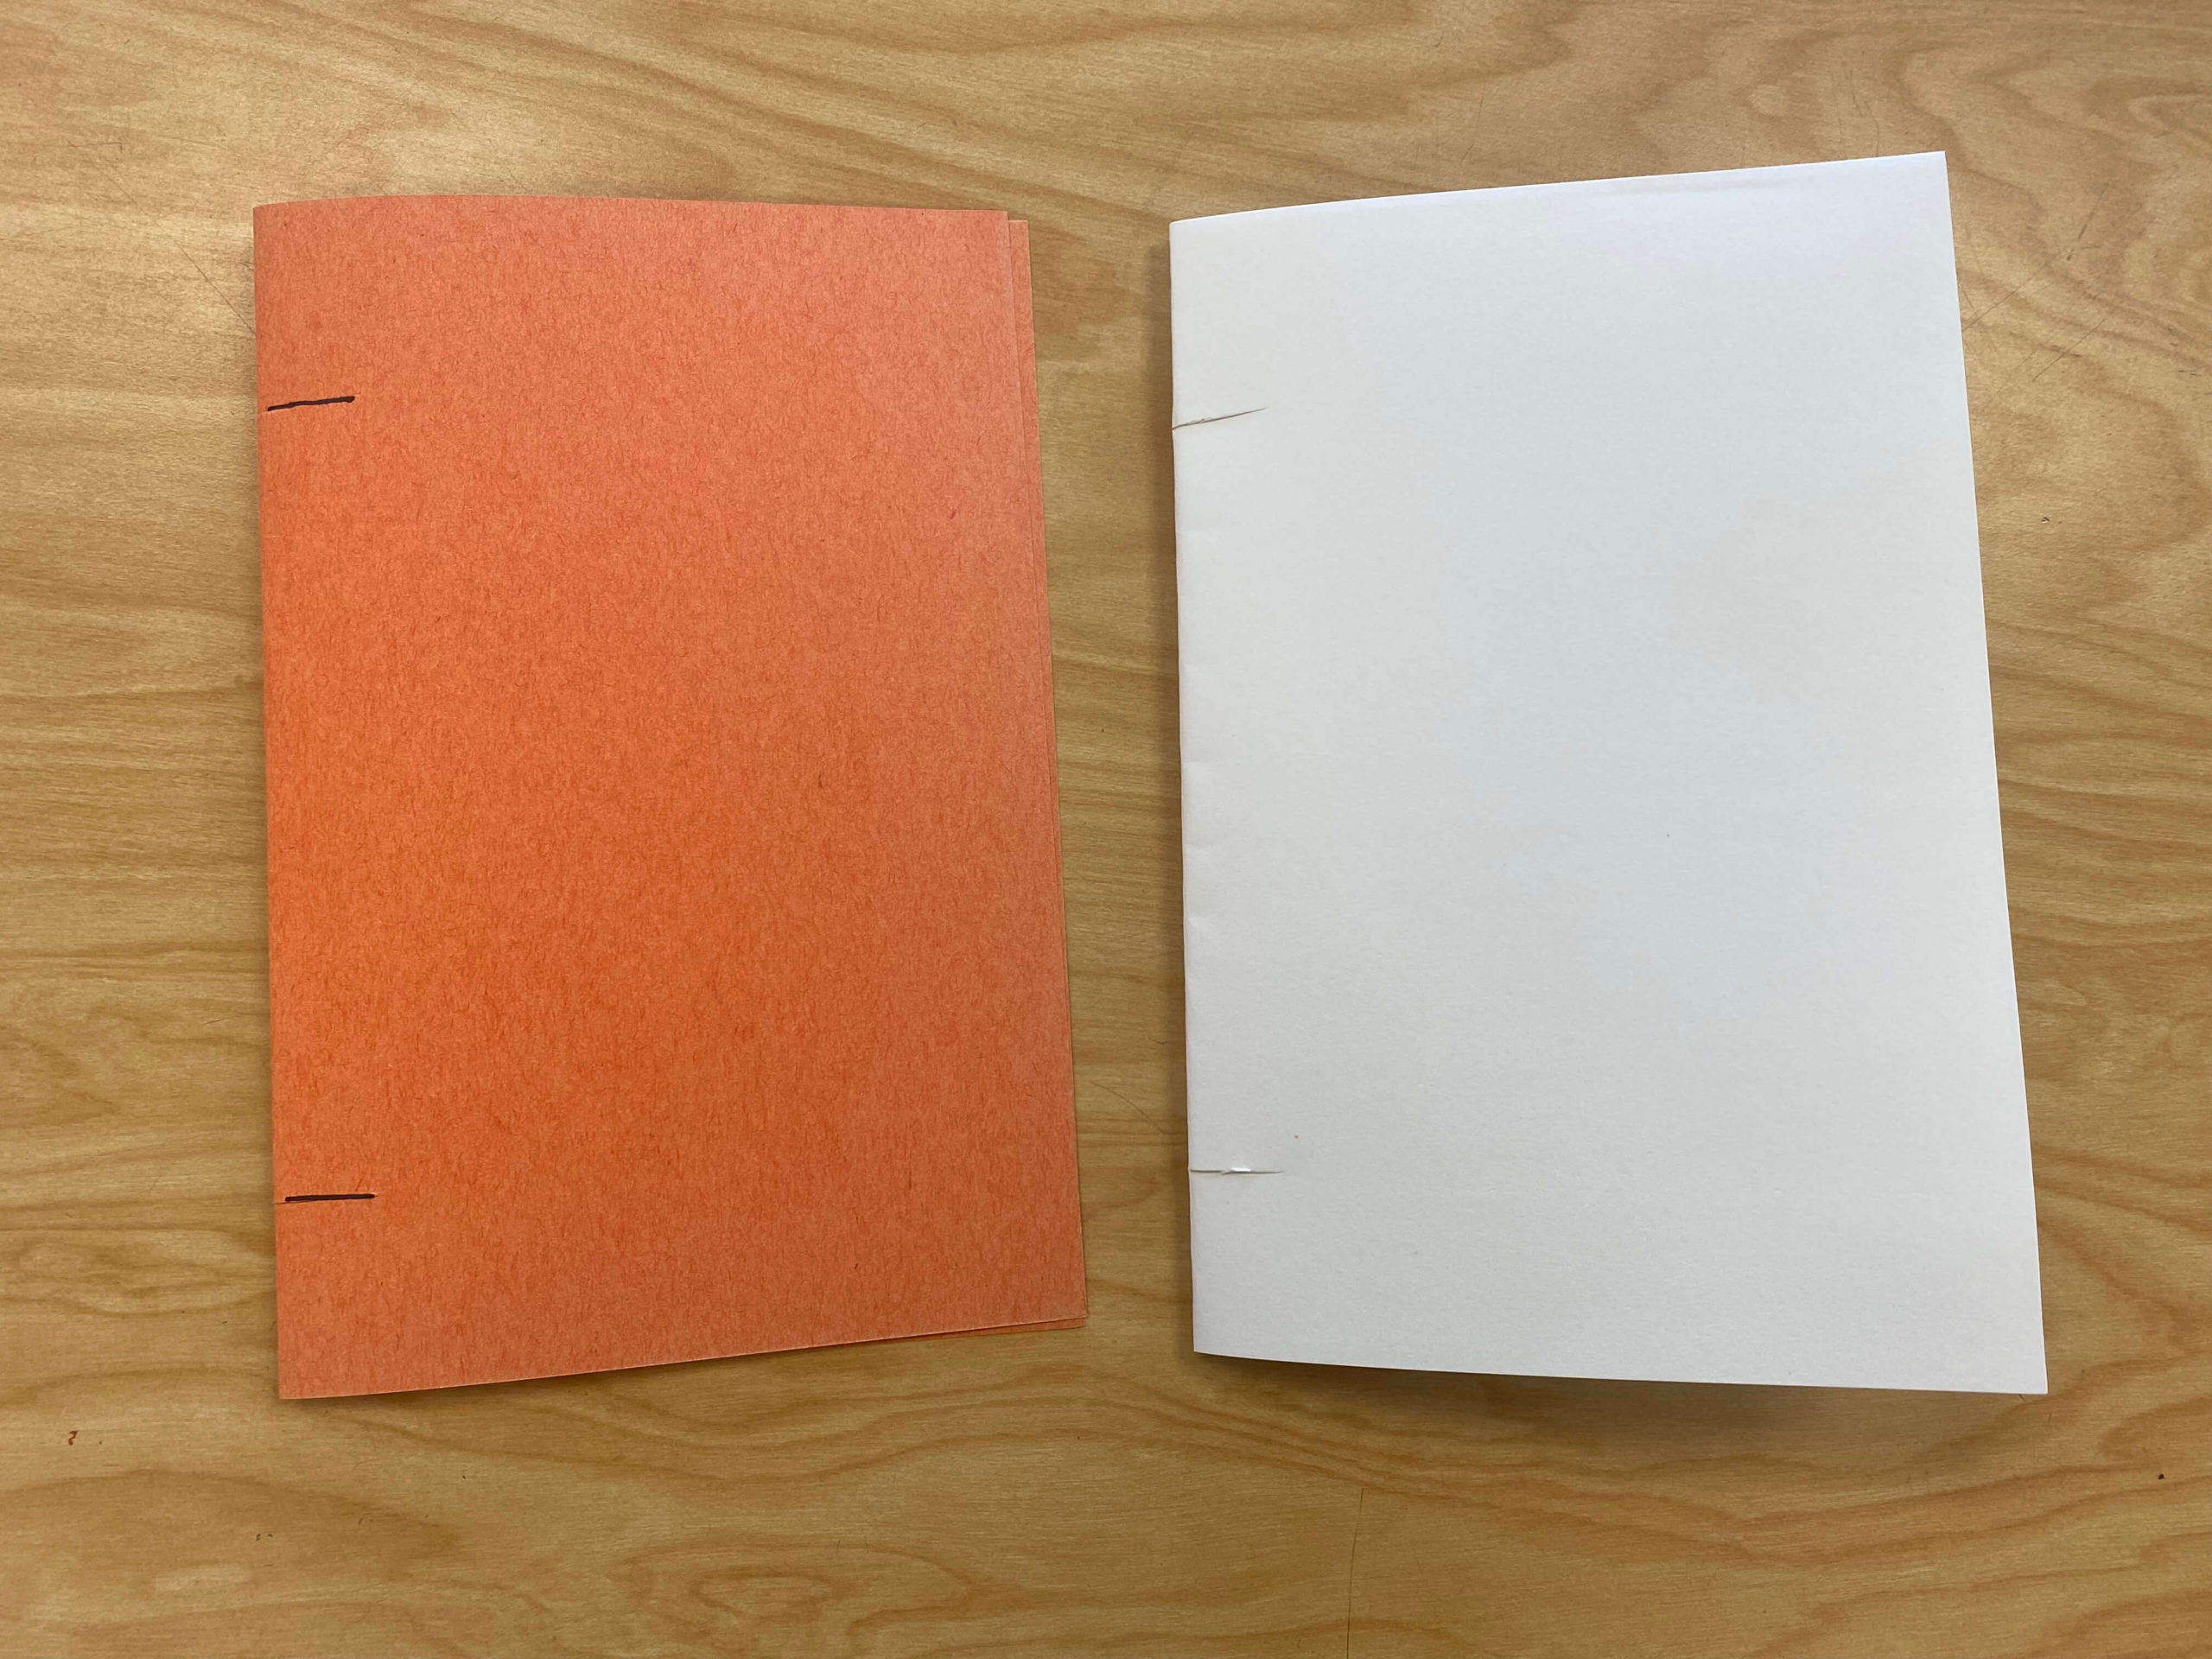
- Cut a thin line between the two slits. When you open the top page, it will look like you’ve cut out a small rectangle.
(Insert Photo 9) (Insert Photo 10) (Insert Photo 11)
- Set the top page aside.
- Open the remaining pages so the fold in the paper is facing you.
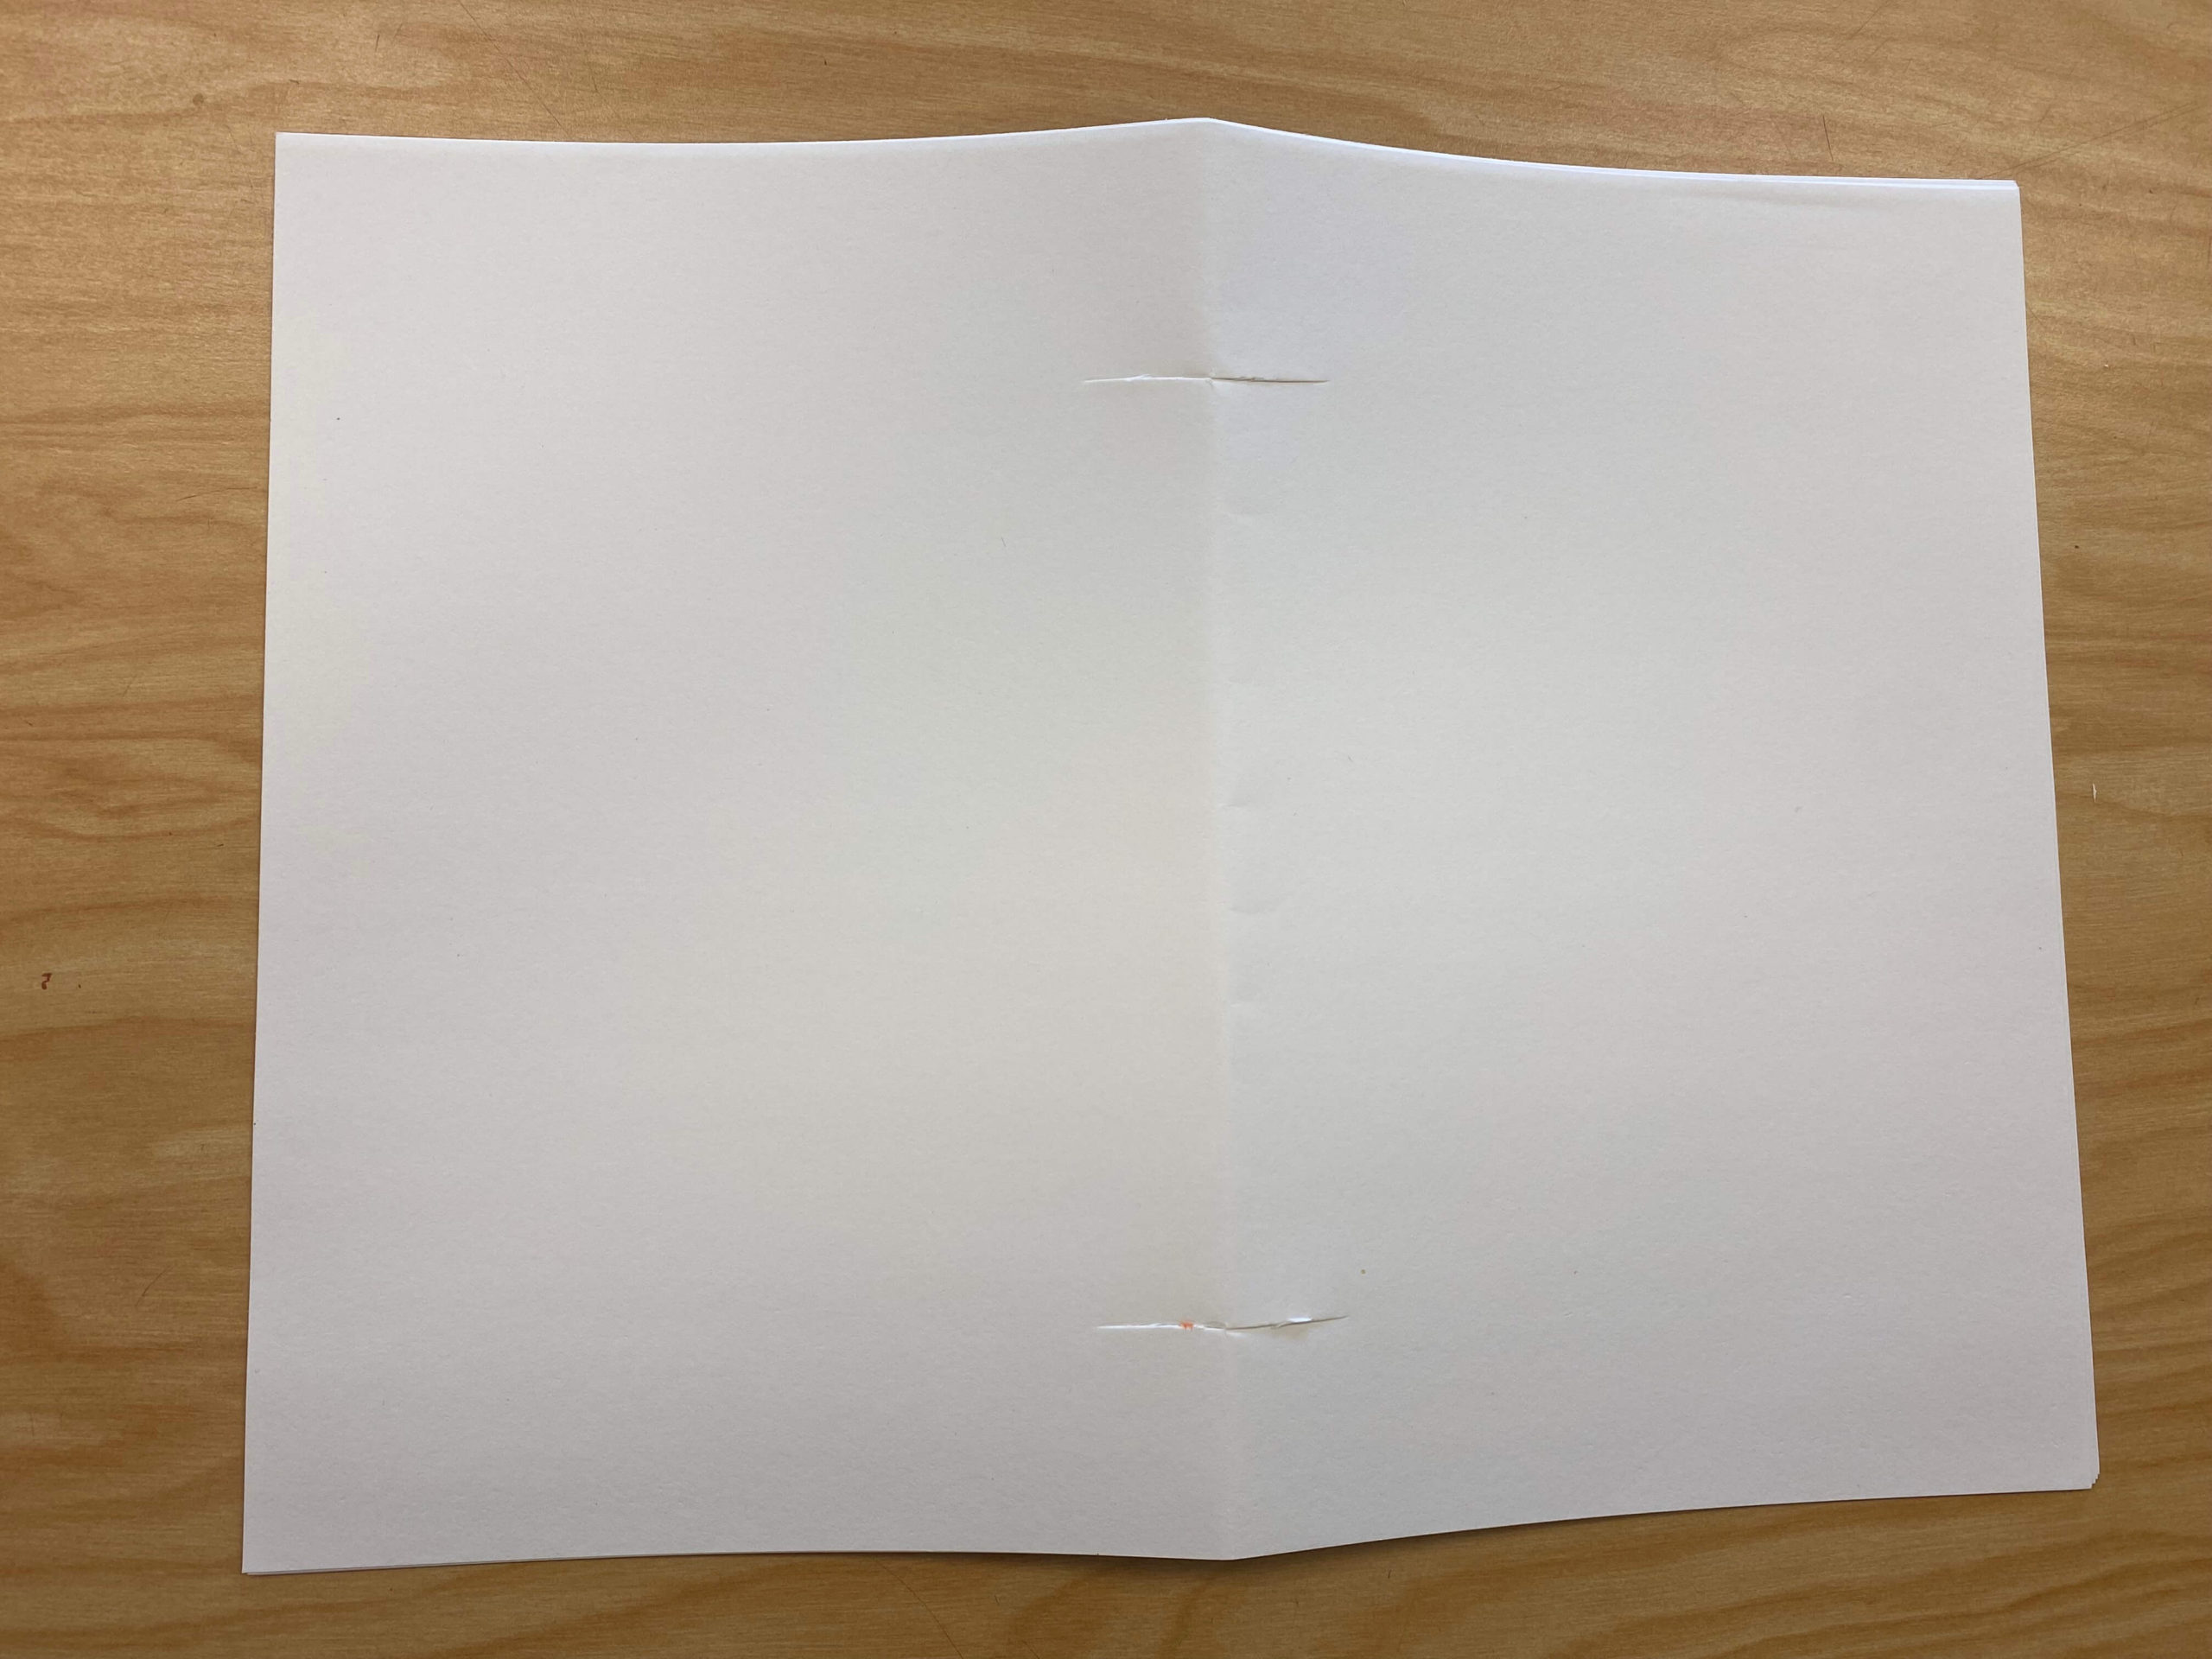
- On the top and bottom of that fold, cut the paper until you reach each slit.
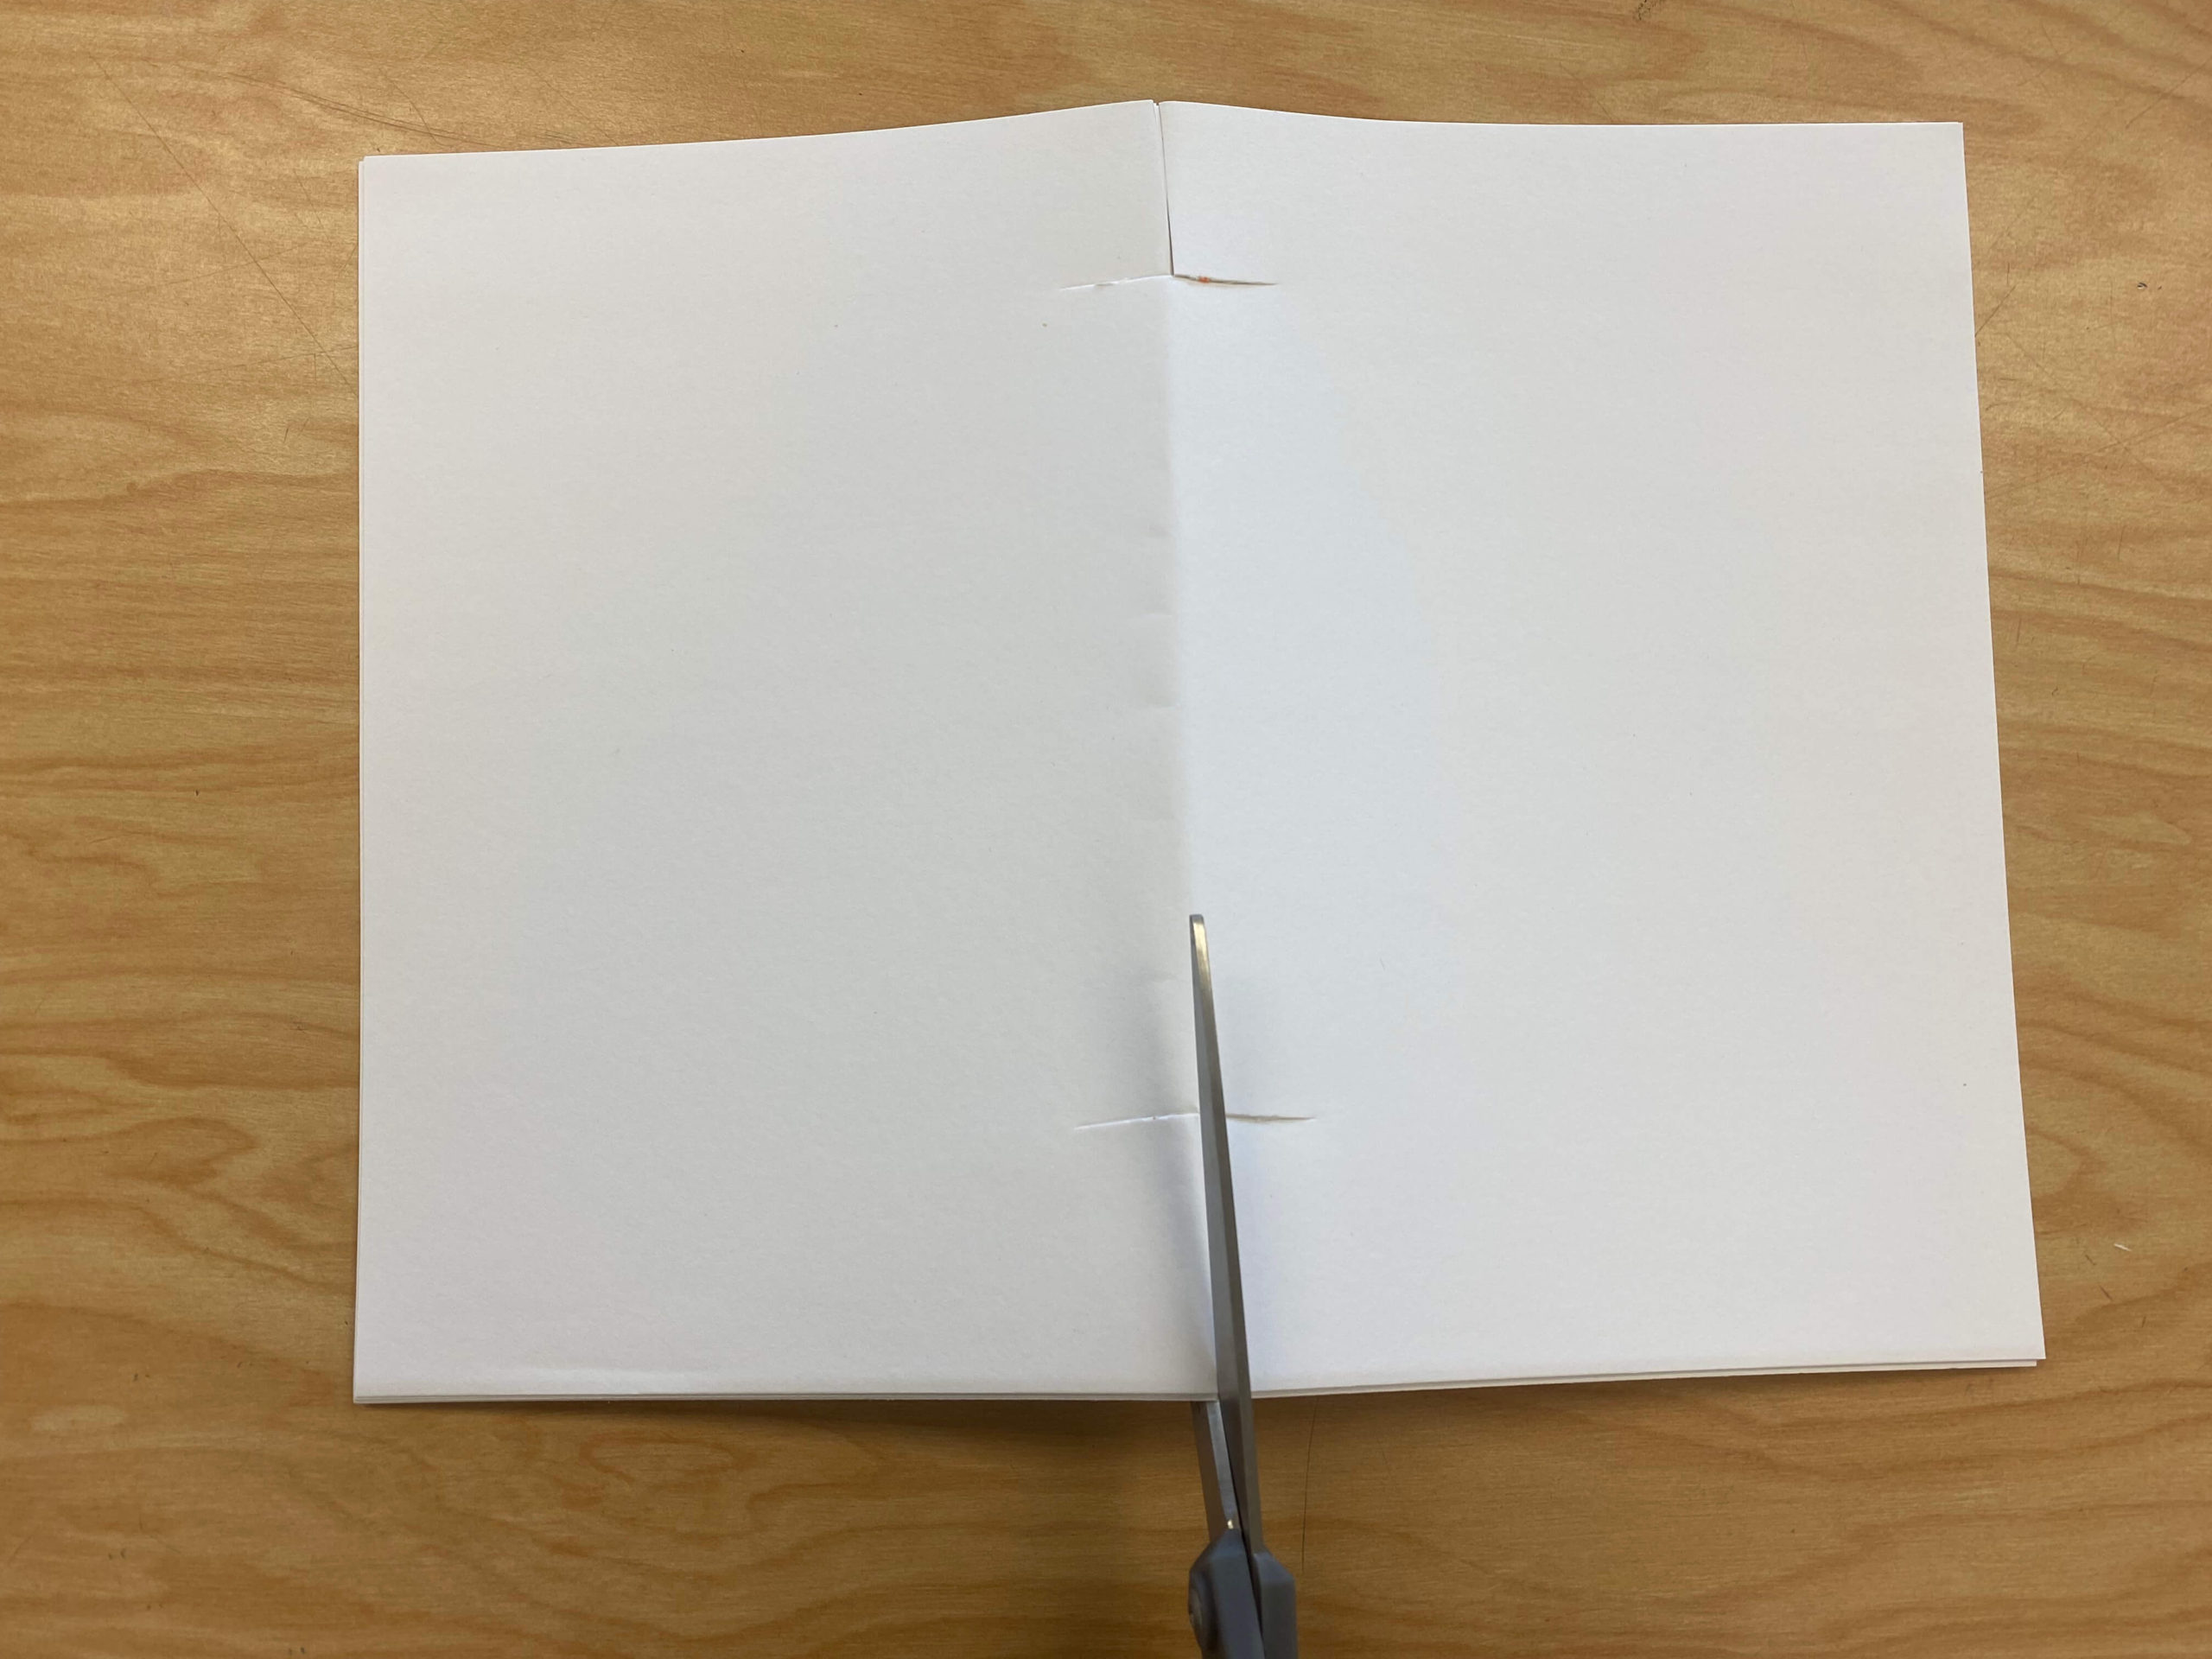
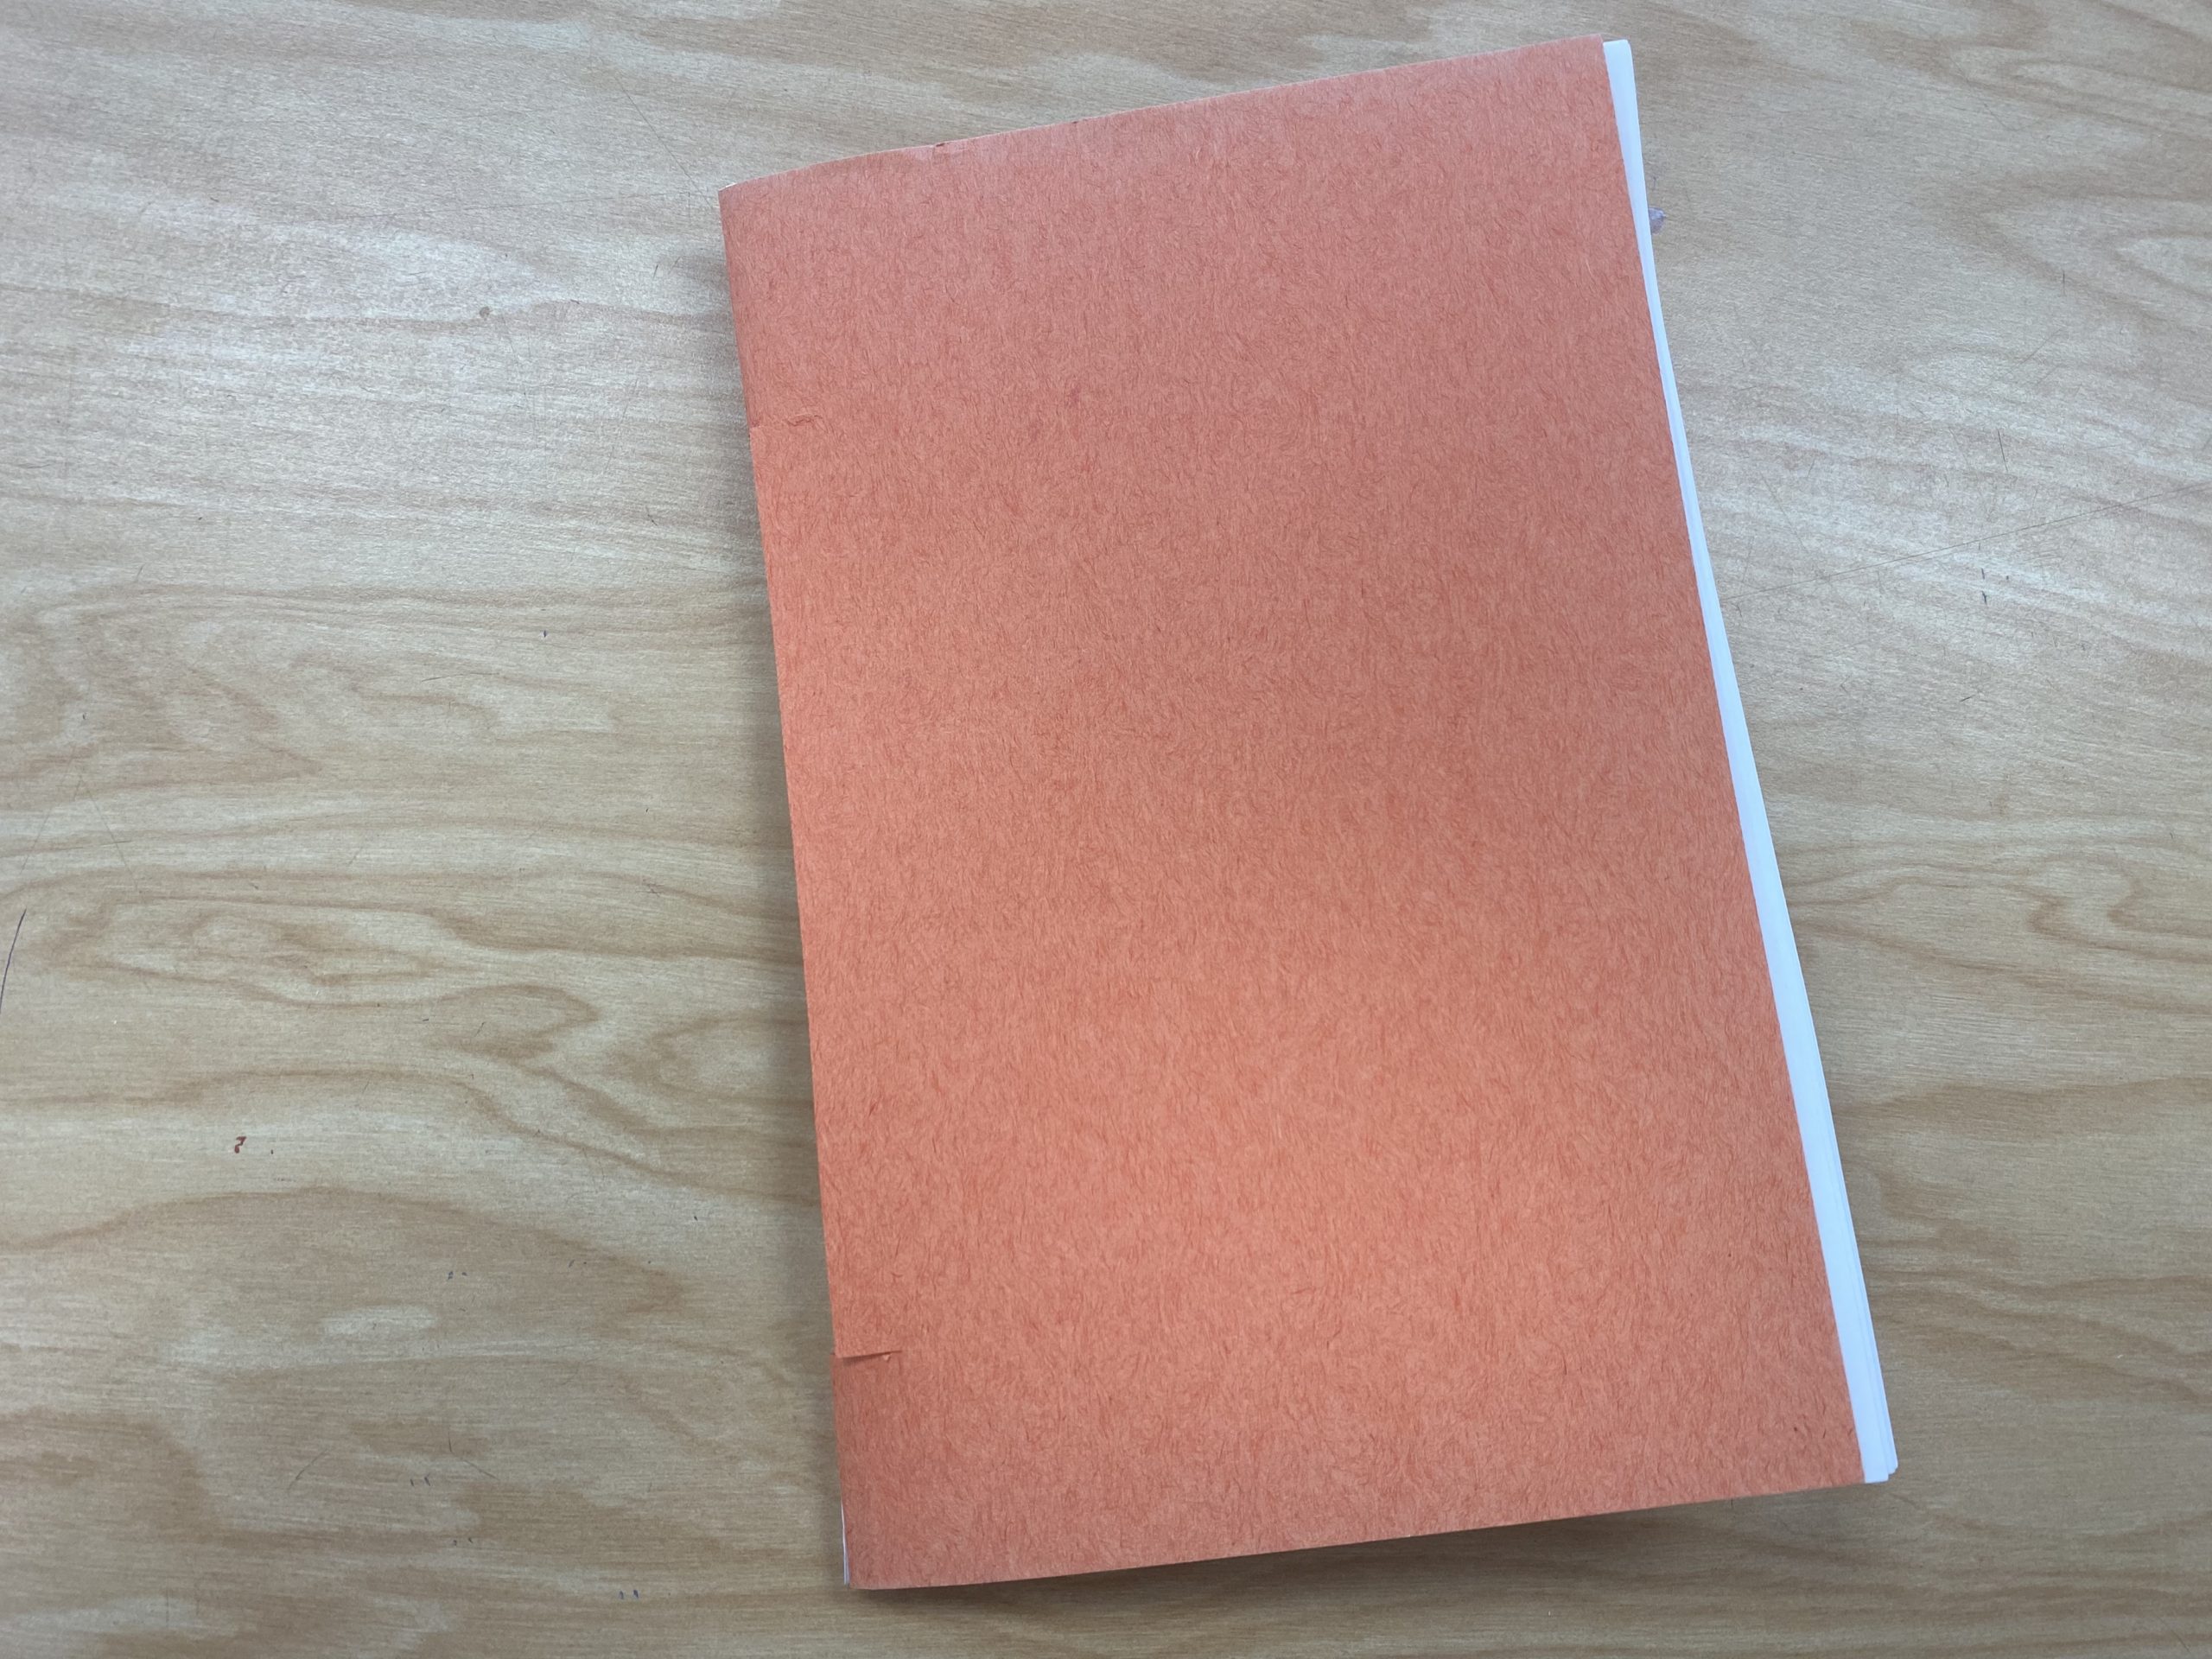
- Roll up the paper like a newspaper.
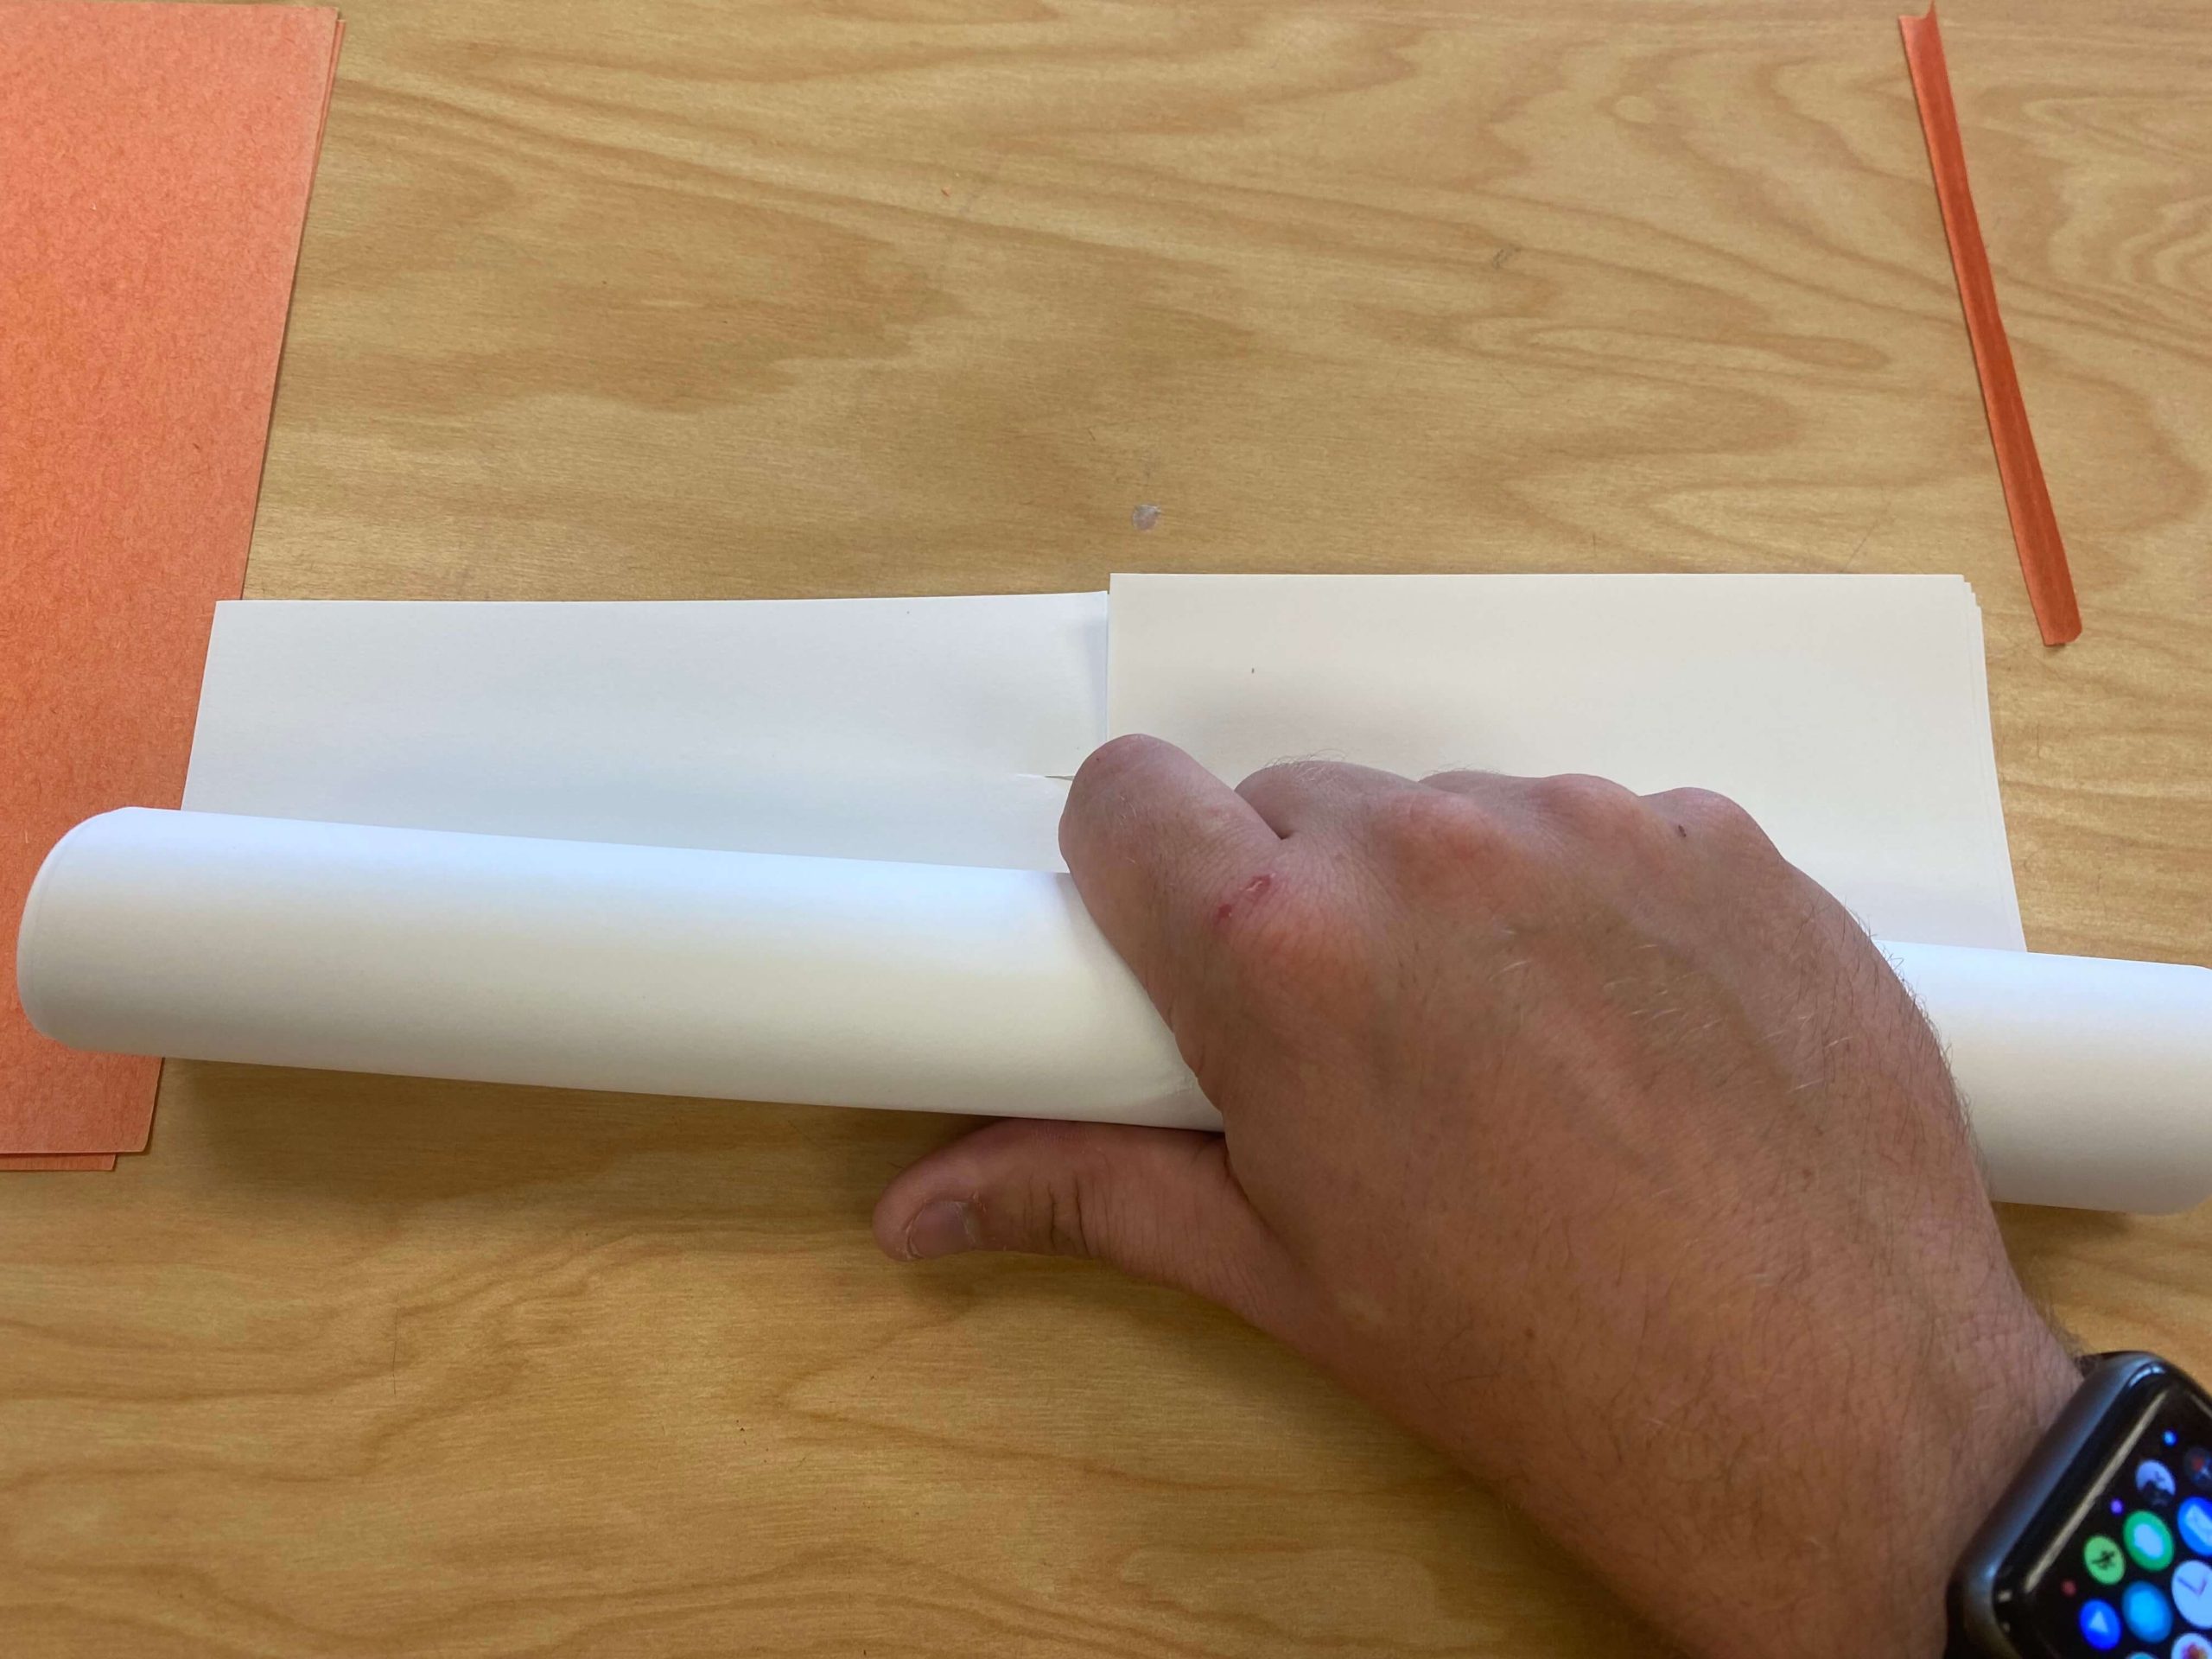
- Slide the roll through the cutout you made in the top page.
- Carefully unroll the pages.
- Voila! You have a sketchbook!
![]()
Book 3: Sewn Pamphlet Sketchbook
Supplies:
- A few sheets of paper
- Scissors
- Yarn
- Marker/Pencil (optional)
Steps:
- Pile the papers together and fold them in half the “hamburger” way.
- Along the folded edge, make a mark in the center and about an inch from the top and bottom.
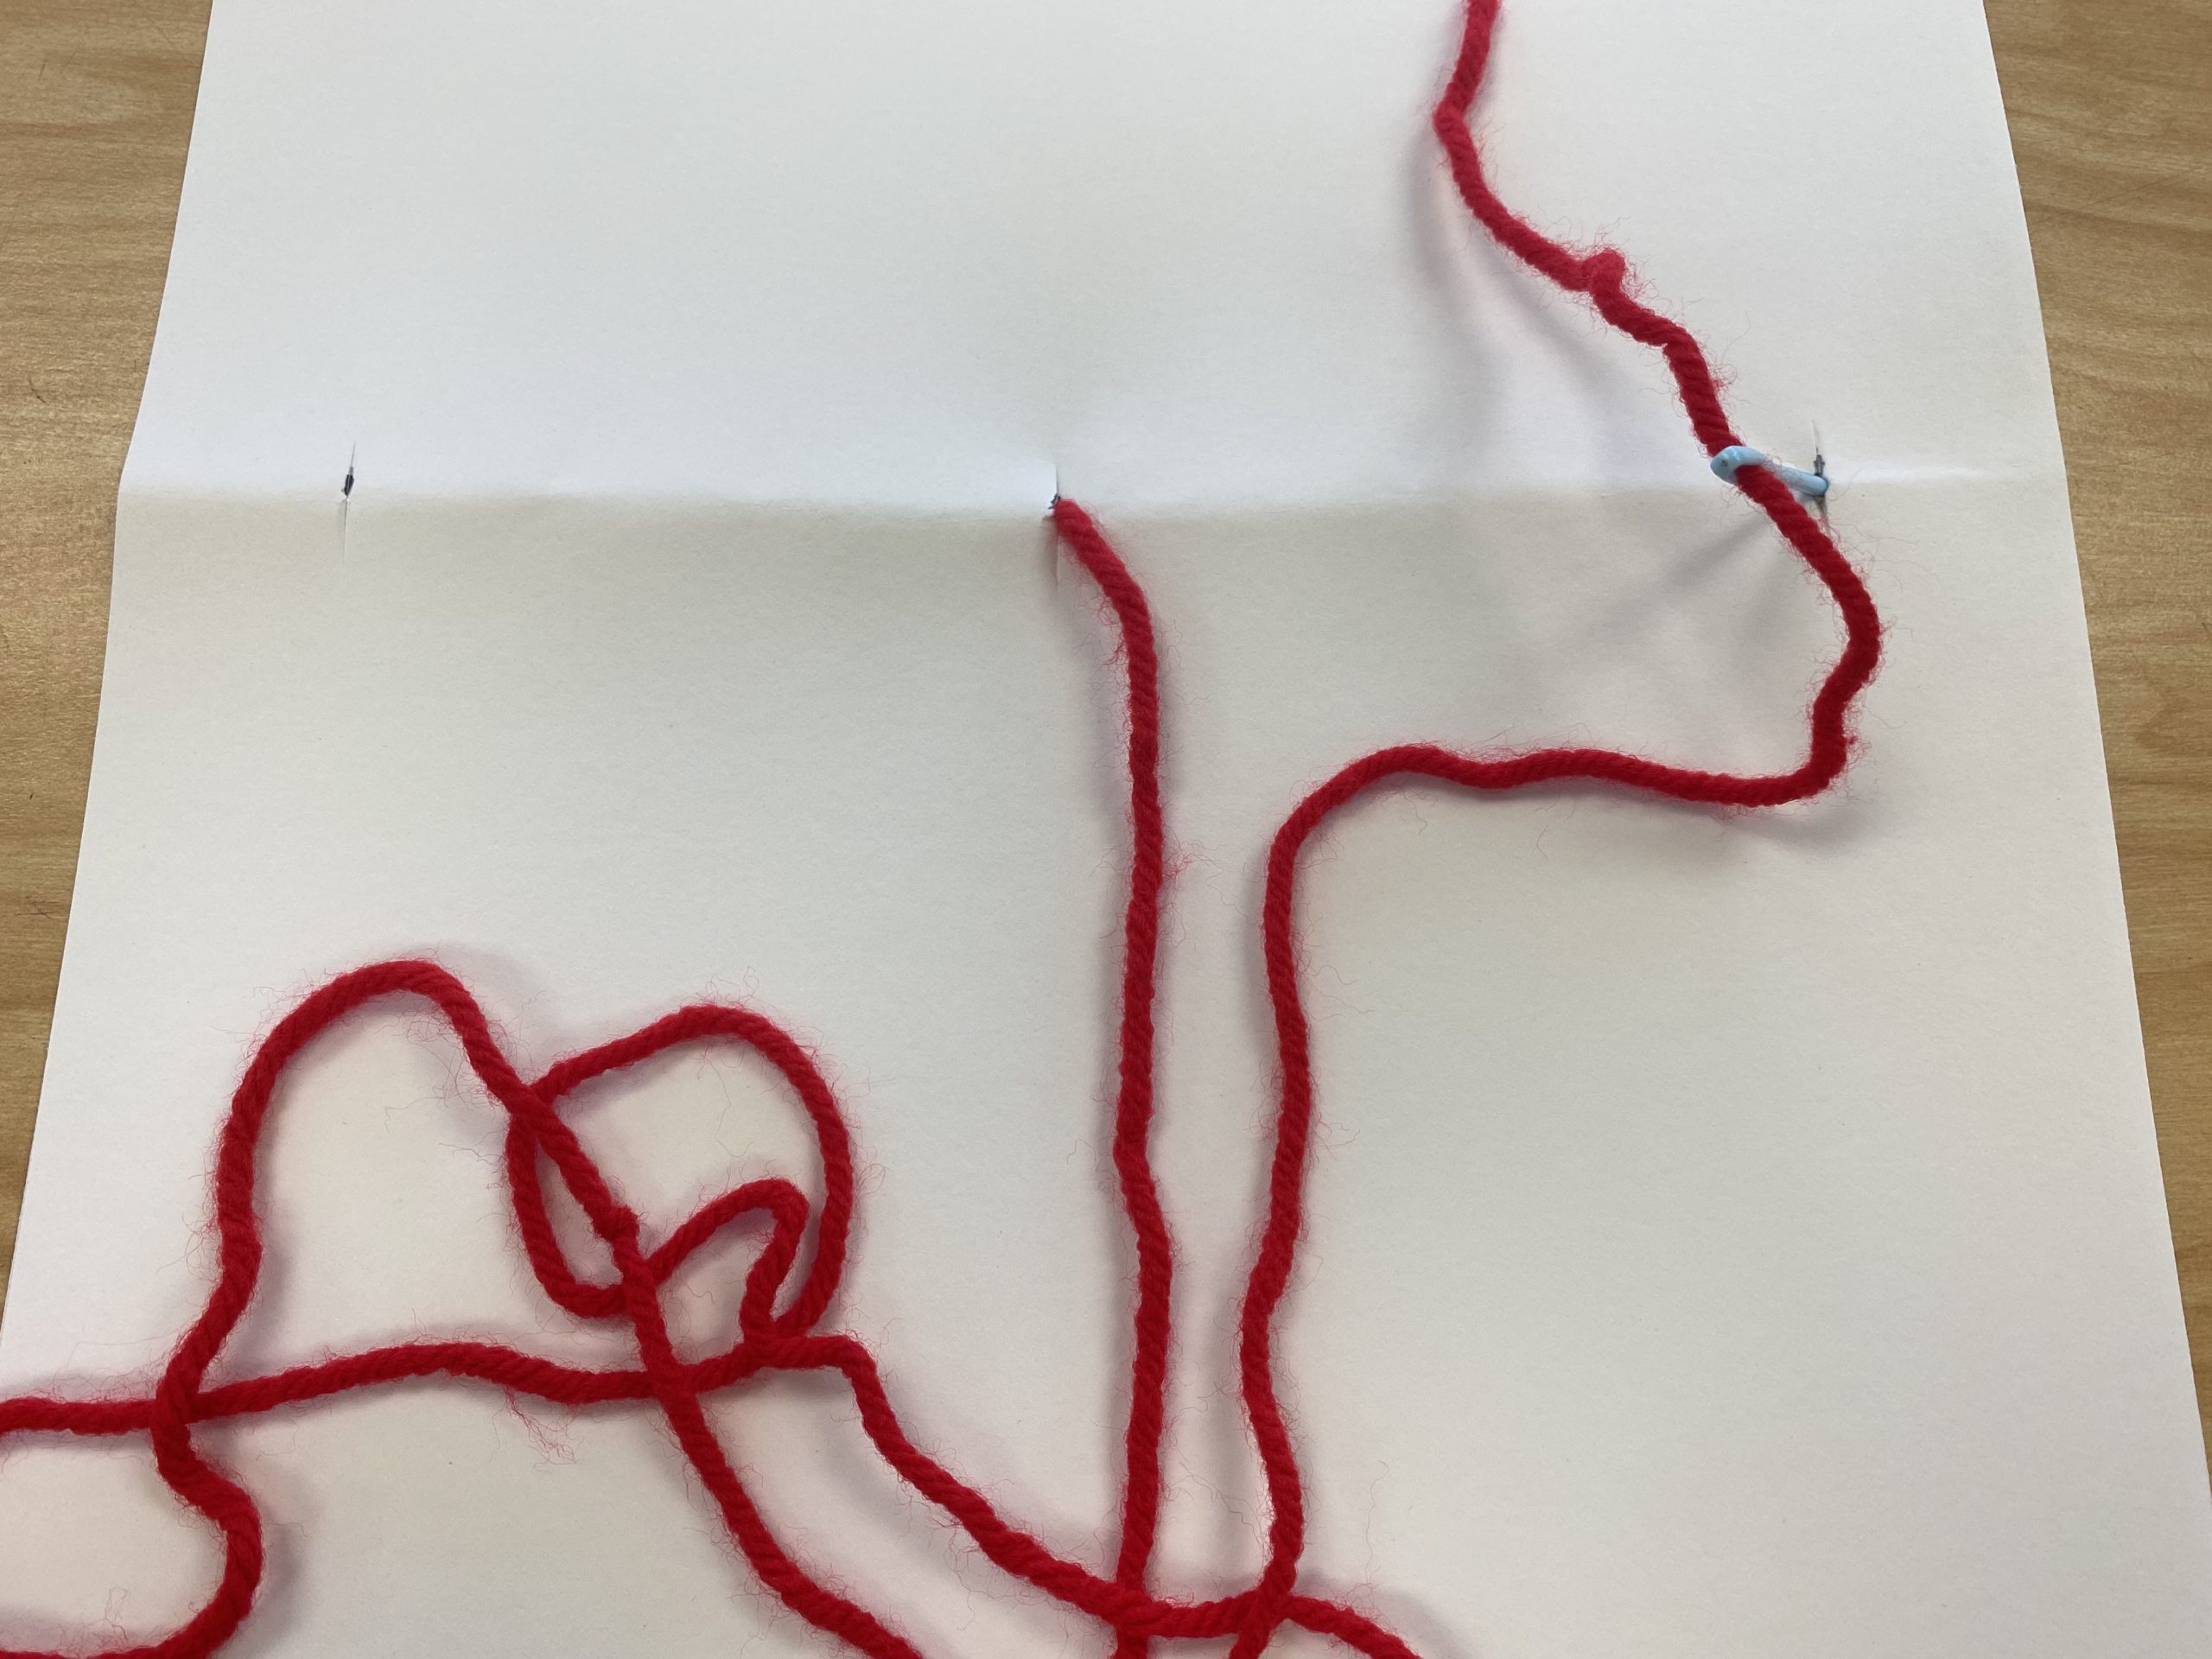
- Cut little slits at each of those marks. (Note: If your students are more advanced, you can open the book and make the marks along the centerfold. Students can then use a blunt needle, awl, or pencil to punch holes through the paper.)
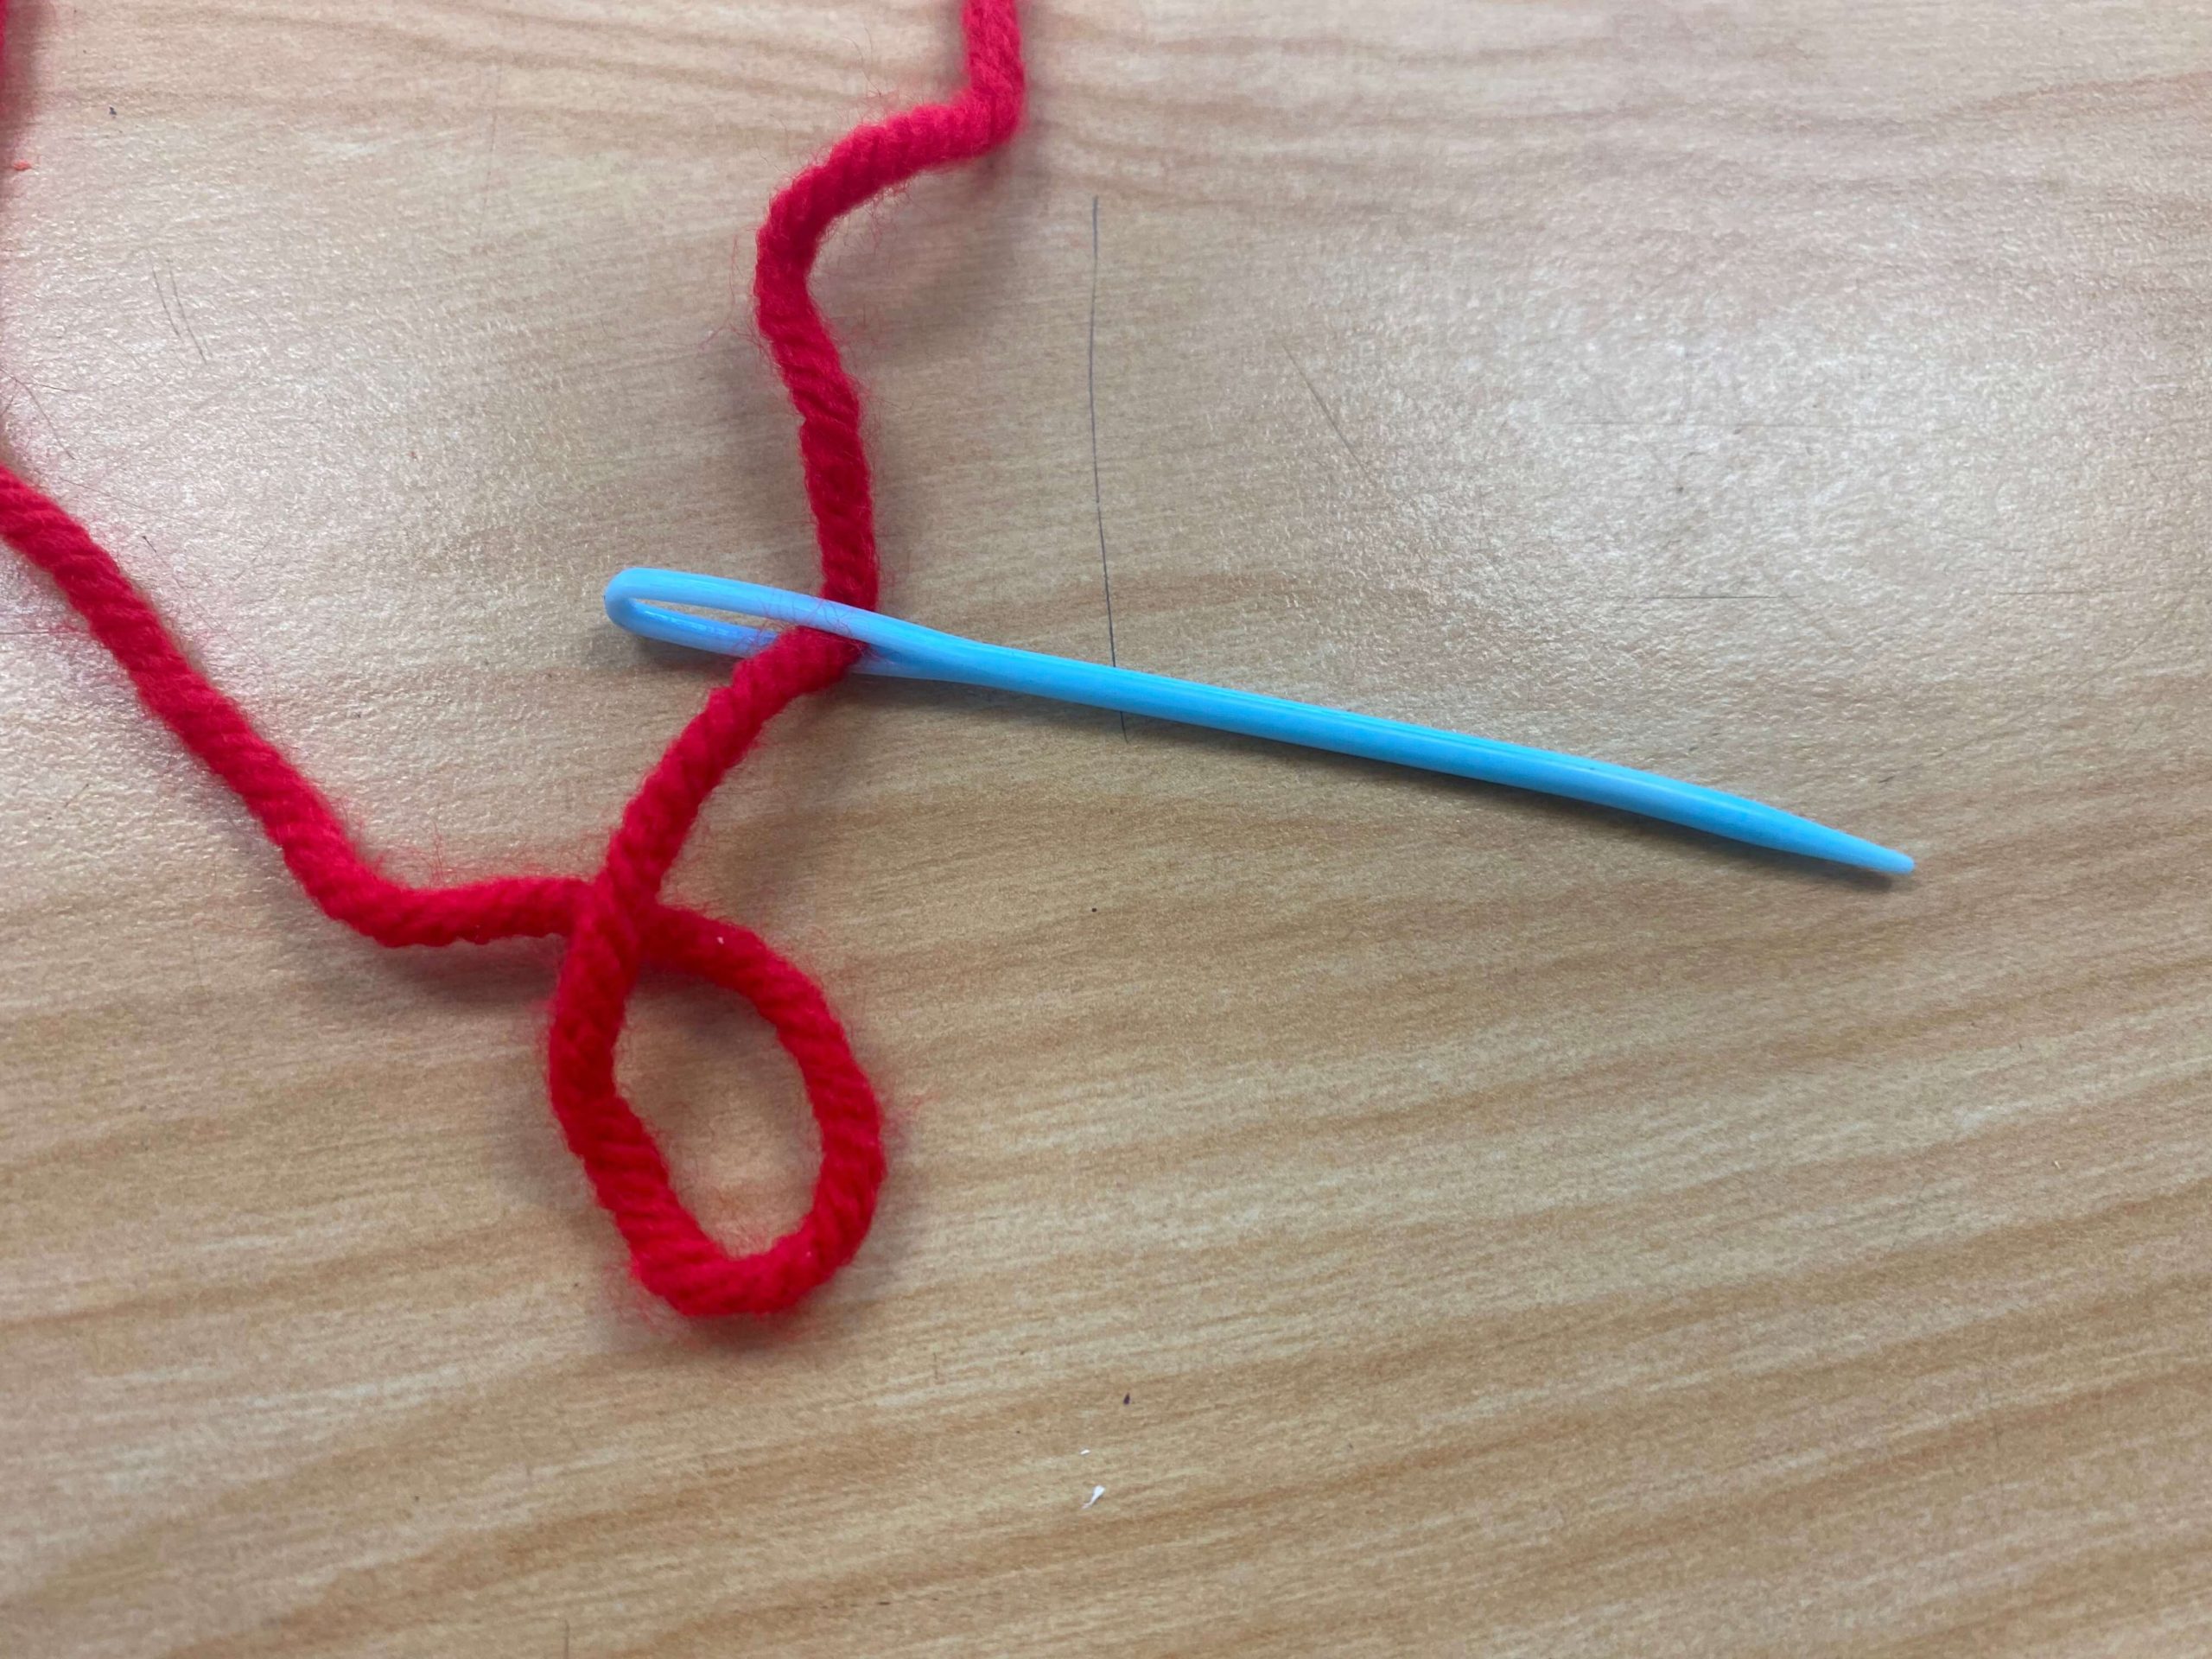
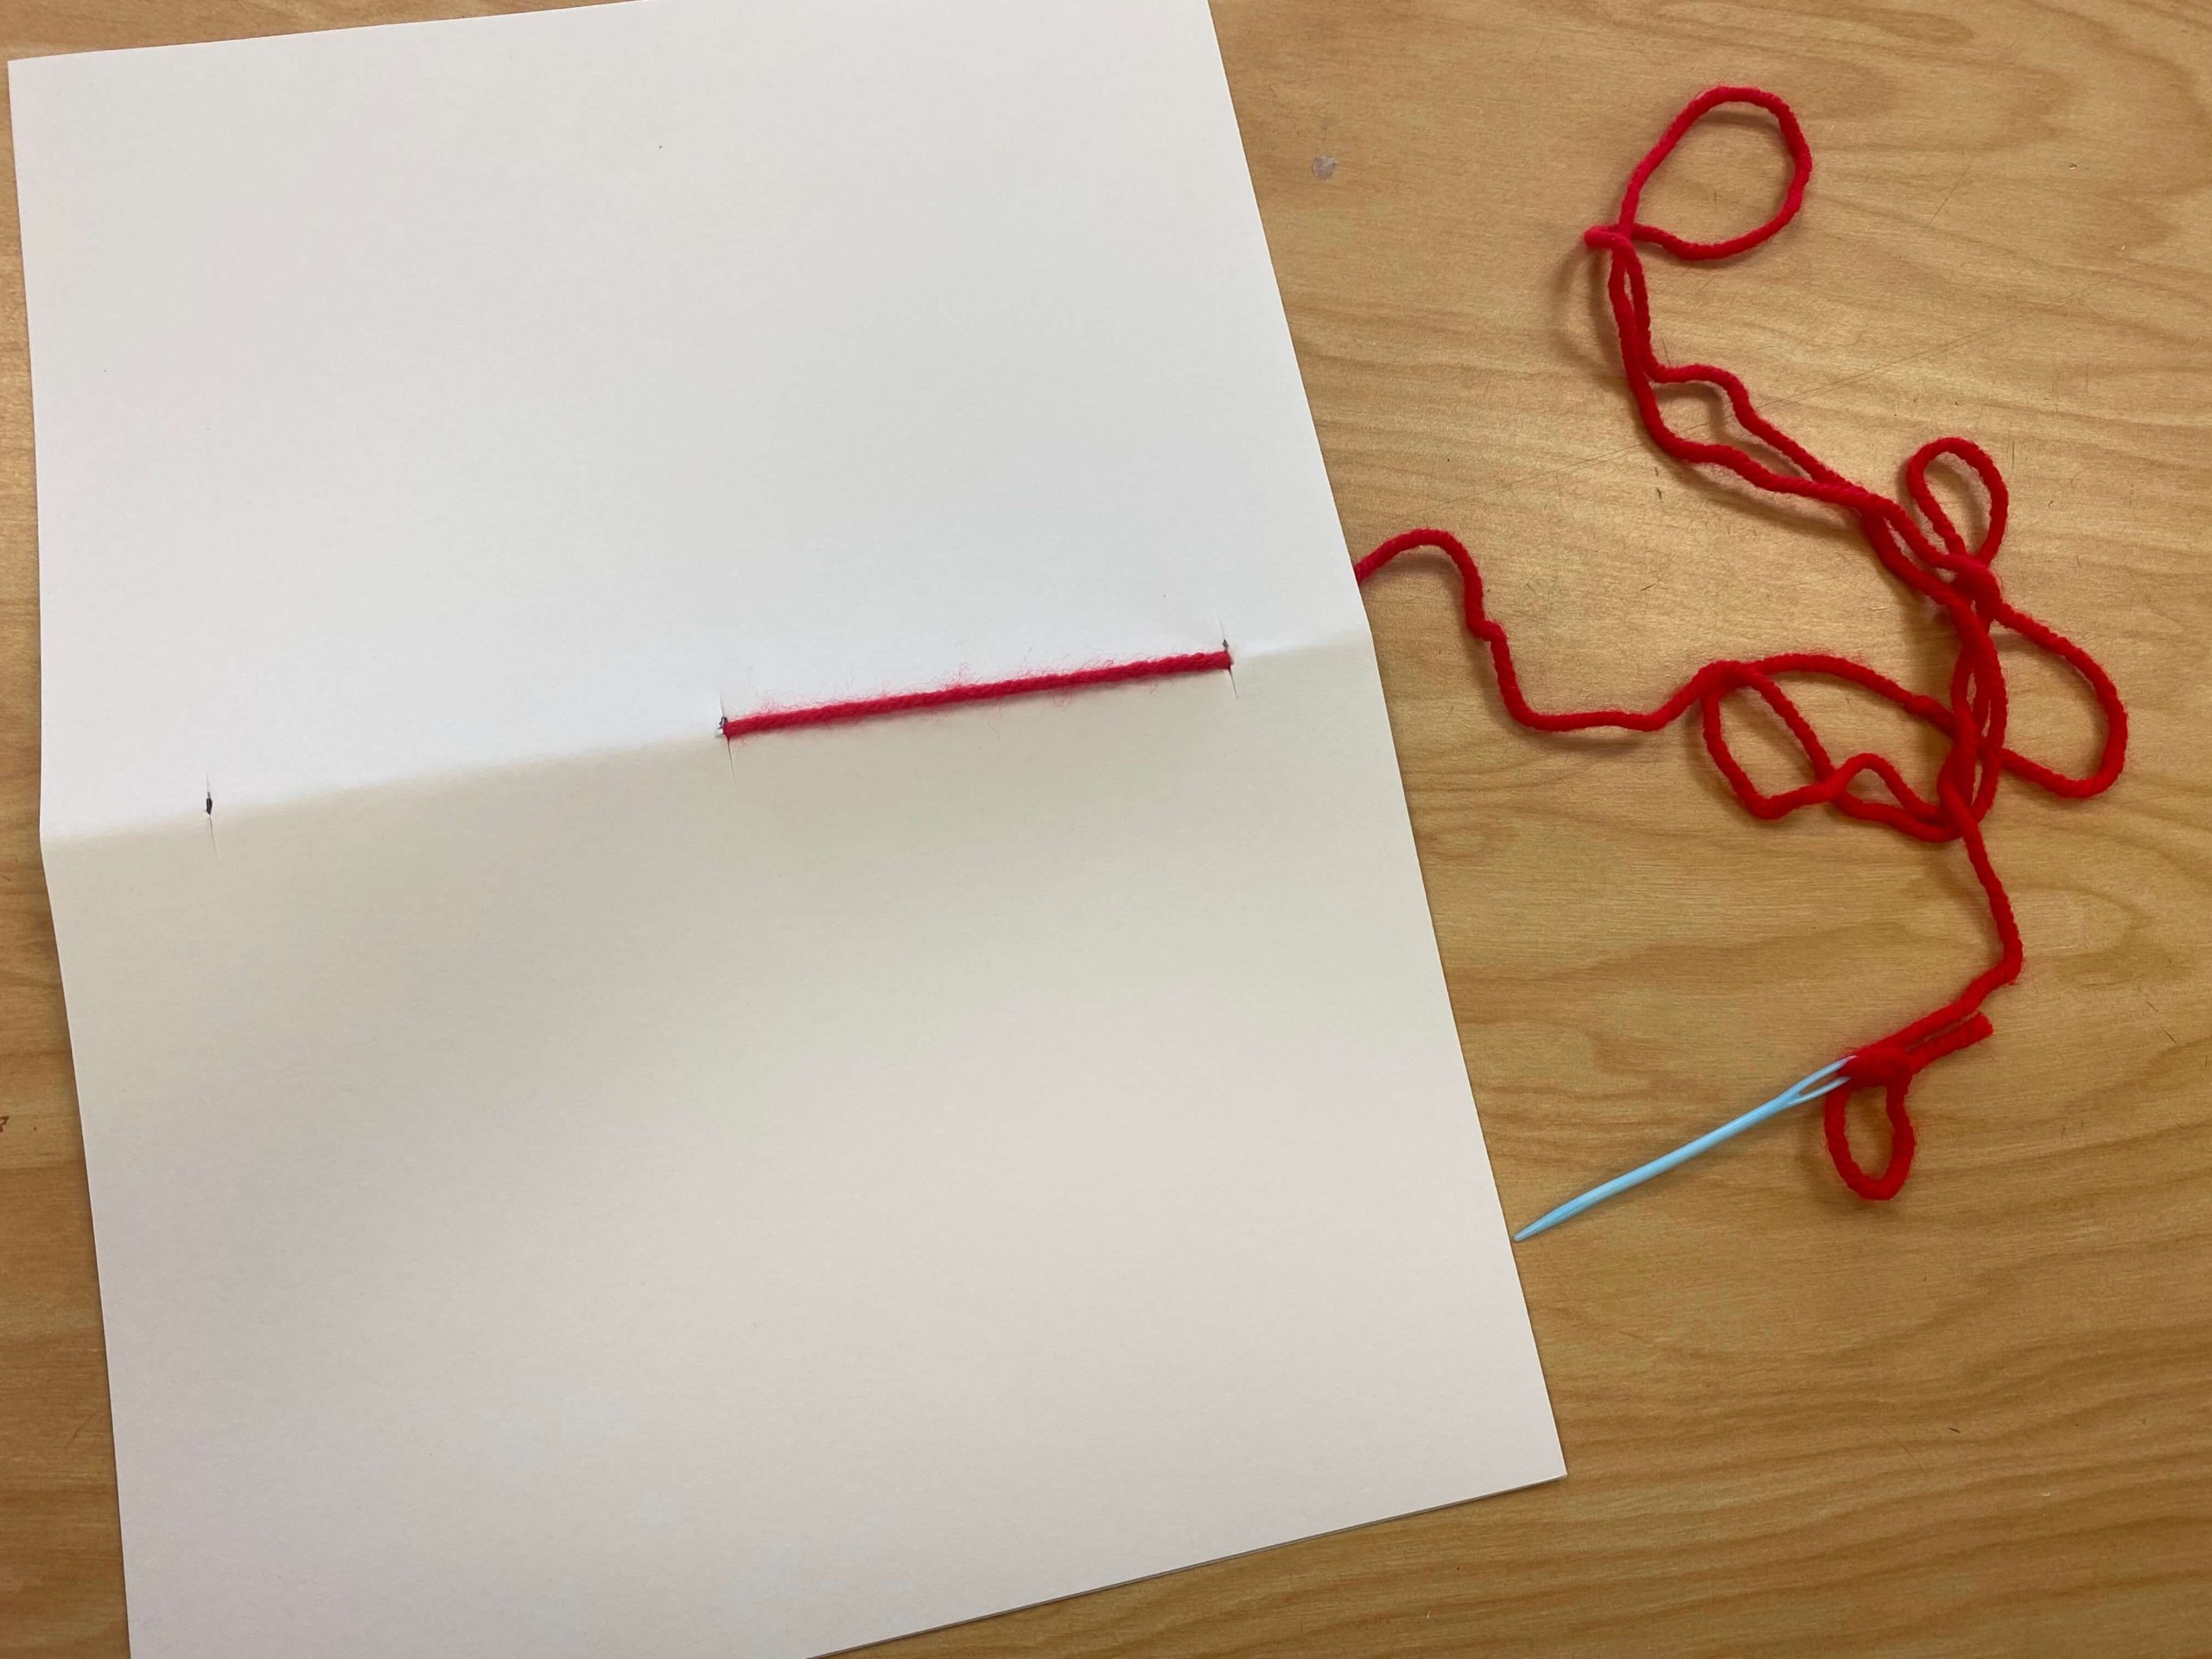
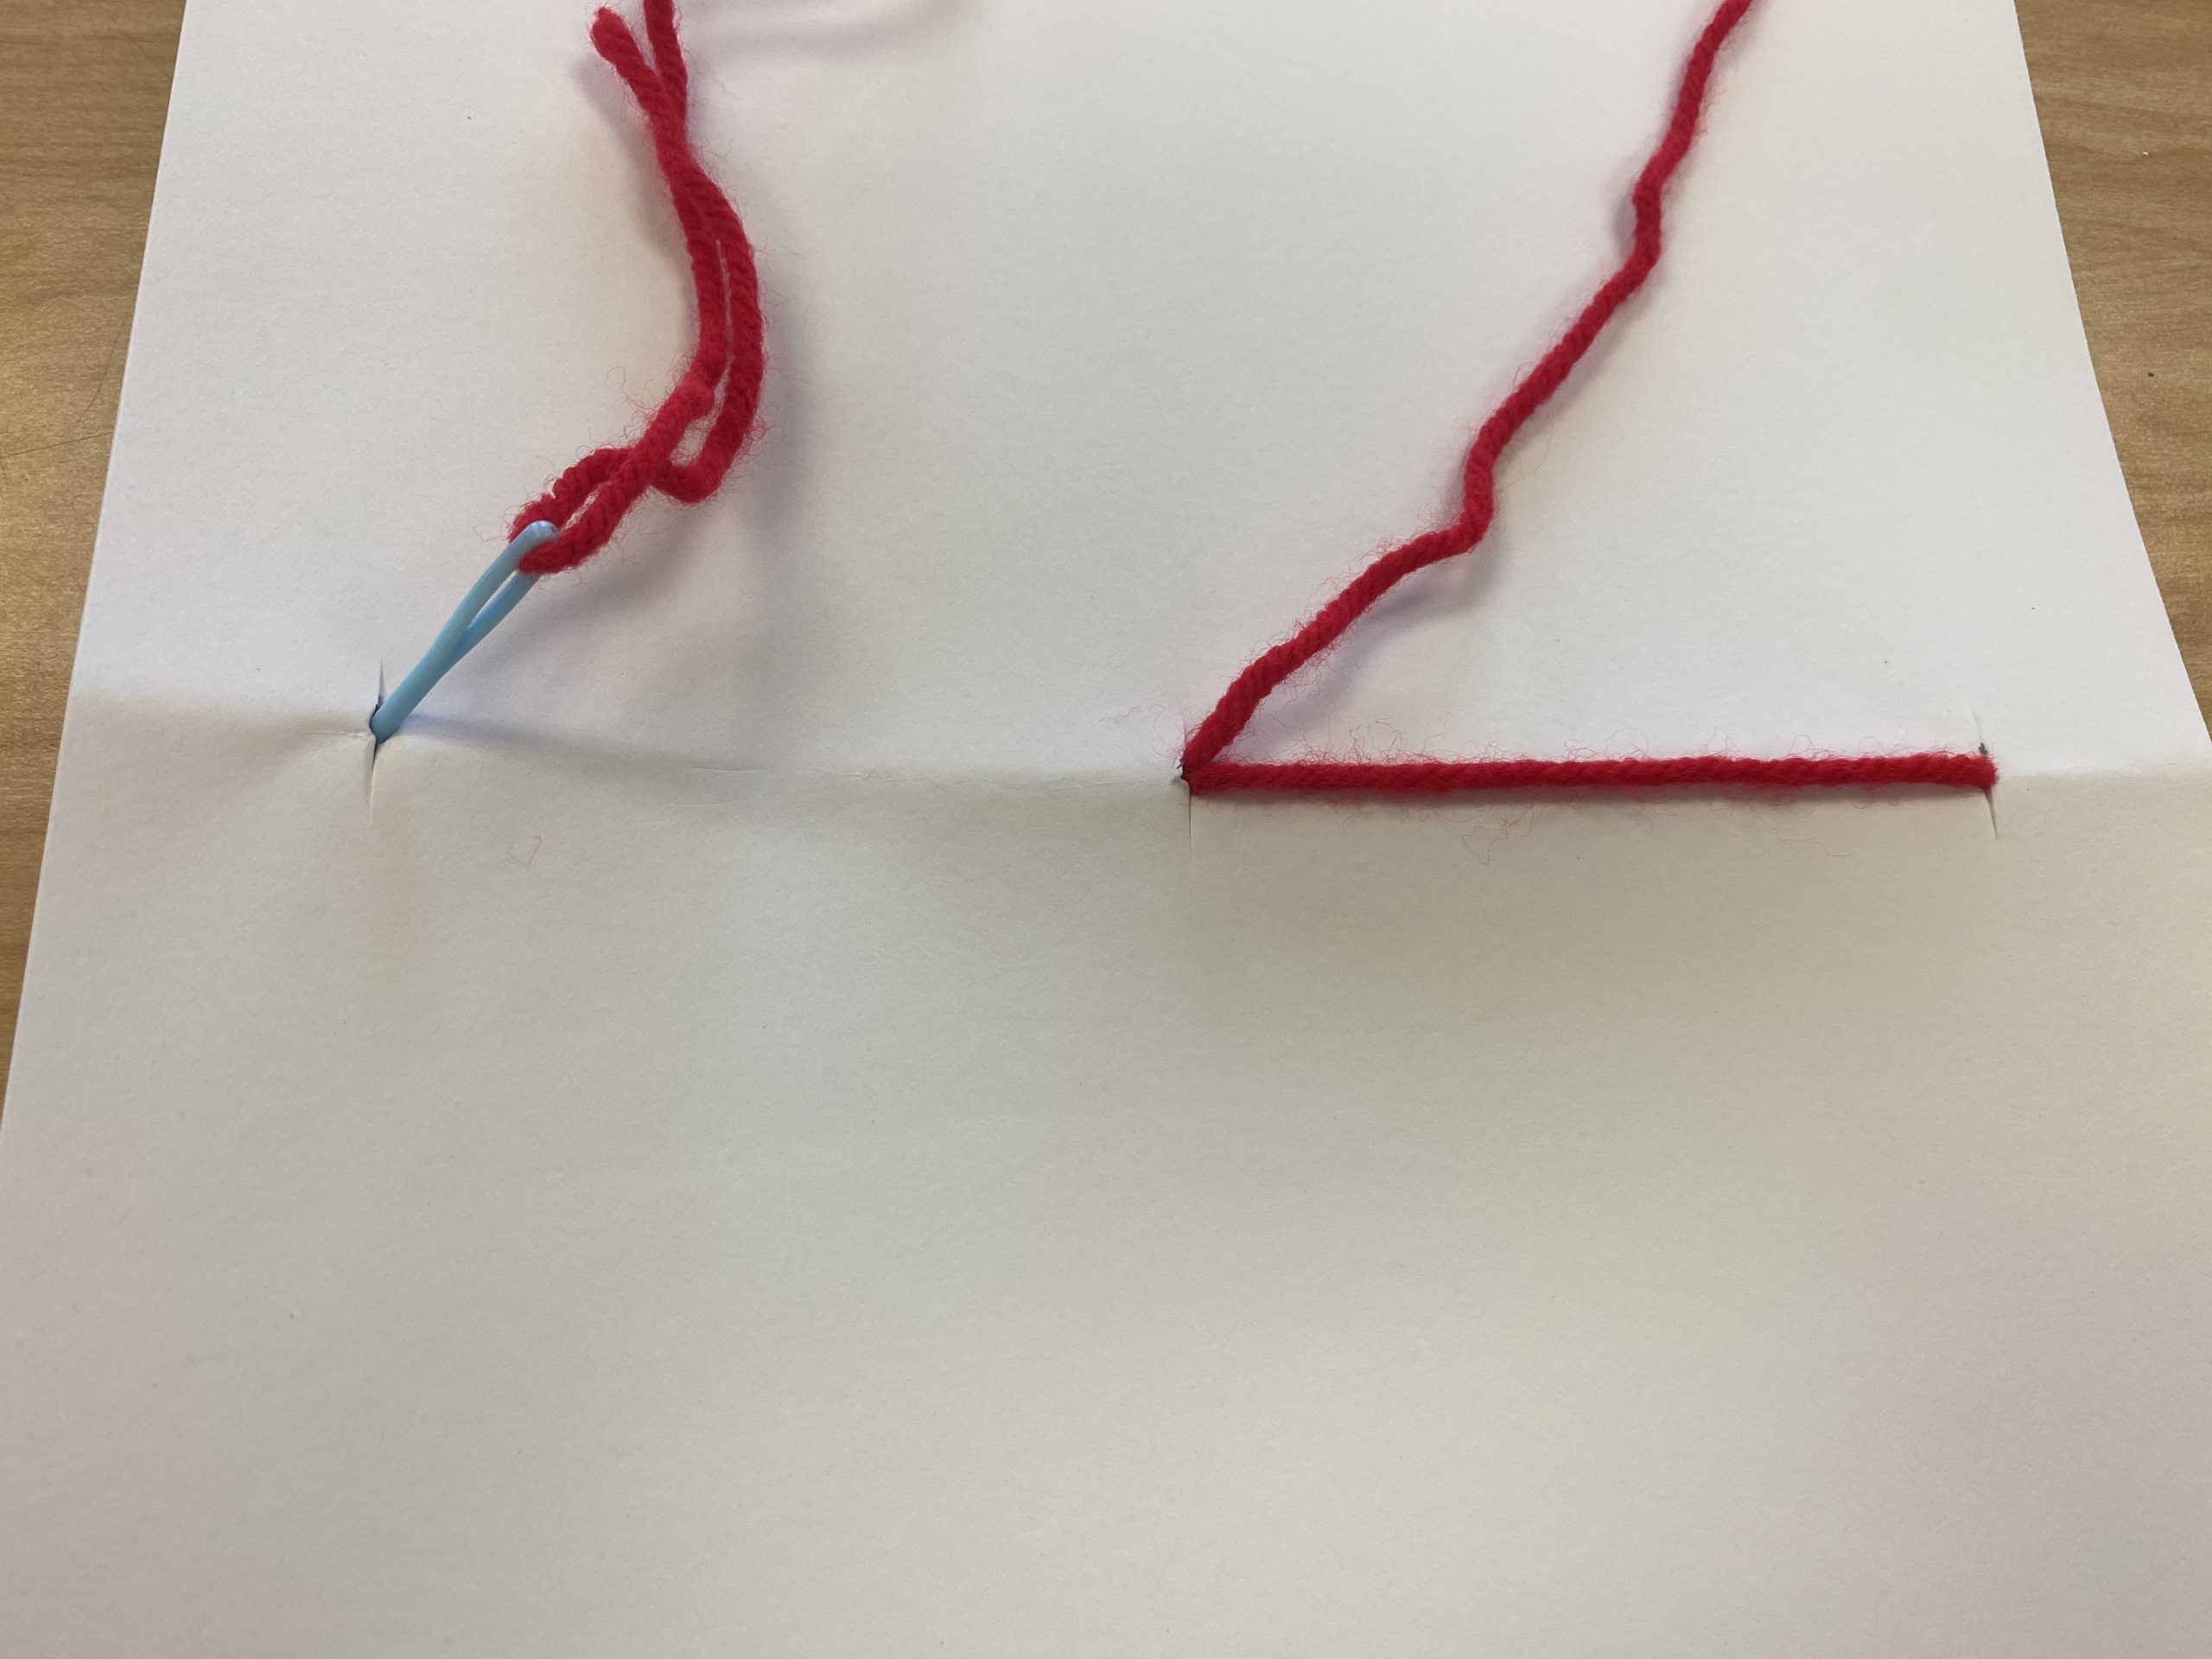
- Thread a large needle with the yarn. (Note: I am using a plastic tapestry needle, but any needle that the yarn fits through will work perfectly.)
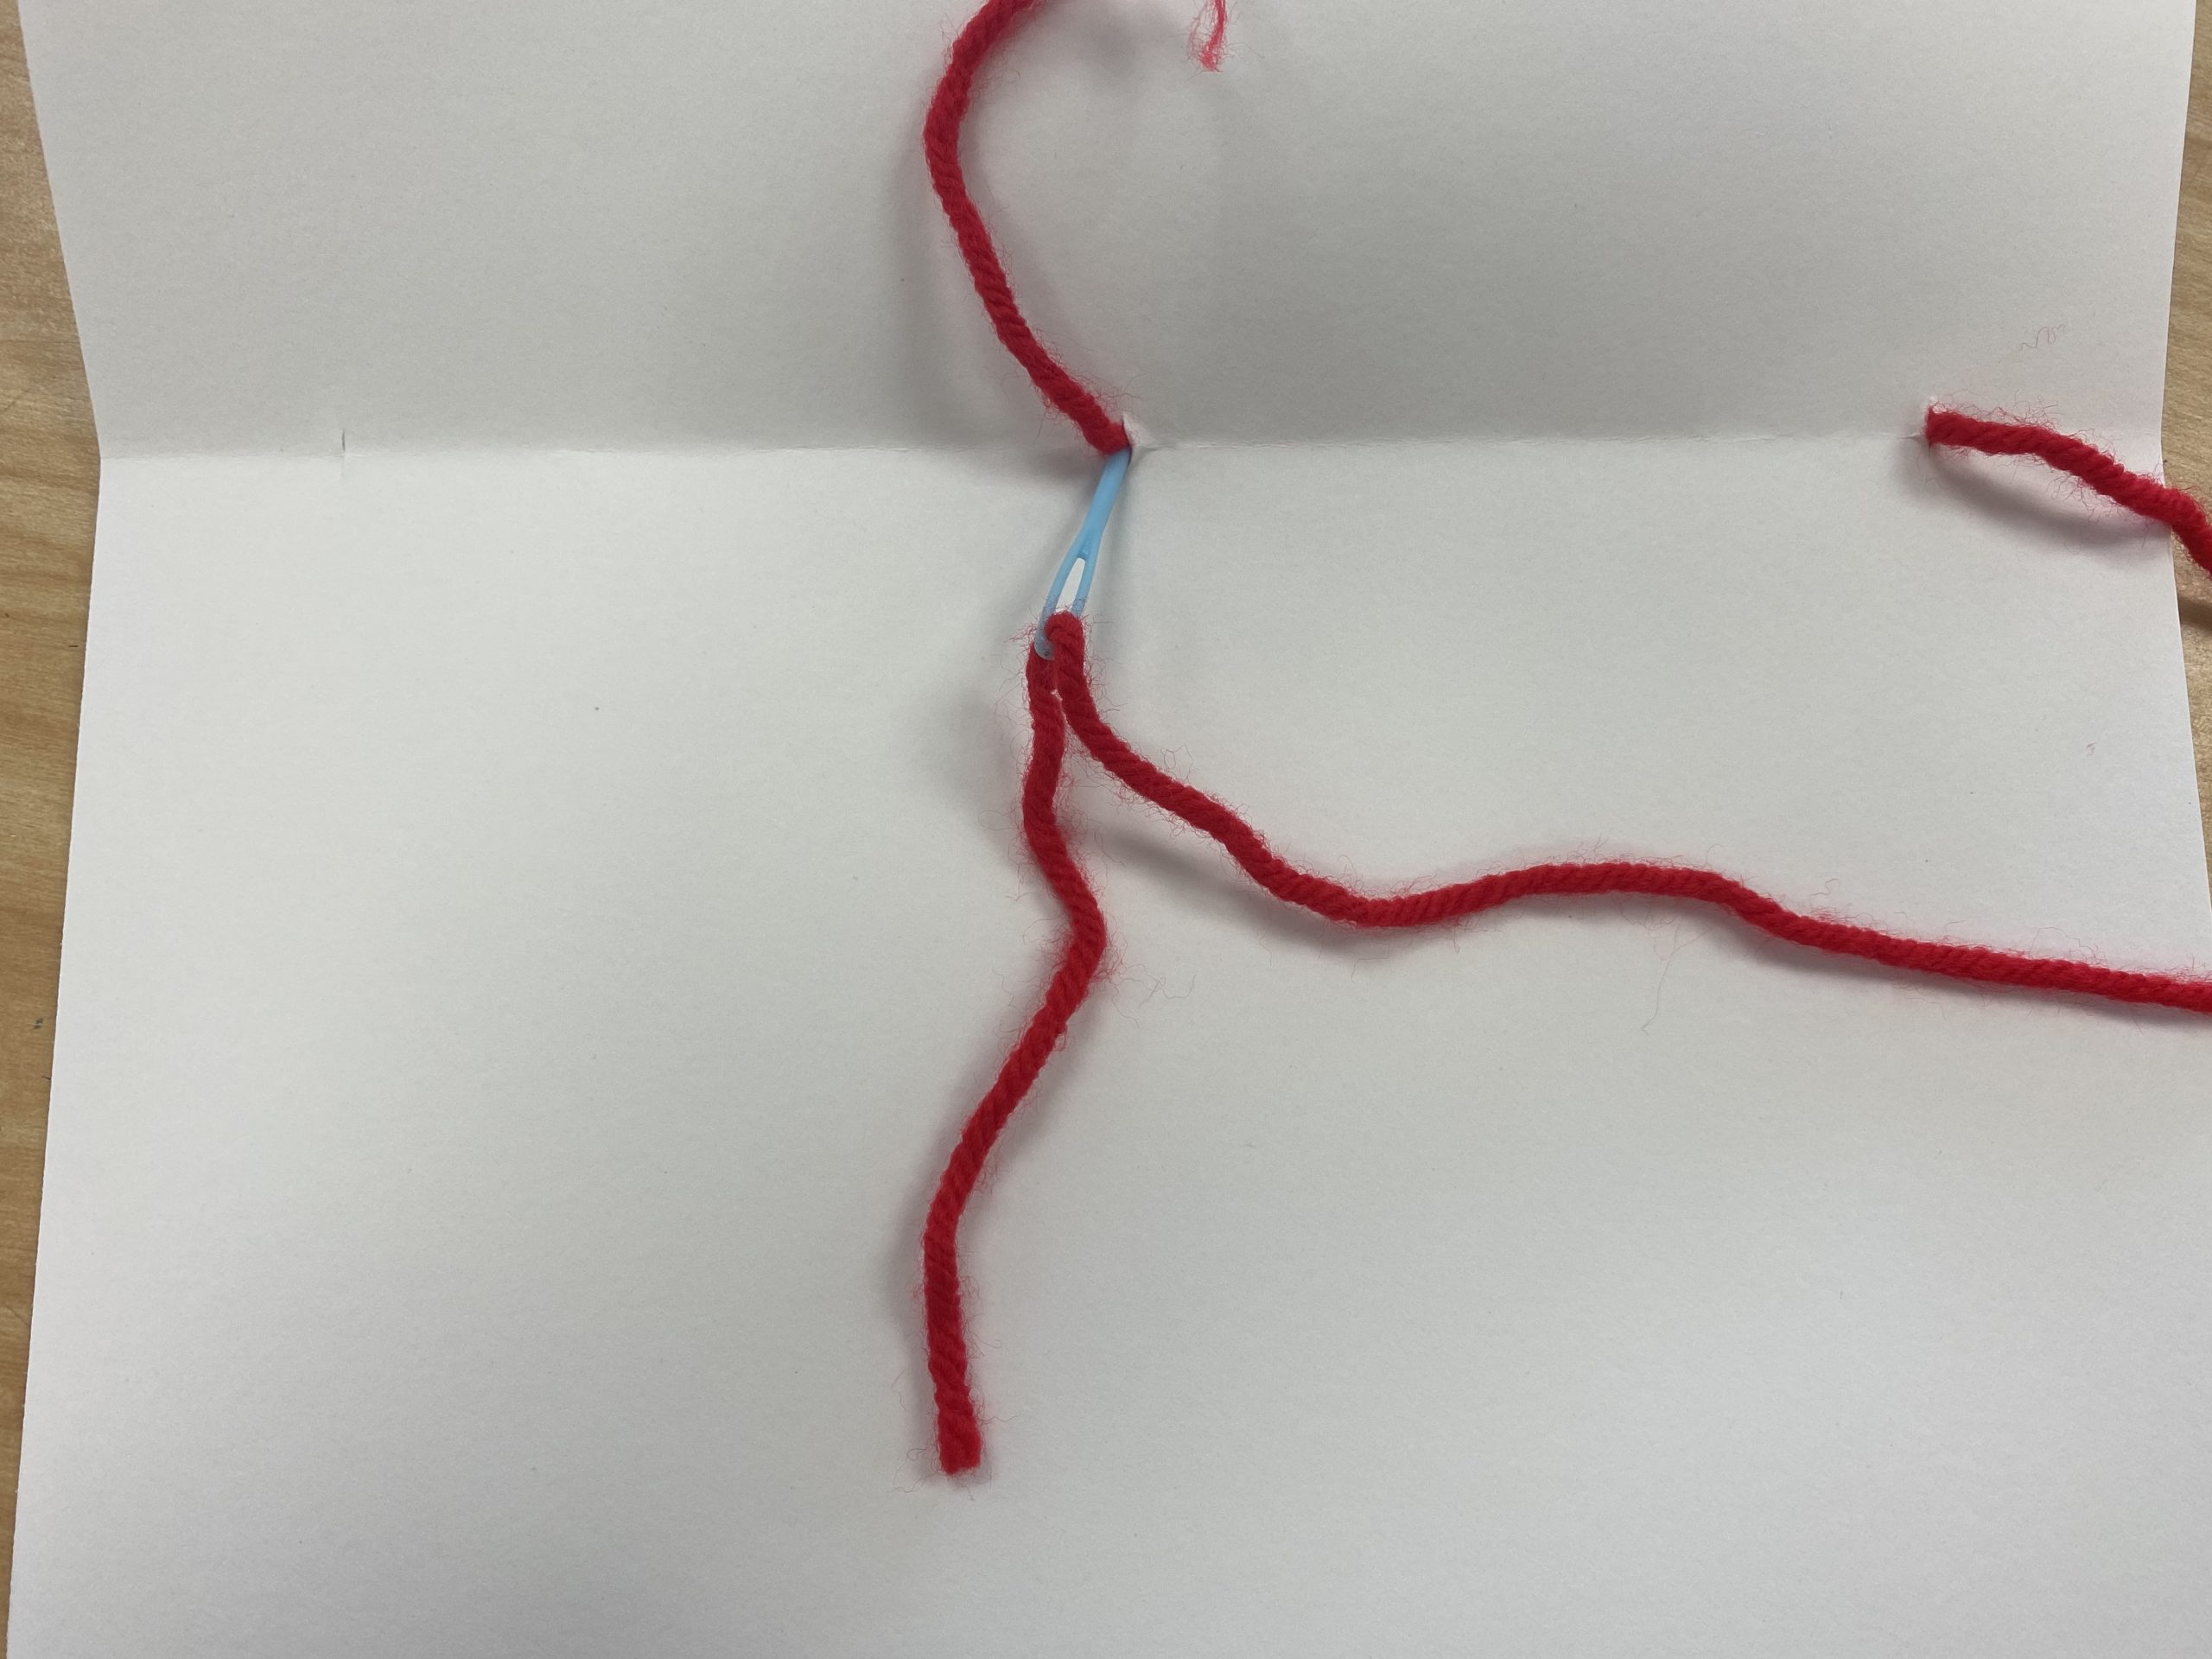
- Open the book to the center and push the needle through the middle hole. The needle should go from the inside of the book to the outside. Remember to leave a little yarn tail inside the book. Sometimes I have my students tape the tail down so it doesn’t slide out if they pull too hard.
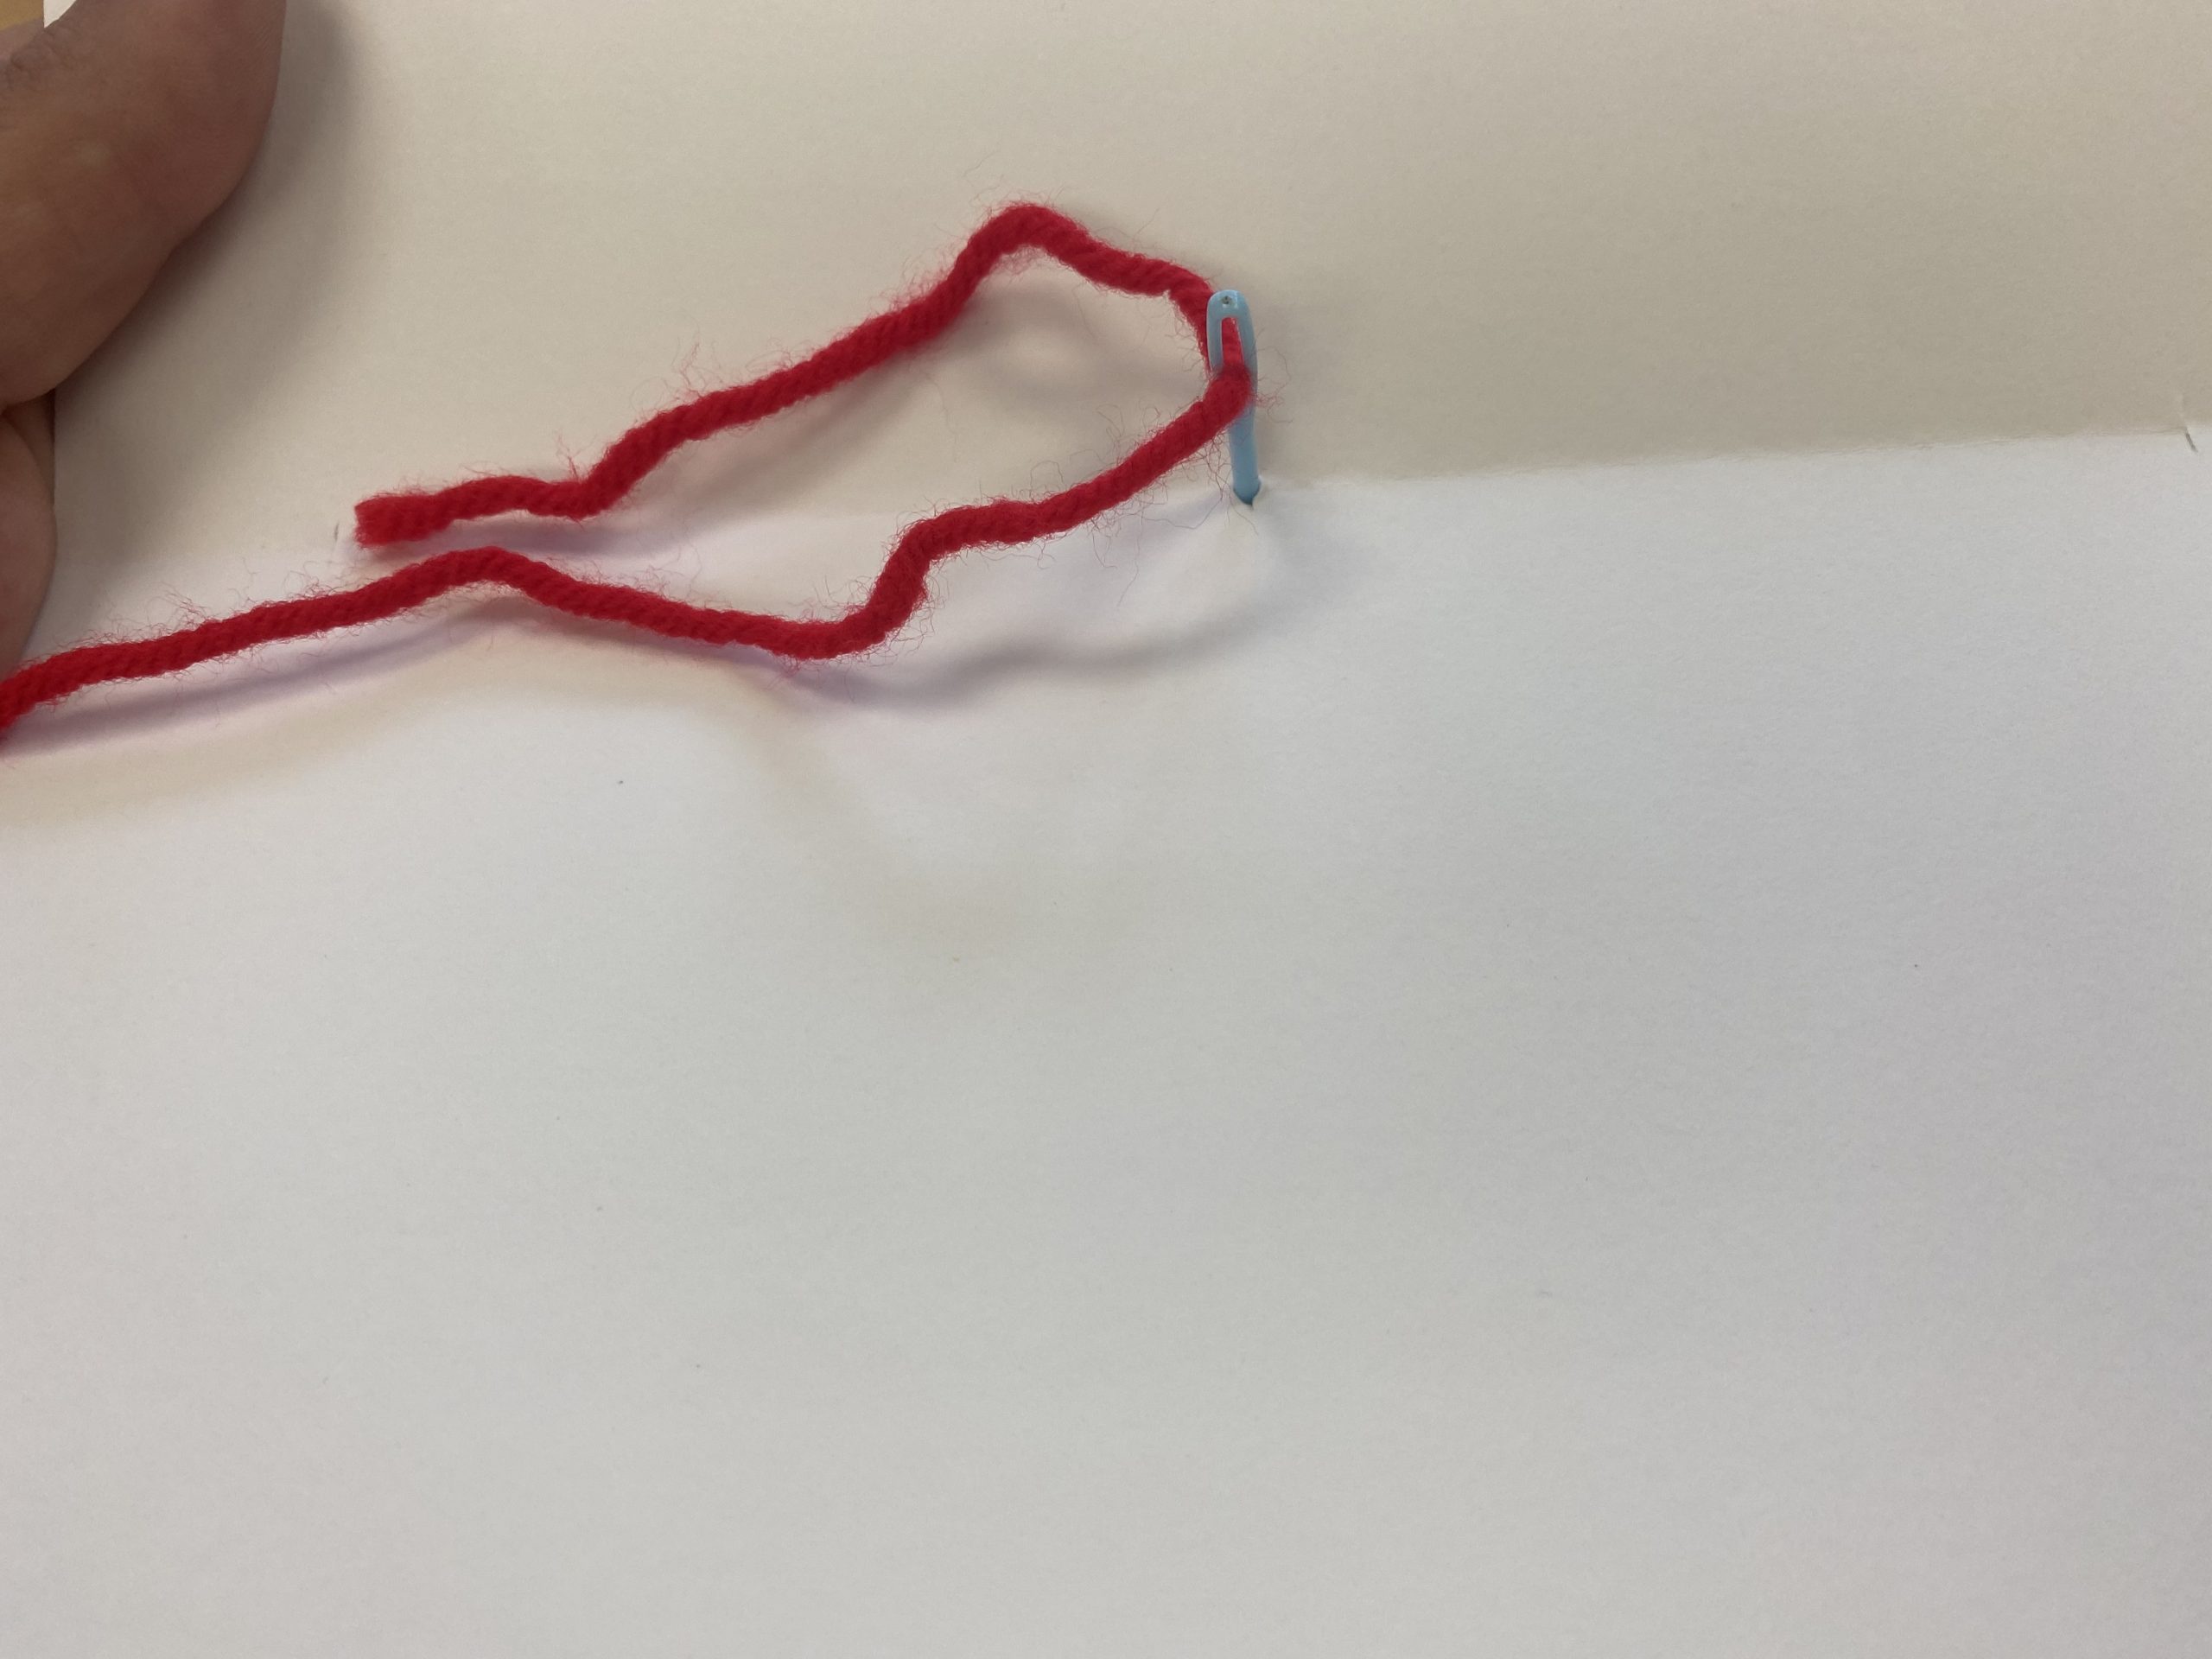
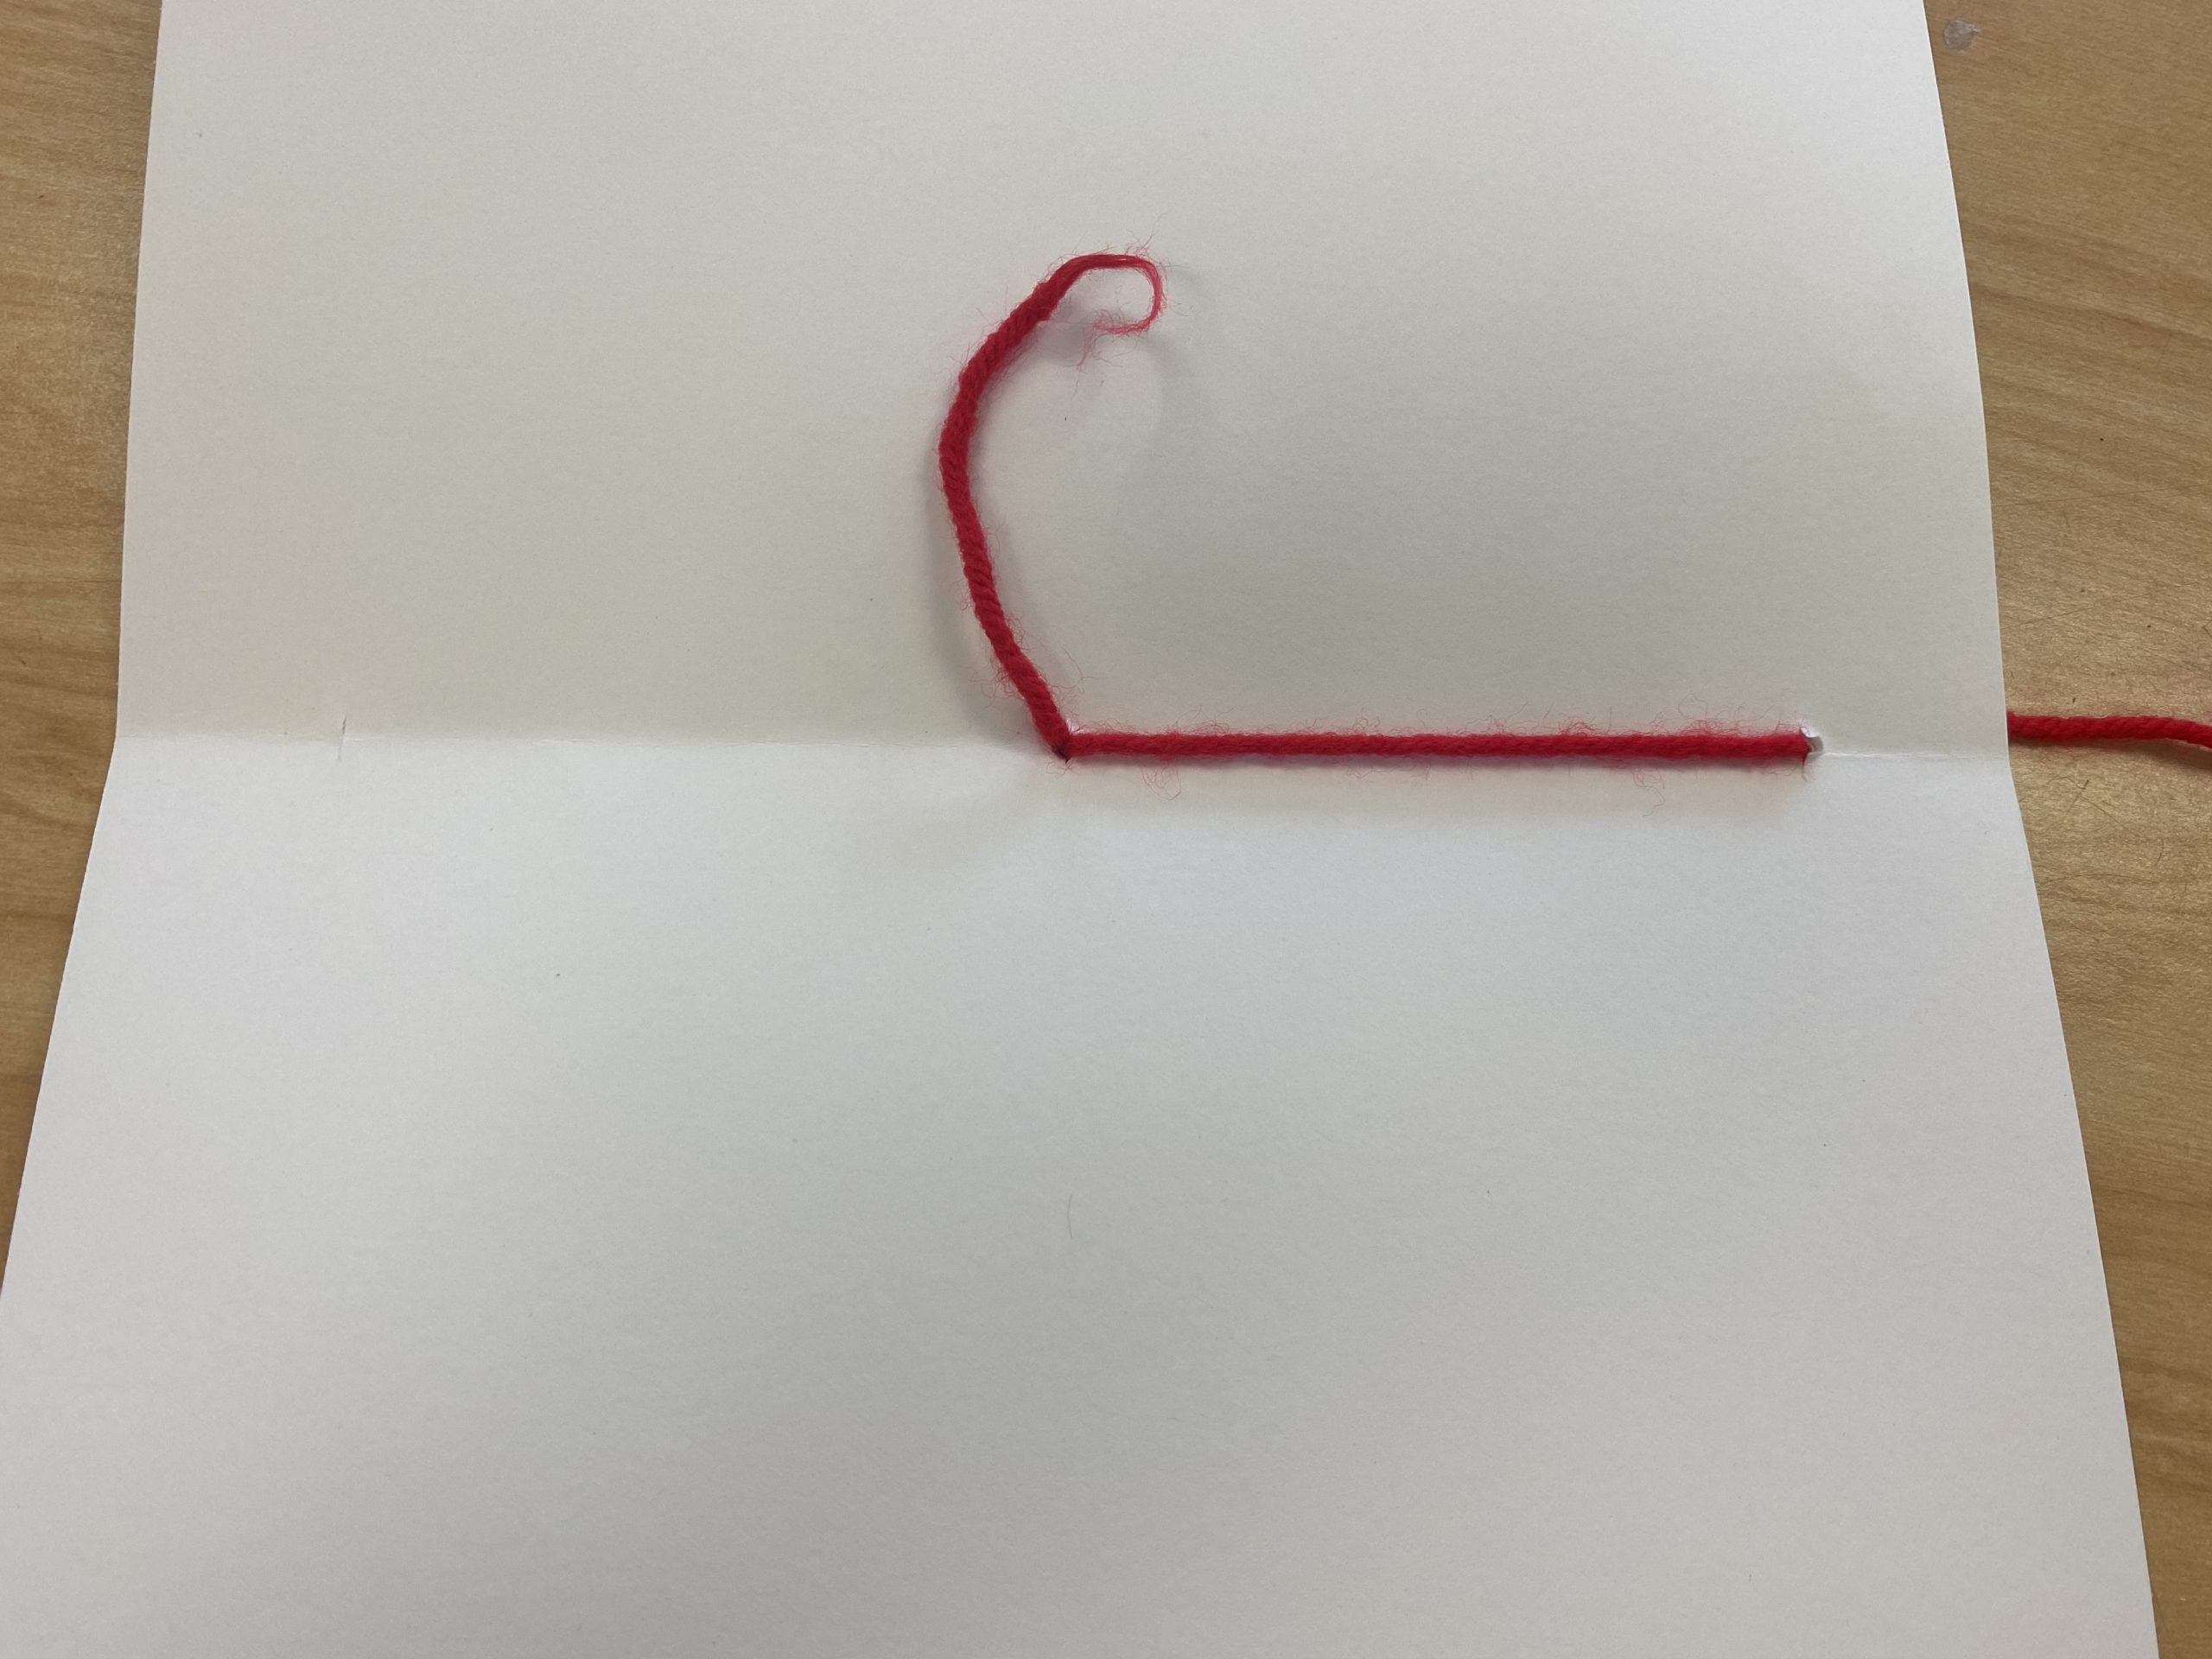
- Pull the yarn taught.
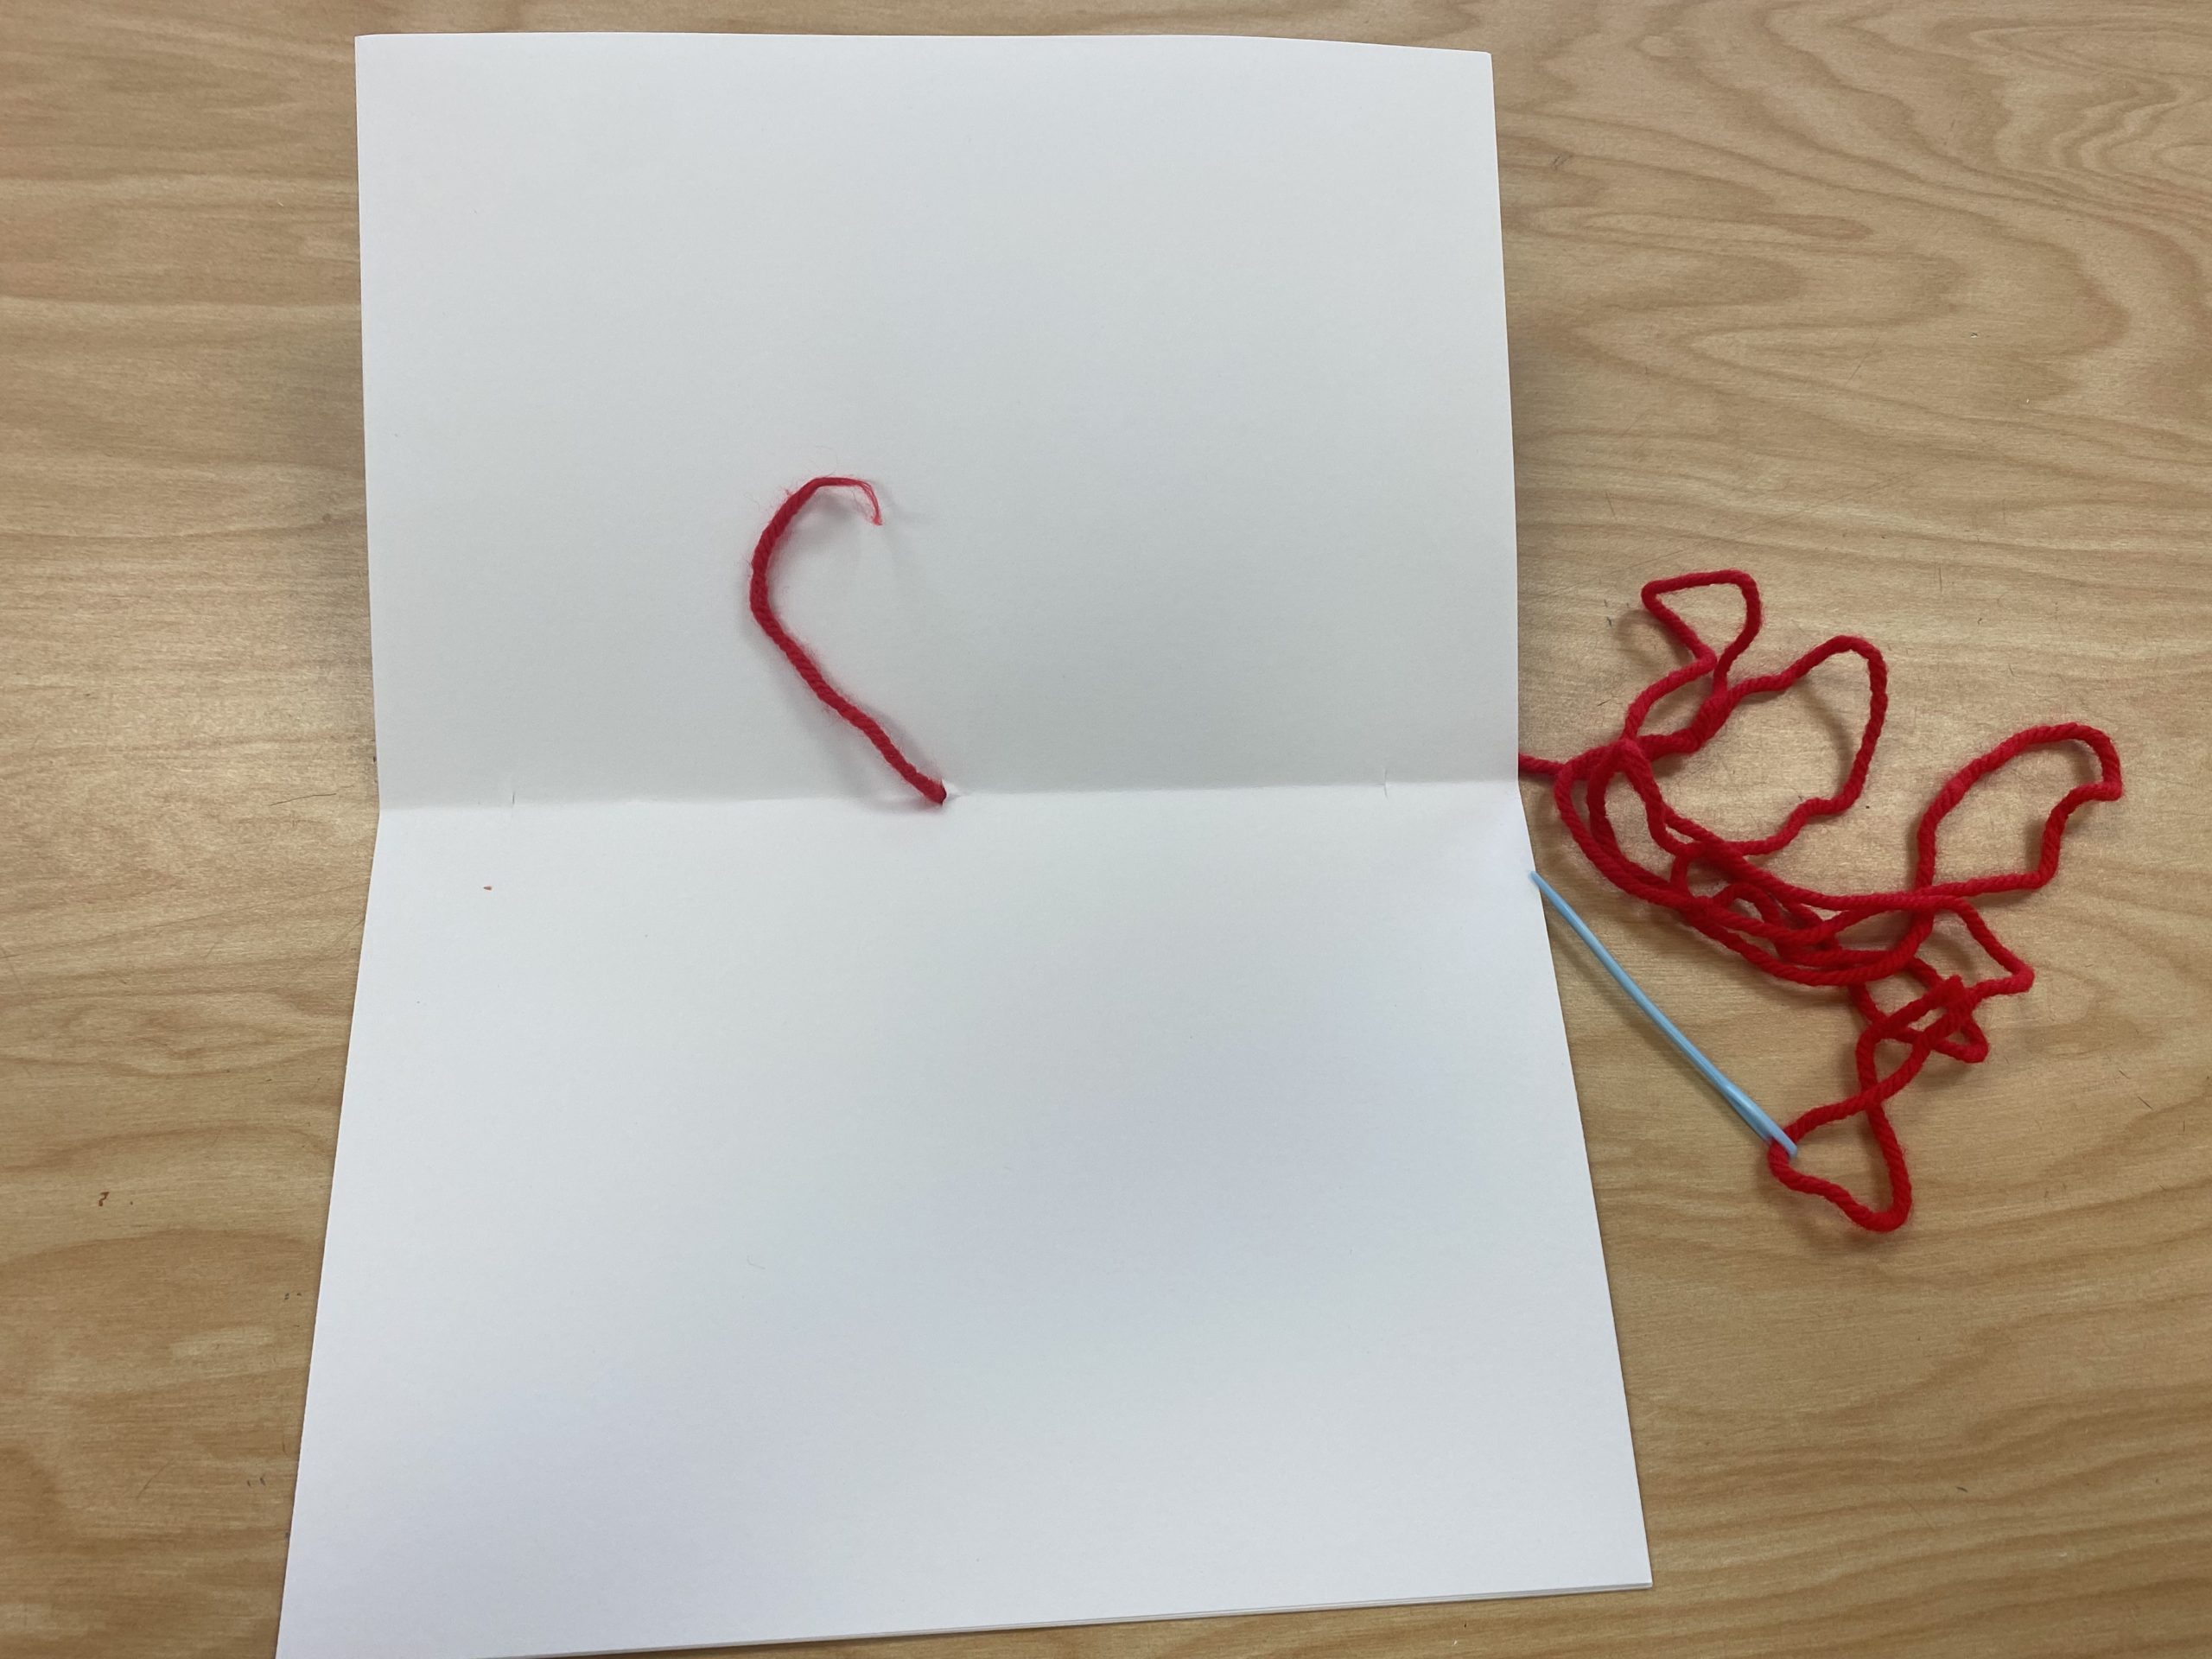
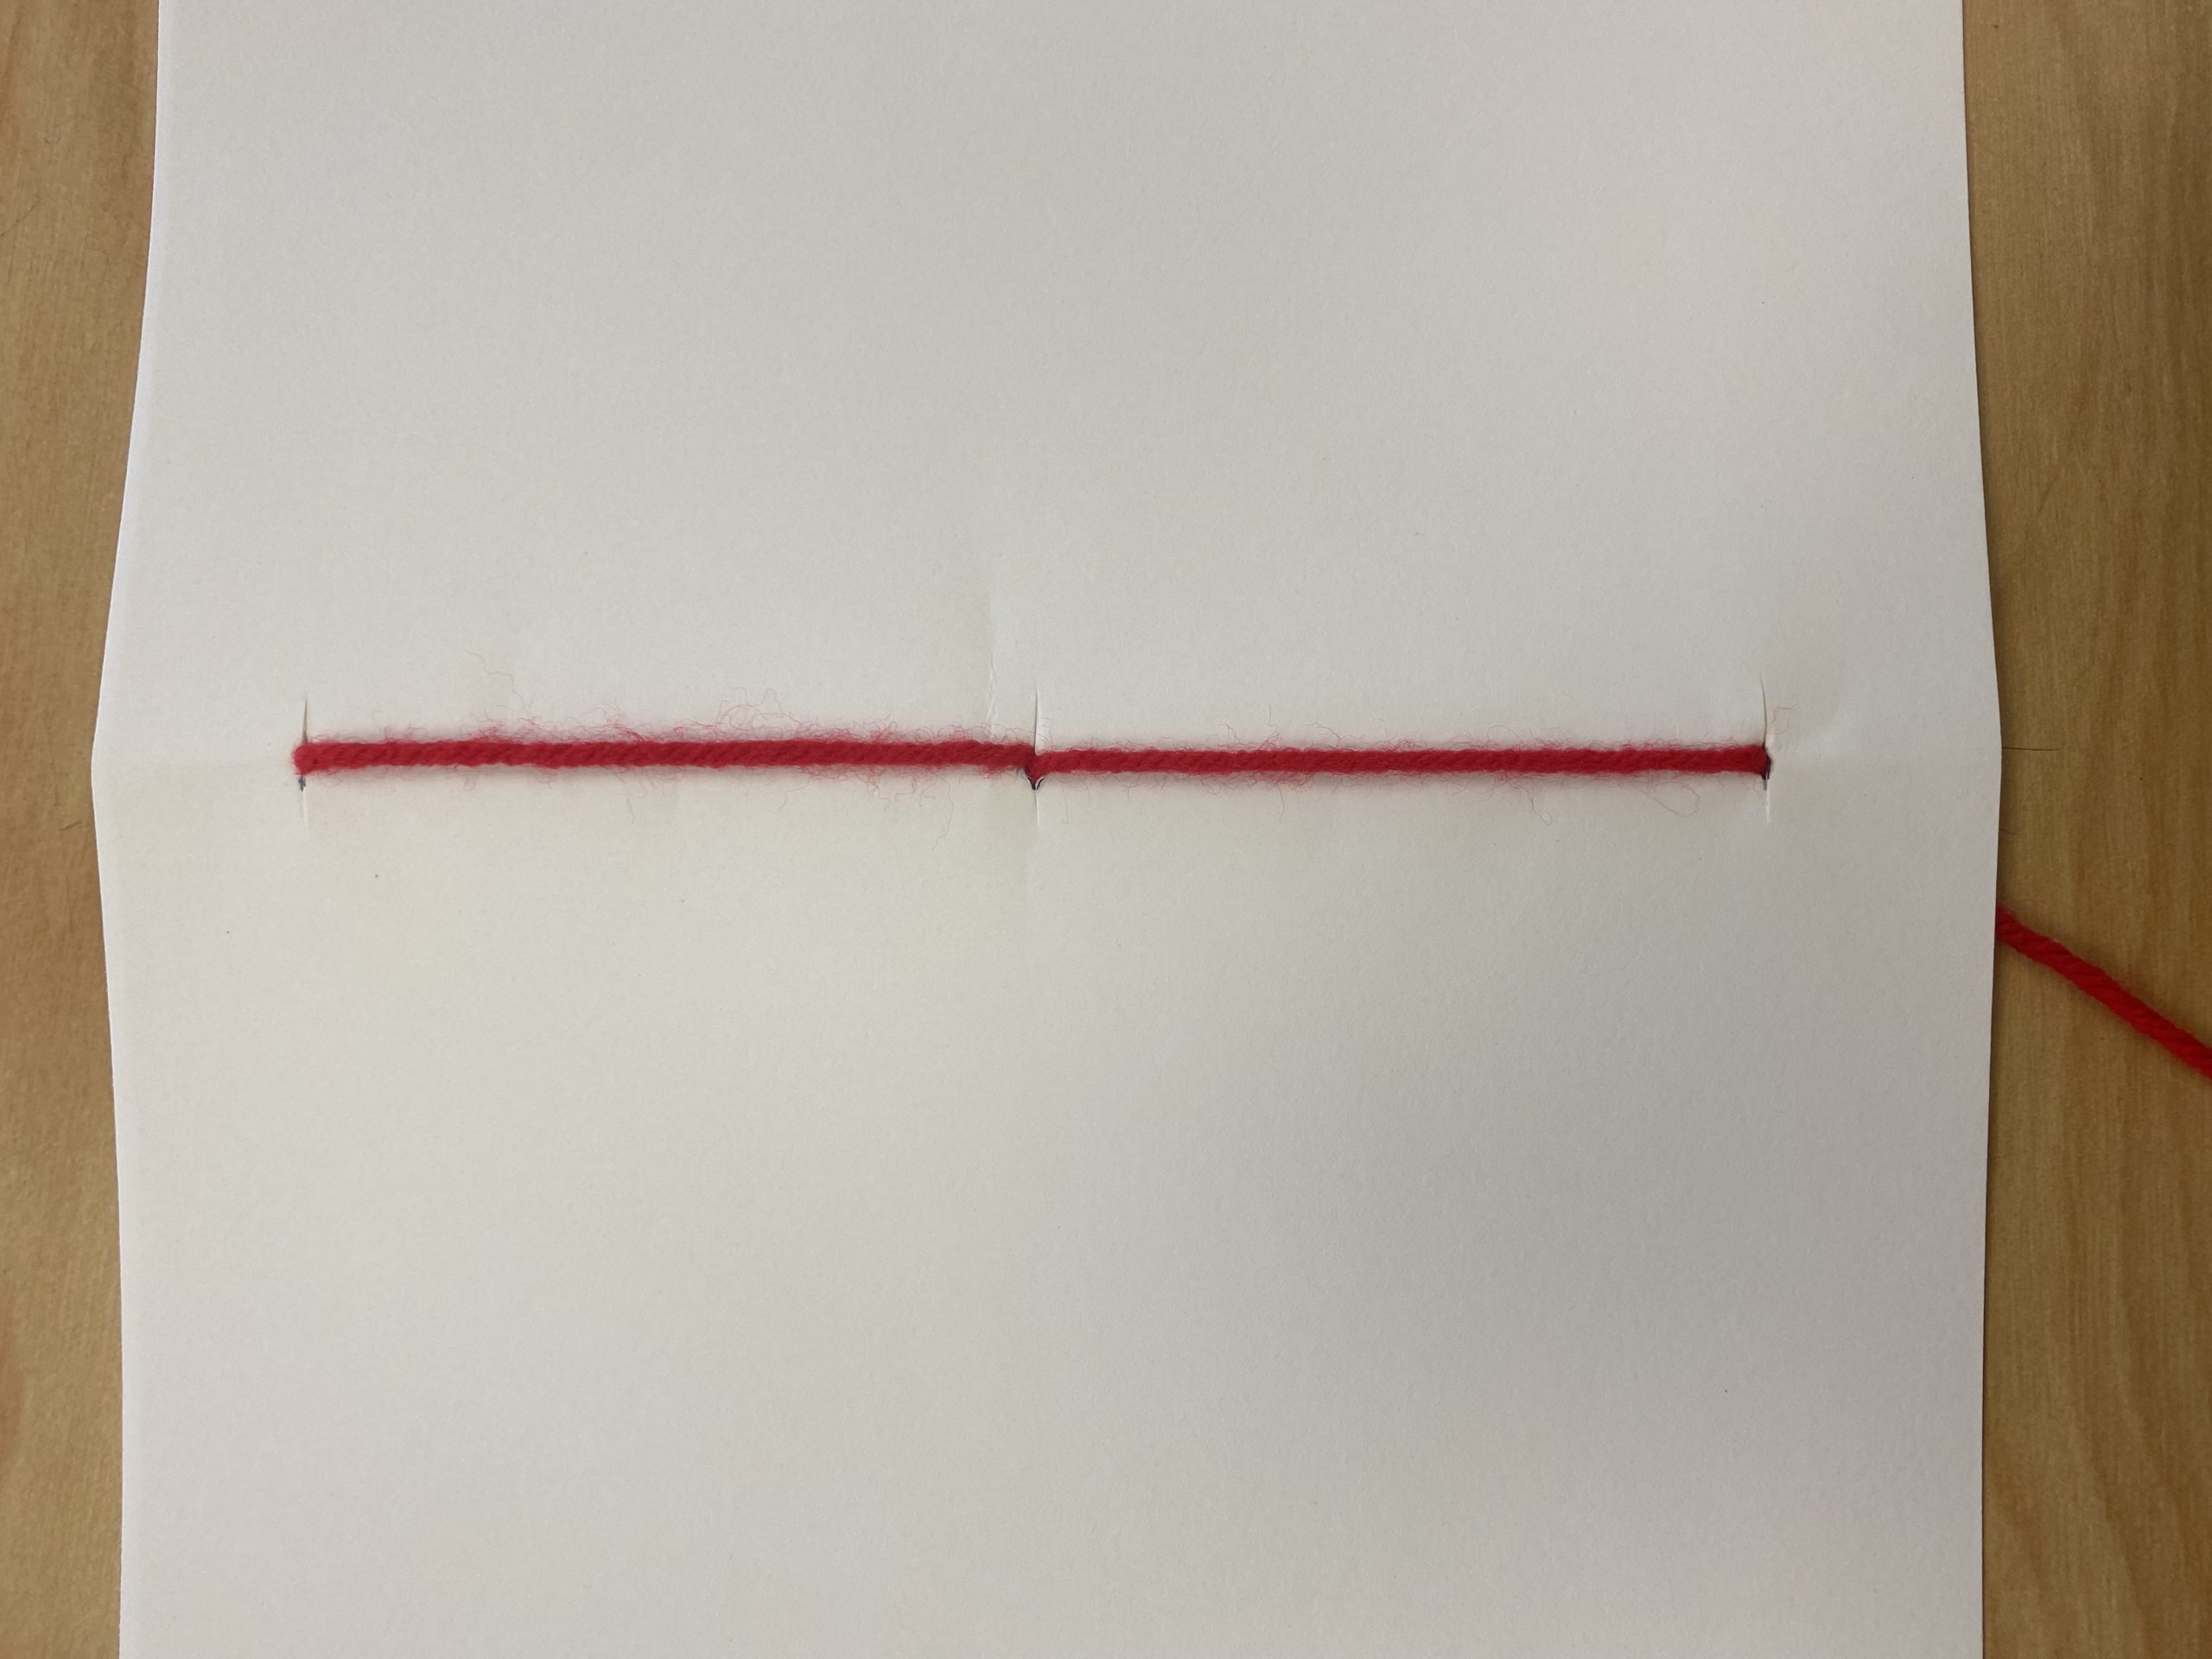
- Turn the book over. Next, push the needle through the bottom hole to the inside of the book.
- Pull the yarn taught.
![]()
![]()
- Flip the book over so the inside is facing you. Push the needle back through the middle hole to the outside of the book.
- Pull the yarn taught.
- Flip the book over so the outside is facing you. Push the needle through the top hole so it goes inside the book.
- Pull the yarn taught.
- Insert the needle under the yarn between the bottom and middle holes.
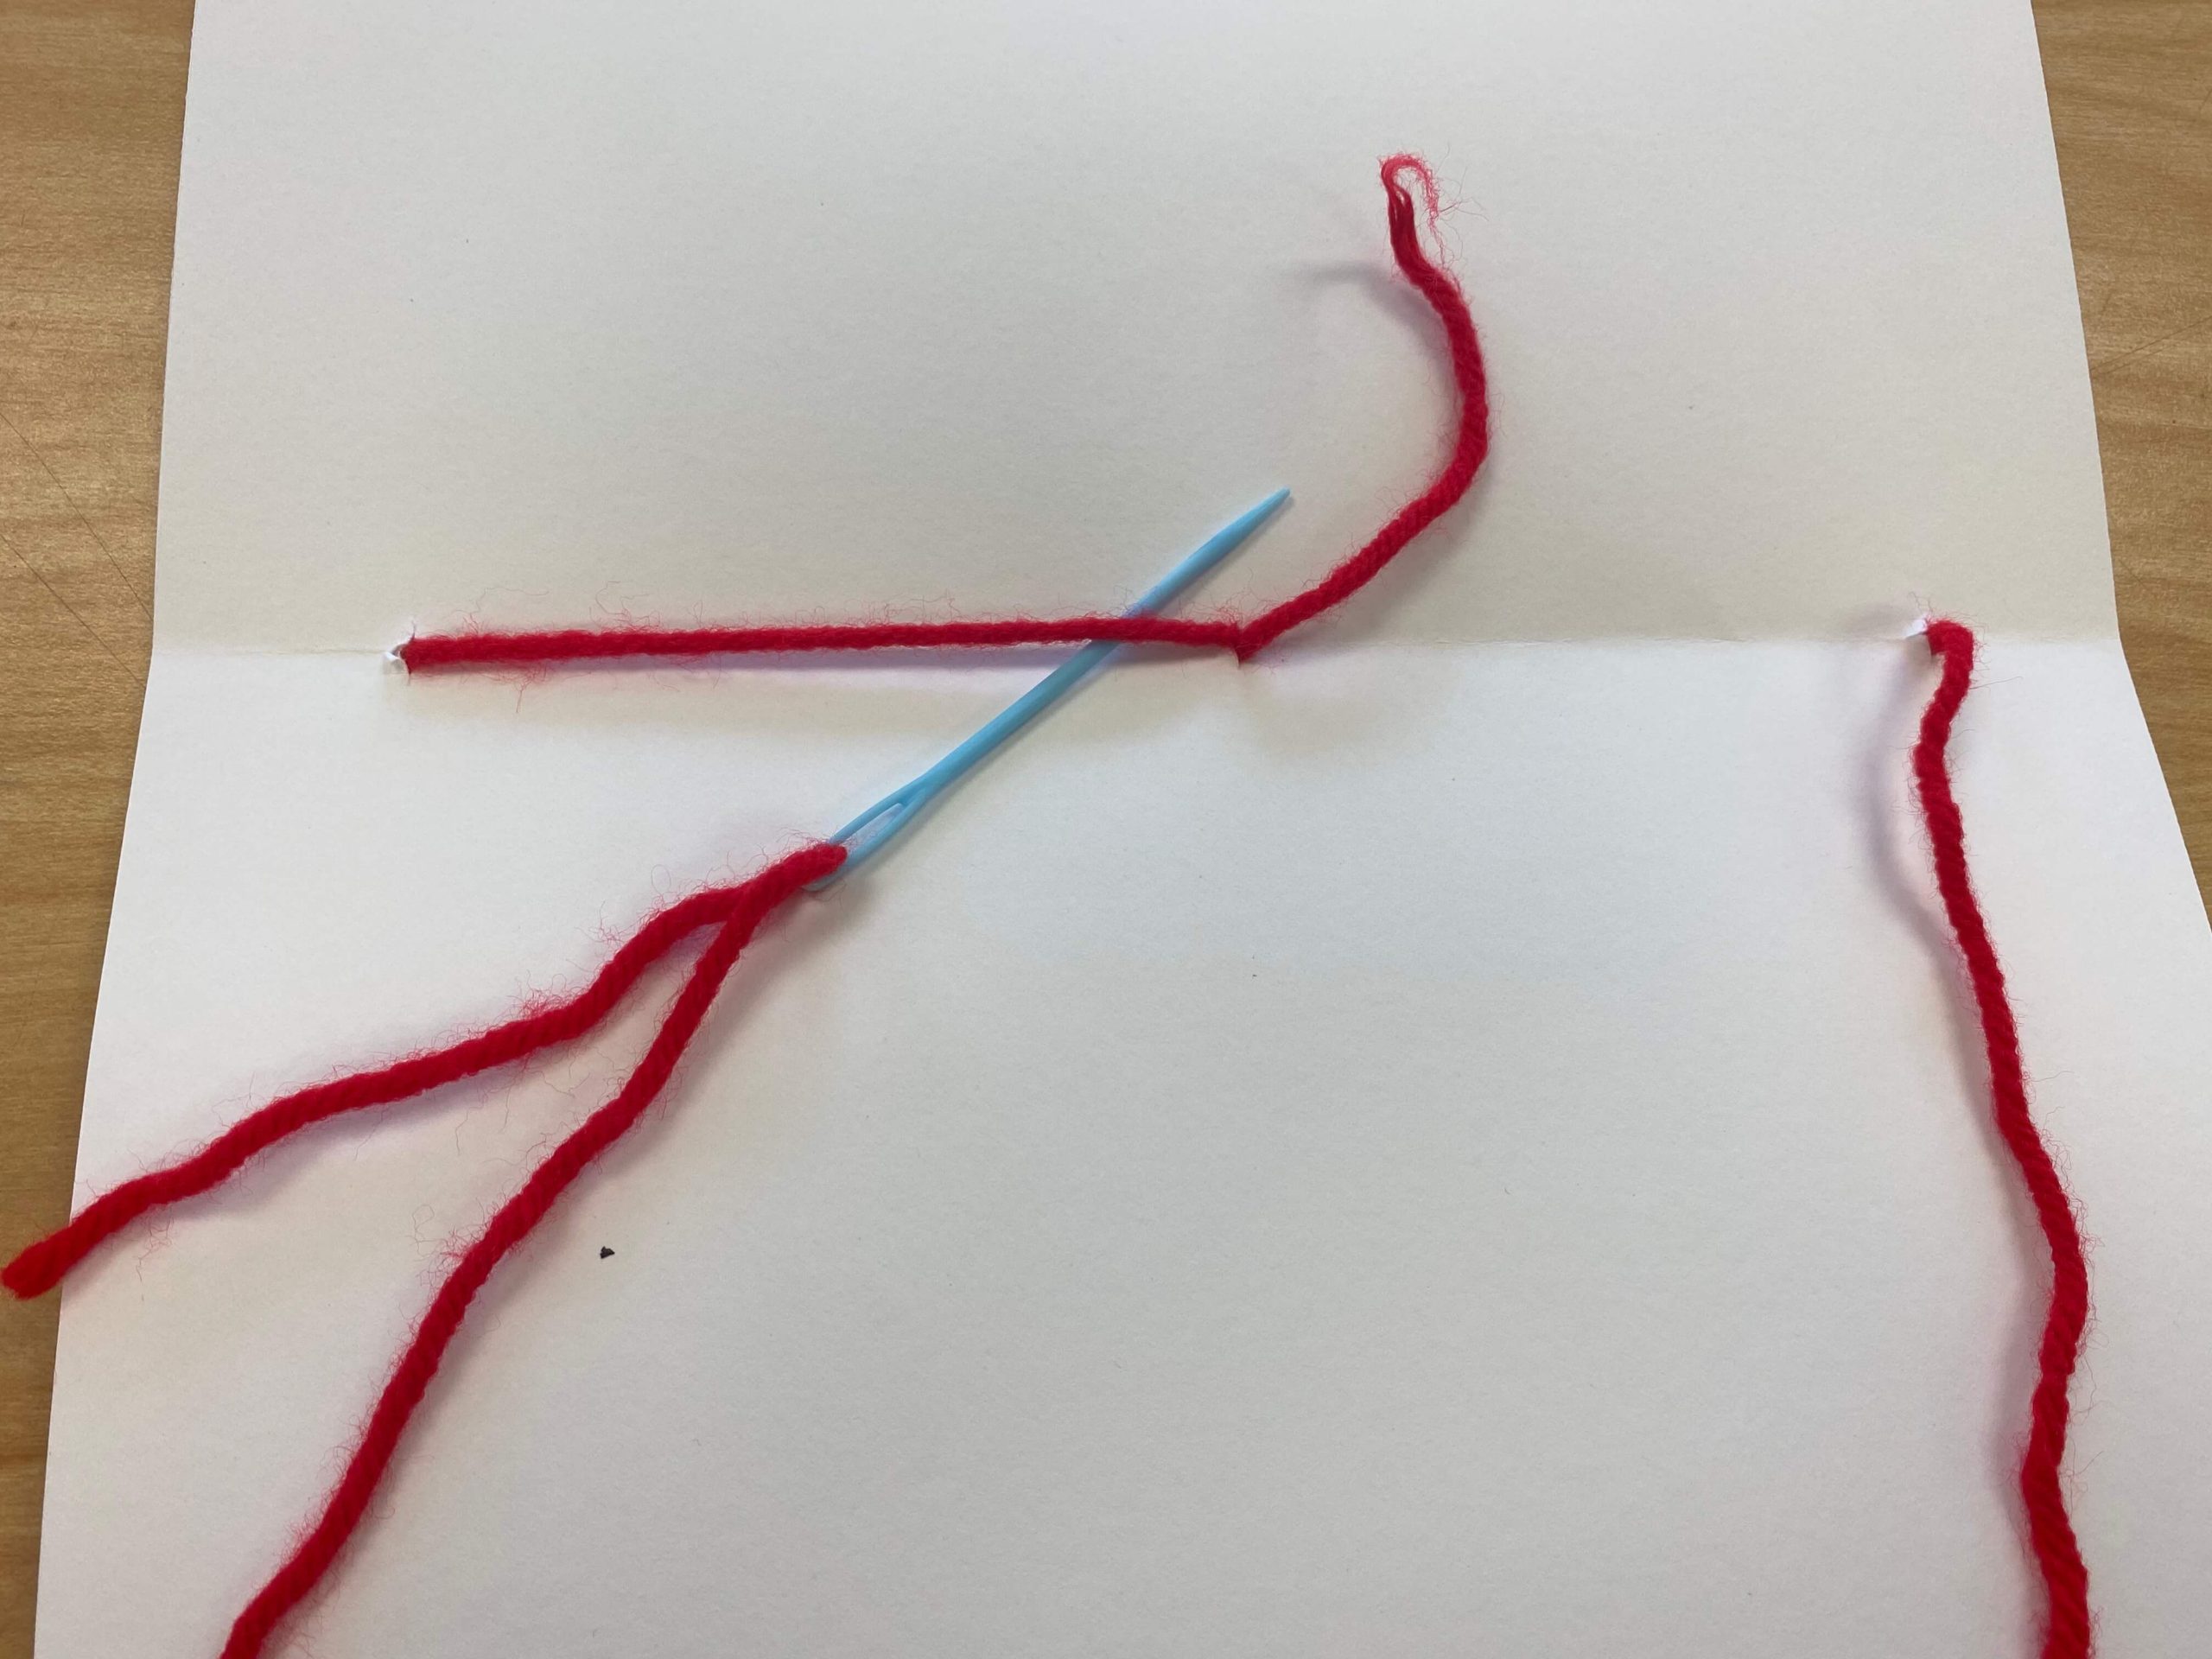
- Pull the yarn taught.
- Tie off the yarn with a double knot.
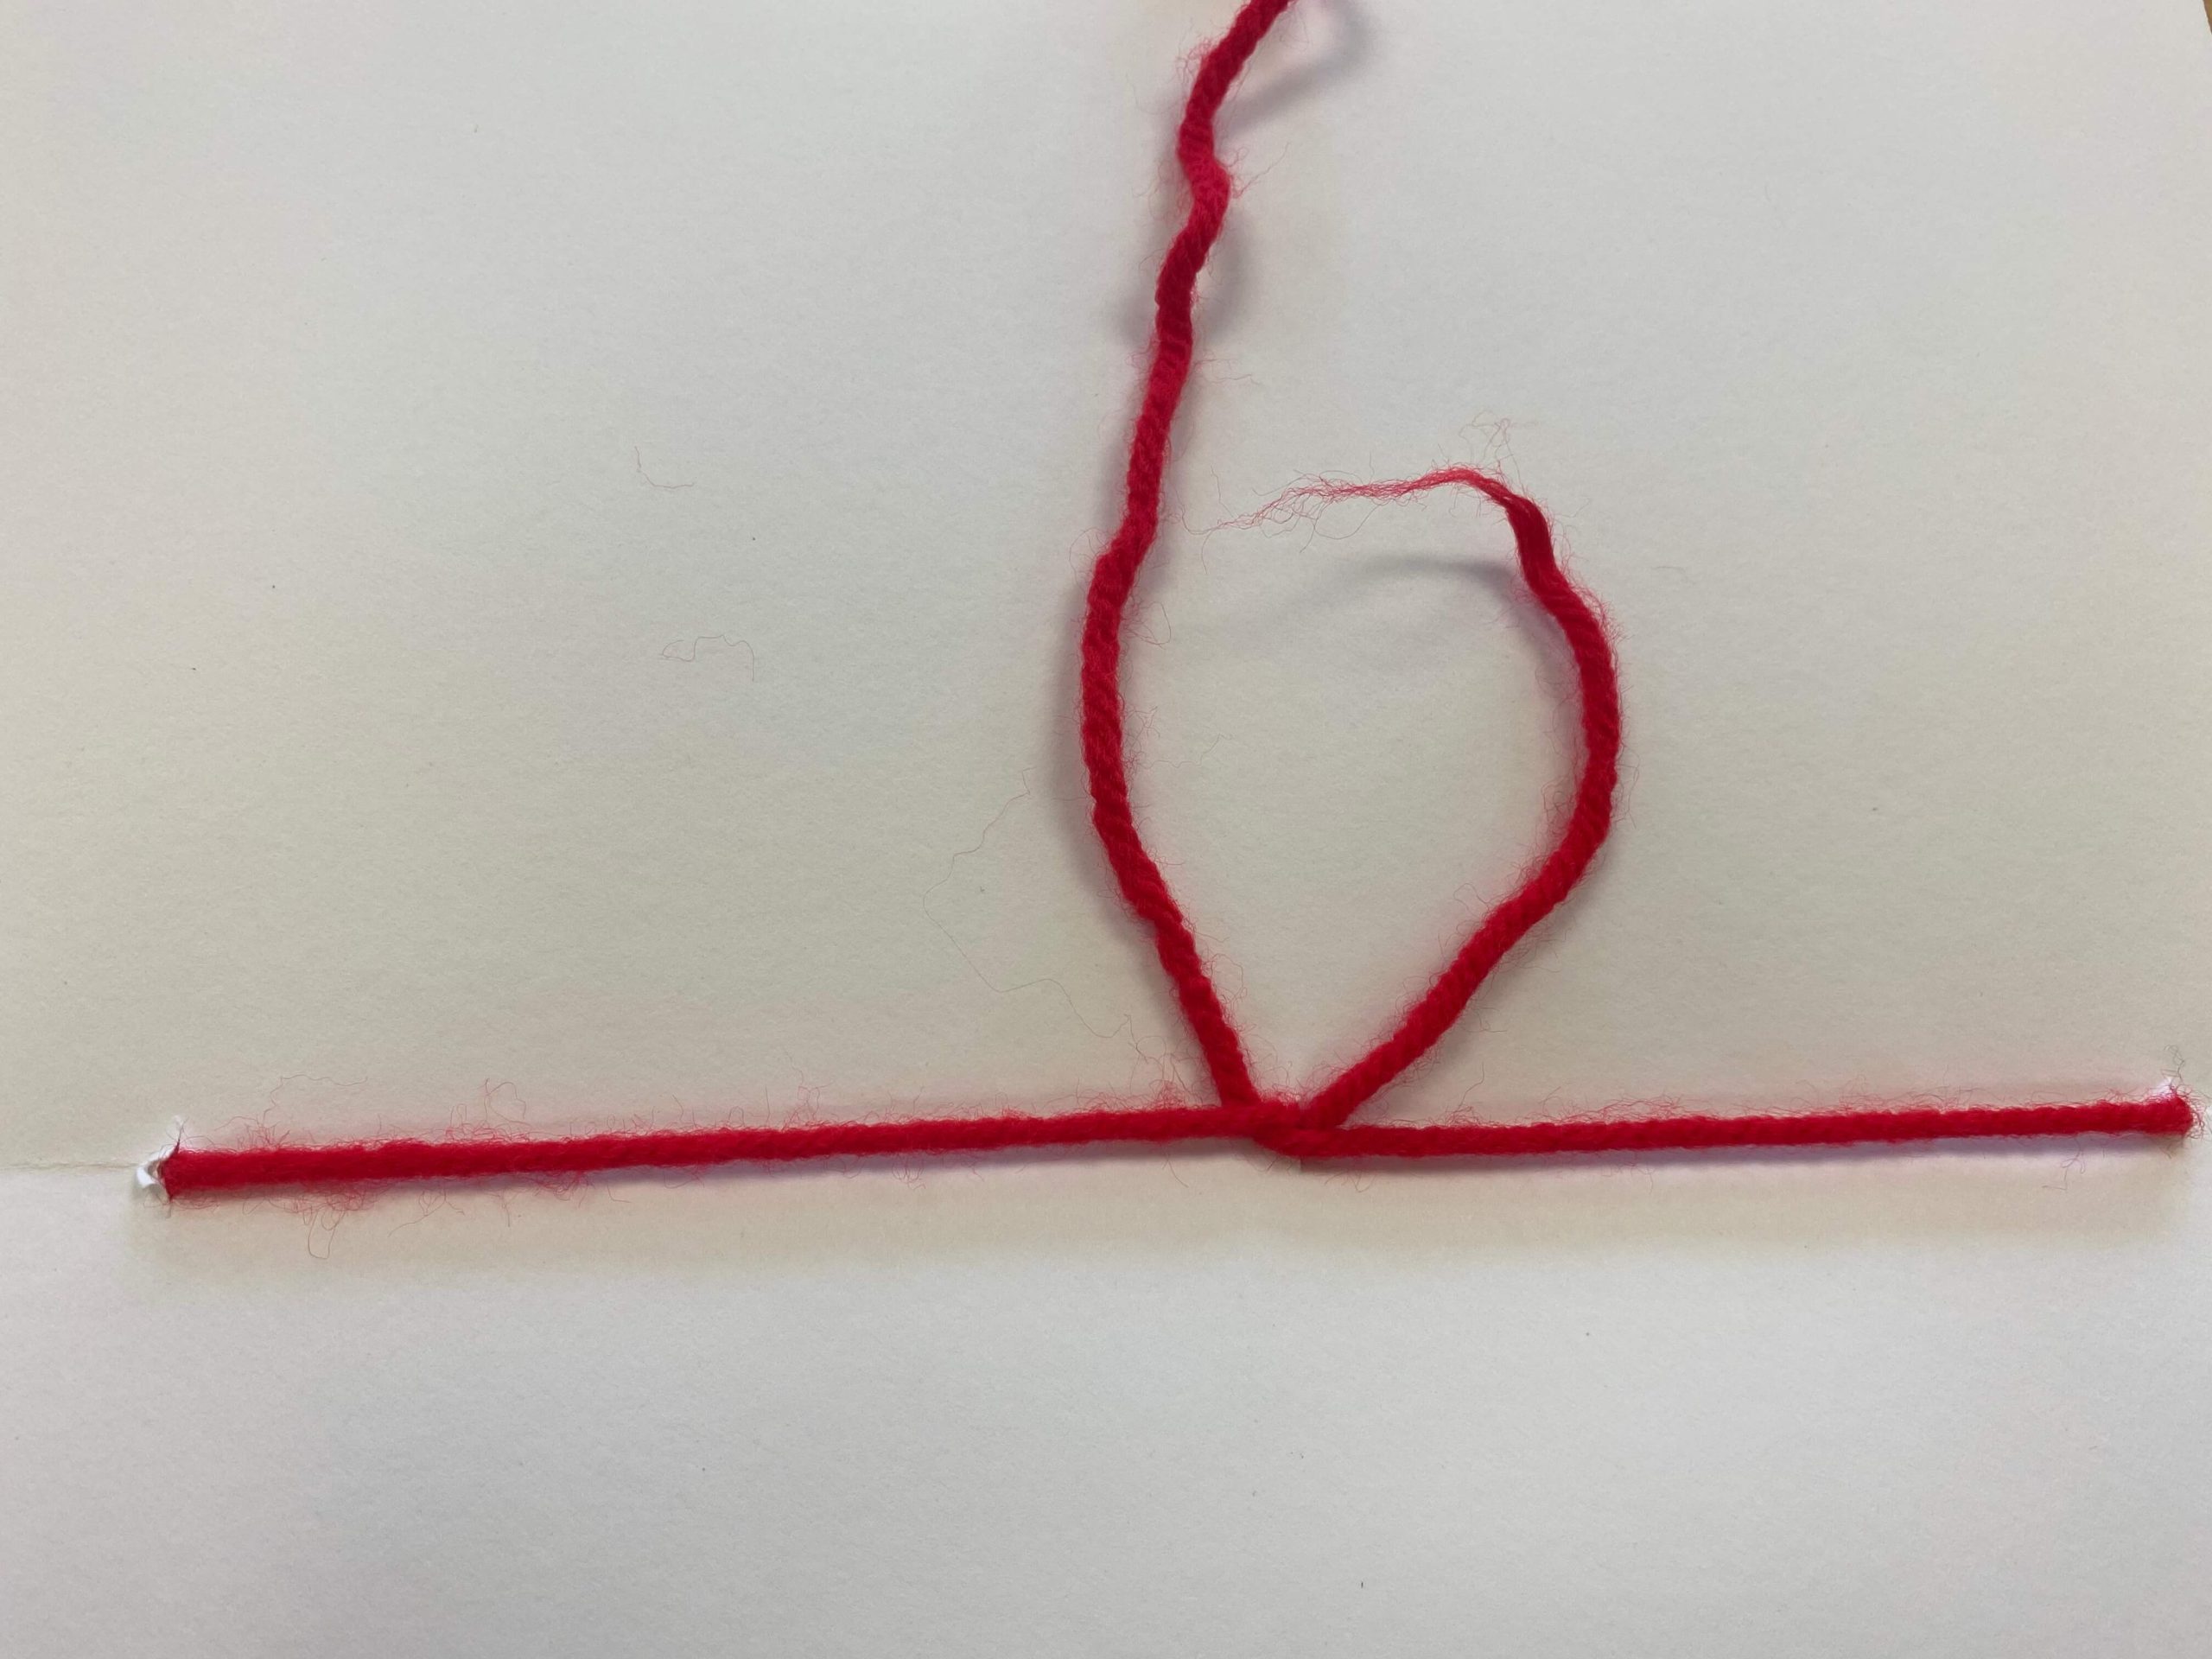
- Cut off the excess yarn.
- Voila! You have a sketchbook!
Optional Extension for the Sewn Pamphlet Sketchbook:
Overall, I’ve gotten away from utilizing worksheets in my classroom and I opt mostly for online resources. However, every now and then there are miscellaneous papers I like my students to have readily available. The best solution for this? Pockets!
Optional Extension for the Sewn Pamphlet Sketchbook:
Overall, I’ve gotten away from utilizing worksheets in my classroom and I opt mostly for online resources. However, now and then I do use worksheets I need my students to keep track of. The best solution for this? Pockets!
To create pockets with the Sewn Pamphlet Sketchbook, you will need:
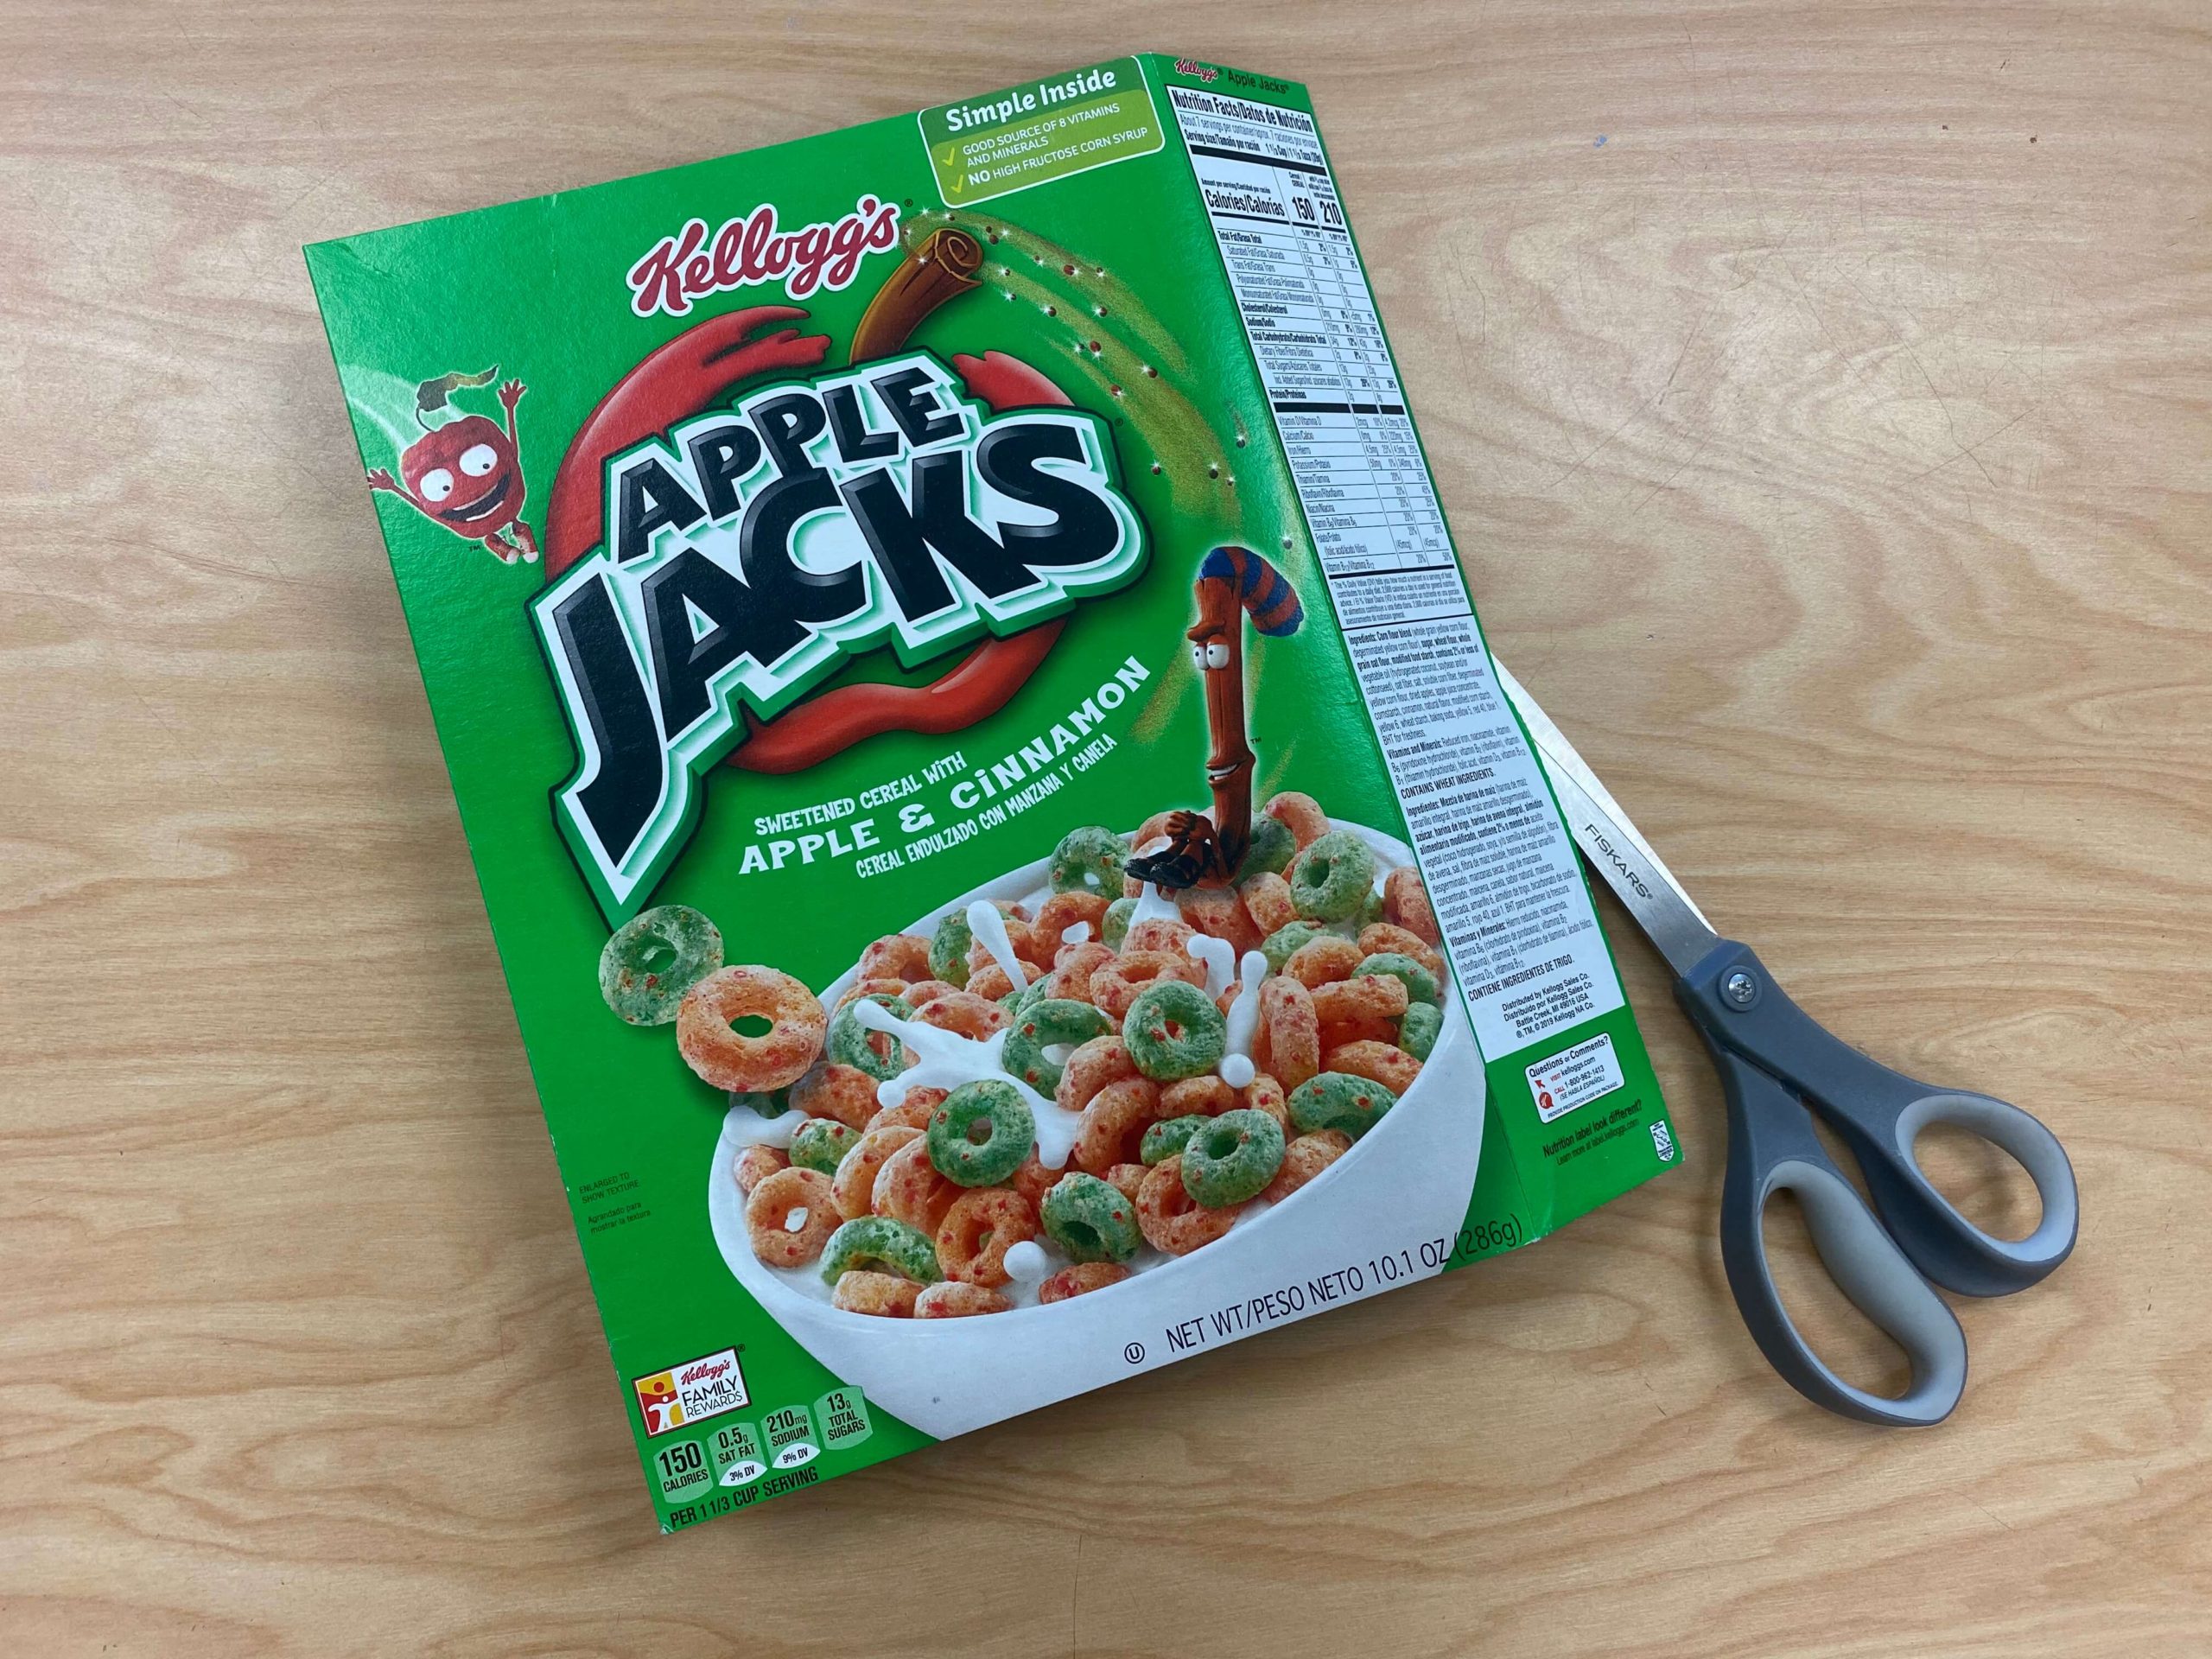
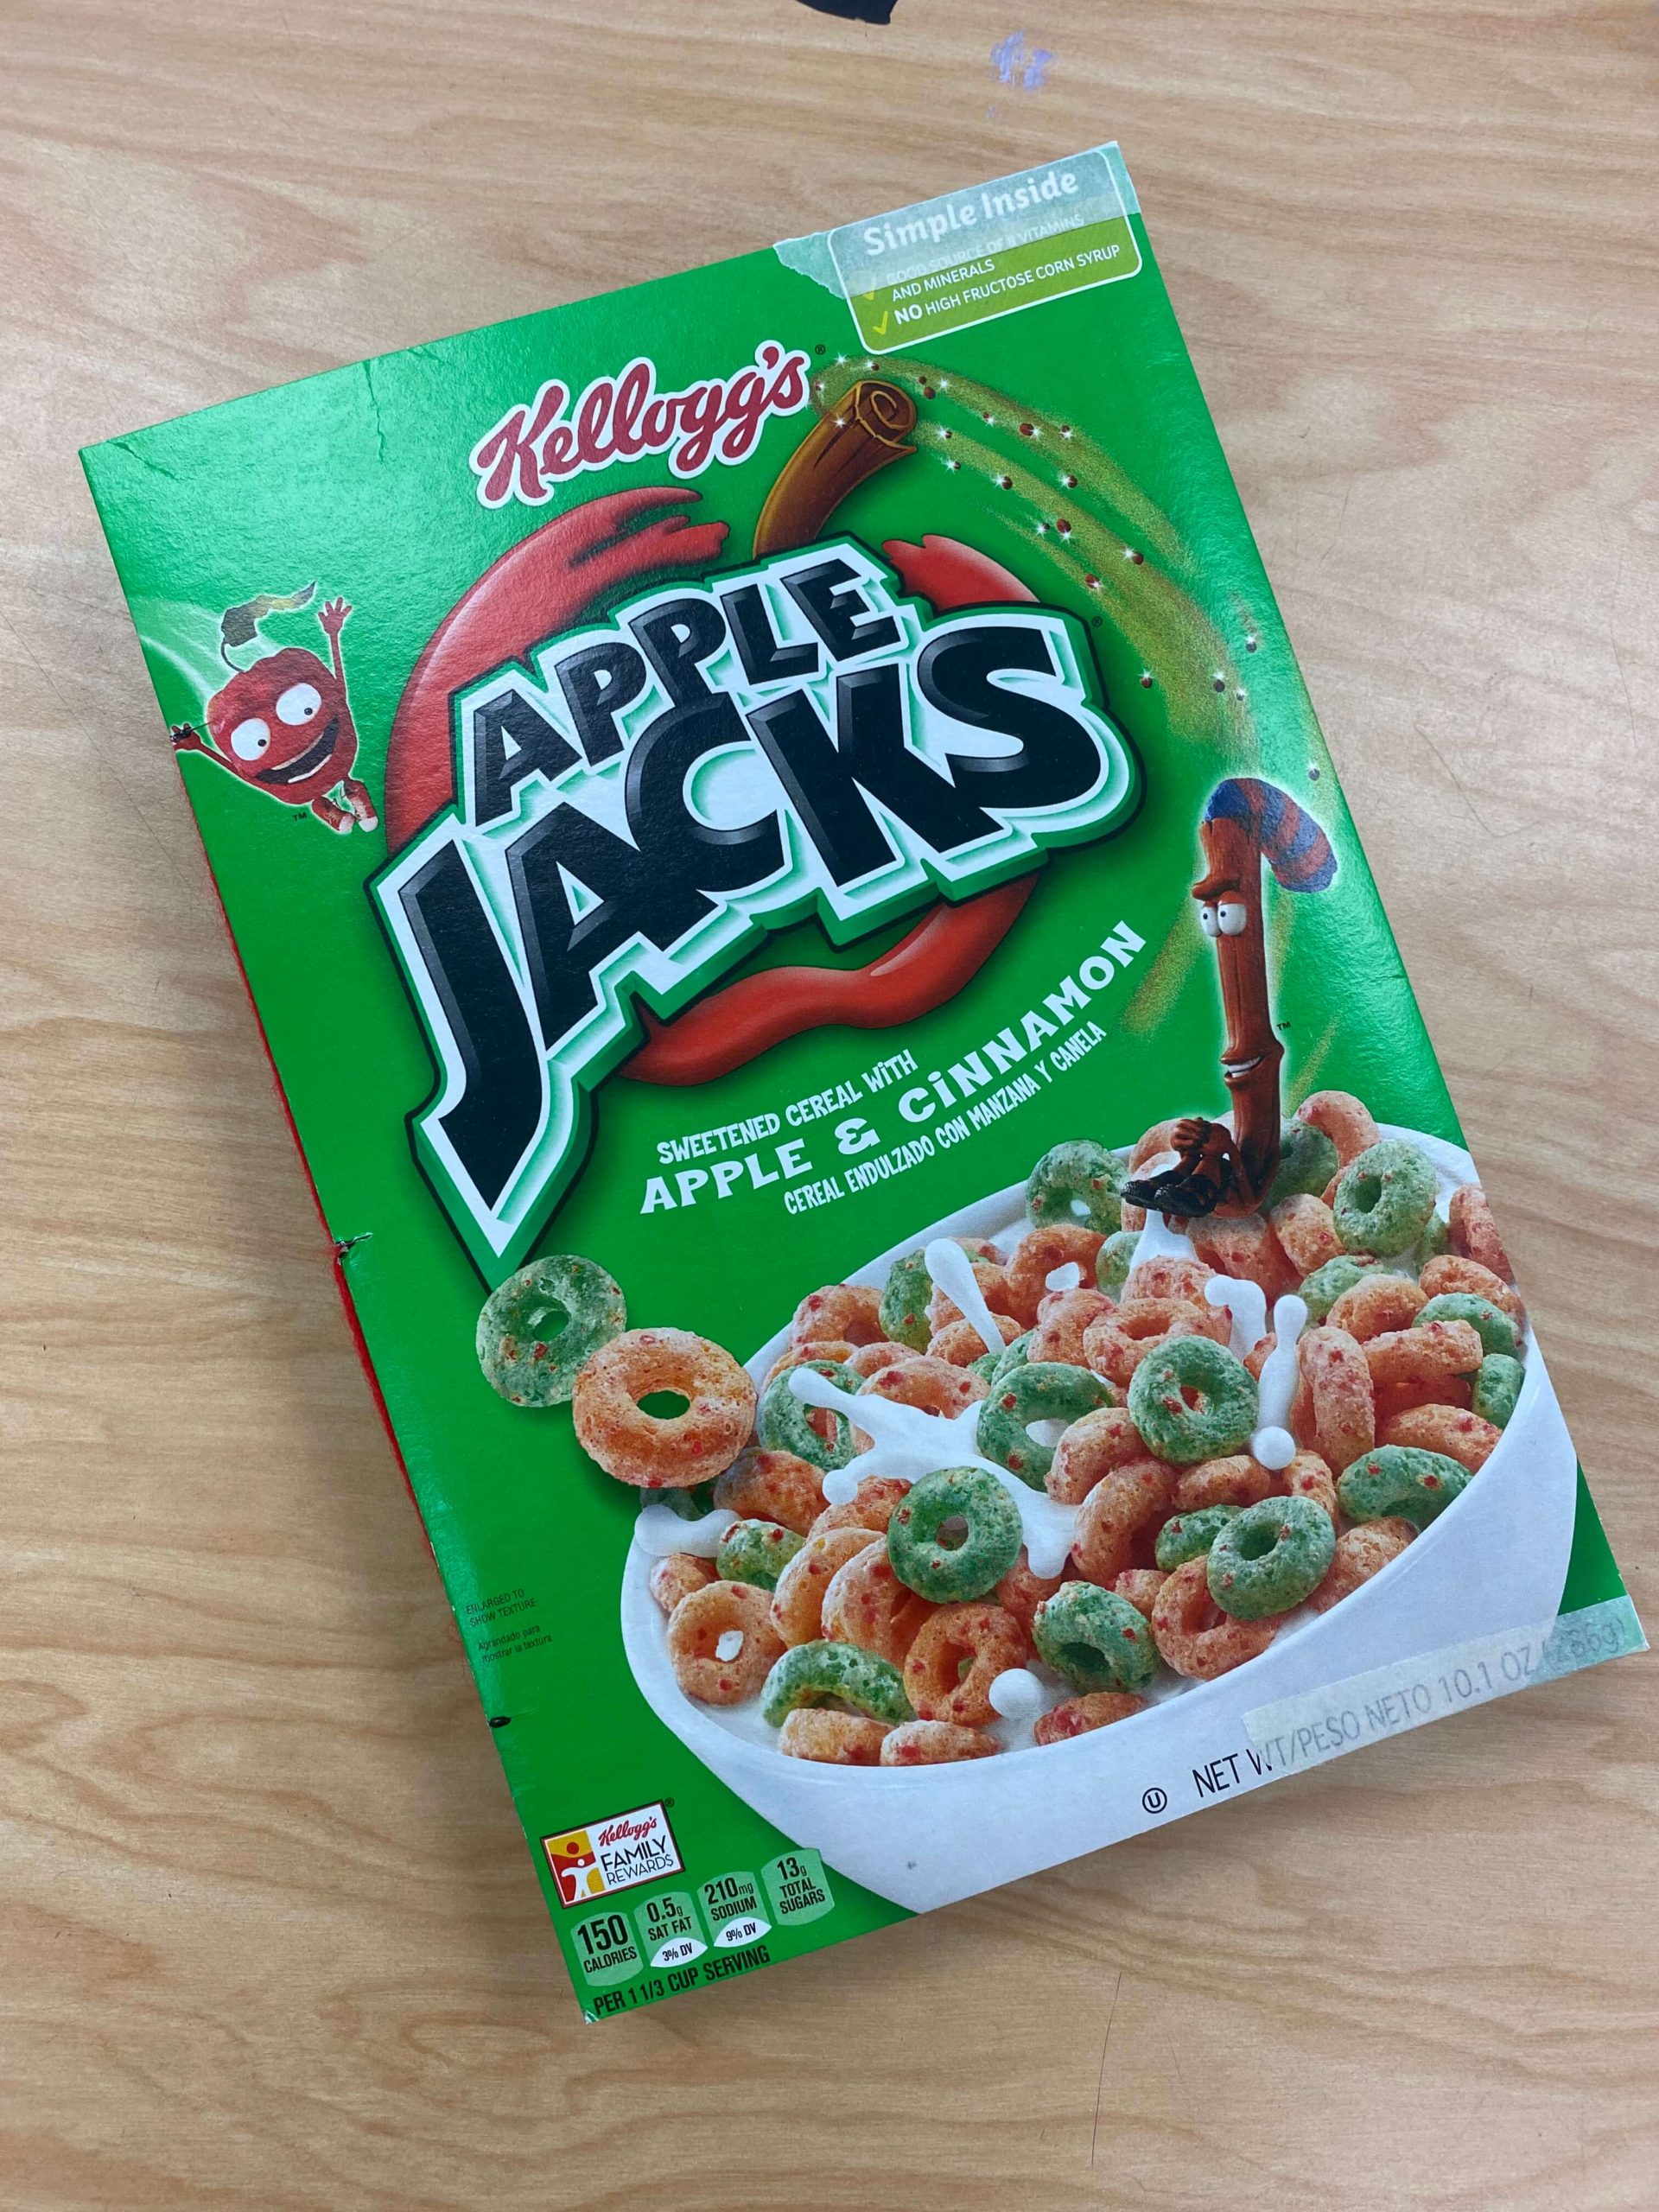
- A cereal box (To gather enough boxes for my students, I simply asked my colleagues to donate any used cereal boxes. Be sure to request that they are collapsed! It will save you the hassle and make them easier to store until you need them.)
- Tape/Glue (I prefer masking tape for this. I find it holds up better than glue and eliminates the need for drying time!)
- Scissors
Steps:
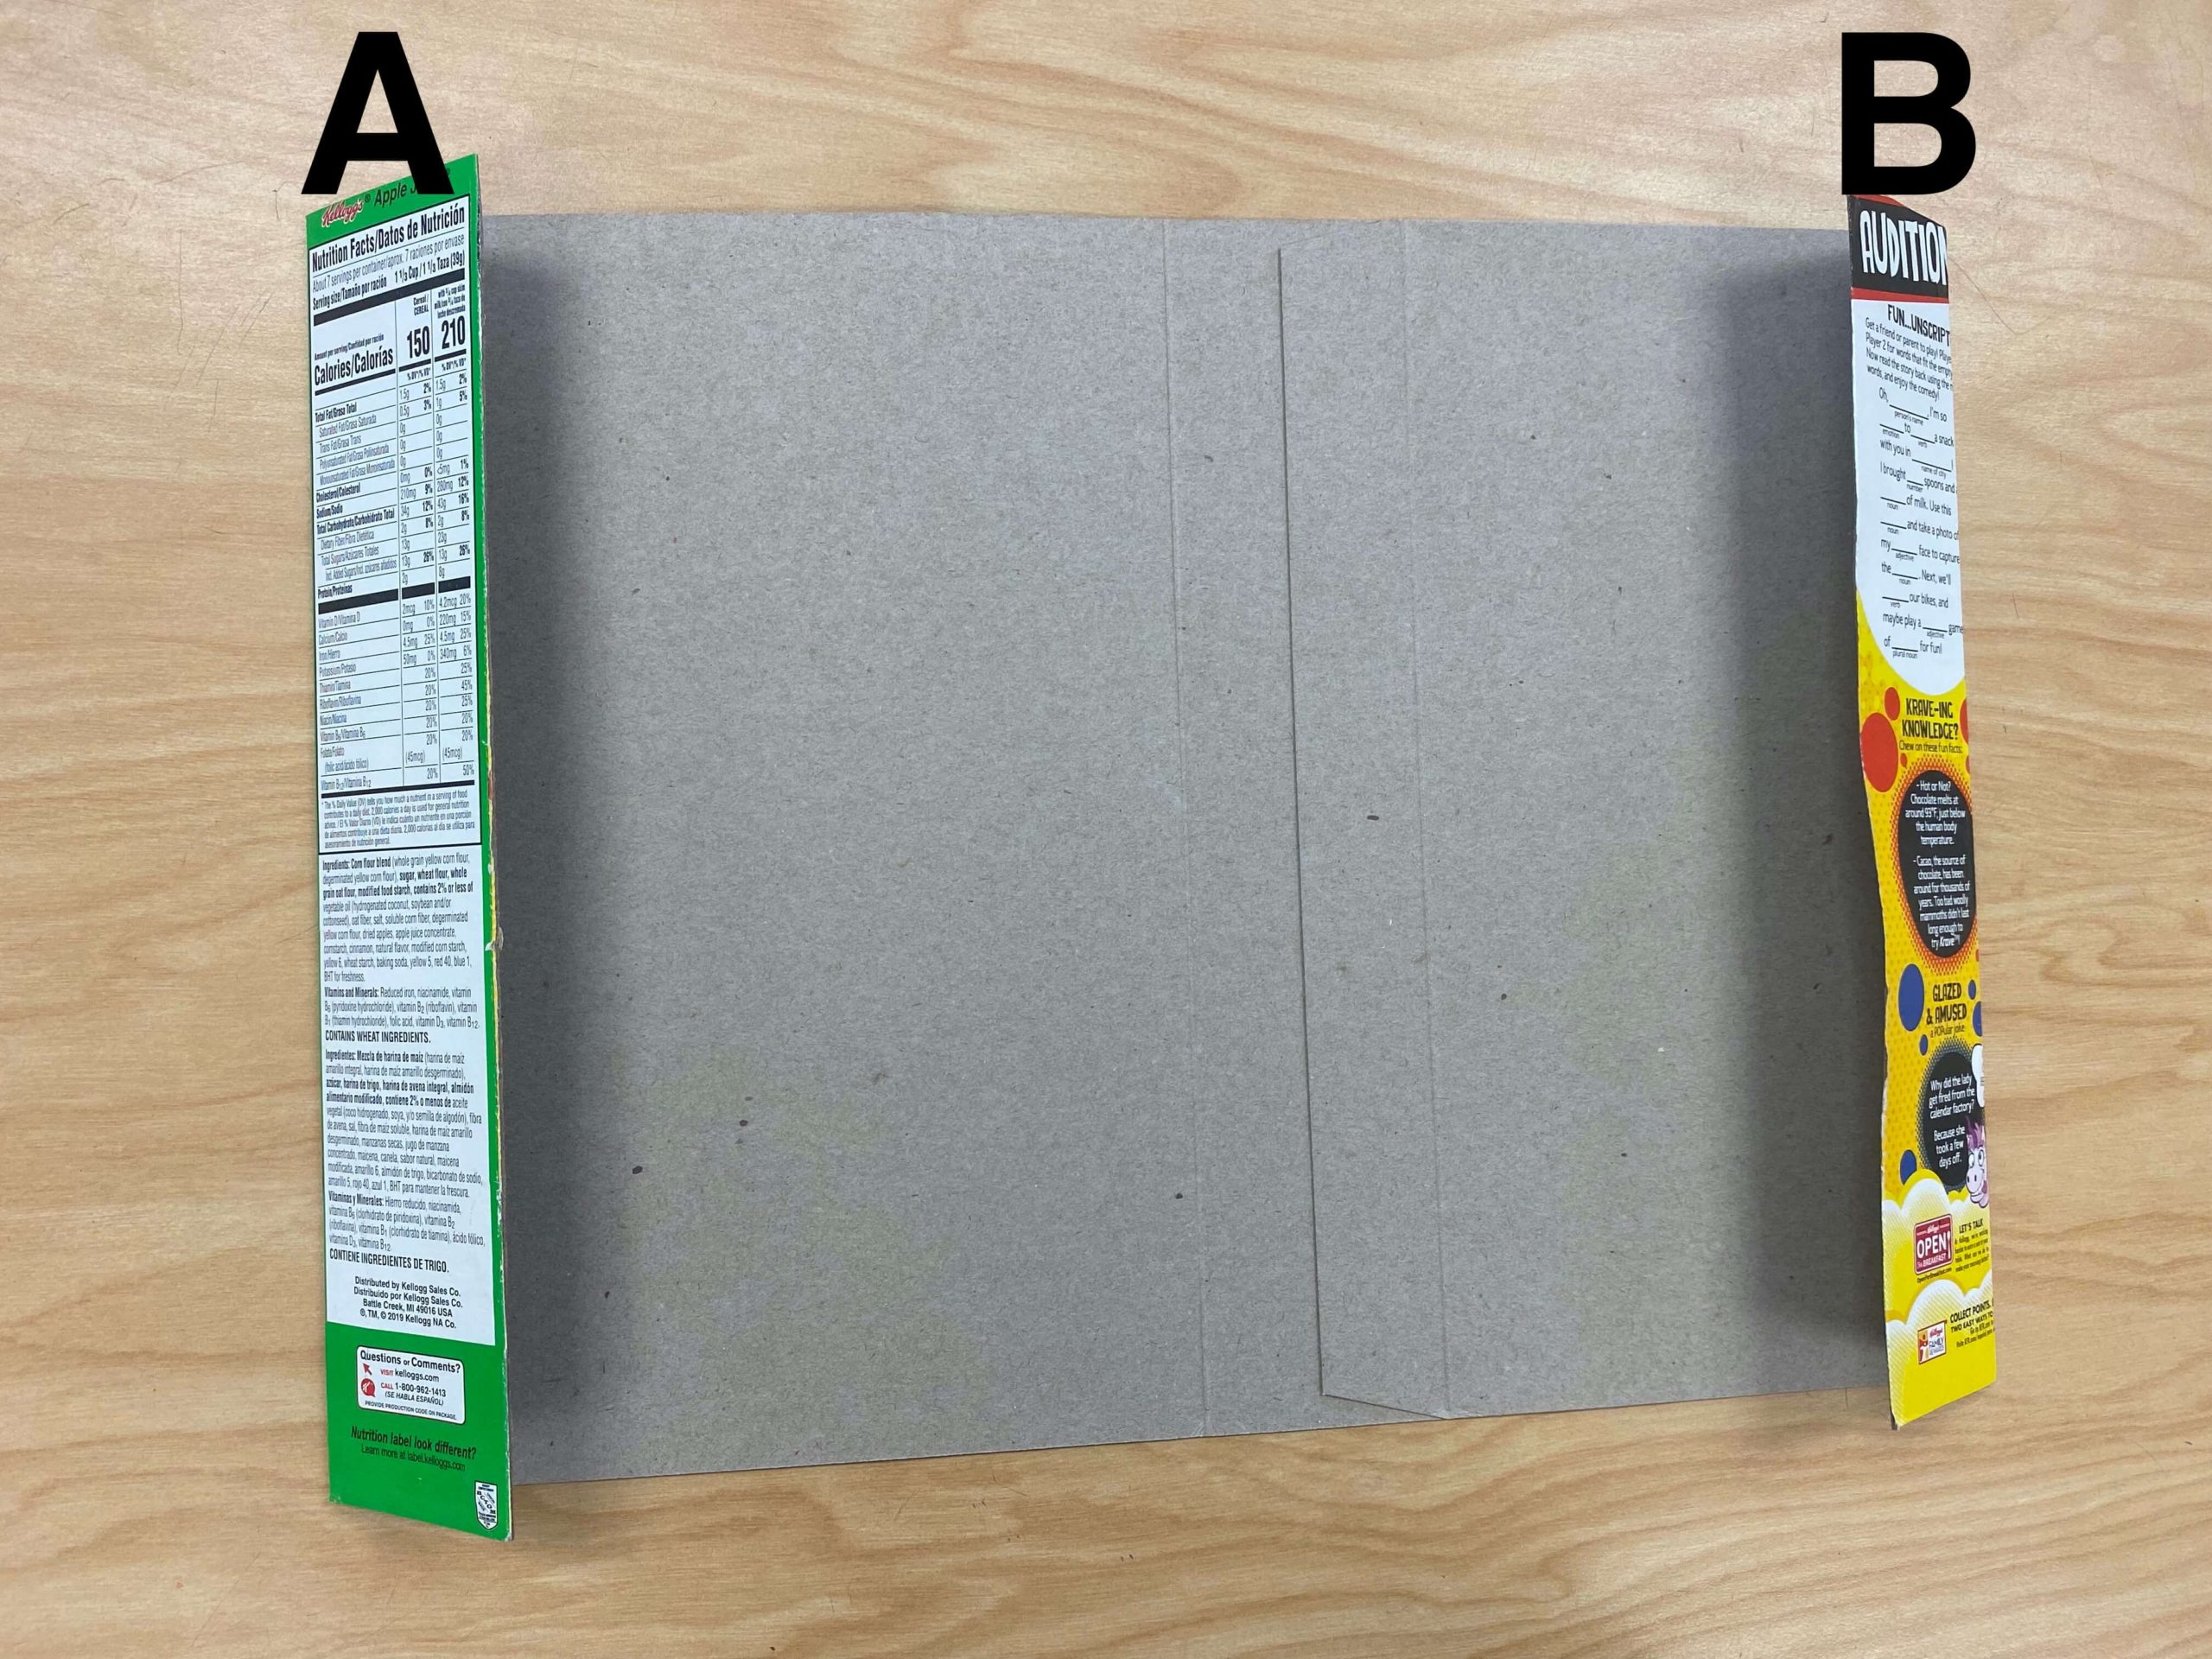
- Cut off all the tabs on the top and bottom of the box.
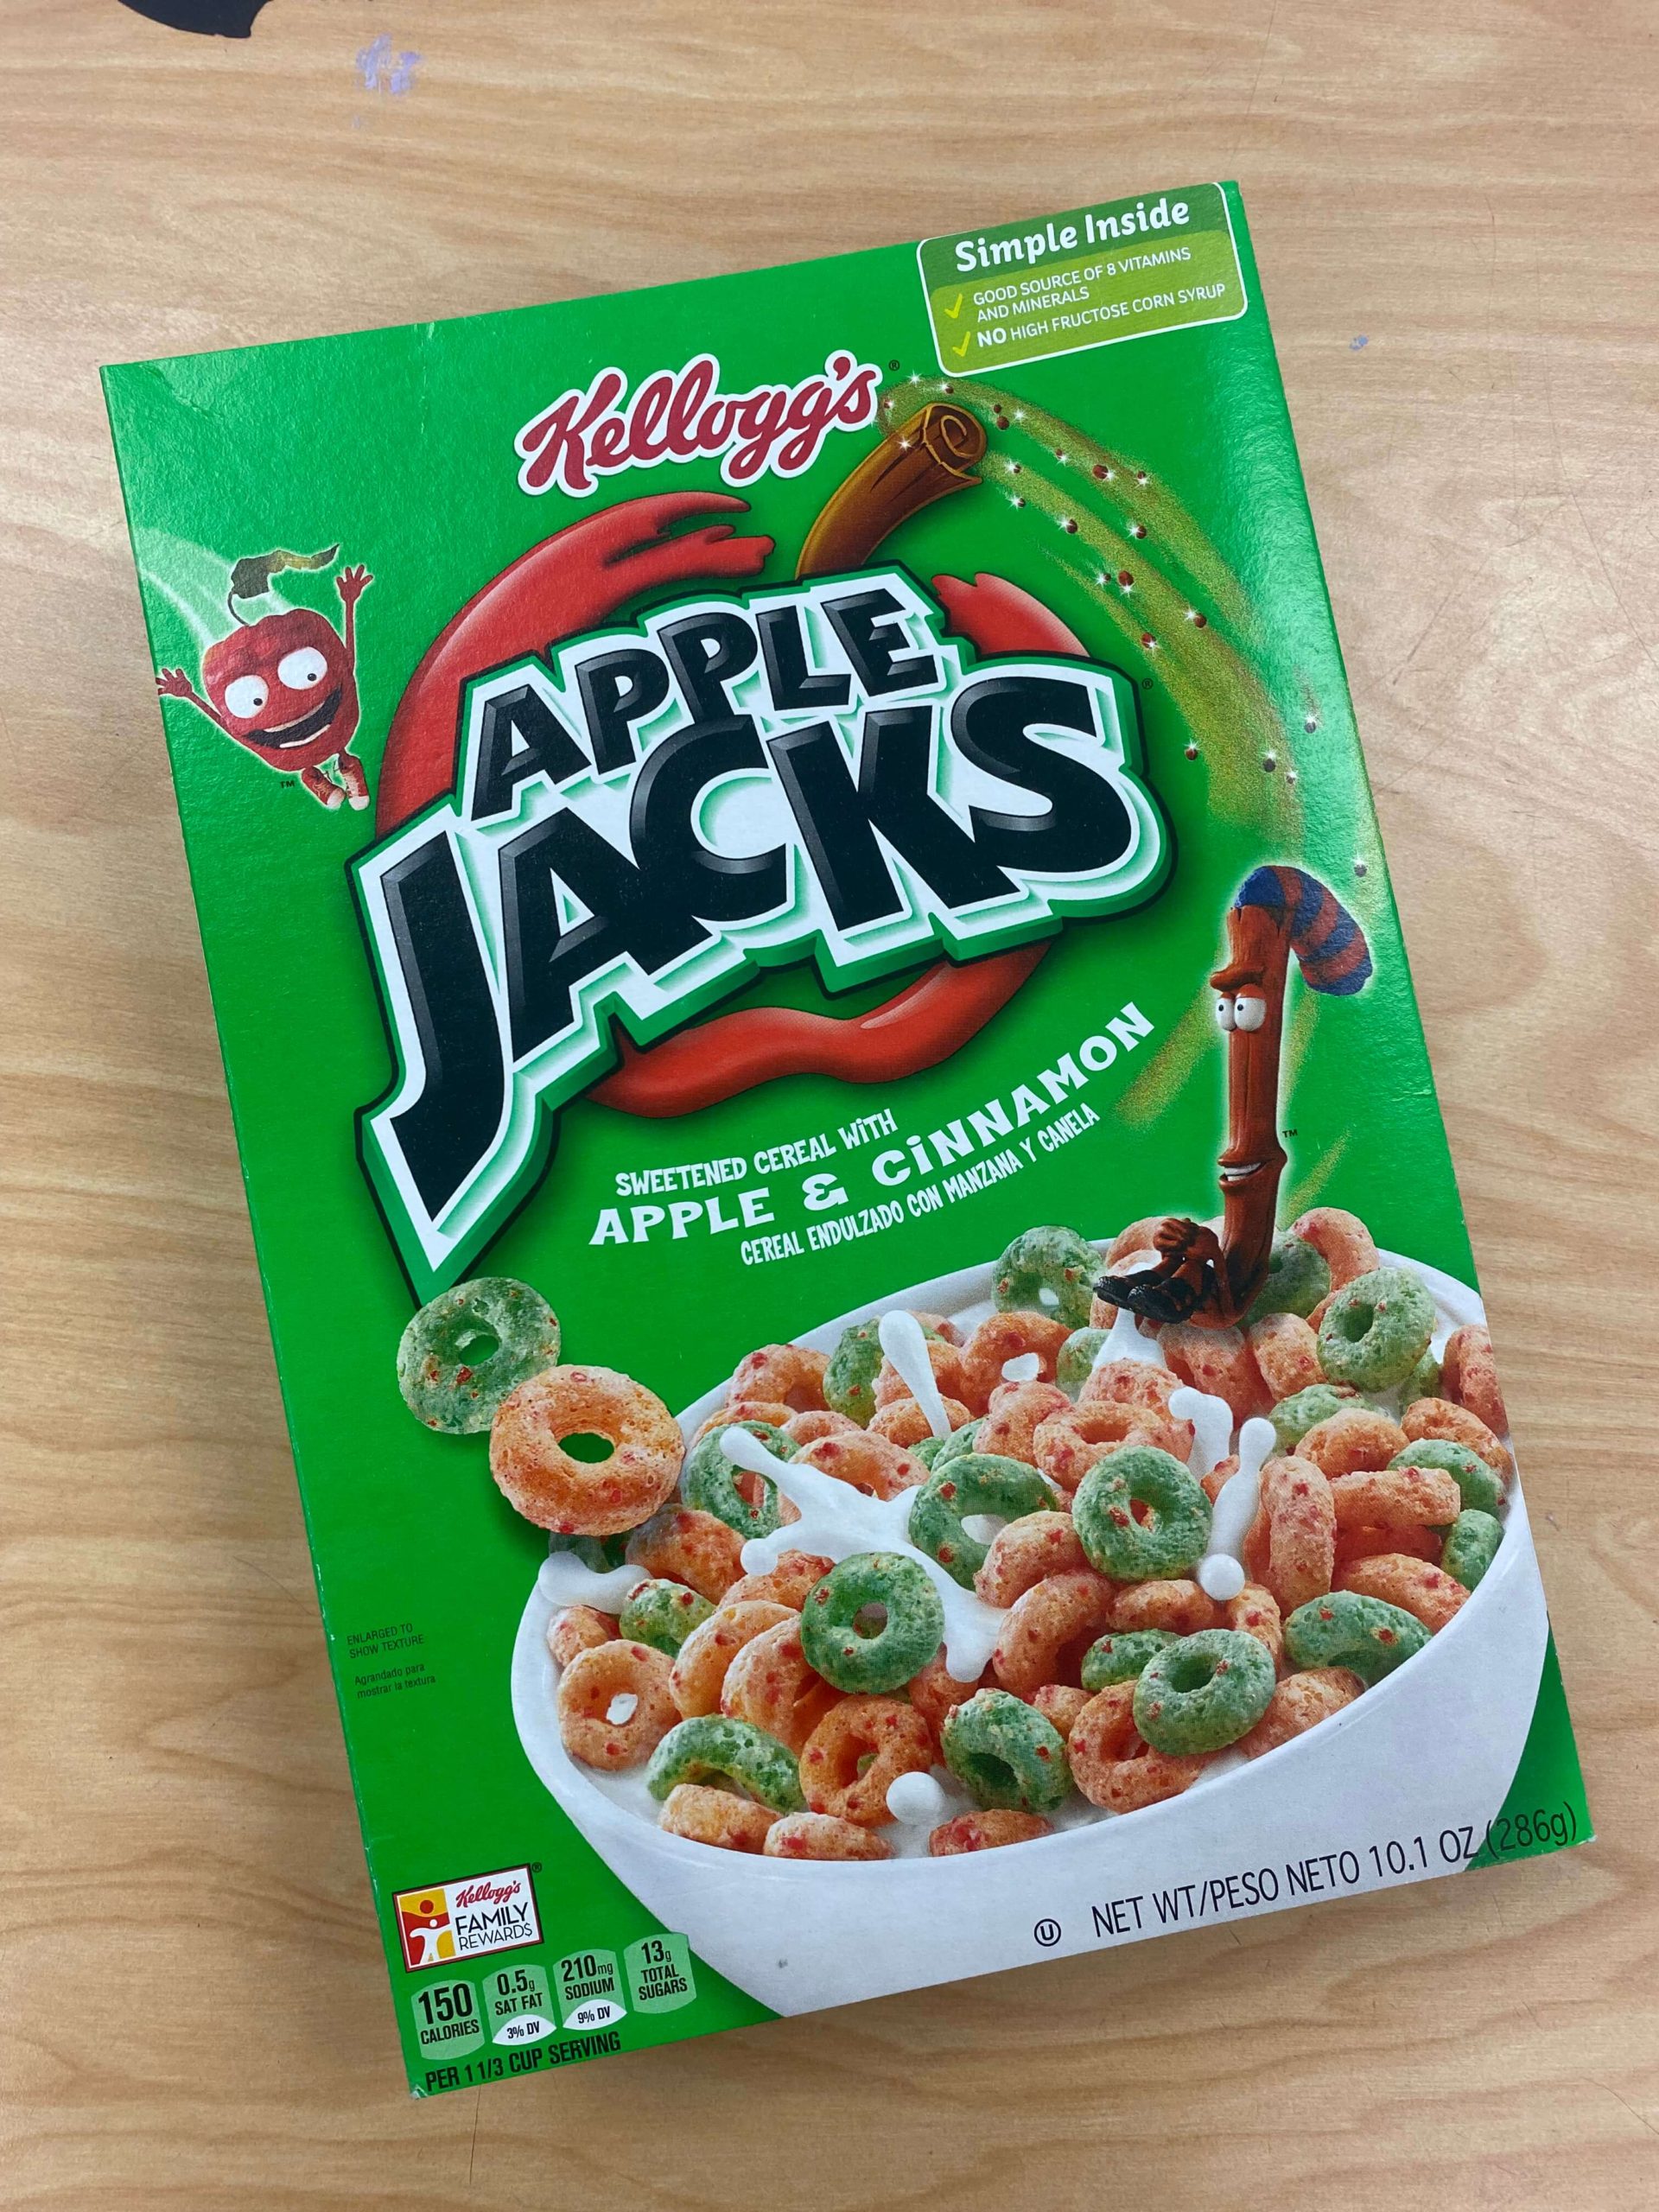
- Collapse the box.
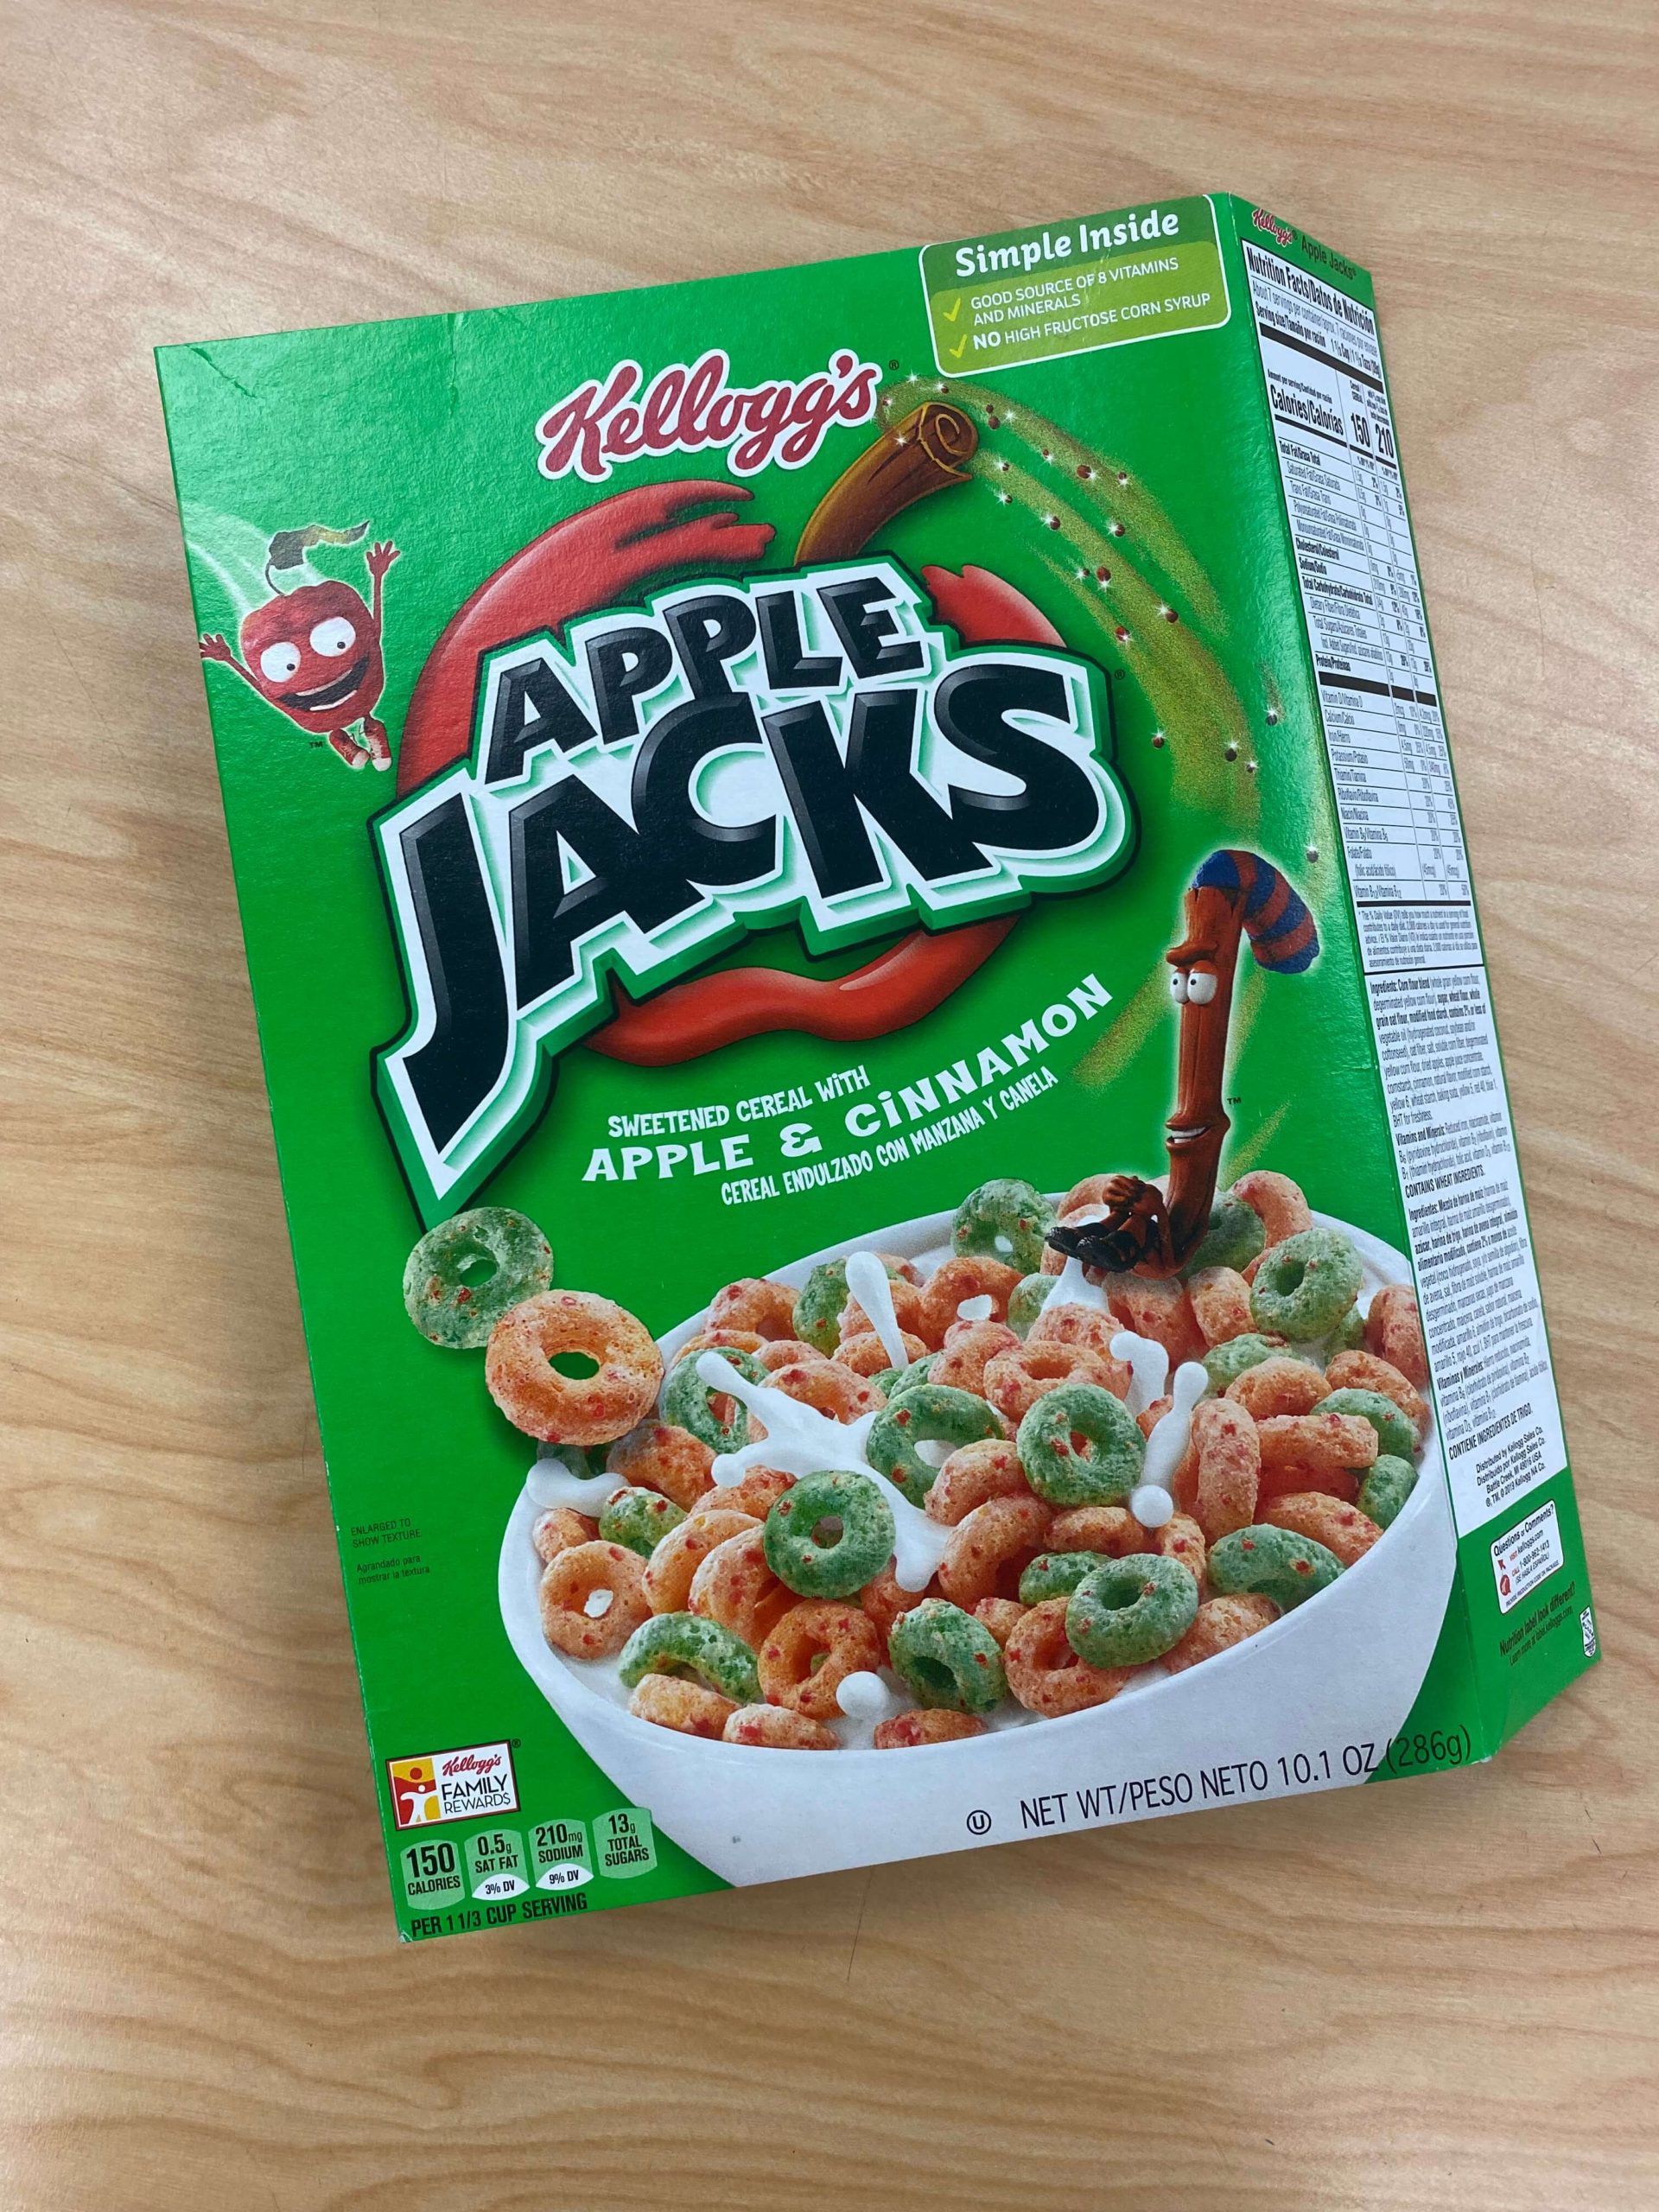
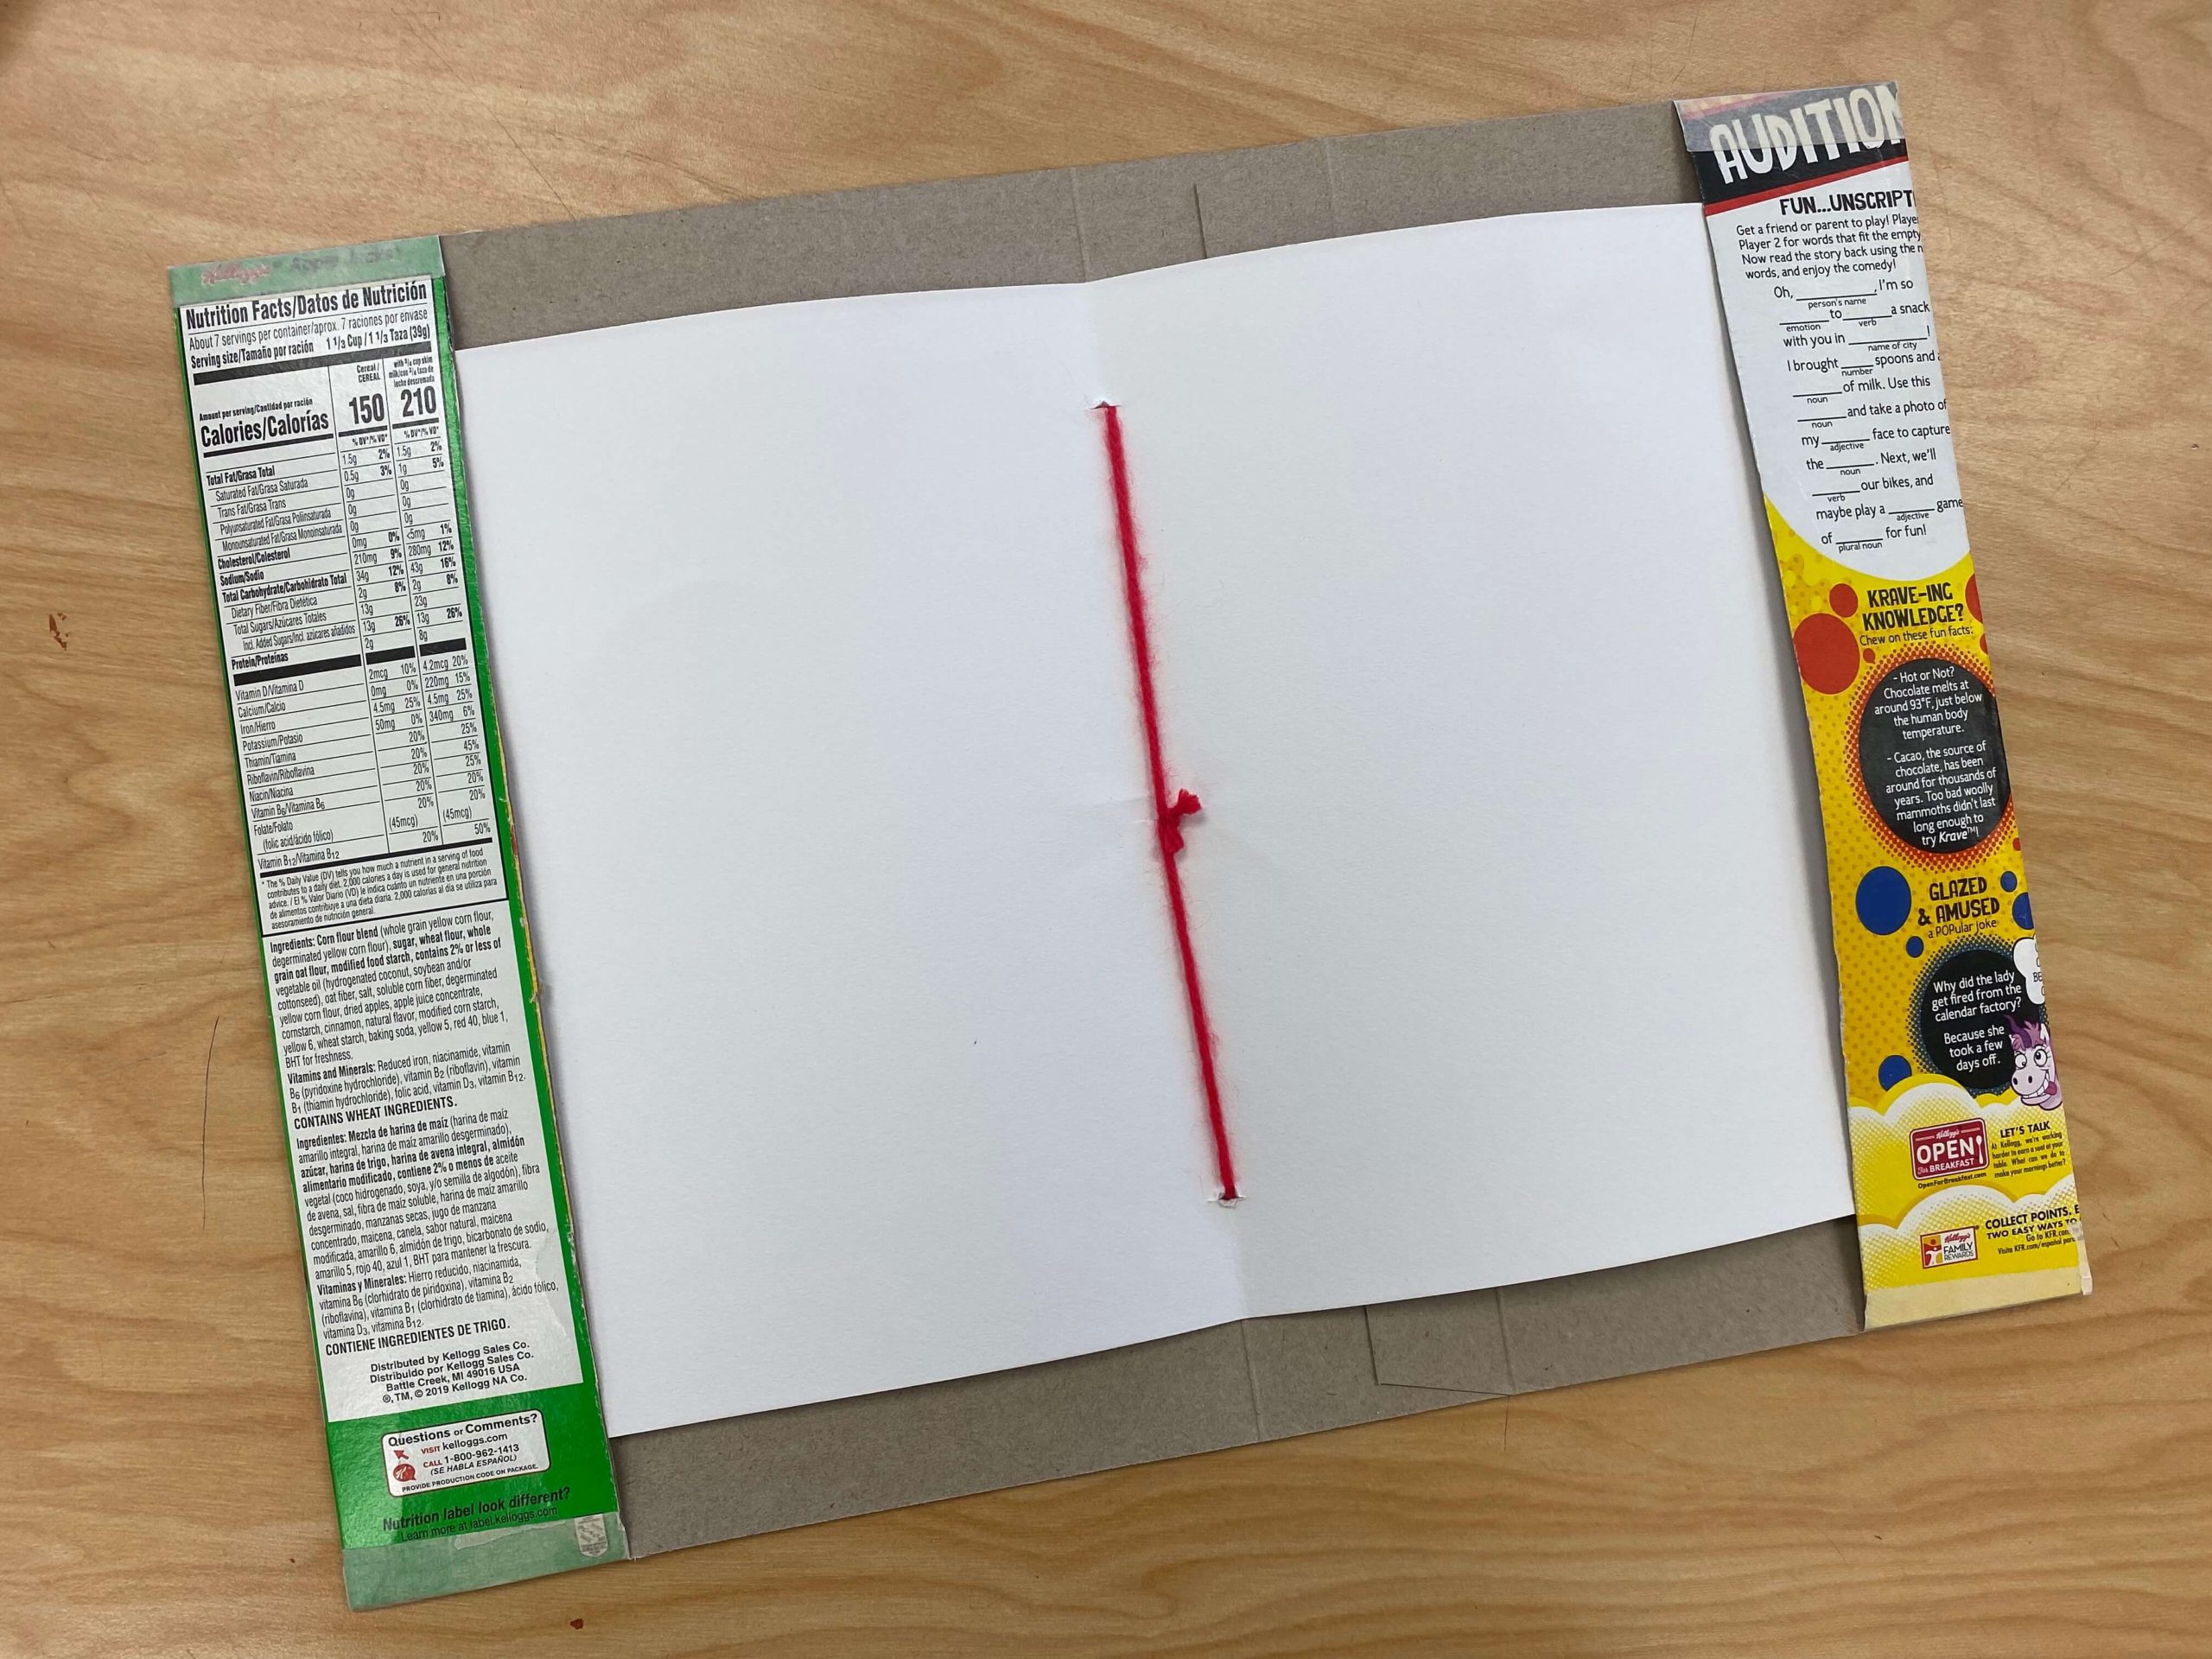
- Locate the right-side panel of the box and cut along the crease separating the side panel from the back panel.
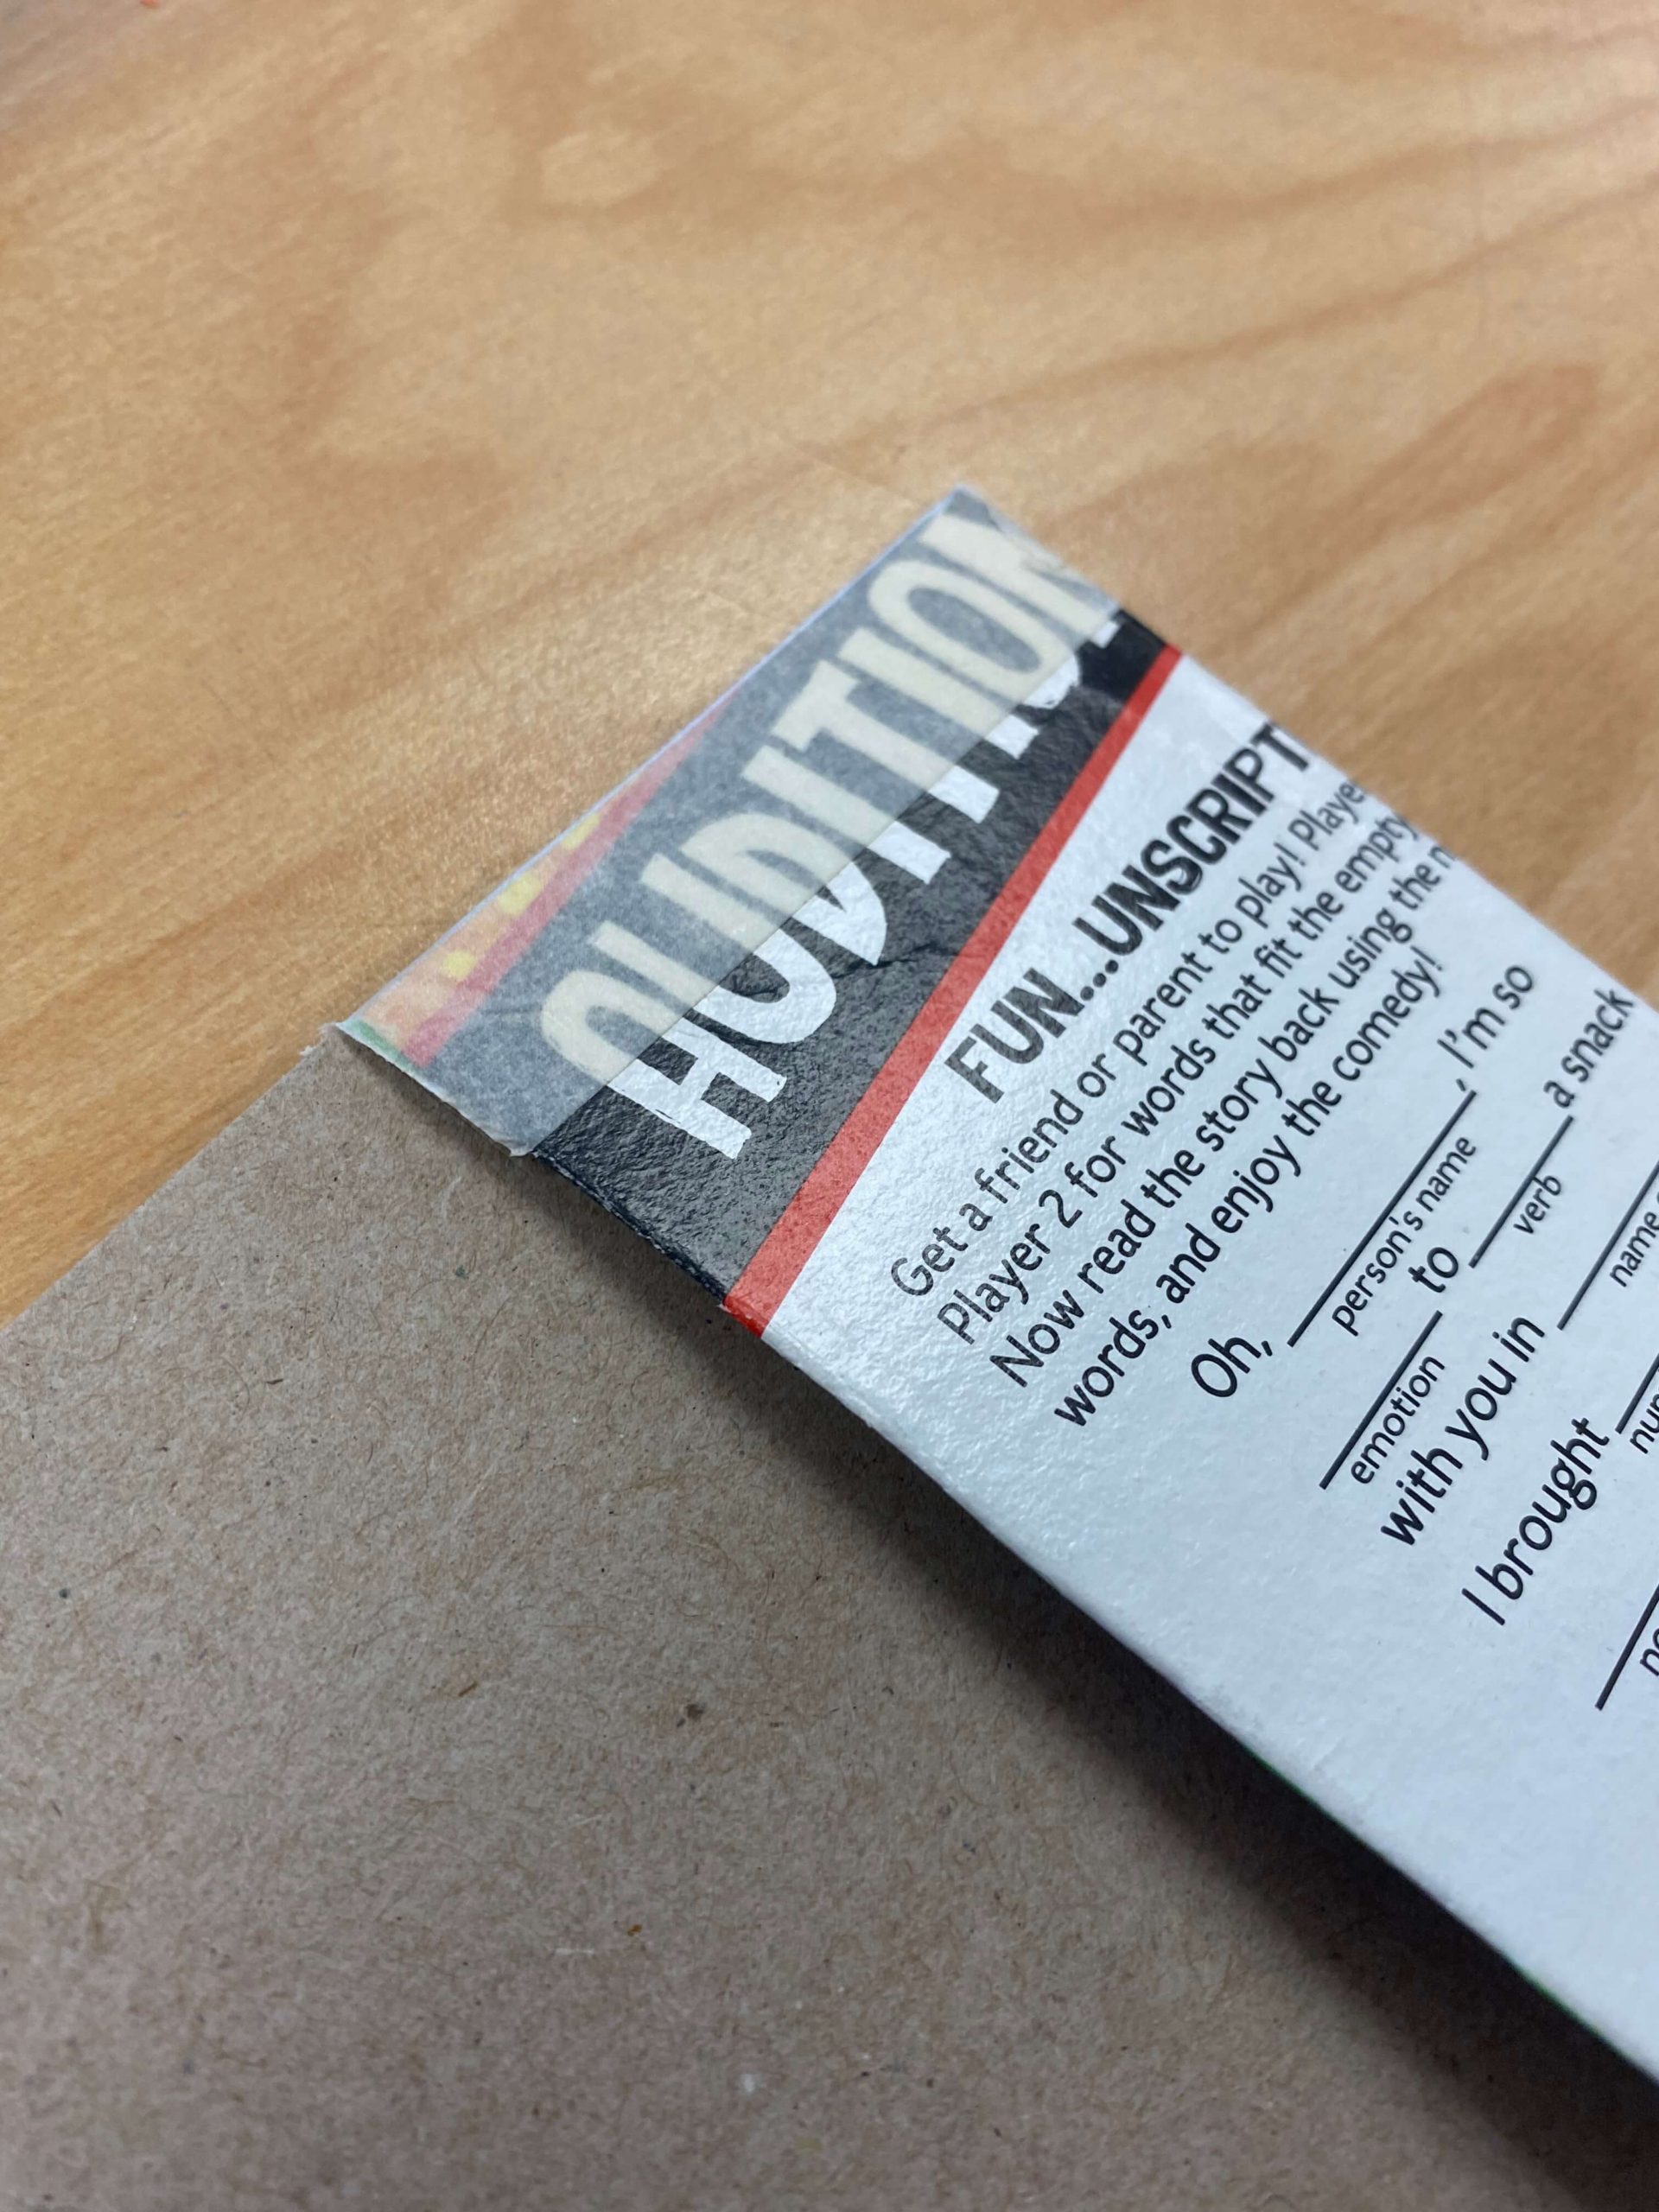
- Flip the box over. Fold side A. This will be easy because there is already a crease there. Fold side B to match side A. You have now created two flaps.
- Tape the top and bottom of each flap. This will create pockets.
- Close the box.
- Line up the pages of the sketchbook and mark where you are going to make the holes. The box will be sticking out on the side, top, and bottom. You can cut it down if you want, but I like the way it looks and so does my students.
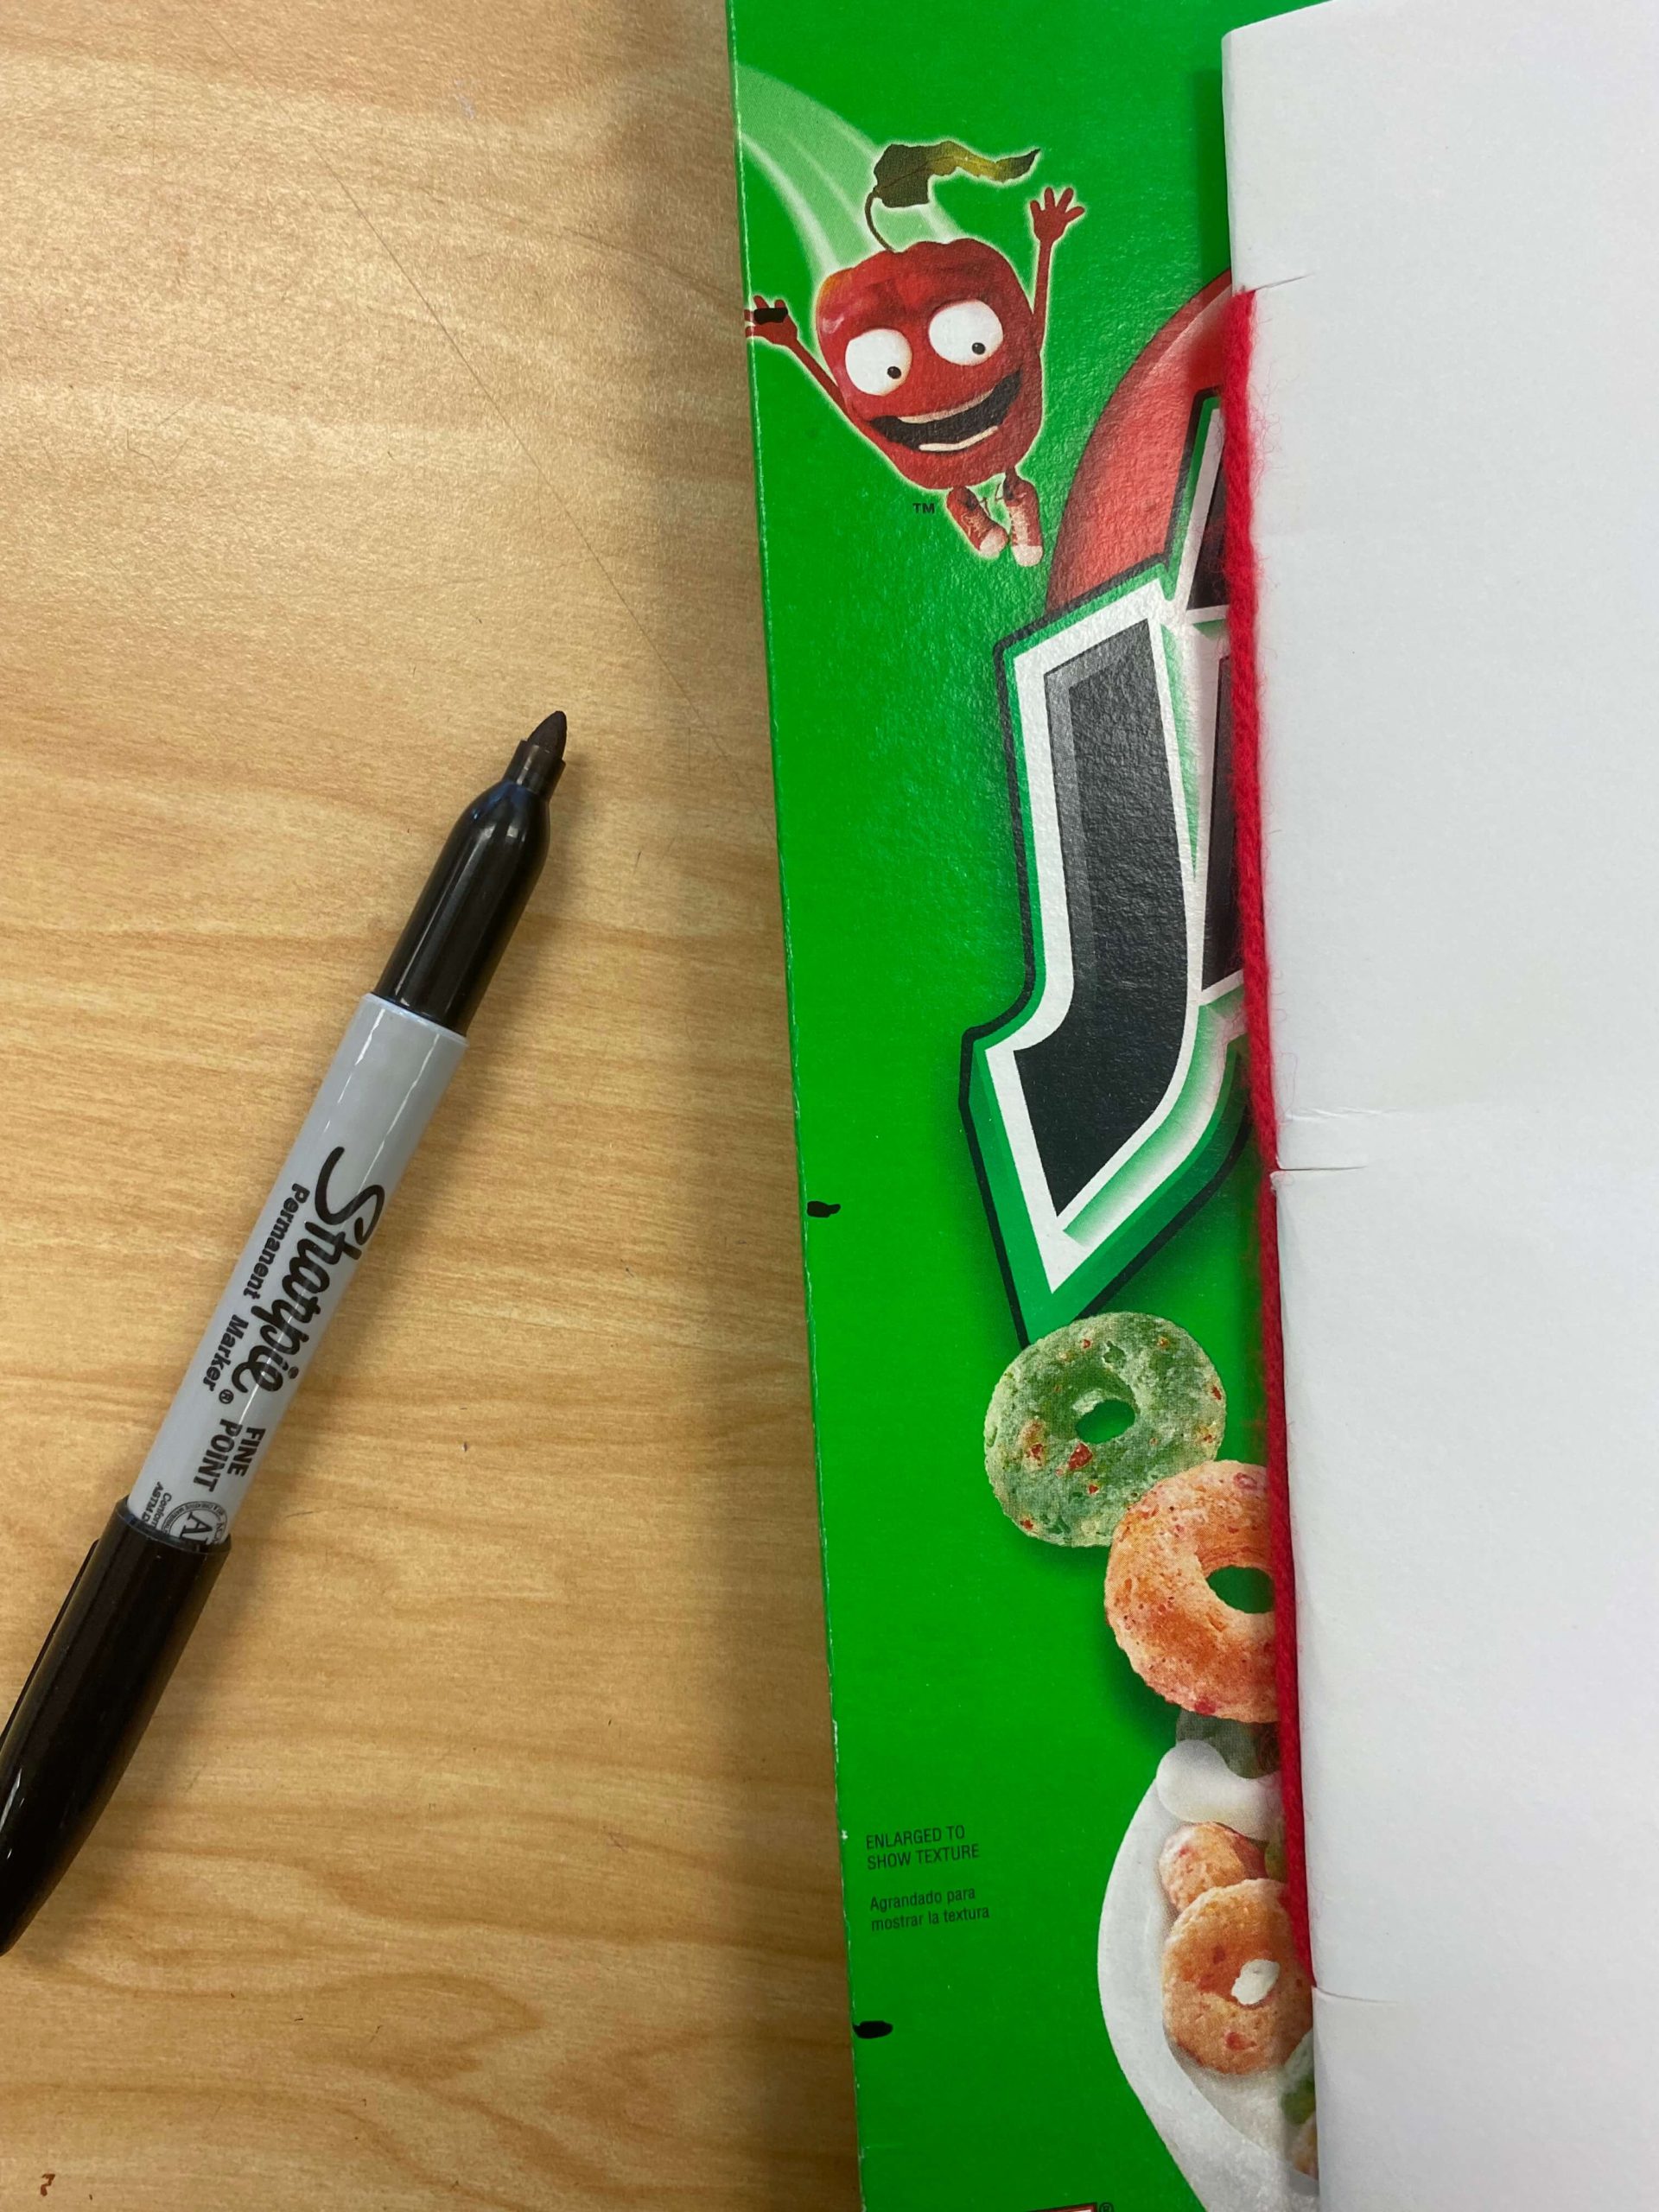
- Cut little slits where you are going to make holes.
- Insert the papers into the box making sure the slits match up.

- Follow the instructions from the Sewn Pamphlet Sketchbook to sew the book together.
- Voila! You now have a Sewn Pamphlet Sketchbook with a cover that has pockets!
Part III: Game and Toy Informed Art Projects
Gaming your Pedagogy:
Taking inspiration from games, toys, and play in the art classroom

Renee Jackson is an Assistant Professor and Program Head of Art Education at Tyler School of Art and Architecture, in the Art Education and Community Arts Practices Department at Temple University. She is an artist, critical feminist pedagogue, and scholar, whose research interests relate to the disruption of oppressive mechanisms in education and the integration of game-design and game-play as collaborative art forms and learning tools, in support of this goal. Jackson has worked as an art educator for 21 years at all levels and in various contexts.
Part 3: Game and Toy Informed Art Projects
For this entry, I am simply going to share some game and toy informed art projects that took place at the elementary and secondary levels. These projects can be adapted for various grade levels, but I have included the grades I worked with originally and their examples captured in the photographs. Various media and skills/techniques can be applied to most projects, so I am listing objectives related primarily to understanding and knowledge, rather than the art skills/techniques involved.
1. Chess and Hierarchies (Grade 4/5)

Rationale: The purpose of this series of lessons is to create an understanding of hierarchic societal structures and to generate dialogue around the hierarchies that impact us every day. Societies in the global north are structured in this way leaving few in “control”, with the benefit of financial gain, and the rest lacking control and power. A healthy, caring society would function in a more interconnected, interdependent way. Chess is a game that encapsulates this hierarchical construction and provides the opportunity for discussion and analysis of everyday hierarchies in our lives.
Project: Students create their own chess set with a sculpting material like clay or Sculpey. They use form and color to create pieces that symbolize elements related to their selected hierarchy.
Objectives
- Students will know that the game of chess is based on Medieval societal structure
- Students will make contemporary parallels to the medieval structure of the chess set
- Students will develop an understanding of systems of power
- Students will research/consider/discuss strategies for disrupting systems of power
- Students will be able to use sculptural forms to symbolically represent a set of hierarchies that parallels a chess set
- Modes of Transportation by Geneva (pedestrians; cars; buses; airplanes; canoes) by Geneva
- Fashion by Soomin
- Sea creatures by Nicole
- Society/social structures by Maggie (people without housing; police; judges)
- Zelda Characters and gender stereotypes by Ziva
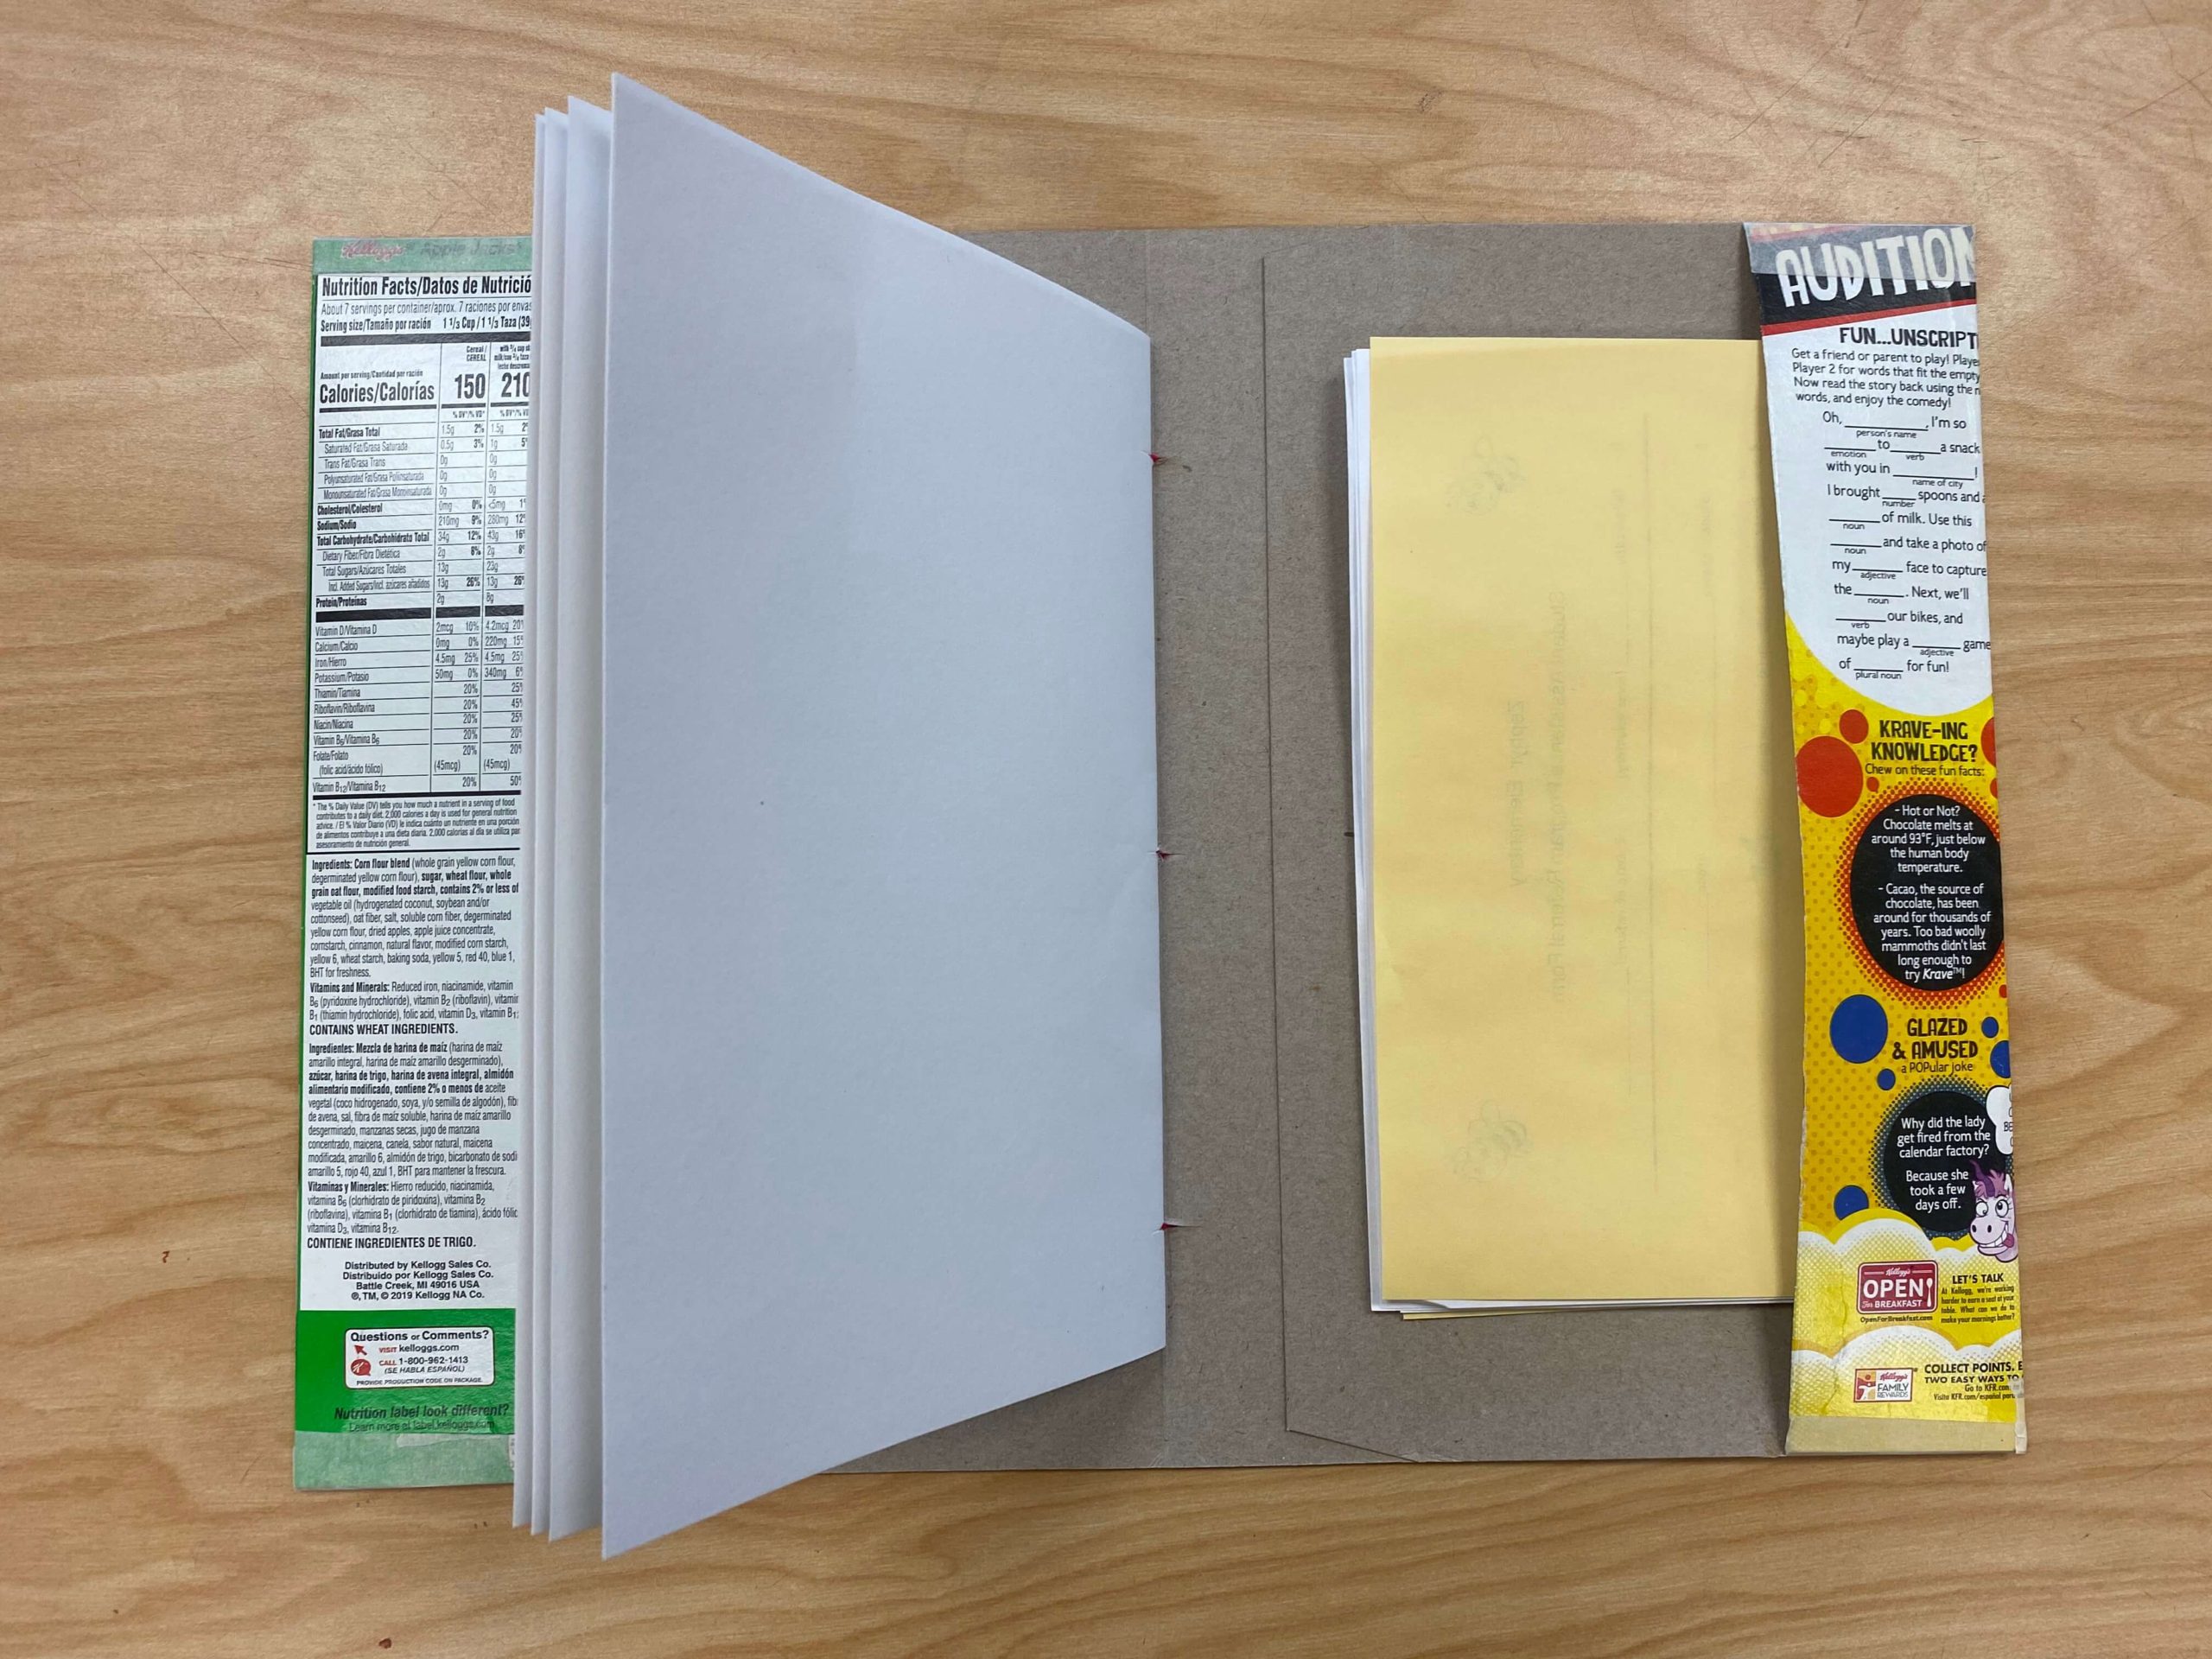
2. Conversation Cards (Grade 10)
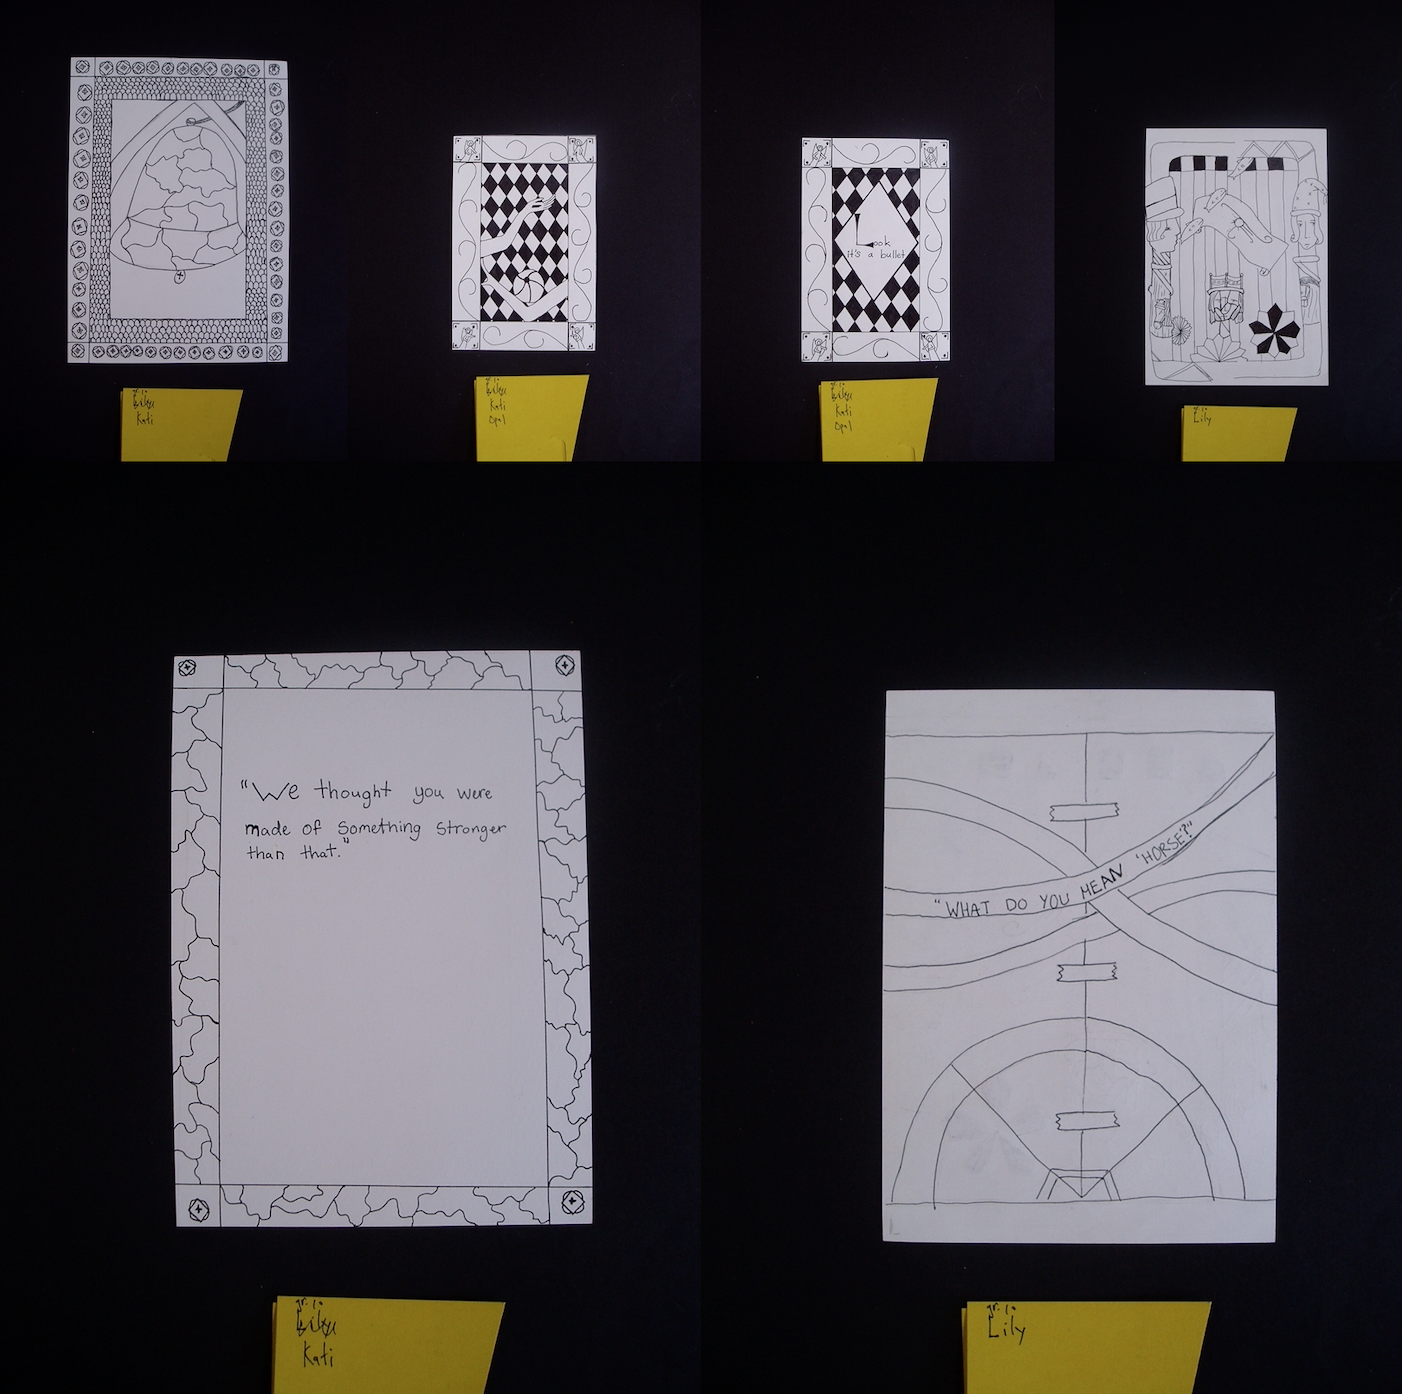
Rationale: The purpose of this series of lessons is to identify trademarks of Medieval art, form an understanding of the creative process, and facilitate a philosophical understanding of the idea that a conversation is almost like having an internal deck of cards. This deck of cards evolves as we grow and experience, and when we chat with someone, it is as if we play cards that connect in various lateral ways with what the other person is saying. What happens when we don’t connect? How do we come to understand someone else’s deck of cards? How do we learn and incorporate new cards into our deck?
Project: Various media, art, and resources can be the leaping point for inspiration for this project. In the images pictured here, we were making connections to Medieval art in terms of symbolism and style and exploring pen and ink. Students created a set of cards with borders and symbols representing things about themselves (interests; experiences; opinions). On the back, they briefly describe what they have represented. Students can sit together and play and talk beginning with a random card, and the goal of simply making various types of literal and lateral connections. Other cards can be drafted/developed as a result of conversations while they are taking place. This can be played in public as performance art, and many interesting experiments and versions of “the game” can take place. For example, attempting to play “disconnected” cards or cards that might be considered opposites….
Objectives
- Students will develop an understanding that we are constantly evolving as individuals experiencing the world, and our “decks of cards” grows and changes
- Students will develop an understanding that games can be an interesting framework through which to consider life metaphorically
3. My Ultra-Favorite Animal Trading Cards and Action Figures (Grade 4/5)
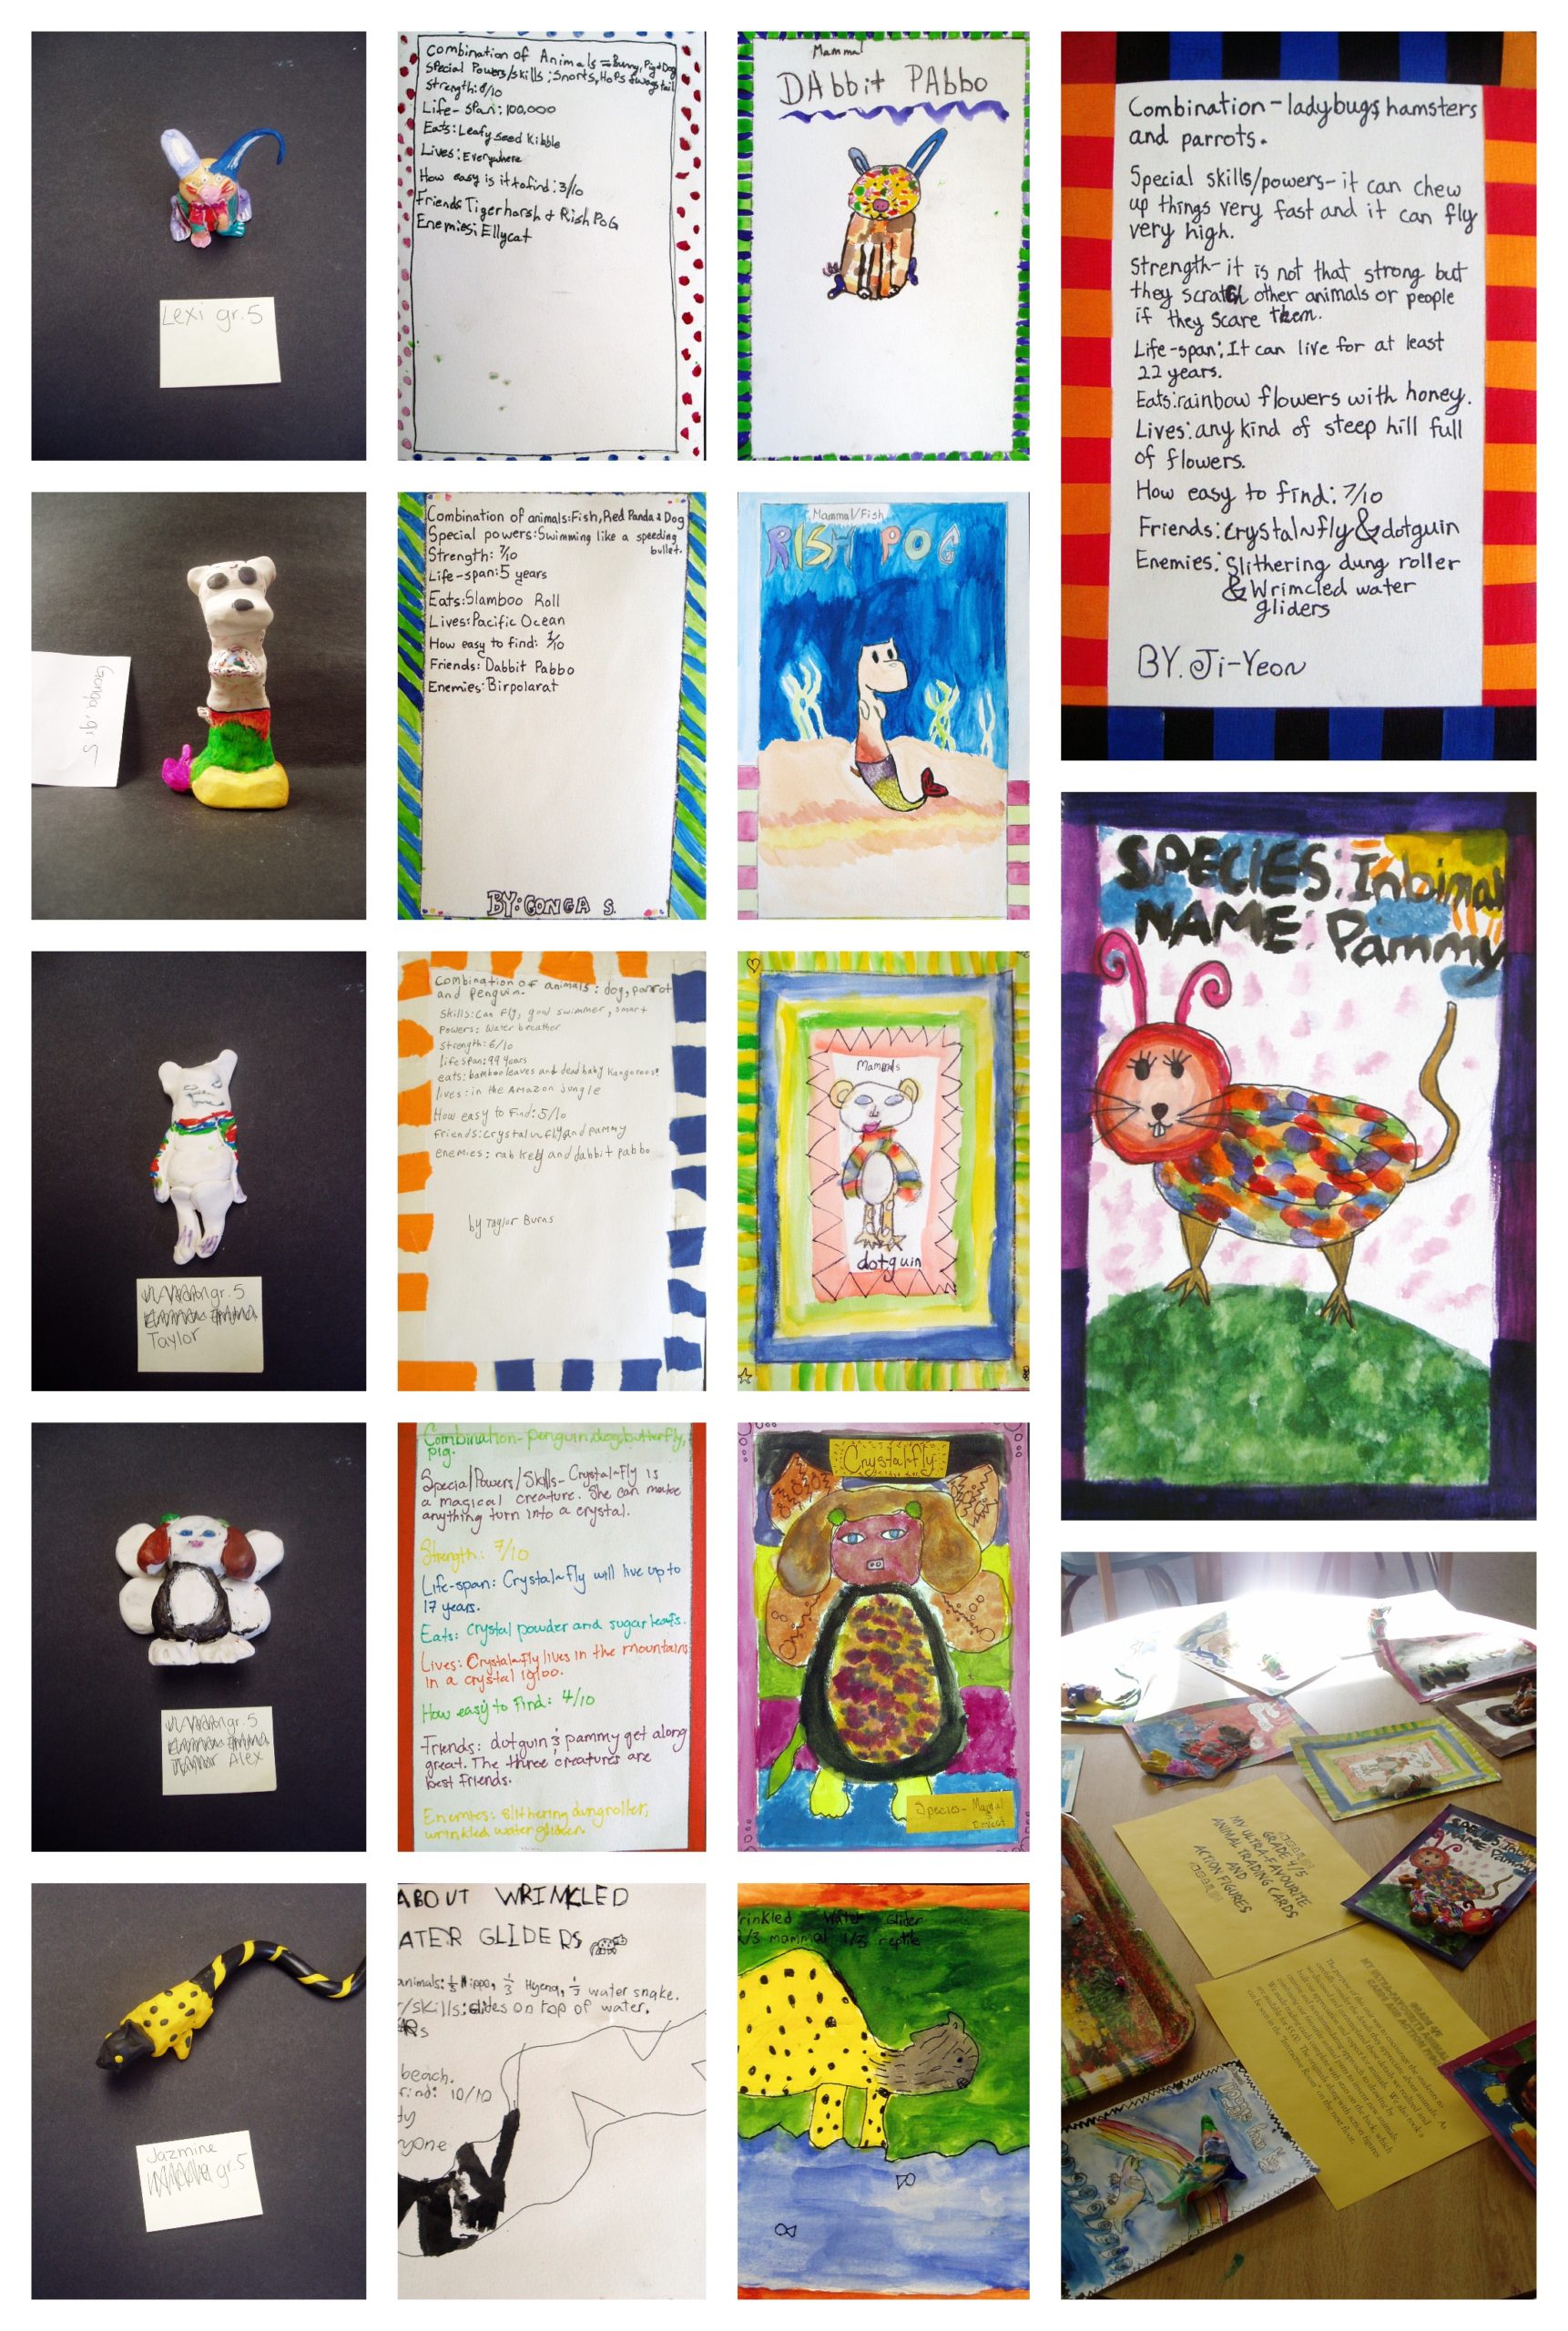
Rationale: The purpose of this series of lessons is to encourage the students to consider the details they appreciate and are fascinated by regarding animals and insects. Through discussion, students will learn about the details appreciated and celebrated by their peers, ideally reinforcing the collective overall appreciation and respect for animals. They will combine their favorite animals to invent a new “ultra-favorite” animal. These new animals will be made into a deck of trading cards, and as an extension, action figure versions will be made as well.
Project: In this case, though many media can be applied, students used pen and ink and watercolor to draw their hybrid creature. Students invented a new name based on the chosen combination of animals. Inspired by game cards like Magic: The Gathering, Yugioh, Dungeons and Dragons, and more traditional sports trading cards, students collectively decided categories for a series of statistics and details about their creature on the back of the card (ie/ what they eat; strength, etc….). Students can invent games with their cards inspired by games that exist, or potentially invent a whole new approach!
Objectives
- Students will consider what they value about animals and consider ways that they can care for animals
- Students will be able to explain some contemporary animal situations (ie. Endangered species, overpopulation, etc….)
- Students will know various types of trading cards and game cards and the various ways they are played and used
- Students will know how to create a pattern and a border by applying elements/details related to their animal drawing (visually or symbolically)
Action Figures
- Students will be able to create a 3d version of their 2d ultra-favorite animal trading card
4. Found Object Toys: Customized Toys and Resourcefulness (Grade 11/12)
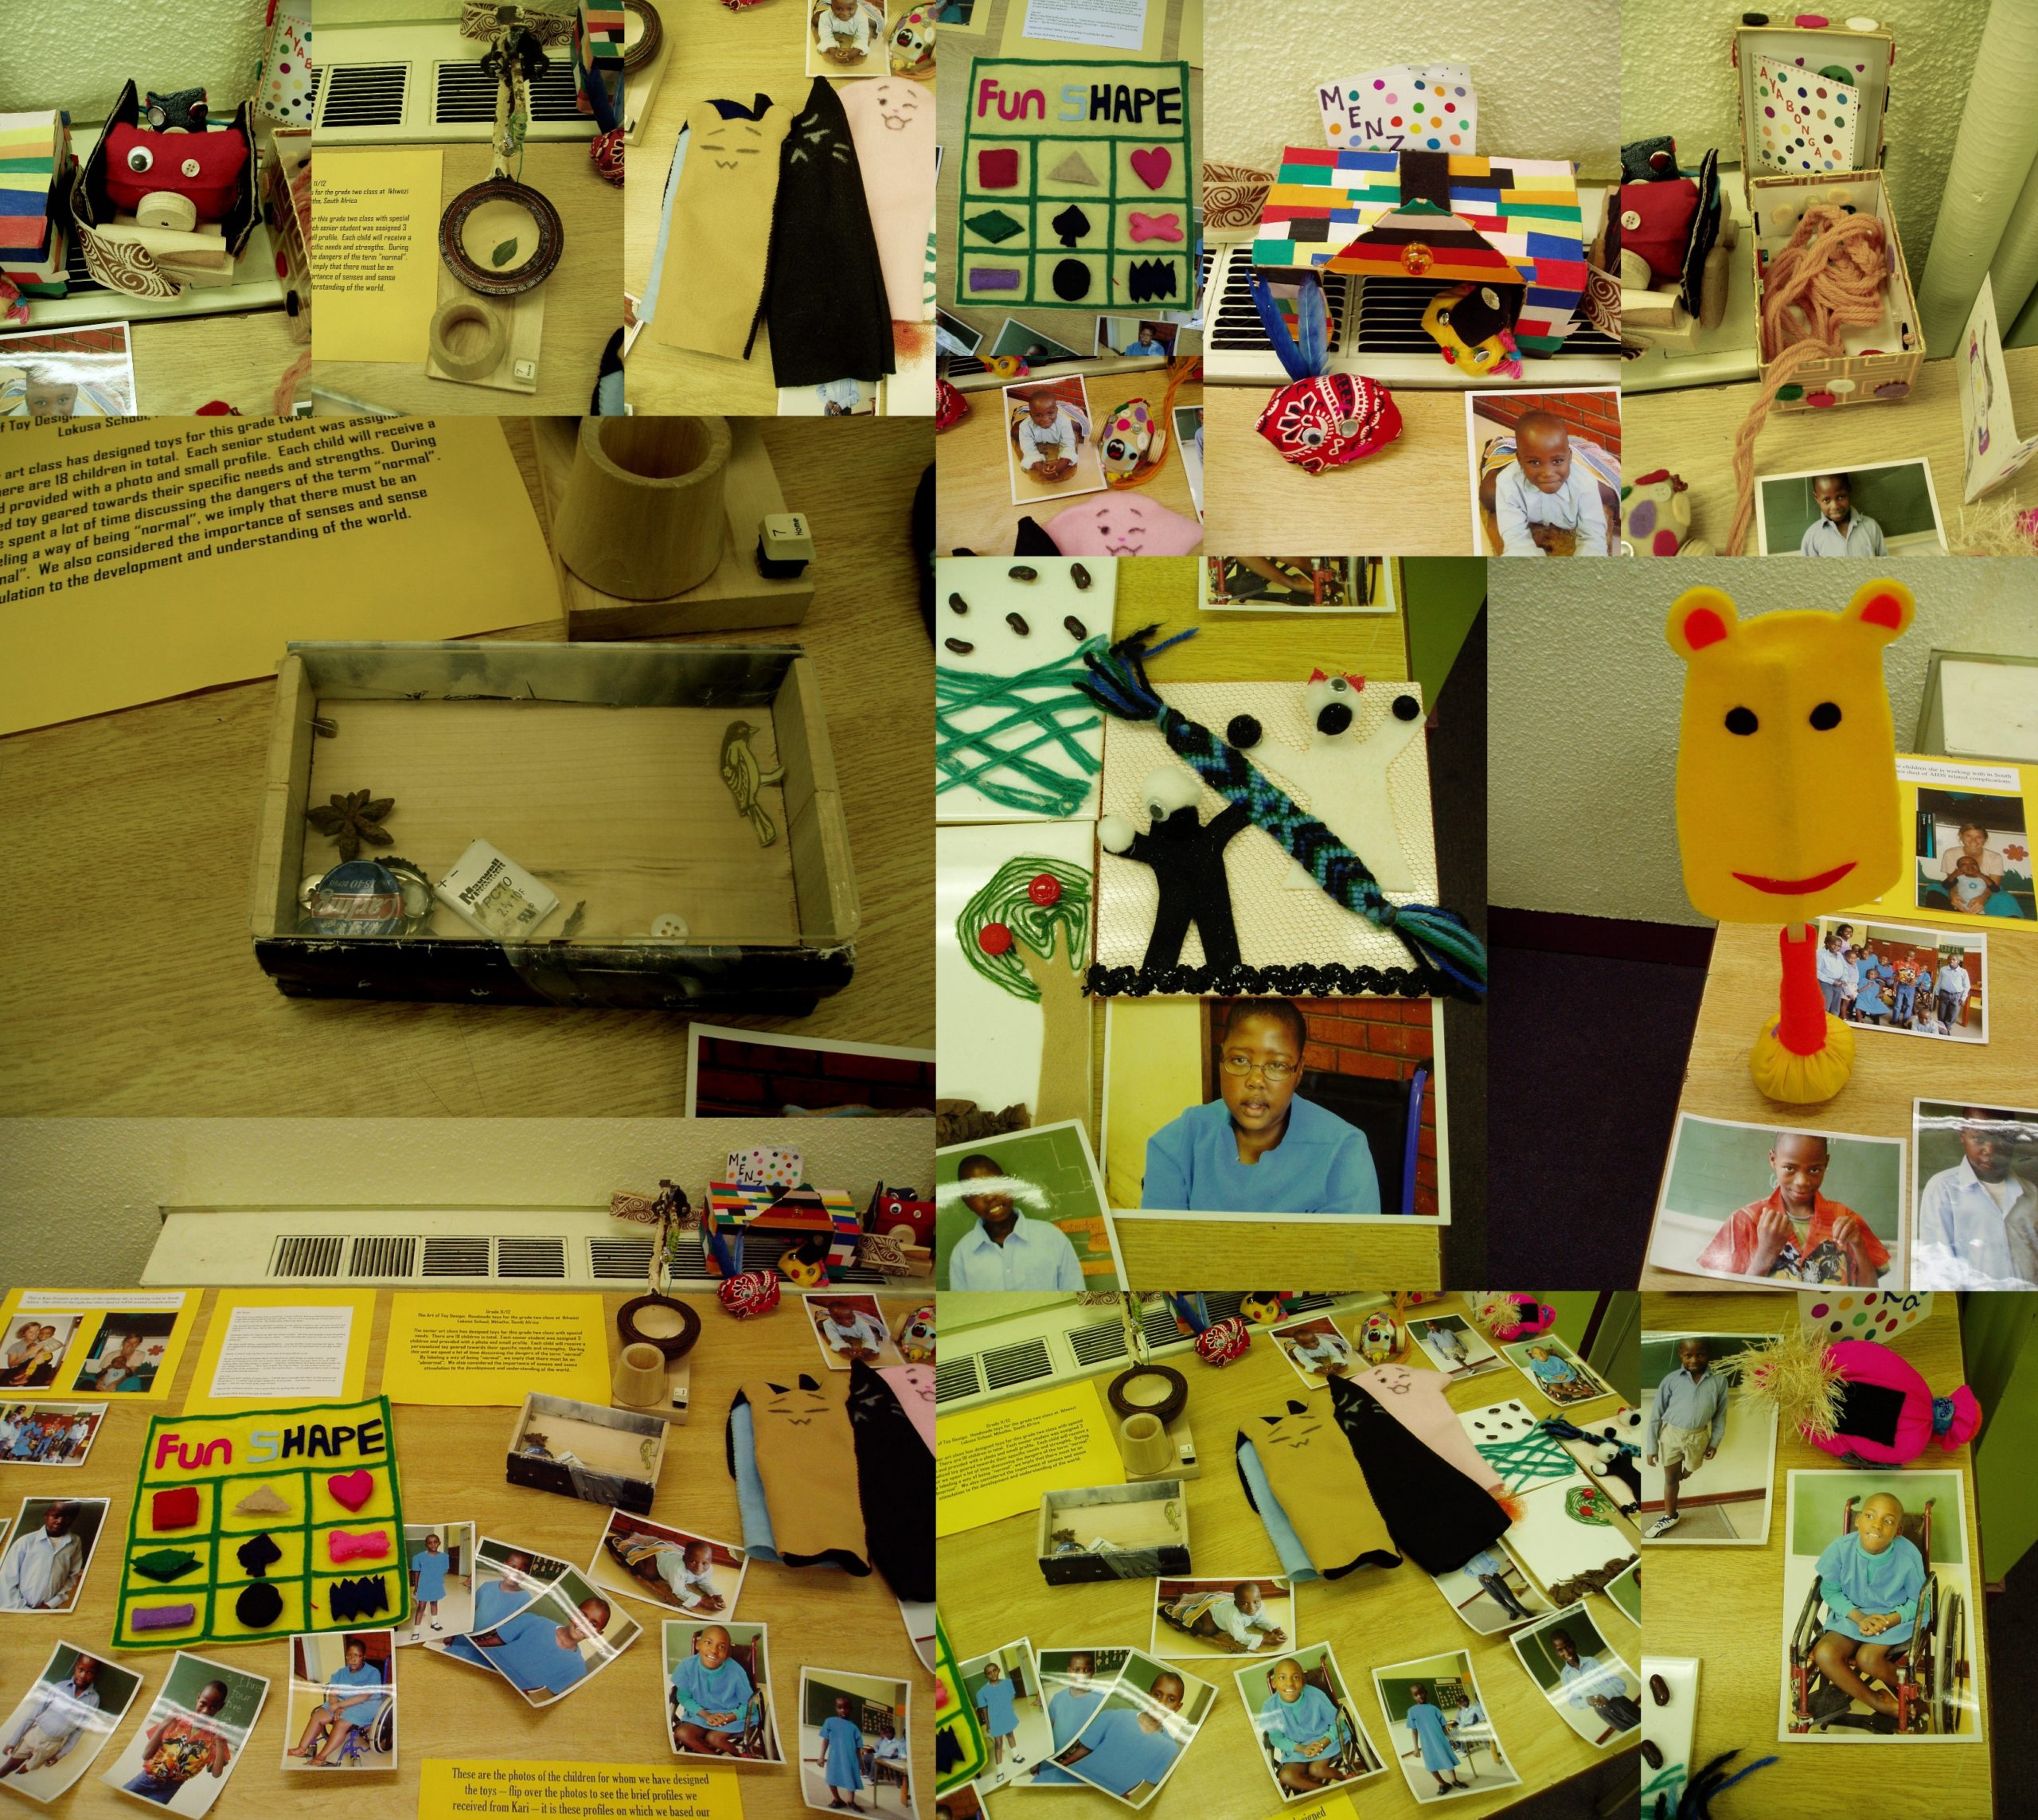
Rationale: The purpose of this series of lessons is to explore toys as an art form around the world. Found object toys will be designed for a specific child with specific needs in an orphanage in Mthatha, South Africa. My friend who is a nurse will be sending us the profiles of the children, and we will send them the custom-designed toys in the mail. This project is inspired by Renee Forrestall who invited my class to engage in a similar project in my Inclusive Arts Class during pre-service teacher training. We will be considering the importance of senses and sense stimulation towards the development, understanding, and navigation of the world.
Project: The important artistic skill the students will be developing for this project is resourcefulness. All toys designed will be made out of found objects/recycled material. Students will develop the understanding that nations in the global north are raising consumers as opposed to problem-solvers. Generally speaking, in this context, if we need something we buy it as opposed to figuring out how to work with what we have. Examples of resourcefulness across the global south will be shared. Habits of consumption affect the way people think, as well as relationships/connections with the surrounding environment.
Objectives
- Students will be able to make assemblages or construction sculptures (using wood, wire, or textiles);
- Students will be able to analyze the relationship between the works of an artist or designer and his/her culture
- Students will have an understanding of the importance of resourcefulness in art and life
- Students will know that the line between art and design is fine
- Students will be able to identify “toy” art by contemporary artists and folk artists locally and internationally
- Students will know that the word normal is dangerous and will develop an understanding of its implications
- Students will design a toy for a specific child who has developmental challenges and will use their creative capacity while considering the child’s specific situation
5. Found Object Toys: Punk and DIY Culture (Grades 3-6)
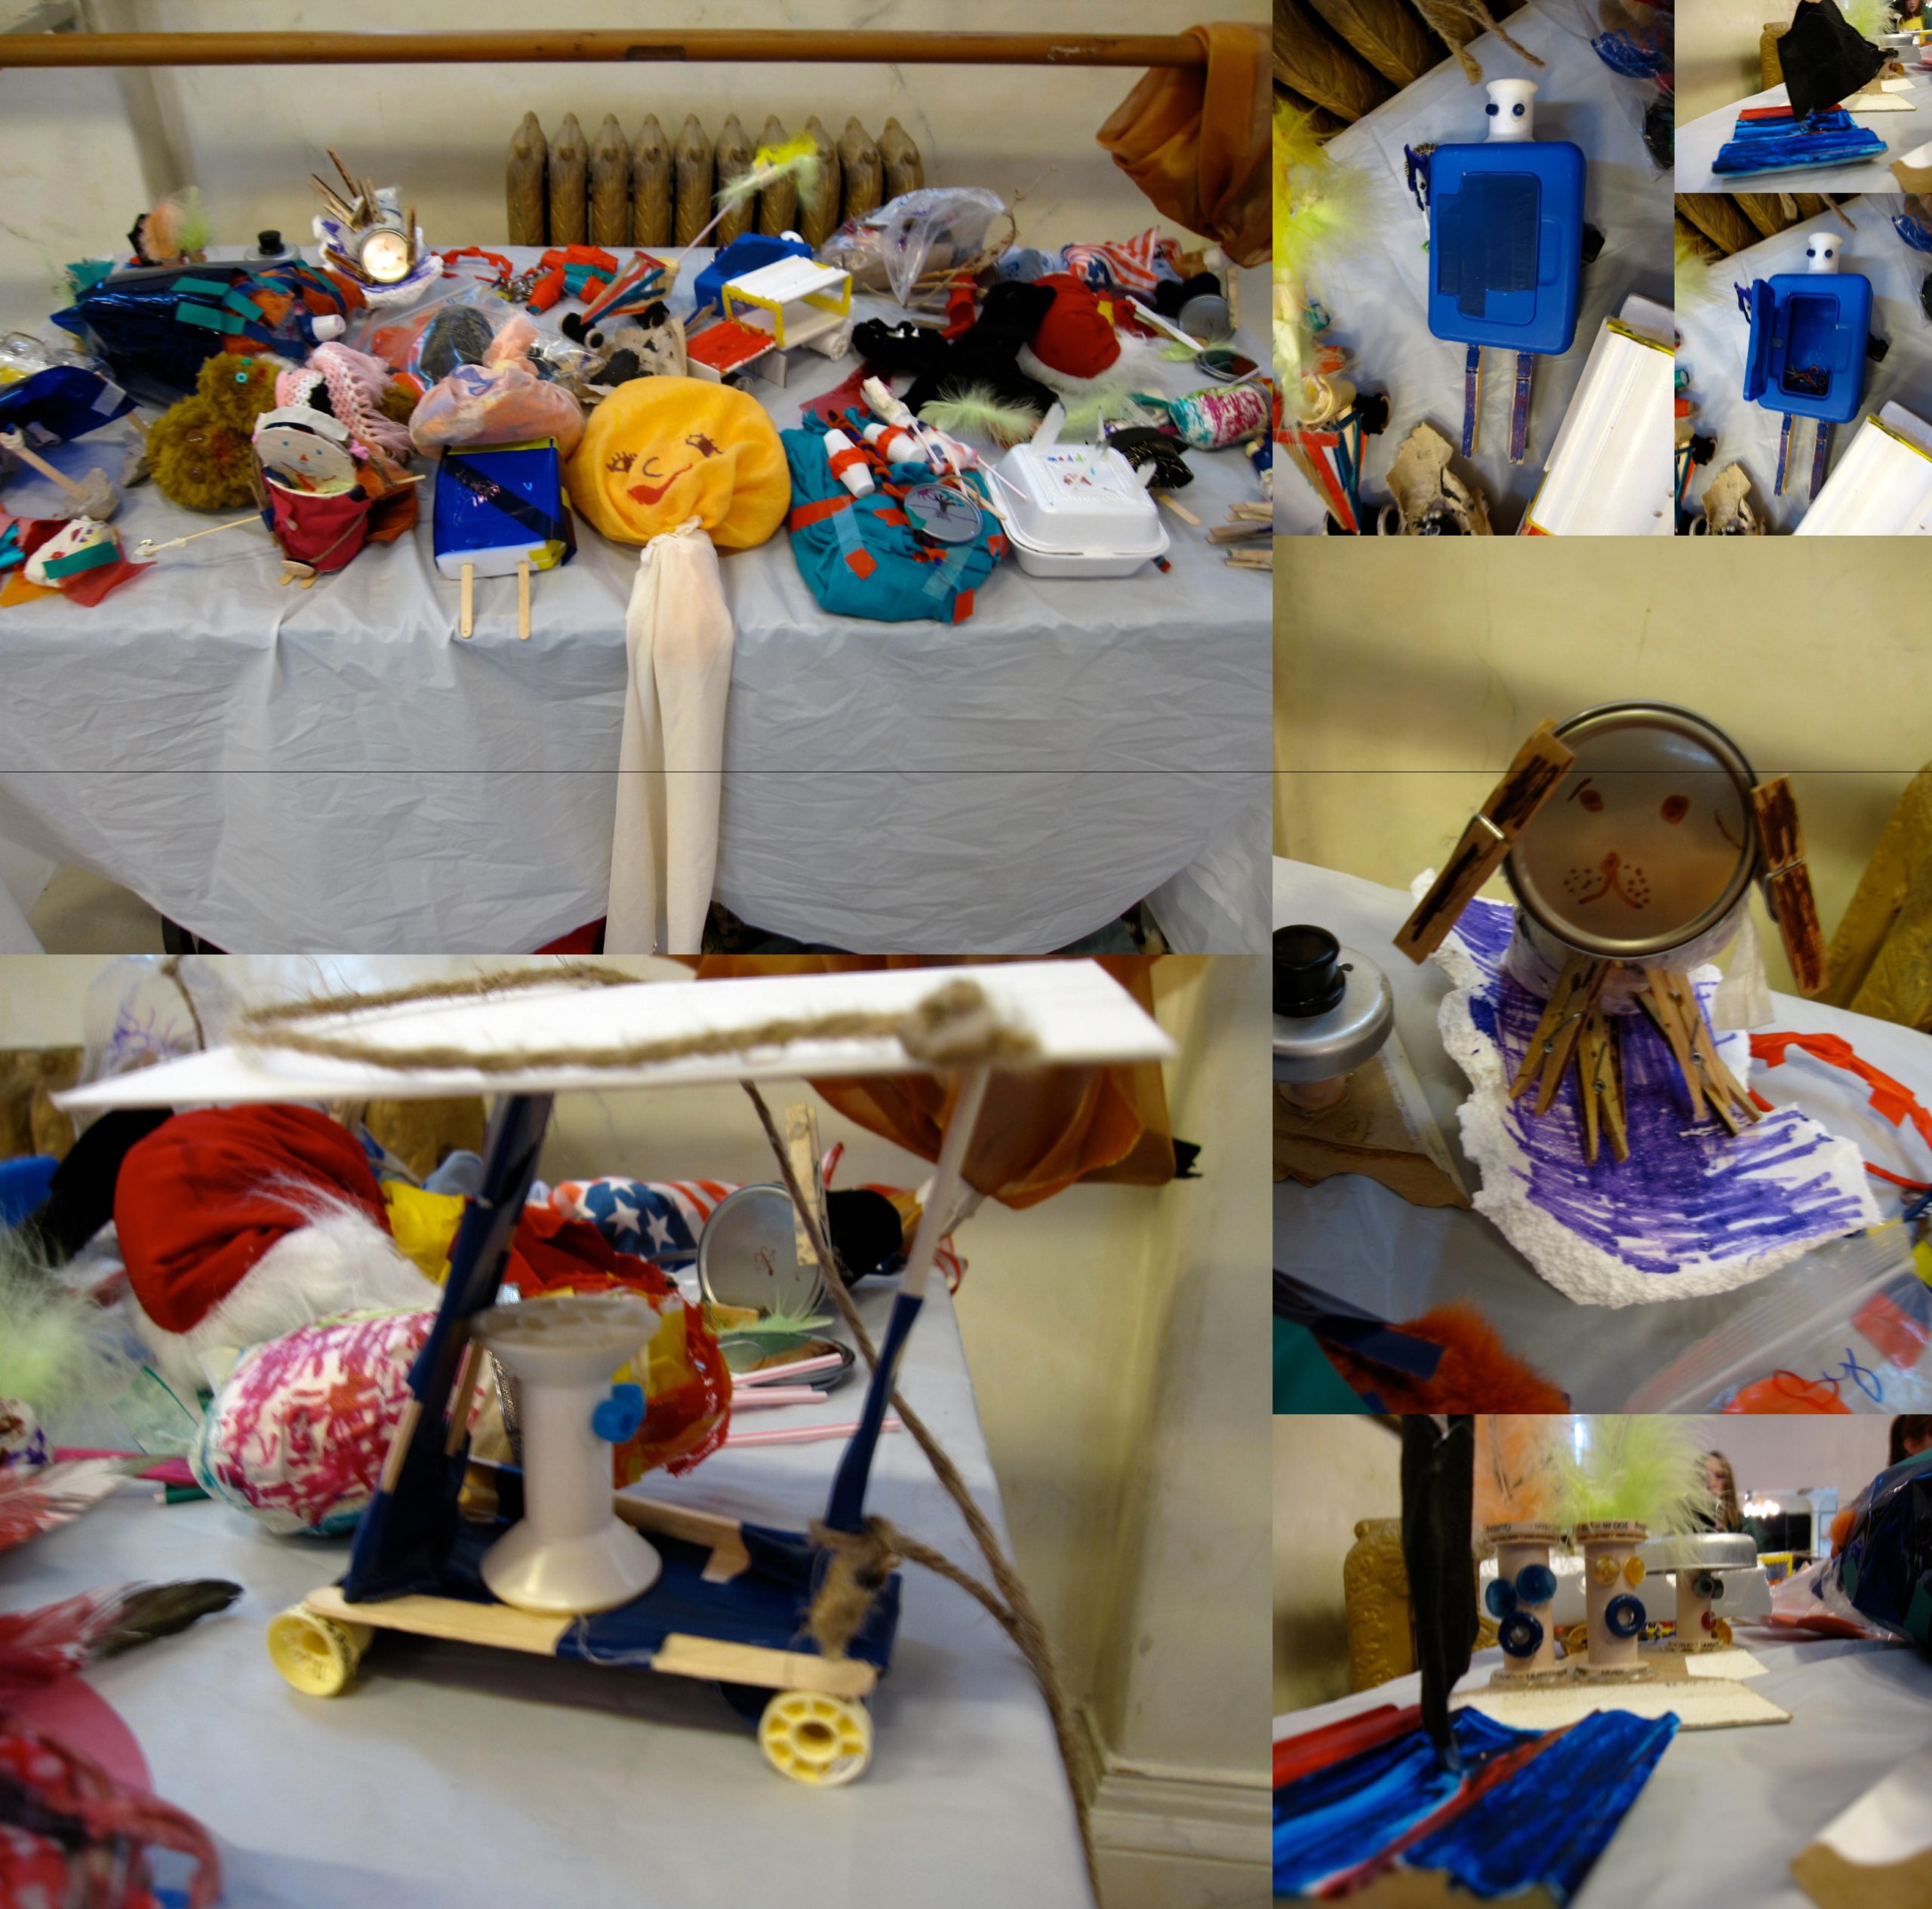
Rationale: The purpose of this series of lessons is to develop the part of the imagination required to support the skill of resourcefulness. At the heart of punk rock – DIY, or do it yourself, you find a rebellious spirit. DIY culture means you don’t buy things, you make what you need. The fact that we buy everything we need and use really affects the way we think and feel. If items are disposable, and our main goal in life is to buy stuff, how does that affect the way we treat objects and people? How does that affect our appreciation of life and the world? How does this affect our creativity and problem-solving skills?
Project: The purpose of this project is to discuss the importance of rebelling against the system, to listen to punk to support this, and to recognize the DIY the importance and fun of doing and making things for ourselves, in the form of games and toys.
Objectives
- As a result of these lessons, students will have an awareness of the importance of making toys and games for themselves rather than relying on purchasing them
- Students will develop an understanding of Punk/DIY culture. And make contemporary parallels
- Students will know that some toys and objects are made in factories by children their own age because it’s cheaper
- Students will have an awareness of the connection between their actions in the world and the way they think (for example they will know that buying pre-fabricated toys all the time can limit their capacity to imagine and the ability to build and repair things for themselves)
- Students will know how to build toys that won’t fall apart easily using a selection of basic tools
- Students will know that games and toys can be made from very basic found objects, and will learn to pay closer attention to the objects in the world around them and to recognize the potential of objects to play this role
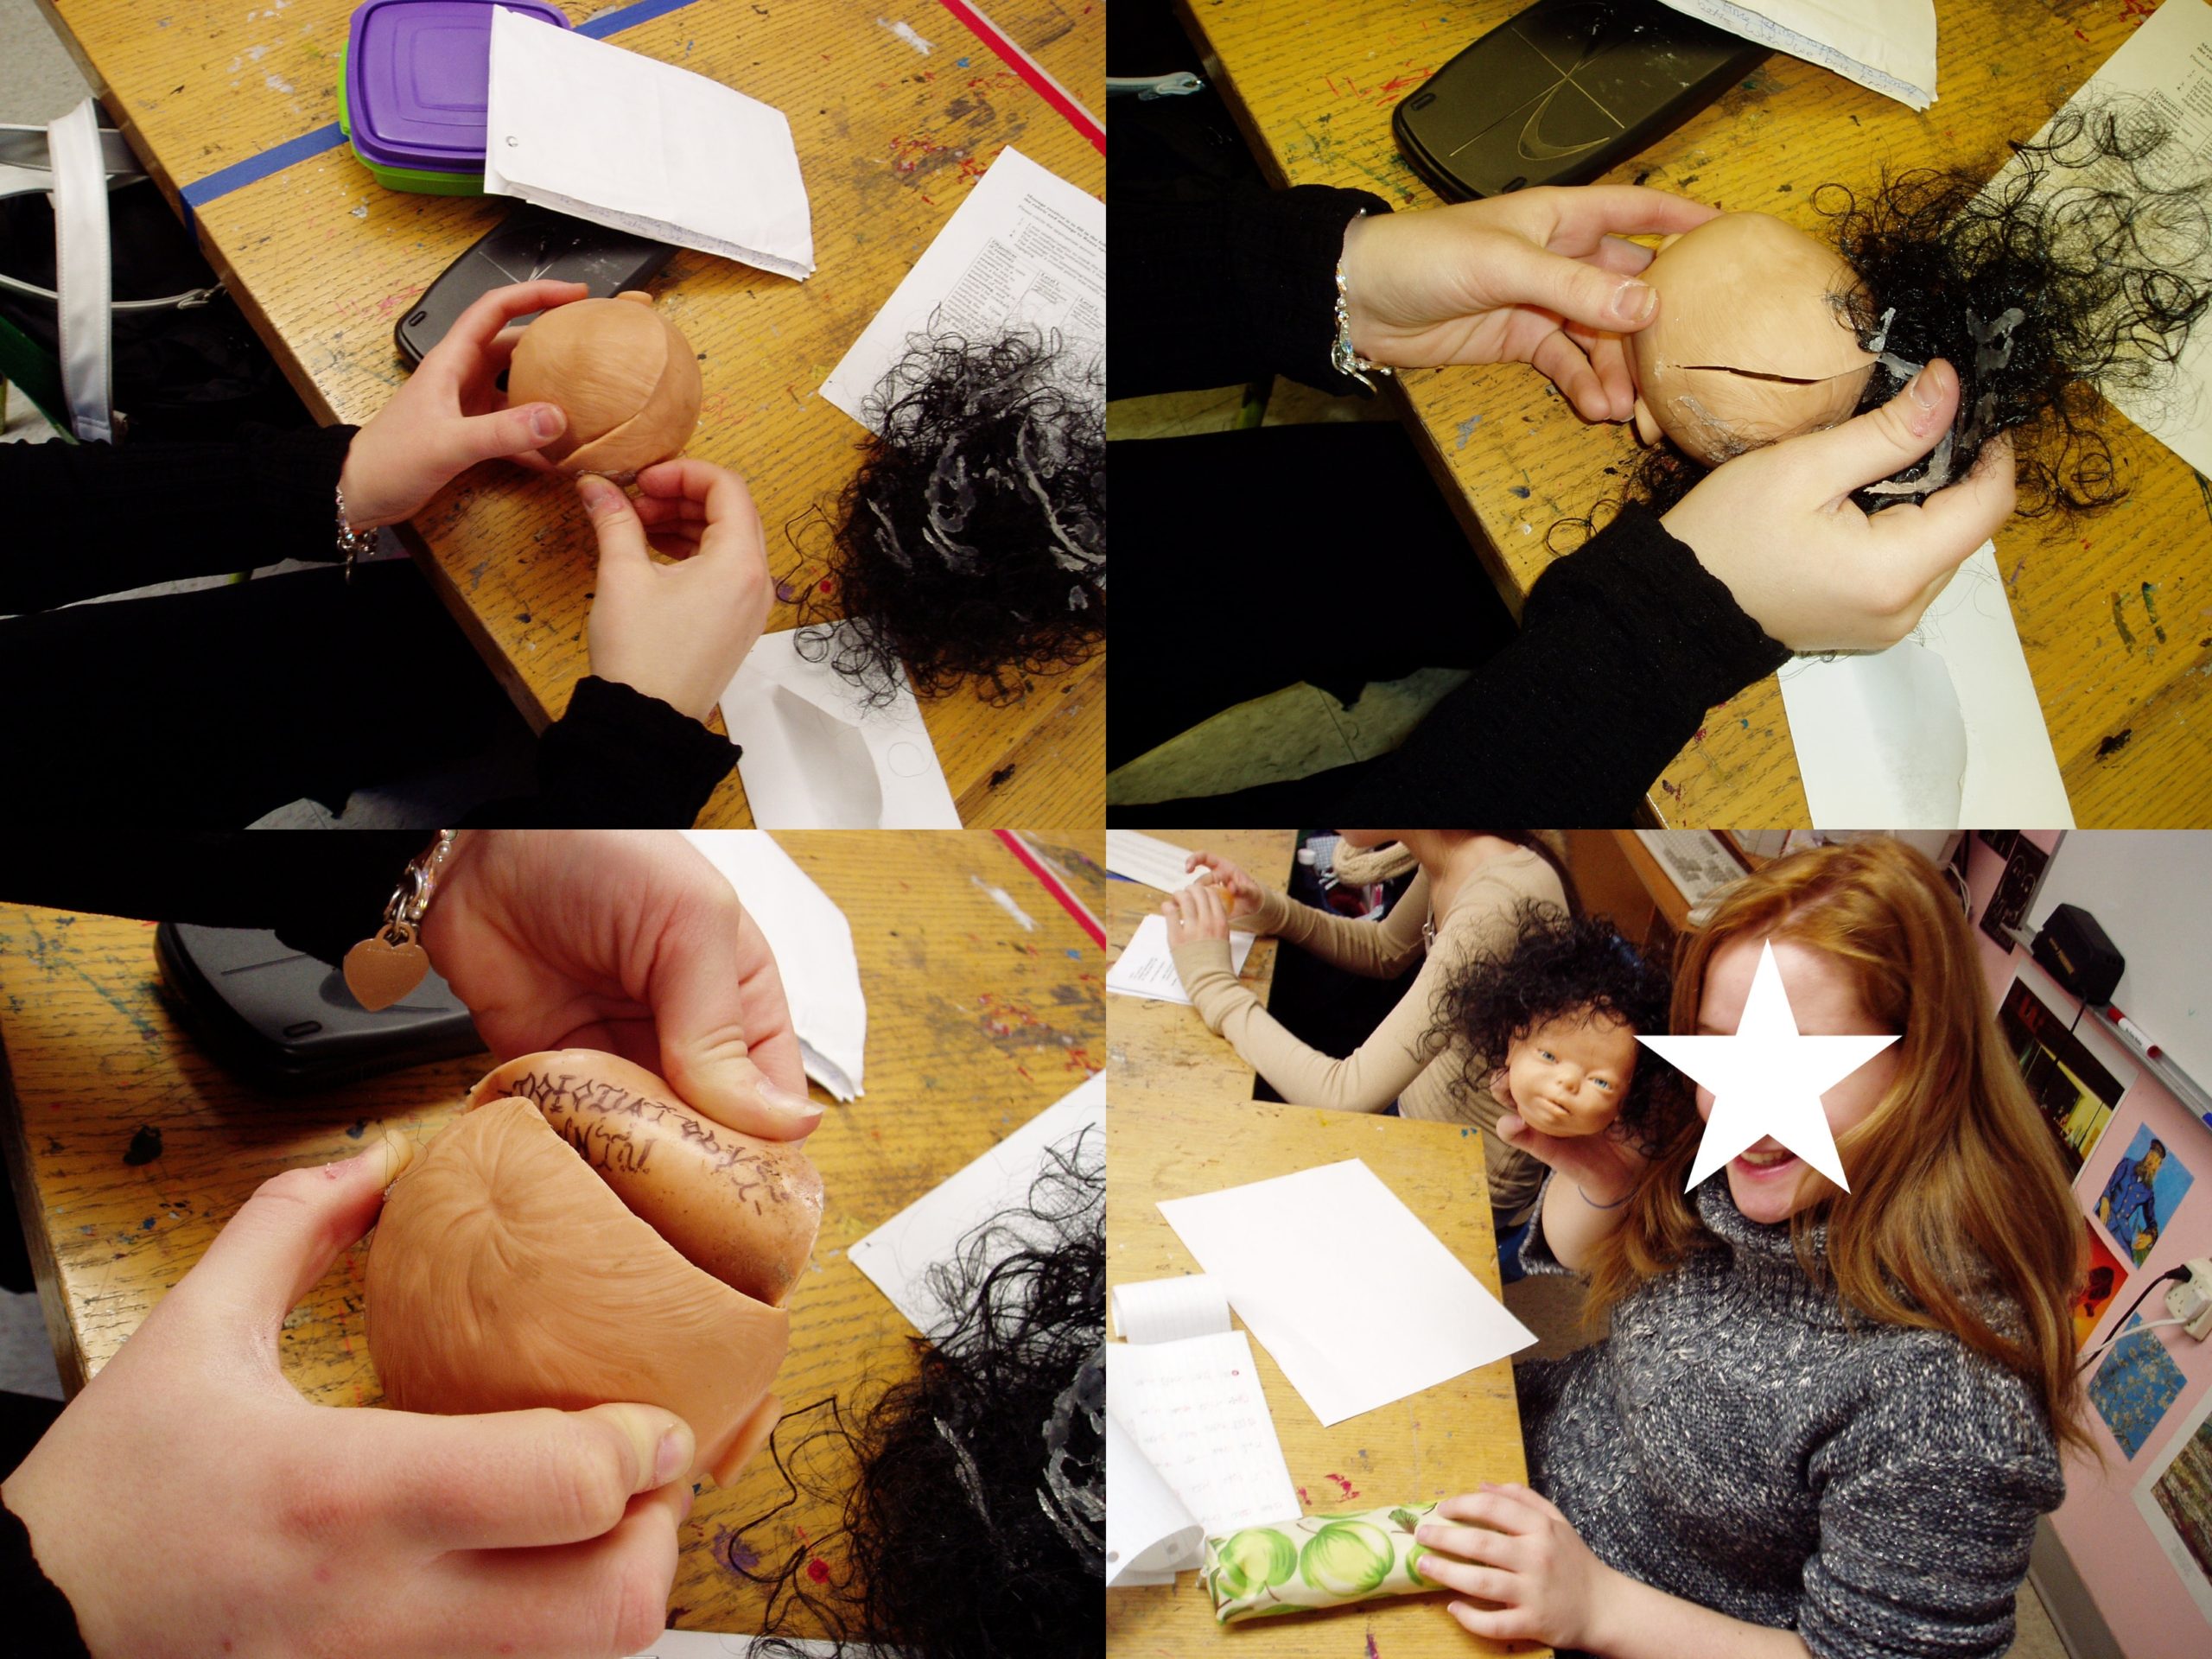
6. Found Object Dolls or Action Figures and their Style (Grade 7/8)
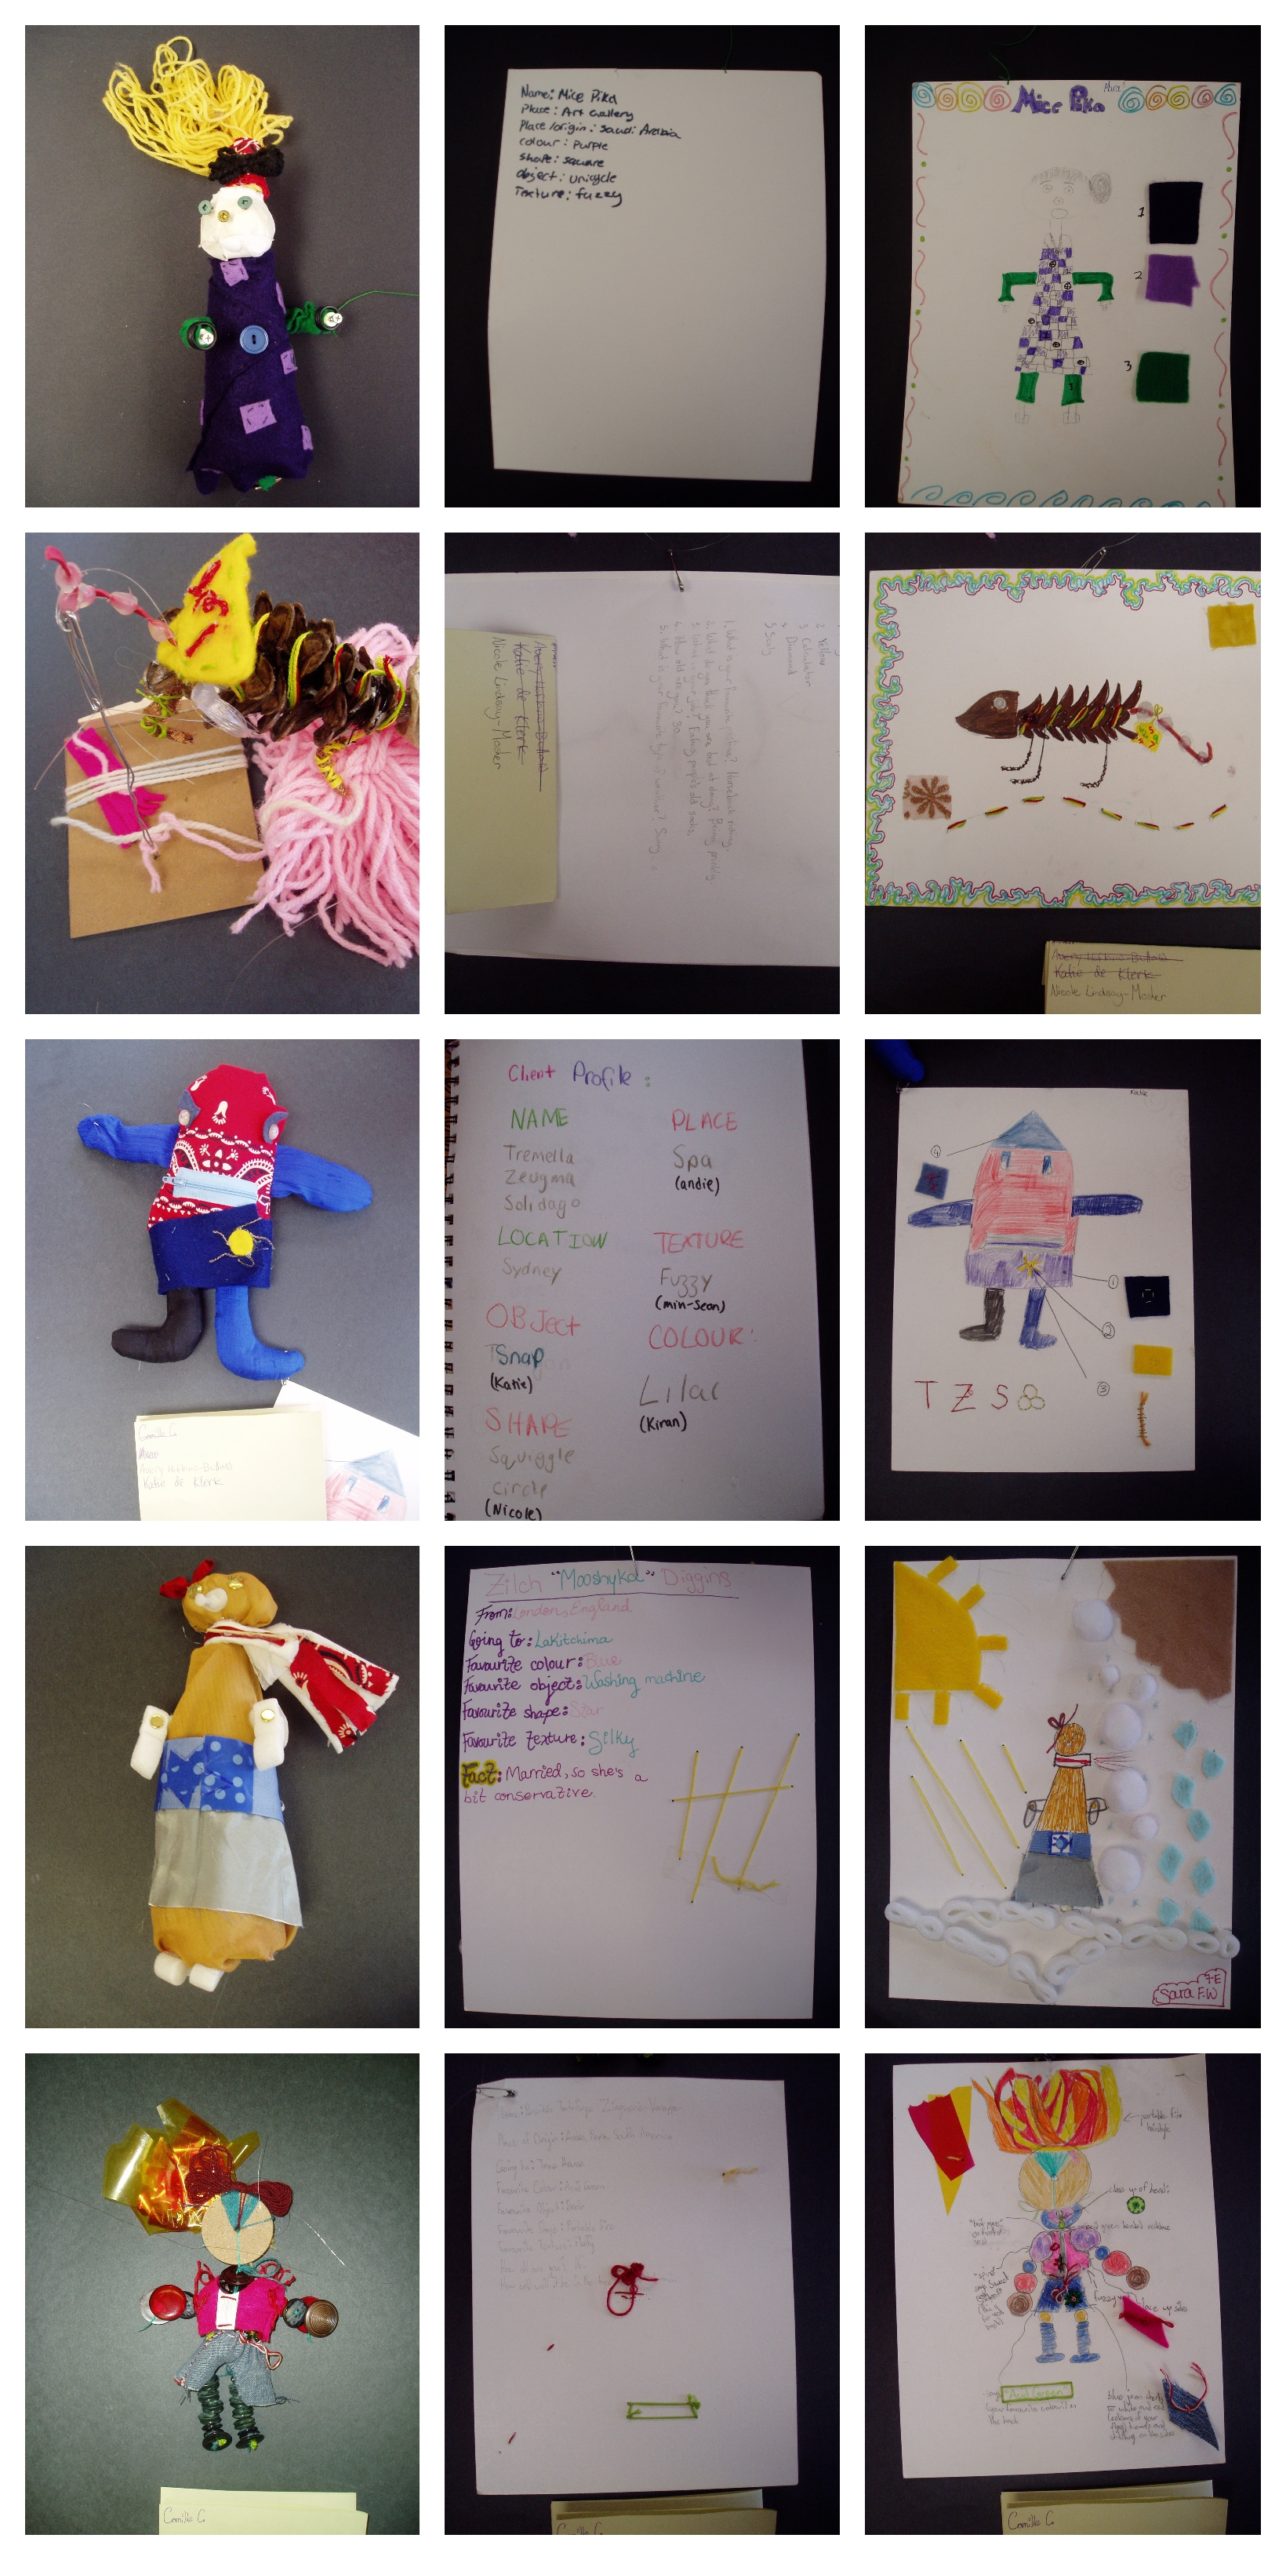
Rationale: The purpose of this series of lessons, is to develop the part of the imagination required to support the skill of resourcefulness.
Project: We will be creating a wide variety of types of dolls/action figures using recycled and found materials. This supports our underlying broader theme, seeing potential.
Objectives
- The purpose of this lesson is to acknowledge the importance of resourcefulness
- Students will know multiple approaches to attaching various materials sturdily, and with movement
- use the appropriate tools, materials, and techniques correctly, selecting those that will create the desired effect (e.g., use splatter painting or dry brush technique to represent the rhythms, melody, and dynamics in a piece of music).
… and their Style….
Rationale: This project will provide students with the experience of fashion design from the planning stages through to the actual creation of an entire outfit, in miniature, for their found object doll/action figure. Students will create profiles for their found object doll clients from which to build the style of their client. These profiles will be built by selecting a random place in the world by pointing blindfolded at a map. Names will be established from random dictionary word selections. The taste of the client will emerge by drawing a favorite color, texture, shape, and object from a hat.
Objectives
- As a result of this lesson, students will know how to sew by hand using a few basic stitches
- Students will have an awareness of the importance of the process leading to a final product
- Students will know how to create a pattern with which to make clothing
- Students will be aware of the fact that every detail matters – choices communicate information
- Students will make literal and metaphorical connections between their client profiles and style choices
7. Cracking the Secret Codes (Grade 10)
Rationale: This project involves learning about the history of secret codes and the different approaches taken to develop them and to send covert messages. Various stories and roles related to codes will be explored, and ideas about how we may use them in contemporary art and everyday circumstances will be discussed.
Project: Students will develop their own coding system and write a coded message that will then be hidden within an everyday object related to their message. Students will exchange these objects and engage with the challenge of decoding the message.
Objectives
- Students will develop an understanding of various approaches to and purposes for developing secret codes both historically and in contemporary circumstances
- Students will understand that this is a tool they can incorporate into interactive works of art through which they can send secret messages based on a theme of their choice
- Students will be able to develop their own code and hide it in an everyday object related to their message
8. Thinking through Water (Various Grades, Elementary)
Examples by pre-service elementary generalist teachers @ McGill University
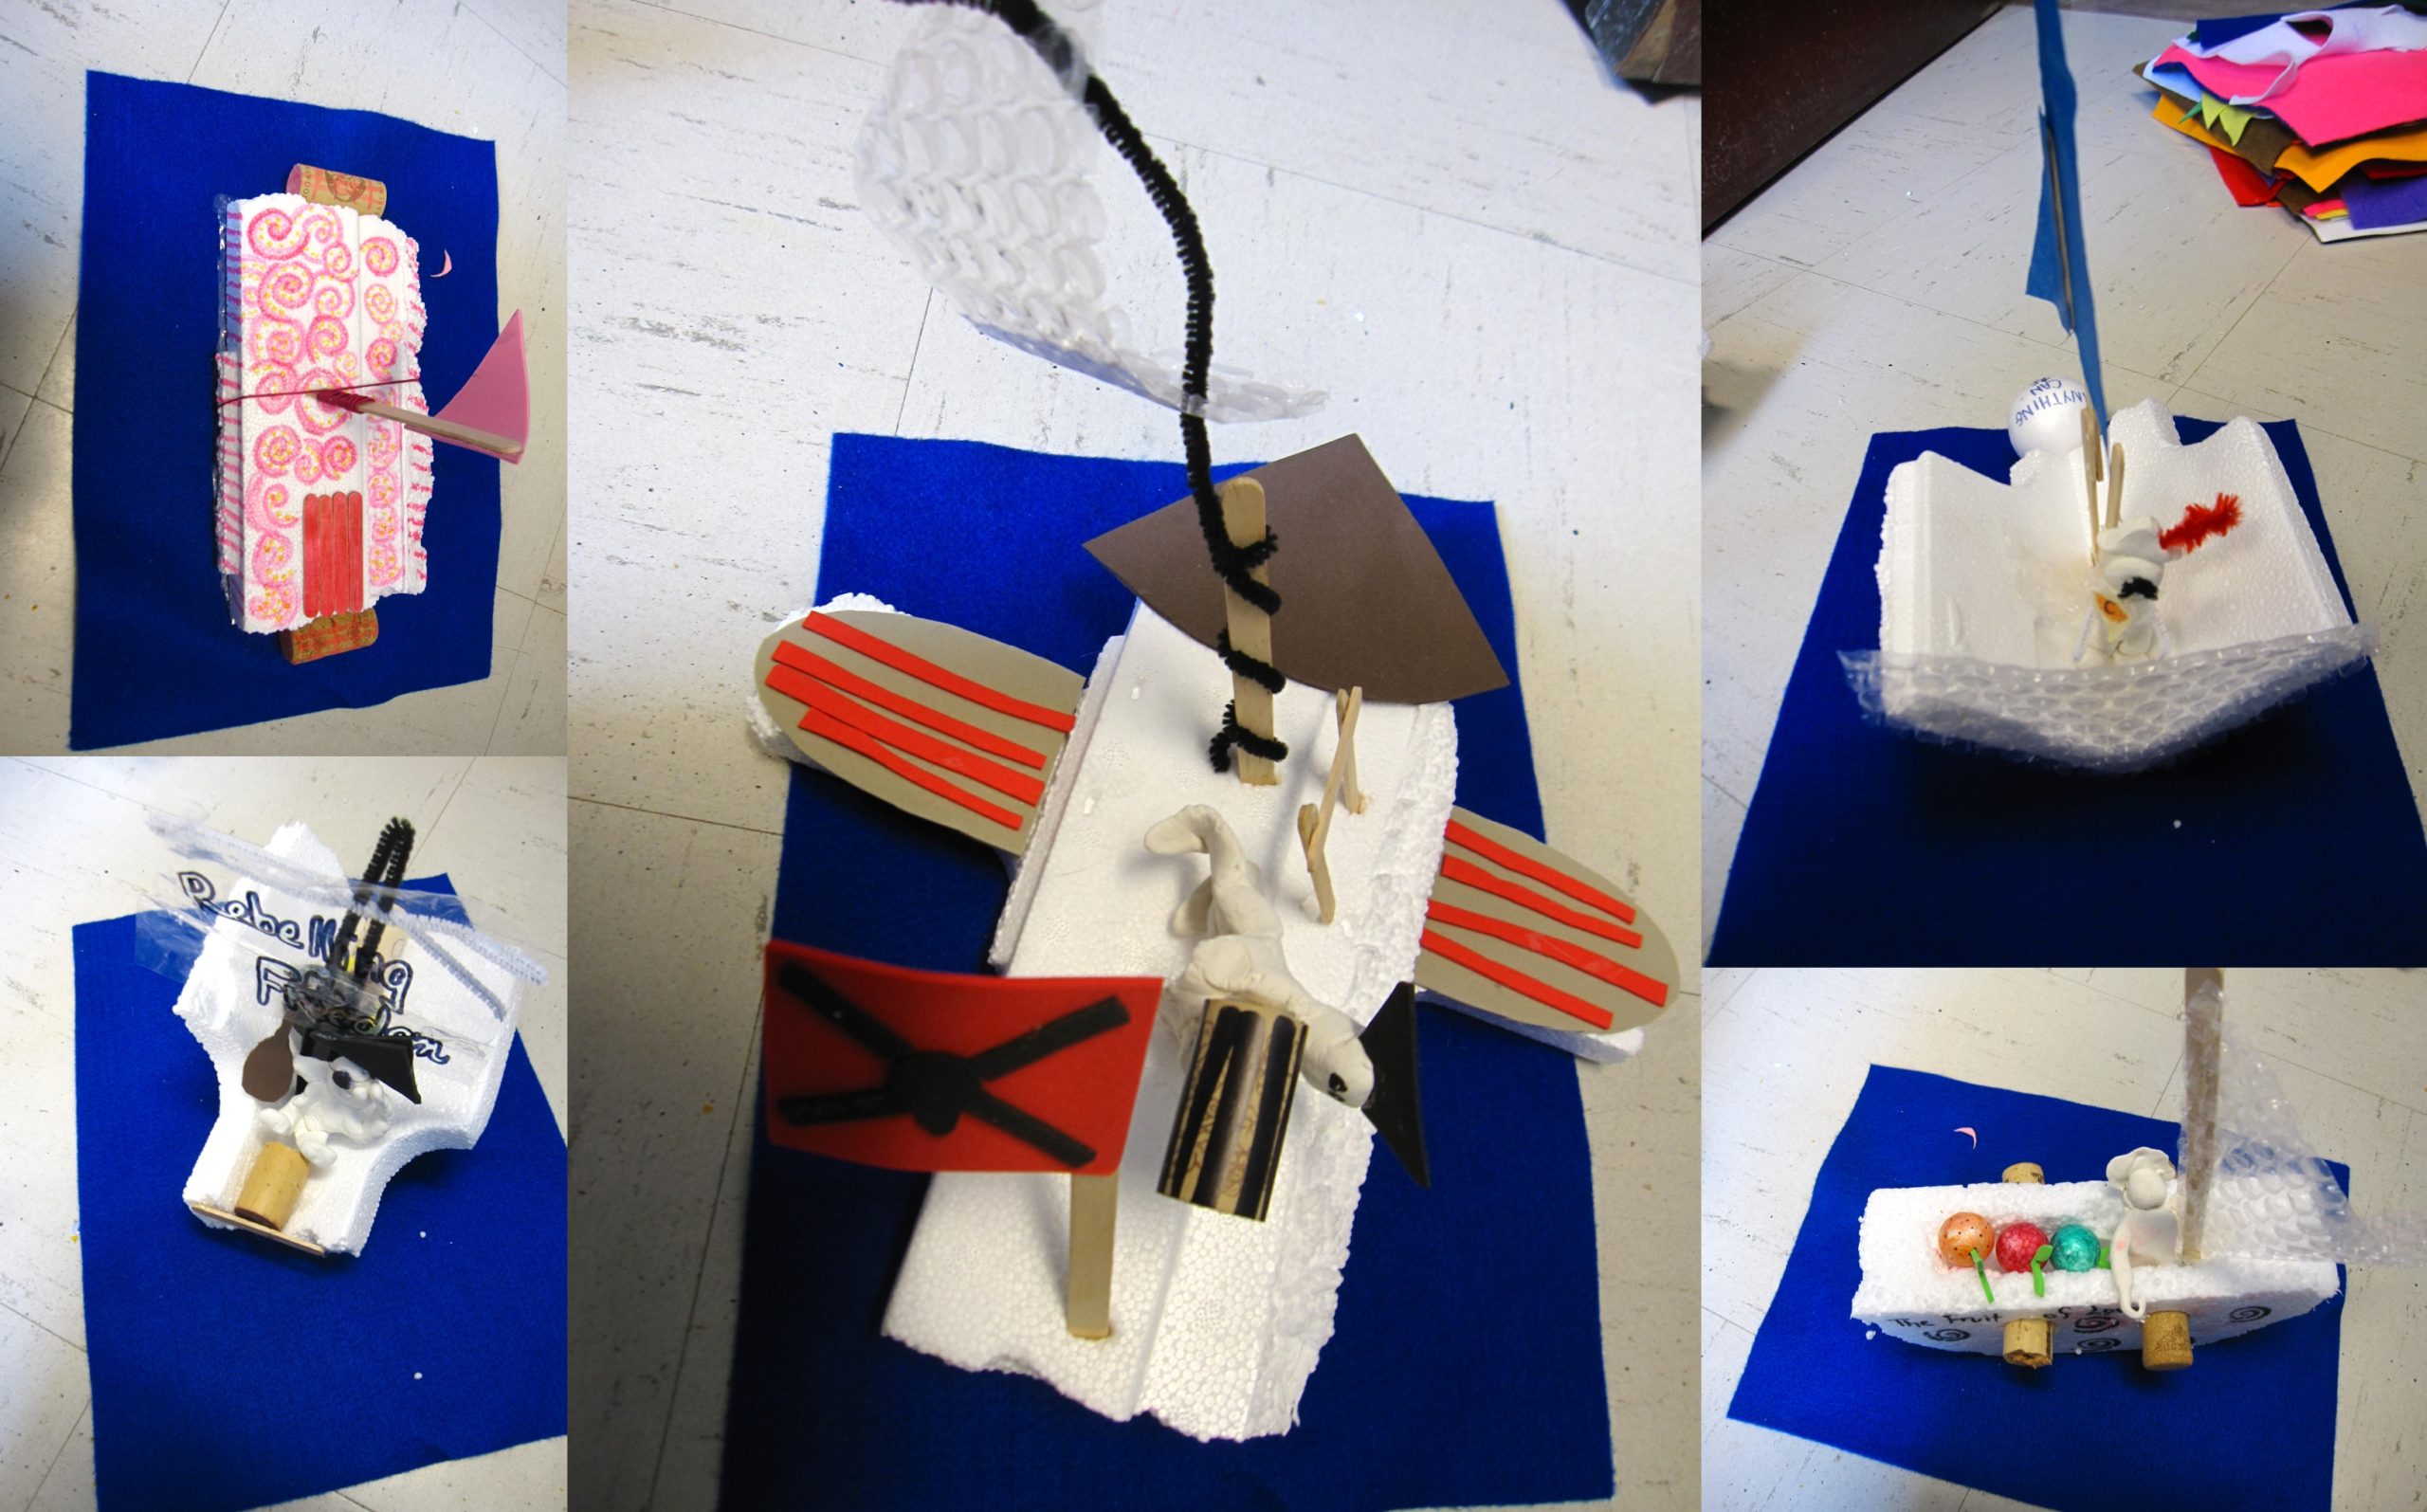
Rationale: Water is a necessary component of all life yet approximately a billion people in the world do not have access to clean and safe drinking water. In a country where clean water is widely available, this series of lessons is meant to first increase childrens’ appreciation and understanding of water, before developing their understanding of global water issues.
The purpose of this strategy is consistent with a place-based approach to environmental education, wherein learning about issues from a local perspective is encouraged to keep issues from becoming abstract and disconnected.
Project: For this project, Students collaboratively create intervention art in the form of a boat that floats and is made from found material. They will add a captain and a key message about water that they would like to share with the school community. Boat races will be held outdoors in puddles or areas at the school where water might be found to promote their messages. As intervention works, the boats will then be left around the school where water is used/found to share the key messages about water with the rest of the school community.
Objectives
- As a result of this lesson, students will know whether a variety of materials sink or float in water
- By collectively developing two strategies, students will know and share two strategies for helping them to work collectively
- Students will have an understanding of what it means to respect the water and will know practical strategies for showing respect to water
- Students will be able to build a small floating boat that carries a message about water
- Students will know what intervention art means
This series of lessons was originally inspired by a game developed by Decode Global called Get Water! The game is no longer available, but the unit/series of lessons, “Thinking through Water” can be used regardless – I have included it here for anyone interested. This final project example that I have shared comes from this series of lessons. This project segues nicely into the fourth and final installment in this Gaming your Pedagogy series: Integrating video games into art curricula. Video games can be a source of inspiration for art educators and art students in a wide variety of ways including making art inspired by a video-game-like Get Water!, making art by messing with video games, creating pixel art, designing video games, and even developing approaches to feedback/evaluation! I will explore some of these options next month.
Professional Learning through Reflective Artmaking
Wendy Milne, EdD. teaches elementary art in the Hempfield Area School District and is the author of the recently published book , “Professional Learning through Reflective Artmaking: A Pedagogical Portfolio.” She resides in Region 1 and was a former co-representative and Advocacy Co- Chair for PAEA.
In late Spring, 2020 my friend and mentor asked me if I would be interested in altering my dissertation into a book to be published by Learning Moments Press (https://learningmomentspress.com/). Since we were all shut down during the quarantine I thought I would have lots of spare time. However, summer passed with few attempts at writing the book and more of a focus (panic, really!) on what the upcoming school year would bring.
I’m an elementary art teacher. As with many school districts, changes during the pandemic year in specialty area subjects were drastic. Many new teaching schedules were put into place in my district -all of which decreased the amount of time my students would have art throughout the year. Nothing raises my blood pressure more than being told my students would not be getting as much art as they deserved. I dealt with this stress by turning to my sketchbook.
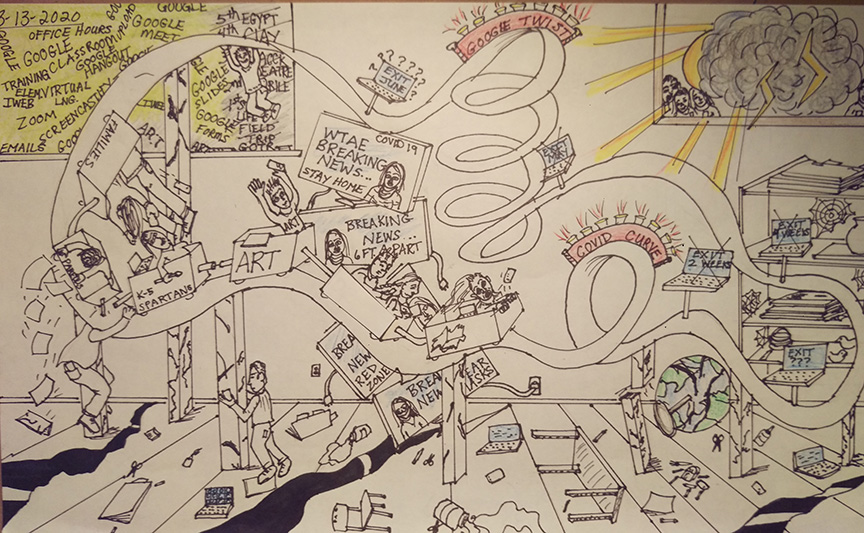
In my book, “Professional Learning through Reflective Artmaking: A Pedagogical Portfolio”
I discuss how I’ve used sketching to reflect on my thoughts/ideas/frustrations/etc for over 30 years of teaching. I briefly discuss some of these thoughts here.
Early in my teaching career, I entered into a doctoral program at the University of Pittsburgh where I was engaged in fairly traditional research courses requiring written research papers. Though delving into research about art education was extremely interesting, I felt as if I did not have the opportunity to be very creative but I did not know how to address this. Additionally, my teaching schedule and coursework allowed for little time –or energy – to make art. The author, Wanda May highlights how many art teachers have little time to be critically reflective on their practice (May, Teachers, Teaching and the Workplace,” 150). More recently, the lack of time and energy for art teachers to reflect was addressed during a NAEA Town Hall meeting “Art Educator as Artist” (June 8, 2021).
Luckily, in one of my classes my professor, Dr. Piantanida, suggested I draw for my research project. I was taken aback for two reasons: The first was I didn’t think it would be acceptable to draw for a graduate class and secondly, I had not been drawing for many years. My skills were rusty and I was embarrassed to share these poorly drawn ideas with anyone. BUT- I was extremely excited to have the chance to be more creative and show ways in which I learn best. I found making quick little sketches using the same media as my students to be ideal. Eventually, I began to intertwine ideas from literature with my initial reflective sketches. I labeled this practice as Reflective Artmaking.
Reflective Artmaking also became a way to work with a student-teacher to delve more deeply into what it means to teach for new and seasoned teachers. Each week my student teacher and I shared and discussed our drawings helping us both come to a new and deeper understanding of our pedagogy.
I abandoned reflective artmaking after completing my degree, once again, claiming limited time and energy. I eventually returned for various reasons, including new PA Department of Education requirements. I volunteered to be on our Teacher Supervision and Evaluation Committee to learn more about the requirements and to encourage our district to include a variety of creative evaluation methods. Our district adopted a four-year plan that included Formal Observation one year and, for the other three years, a Differentiated Project based on Danielson’s Framework of Teaching.
I chose the Professional Growth Portfolio component to demonstrate Danielson’s Framework of Teaching. It took the form of another sketchbook in which I crammed as much information as I could in an effort to thoroughly demonstrate my professional competence and accomplishments. To be honest, this initial attempt to use reflective artmaking again was more of an artistic embellishment for administrators rather than expressions of reflective insights I had done in the past.
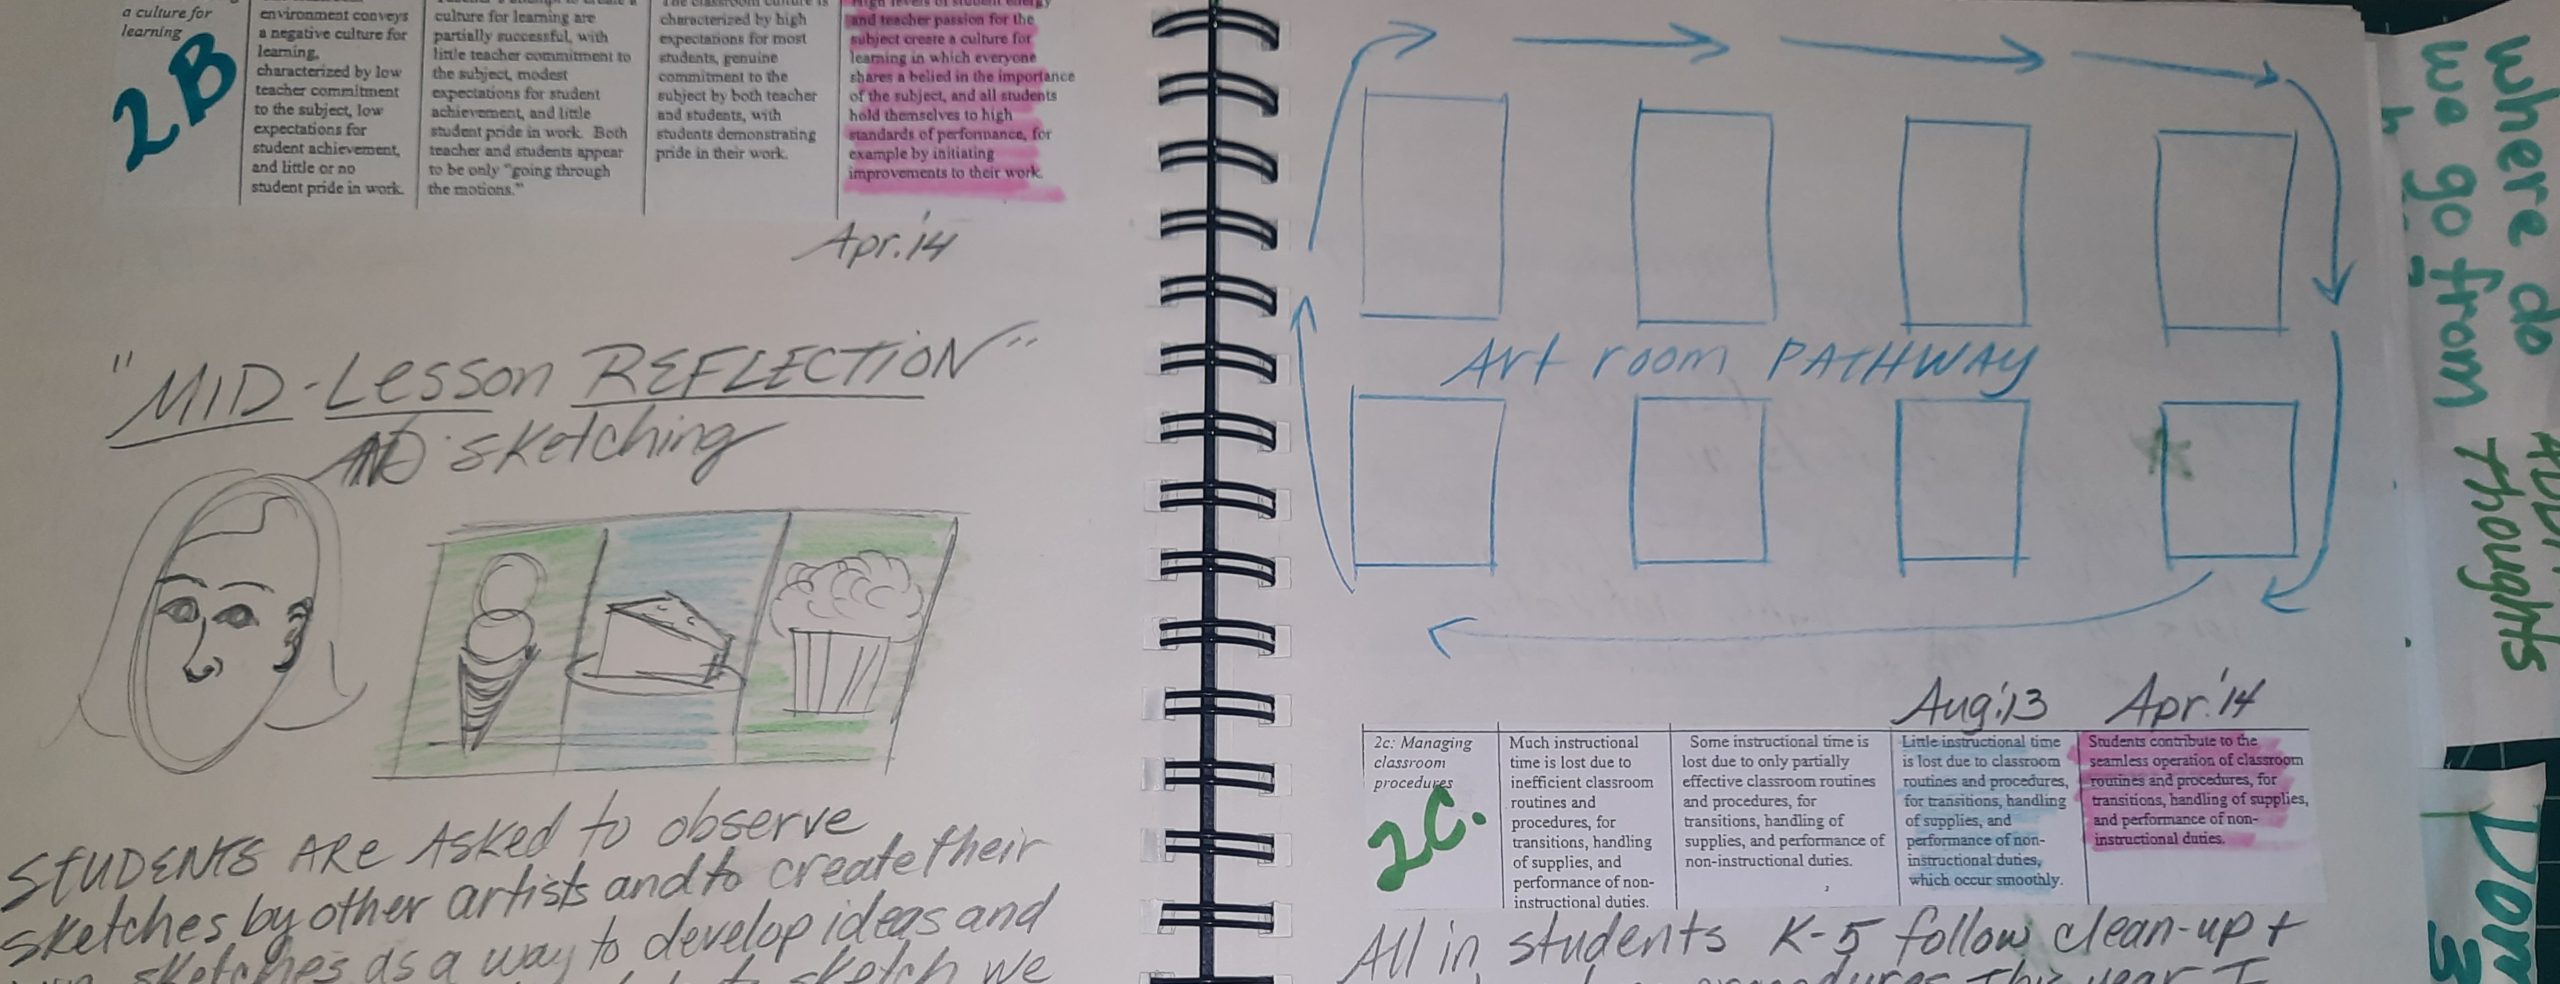
The following year, however, I was determined to meet my needs as an Art teacher rather than create something for the administrators. Thus, I returned to reflective artmaking as I understood it. Re-immersing myself this way proved incredibly rewarding
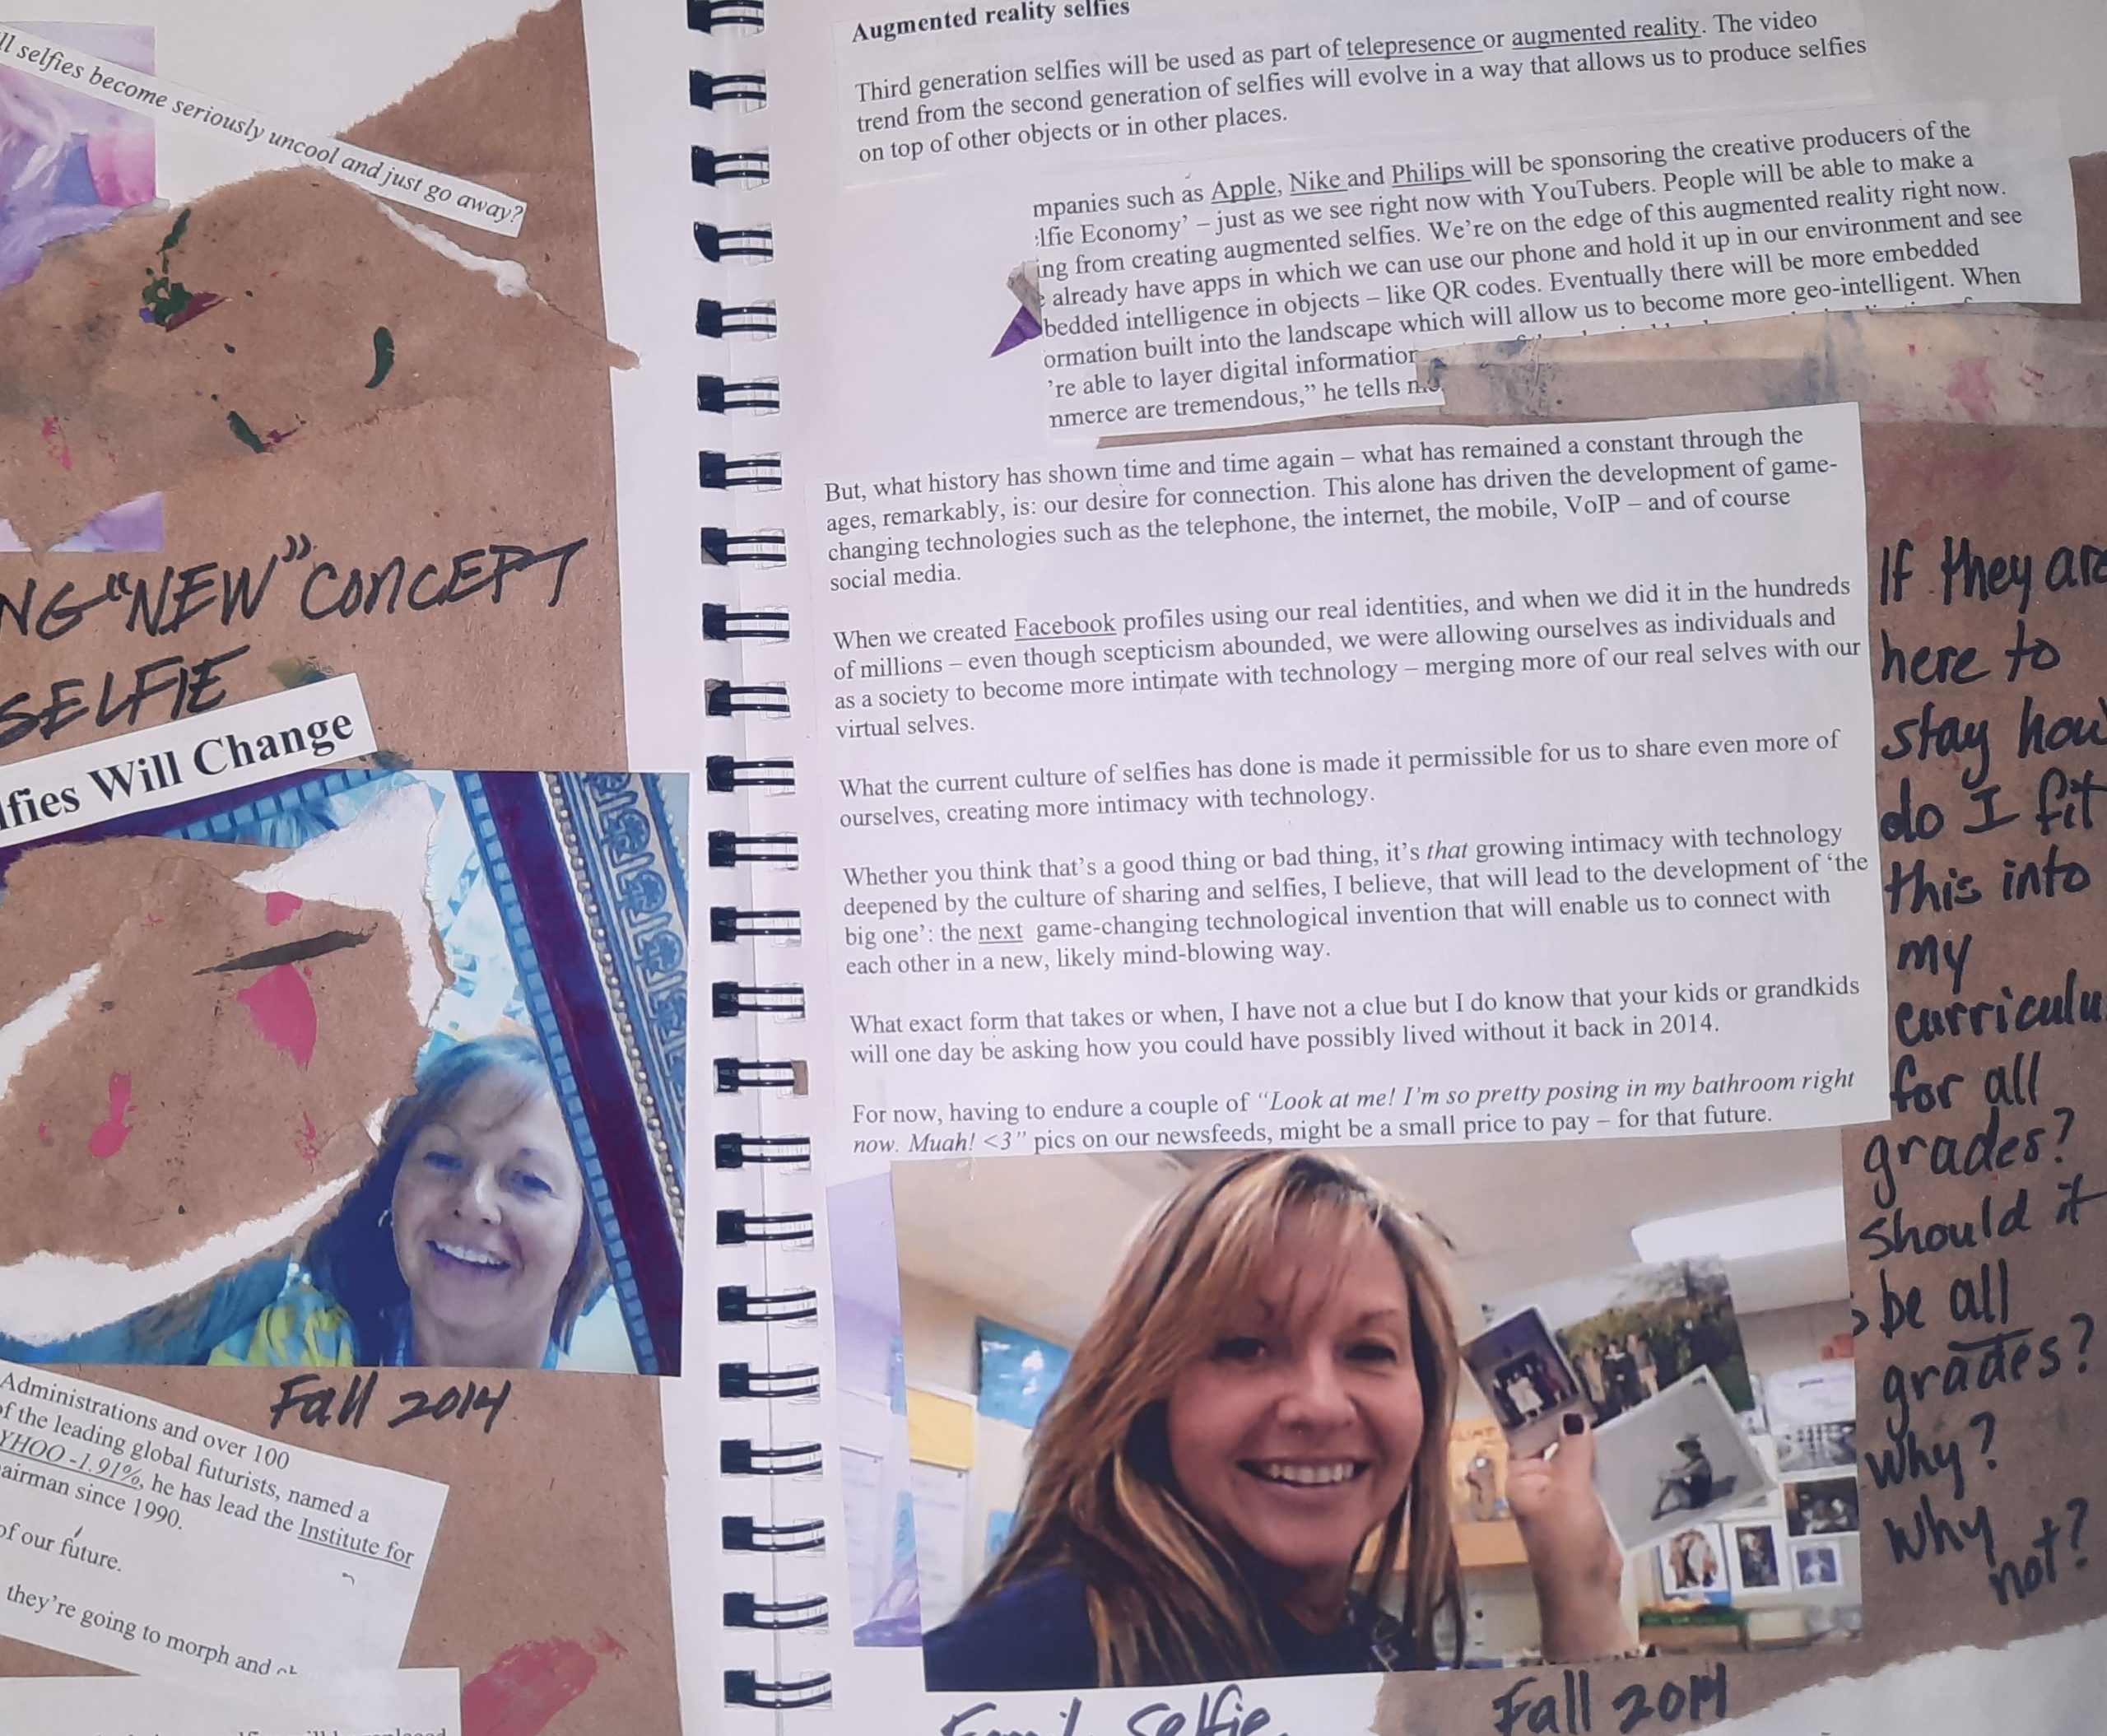
because it allowed me to deeply reflect on my practice once again. I’ve chosen to use a sketchbook format each year for my Differentiated Project and continue to find pleasure in doing so. Numerous iterations of sketchbooks have emerged as well as new and deeper understandings of my pedagogy.
As I ponder the upcoming school years I have left to teach, I realize that neither I nor anyone else can predict what teaching will look like in the years to come. I, like so many other teachers, stand at a crossroads. I can succumb to the stress of a world beyond my control, or I can find ways to manage the stress and continue to strive for a personally and professionally meaningful life. I trust that the lessons I have learned about reflective artmaking will sustain me as I choose to move forward with the hope that life will return, not to what it was, but to something new and exciting. I am reminded as I review my many sketchbooks that my relationships with the students lie at the heart of my practice.
Although my particular process of reflective artmaking may not fit with everyone’s style of professional learning, I hope the artifacts I have shared will give others ideas for meeting whatever challenges we face.
As I finish writing this, I am reminded I have not engaged in reflective artmaking with student teachers again or, ever, with colleagues. If you would like to collaborate with me in the Reflective Artmaking process as part of your own PDE Differentiated Project please message me via email at wendymmilne@aol.com or Twitter @wendymmilne66. Additionally, I will be hosting a Book Club through PAEA in Fall, 2021 (https://paeablog.org/art-educator-opportunities/book-club/) and will be presenting at the PAEA Fall Conference (http://www.paeaconference.org/).
References
- May, Wanda T. “Teachers, Teaching and the Workplace: Omissions in Curriculum Reform.” Studies in Art Education 30, no. 3, (1989): 142-156)
- Milne, Wendy M. Professional Learning through Reflective Artmaking: A Pedagogical Portfolio. Pittsburgh: Learning Moments Press, 2021.
- NAEA Town Hall meeting “Art Educator as Artist” (June 8,2021).
 D5 Creation