paea
now browsing by tag
How to Make Your Art Room an Inclusive Space in 3 Simple Ways by Veronica Hicks
Veronica Hicks is a PAEA board member and serves as the Multi-Ethnic Concerns Representative. Below, Veronica shares 3 simple ways for you to make your art room a more inclusive space.
I’ve spent years instructing students in many different and equally wonderful art classrooms, and, like every other art teacher I know, my free time was spent thinking about how to be my best art teacher self for my students. I still spend the majority my free time thinking about my current art room and instructing art education undergraduates and grads, where I’m lucky enough to share my insights, mistakes, and successes. I’m always in awe of the ideas and thoughts a group of art educators can generate when given the time and space to solver their teaching problems. One that often surfaces in conversation is how to prepare for an inclusive classroom, one in which students of all abilities come to learn and grow. I love discussing the idea of inclusion in art classrooms but translating discussion into realistic classroom instruction can be a challenge!
You’ve probably seen how important inclusive practices are to the success of your art room. It’s important that you absorb ways to make your art room and art class practices so that each part of the room supports your goals for including people who might otherwise be excluded or marginalized in educational spaces.
Without a plan to make your classroom inclusive, your lessons can have less impact, you’ll have fewer opportunities to enhance self-concept in all students, and you may even miss out on the chance to lead by example in your school district.
So why does the task of creating an inclusive classroom seem to make art teachers nervous? Do they assume they’re not consistently assessing their space for the inclusion of all learners?
Maybe because, unless you’re an educator who likes researching and testing inclusive methods, strategizing about this topic can be exhausting! You must find practices that were tested, assess if it relates to the students you instruct, and finally decide if their results are worth trying in your own classroom … ugh, where do you even start?
Well, dear art teacher, the time for guessing is over.
Inclusive Classrooms literally means:
“All individuals, regardless of exceptionality, are entitled to the opportunity to be included in regular classroom environments while receiving the supports necessary to facilitate access to both environment and information. – Eric Shyman, 2015
Prior to the 1970s, most U.S. education environments featured widespread exclusion. Students with severe, moderate, and oftentimes even mild disabilities were excluded from public schooling. State institutions housed hundreds of thousands of children, segregating them, which ultimately showed them that their presence in ‘typical’ society was a disturbance.
Things started to change in The start of inclusion began with the Rehabilitation Act of 1973. This required disabled students their civil rights and required accommodations in schools. Followed by the Education for All Handicapped Children Act in 1975, the U.S. was on a roll towards the education of all children that we see today, including Individual Education Plans (IEPs) and 1997s Individuals with Disabilities Act, or IDEA. Now, all school districts are required to provide FAPE, or a free appropriate public education.
Today, inclusion has become the norm in most schools, children of all abilities engage in their education, learn from friends, share stories, make art, and play with their peers.
After you read this blog post, there will be absolutely no reason you can’t be a part of the inclusive classroom movement every single day — and do it confidently. Not only am I about to provide you with a simple inclusive art classroom formula to follow, but I’m also going to give you ideas for creating different types of classroom changes that you can share.
1. Understand your students.
Before you start to make changes to your classroom space, have a clear understanding of your biggest supporters: your students! They will benefit the most from this change, so…
What do they want to learn about in art class? What changes to your art room would most resonate with them? This is where creating your inclusive classroom as a response to their needs comes in handy. Consider what you know about your students’ goals in your class, especially their interests while you’re coming up with a theme for your next lesson plan.
Don’t know where to start? Here are a few resources to get you started:
Know your students through these simple activities – https://theowlteacher.com/know-your-students/
Don’t just instruct, interact with your students! – https://www.bookwidgets.com/blog/2018/06/20-interactive-teaching-activities-for-in-the-interactive-classroom
2. Identify the accessibility of your art lessons.
Now that you’ve thought about the types of students in your classroom, you can respond to their individual needs. Think about the next art lesson you plan on teaching. For example…
A student with developmental coordination disorder has different motor skills than typically-developing students. This child need would appreciate pre-sharpened pencils placed near their desk. Is the stock of pencils refilled before they arrive in class?
Changes to how you prepare and instruct an art class can be pretty general to start with. For example…
When you create an environment where it is okay to fail, make mistakes, or get frustrated, you are creating an inclusive classroom! Every student pays attention to how you handle blunders and will know it is okay to struggle. In this case, encourage mistakes!
Here are a few ideas for helping students develop confidence and skills in this area:
For younger students – Read the book “Beautiful Oops” by Barney Saltzberg.
A book where artistic mistakes lead to beautiful outcomes, such as a torn piece of paper becomes an alligator’s mouth, and “a smudge and a smear can make magic appear.”
For older students – Read “Accidents May Happen” by Charlotte Jones.
The author shares how mishaps led to inventions like ice-cream sodas, Worcestershire sauce, the yo-yo, cellophane, liquid paper, and dynamite.
3. Consider delivery and assessment.
Start with how you instruct your class – does whole group instruction taper down to flexible groupings which could be small groups? Would you try stations or creative centers for your next lesson? What about paired learning? For example…
Younger students are often teacher-led in instruction, but older students could be student-led with teacher monitoring. Peer-supported learning is a very effective take on learning. Student-led demonstrations could show you how they want their lessons to be delivered (albeit sometimes generating some silly results). If students are given the opportunity to have learning experiences that align with the same learning goals as individual instruction and grading, then maybe these alternative ways may work for your class.
Considering how your classroom, lessons, delivery, and assessment follow a universal design for learning will change how you view visual art content. For example…
Methods that support many learners’ needs include ways of representing learning to students and for students to represent learning back. This means strategies we use in art class, such as modeling, sharing images, manipulating materials, organizing tasks graphically, responding orally and in writing, and using assistive technology. Modifying images to have large print, or drawing a picture instead or writing a response, or just allowing extra time to respond are part of universal design.
Need more inspiration? Check out these links to sources for Universal Design:
From National Education Association (NEA) – “Understanding Universal Design in the Classroom”http://www.nea.org/home/34693.htm
From the Children’s Museum of the Arts (CMA) in New York – “Universal Design for Learning & Adaptive Design” https://cmany.org/schools-and-community/staff-development/universal-design-learning-adaptive-design/
What ways do you think you’ve already embraced inclusive classroom practices in art education? I bet you have an idea or two worth sharing at the next PAEA conference. Consider forming a panel with other art teachers and sharing them with our community!
Putting all of these ideas together, really looking at how you address the challenge of an inclusive classroom and succeed in using inclusive education, is doable, and will be appreciated by your students.
Peace, love, and art – Veronica Hicks, Multi-Ethnic Concerns Representative to PAEA
Balancing the Teacher and Artist in Me, By Jackie Thomas
Balancing the Teacher and Artist in Me
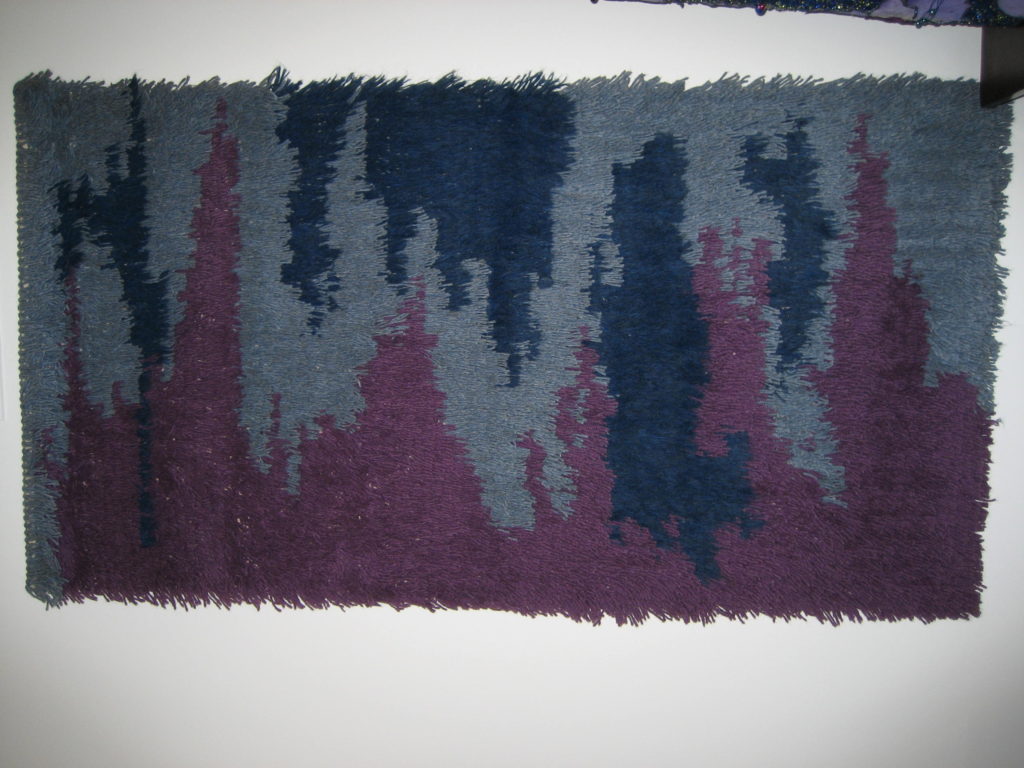
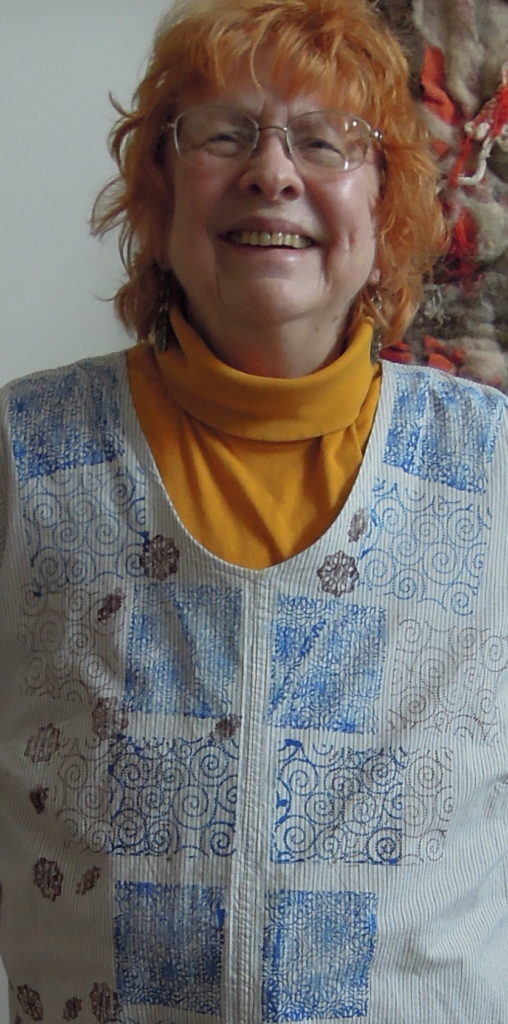
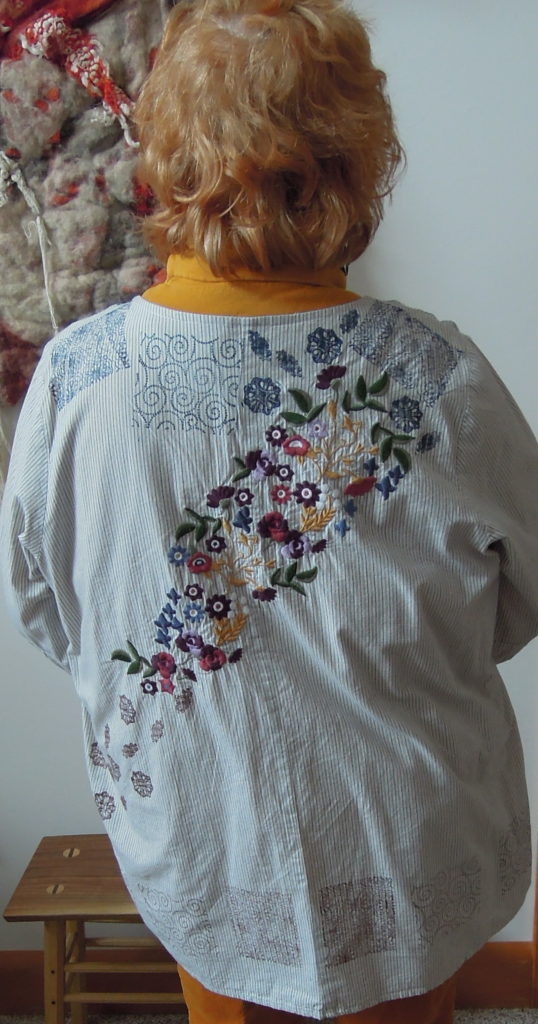
As a Fibers Artist, time has always been a challenge for me. Just plain living takes so much time, and when a teaching career is added, there is little left for the creative process and studio work. I thought I was not really productive in the studio while I was going through challenges of balancing home and school. But in retrospect, I realize I really was productive by channeling my creative energies in a number of ways:
As a brand new teacher, fresh out of college, and having already decided to specialize in Fibers. I packed up a project bag with a pre-woven rya rug backing (on which I drew a simple design), some yarns, a measuring tool, and a large tapestry needle. I kept the bag at school, available for the snippets of time available to work on the rya rug during faculty meetings and in the faculty room (I was told that teachers thought I was stuck up if I never left my classroom, so I scheduled a couple of periods a week to talk with teachers in the faculty room and did my planning at 5:30 in the morning and at home). It was a bulky bag that I lugged around, but I learned about trying to fit into the building and being a member of the larger school community. I believe it took all year to finish that Rya Rug.
Time to balance teaching and art making didn’t shift any over the years, and I decided that I wanted to complete more than just one artifact in a school year. I looked for projects that would not require much of an investment in time. I tried jewelry making for a couple of years. A new bag of materials accompanied me to meetings and on car trips when someone else was driving.
Feltmaking jewelry:
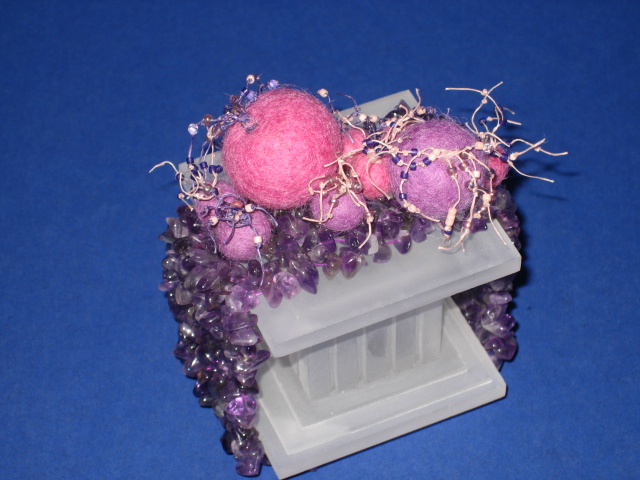
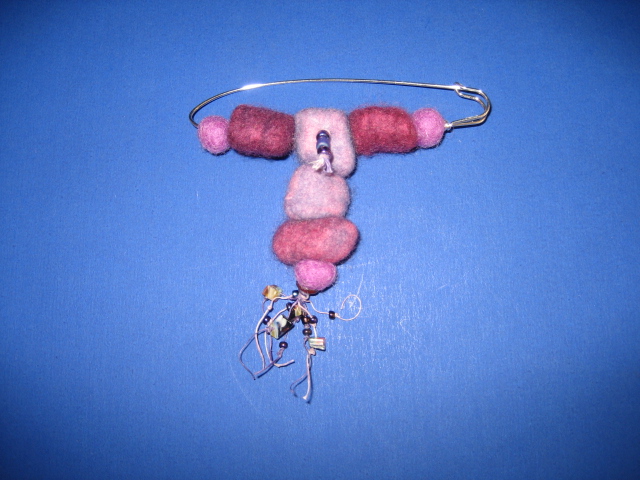
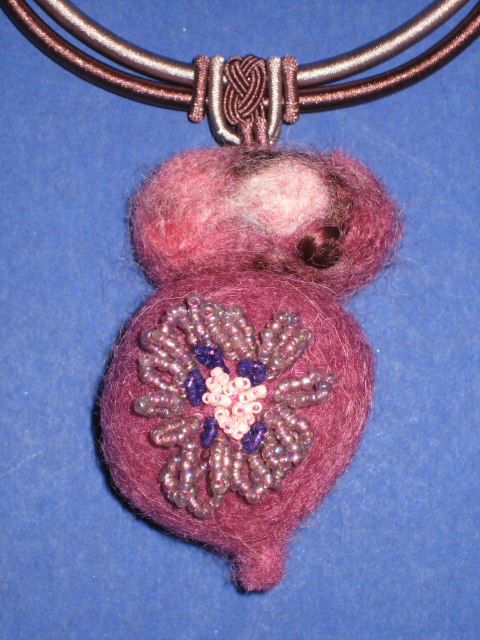
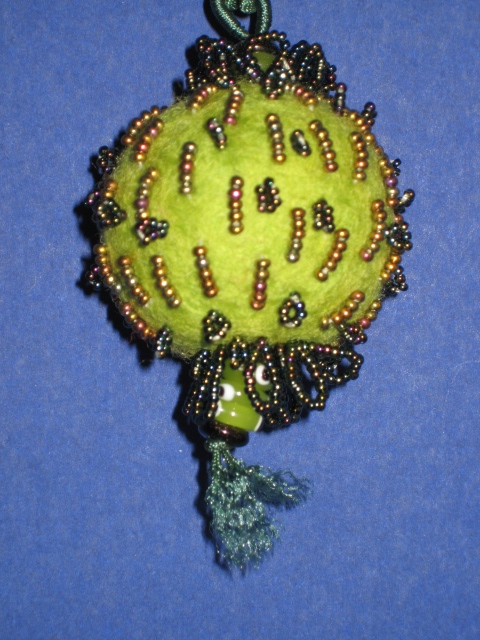
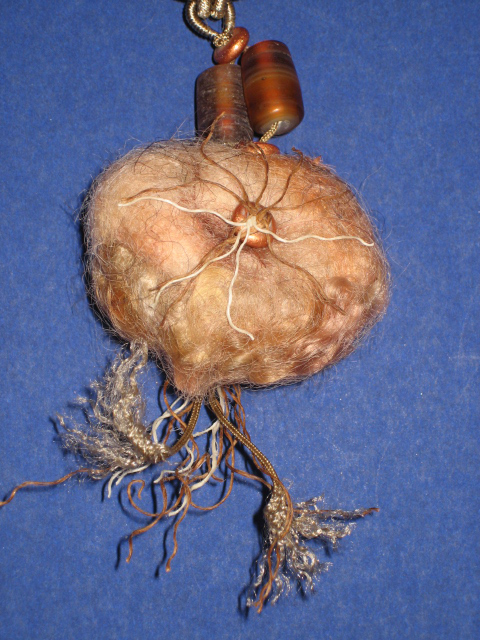
Waxed linen coiling/twining jewelry:
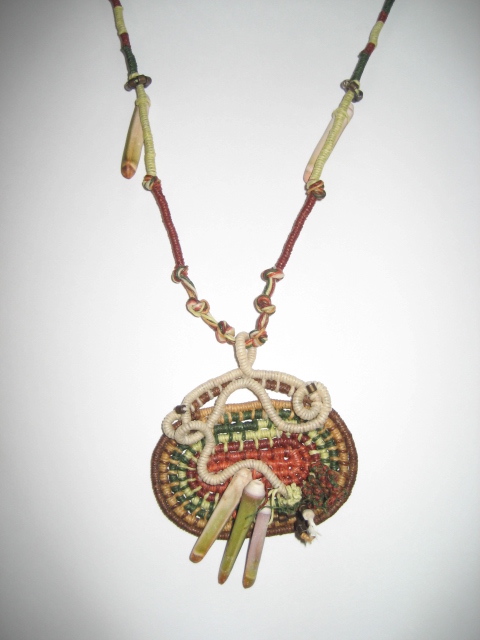
But I eventually decided I didn’t really find jewelry satisfying – too much assembly. And, fibers jewelry making was not really transferable and informative to teaching my students.
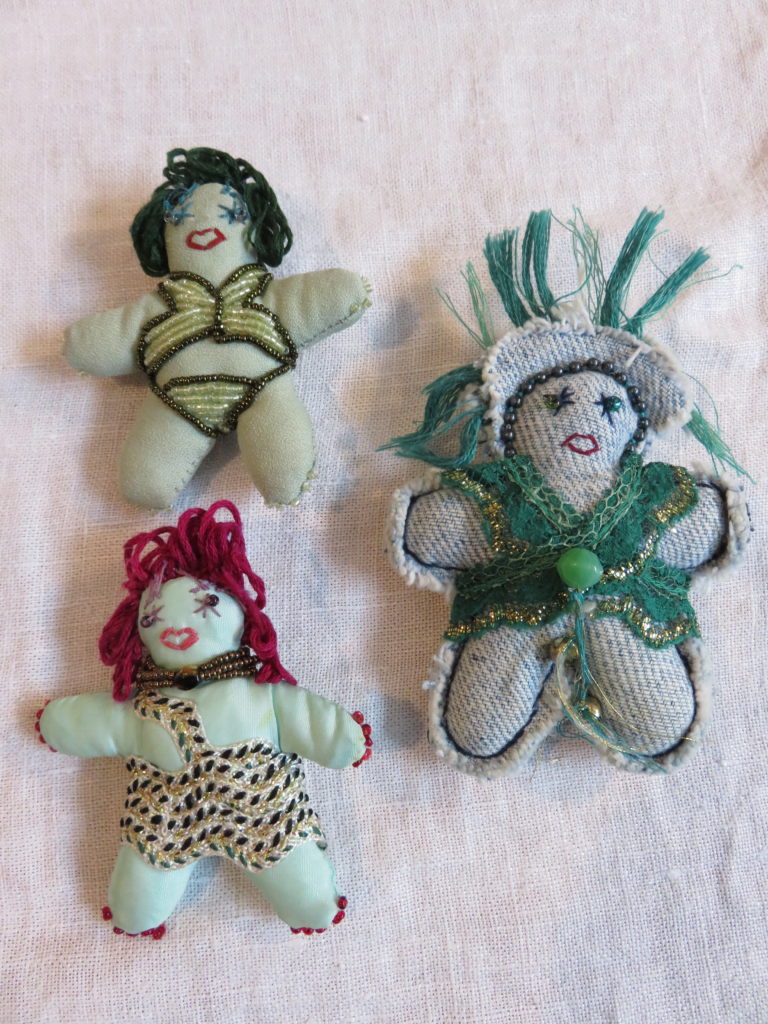
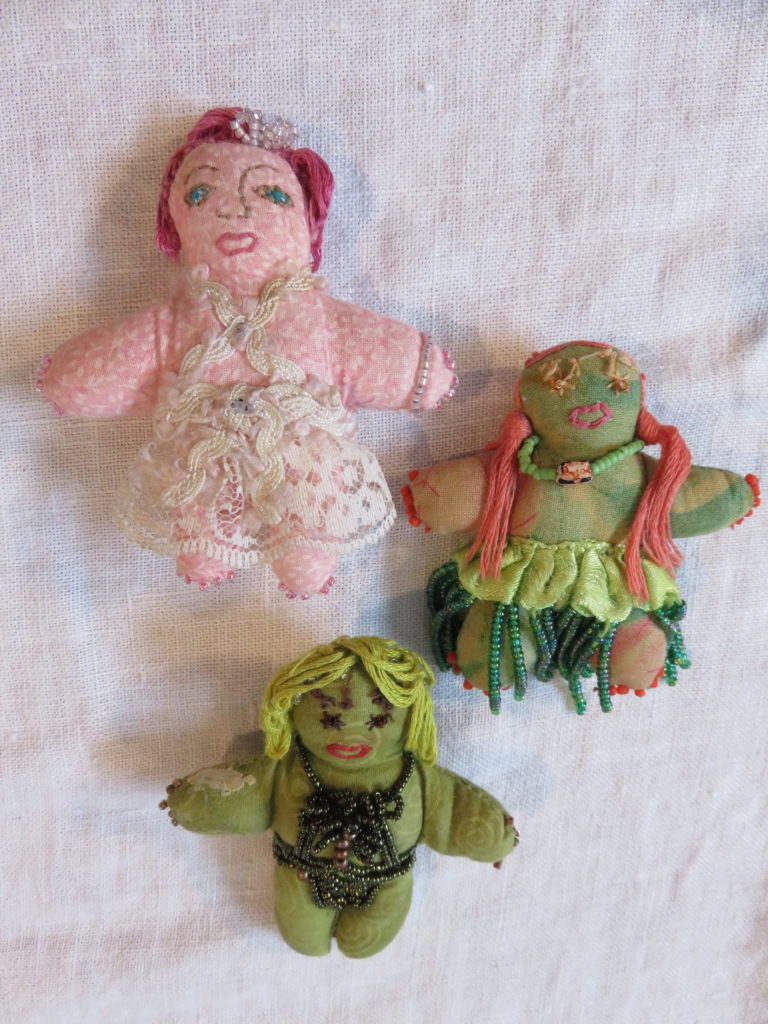
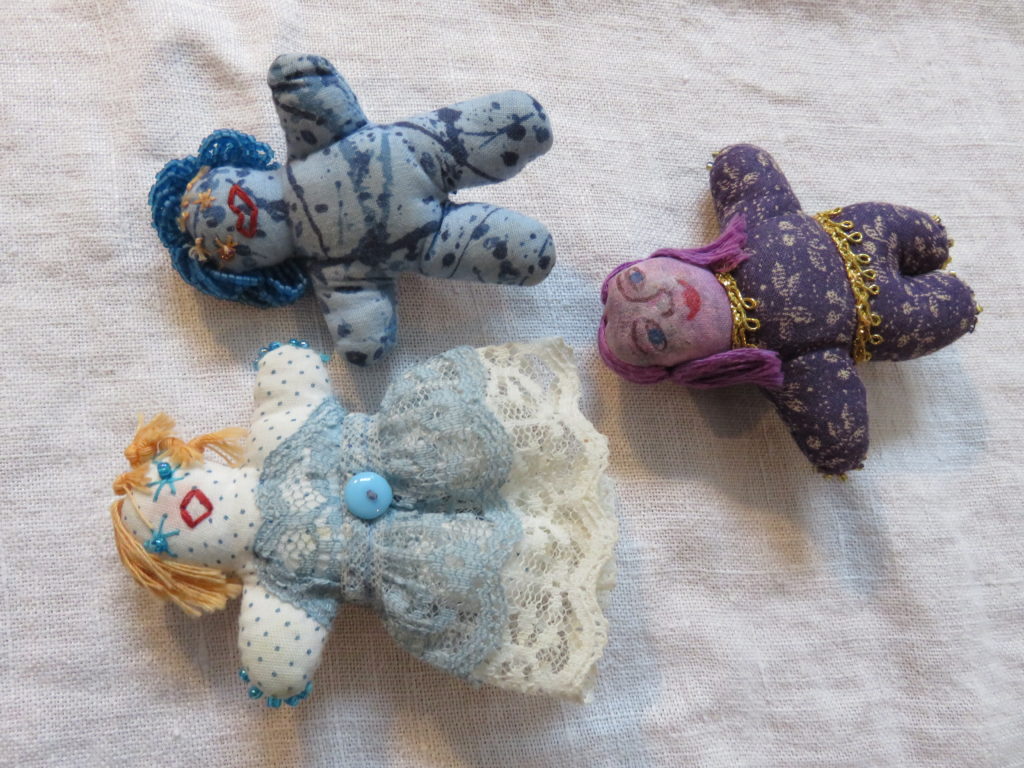
Quite by accident I began to make miniature dolls as fetishes and found that quite satisfying for more than ten years. My sister and I attended the American Crafts Council Baltimore Winter Market every year, and I bought one tiny wearable fetish animal doll from An African doll maker each year.
African Animal Fetishes:

“A fetish is an object of magical powers. It is a guardian chosen by you. Once you have chosen your fetish you must promise to faithfully care for it. You must keep it in a warm, dry place and feed it one grain of corn or rice or bean each year. In return, it will insure you good health, clear sight, protection against injury, success in hunting and trading, and abundant love.”
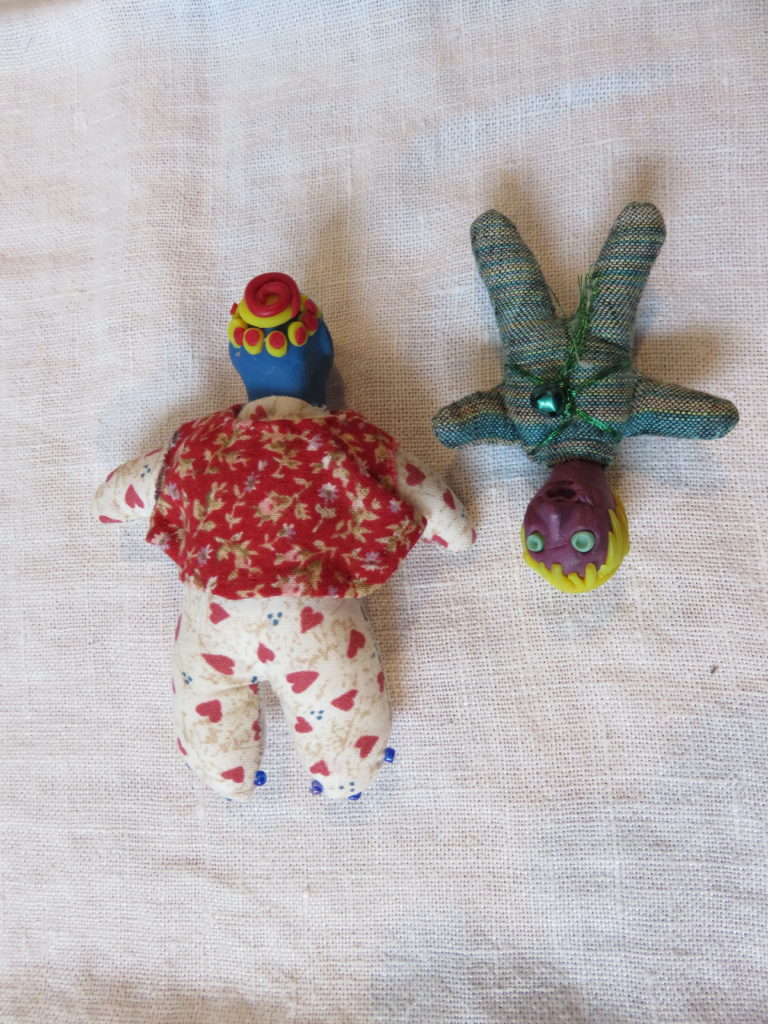
After the fetish artist moved back to Africa, I went through fetish withdrawal, and I began to design and make my own little fetish dolls. I have worn a fetish every day over the past 40+ years.
I usually worked on a series of fetishes of one color/fabric but each with it’s own look/design (one to keep and the others to share). I tried to complete one step in each sitting (i.e. trace the pattern onto the cloth and cut them out; sew the fetish shape with right sides of the cloth together & leaving an opening along one leg; turn the cloth fetishes right side out, stuff them and stitching them closed; embroider the faces; add hair; clothe one fetish at a time).
Some of my Fetishes:
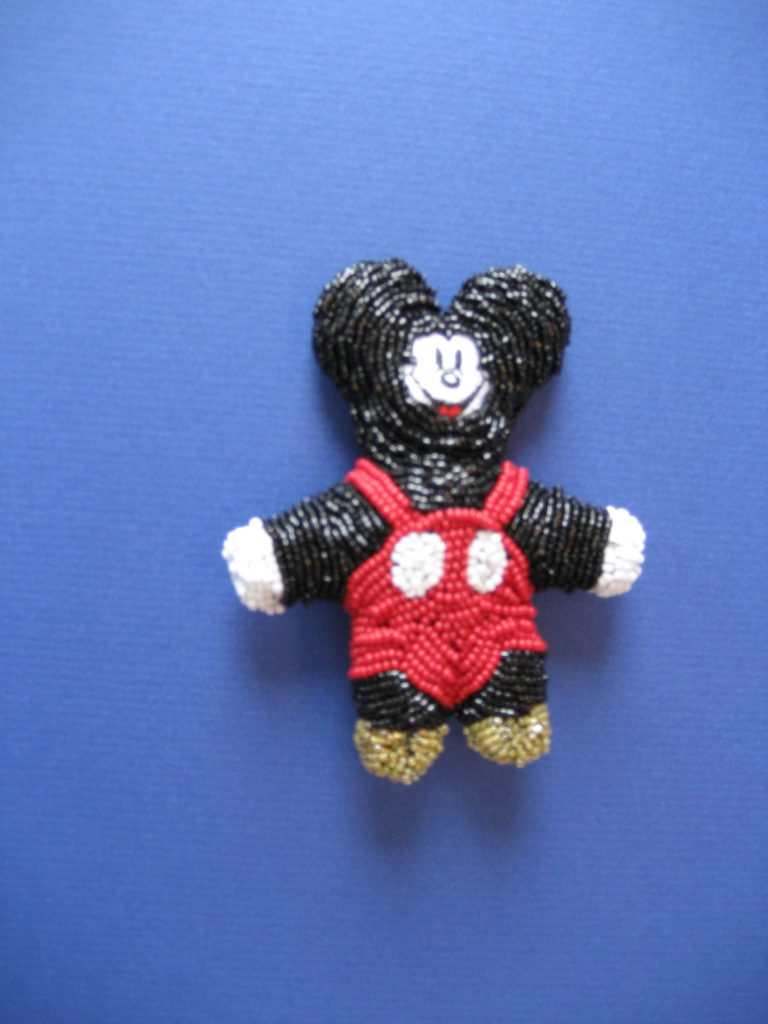
An AHA! Moment occurred when I realized I had boxes and bags of process and project samples for feltmaking (and other fibers processes). They were already of my own hand and design. I pulled them out and began to assemble them into larger sculptures (a technique I then used with students as well). I also challenged myself to create one-a day miniature artifacts to be assembled later into larger pieces.
“Pulls”
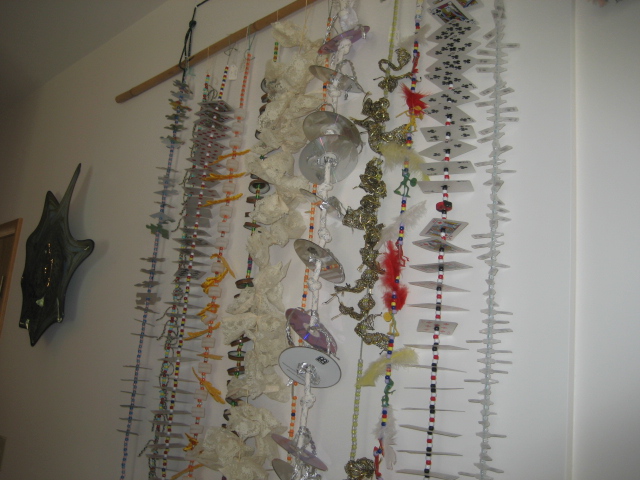
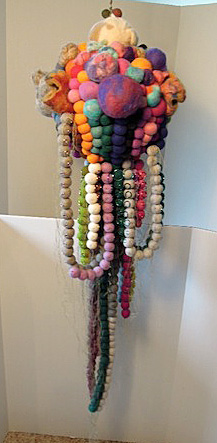
“It’s An Octopus!”
The challenge is the time. I dedicate time (usually weekend or evening) to get a project concept defined in my sketchbook and to organize materials. I look at my schedule to see where I might capture unscheduled time. And I always have a bag or a box loaded and ready when time suddenly and unexpectedly becomes available. I have rules:
- Never let my own art work interfere with planning for my classes and experimenting with materials and techniques before teaching them. Planning is important.
- Never work on my own art during teaching time.
- Request someone else drive whenever possible so I can work on a project during the trip.
- Always have a journal or paper to write down ideas, things to remember, and to record discoveries and things I learned.
- Collect materials and experiences on every walk, vacation, and opportunity.
- Never throw away project failures or demonstration projects. They may serve another purpose later. At the very least, failures help me remember how NOT to do it (because otherwise I will usually do it the unsuccessful way over and over again).
- Teaching others is a prime way to learn and improve my own skills.
- There is always something to be learned, even in the most repetitive experience.
- ALWAYS be ready to work on a project…. i.e. ball gown components created while sitting at Little League games.
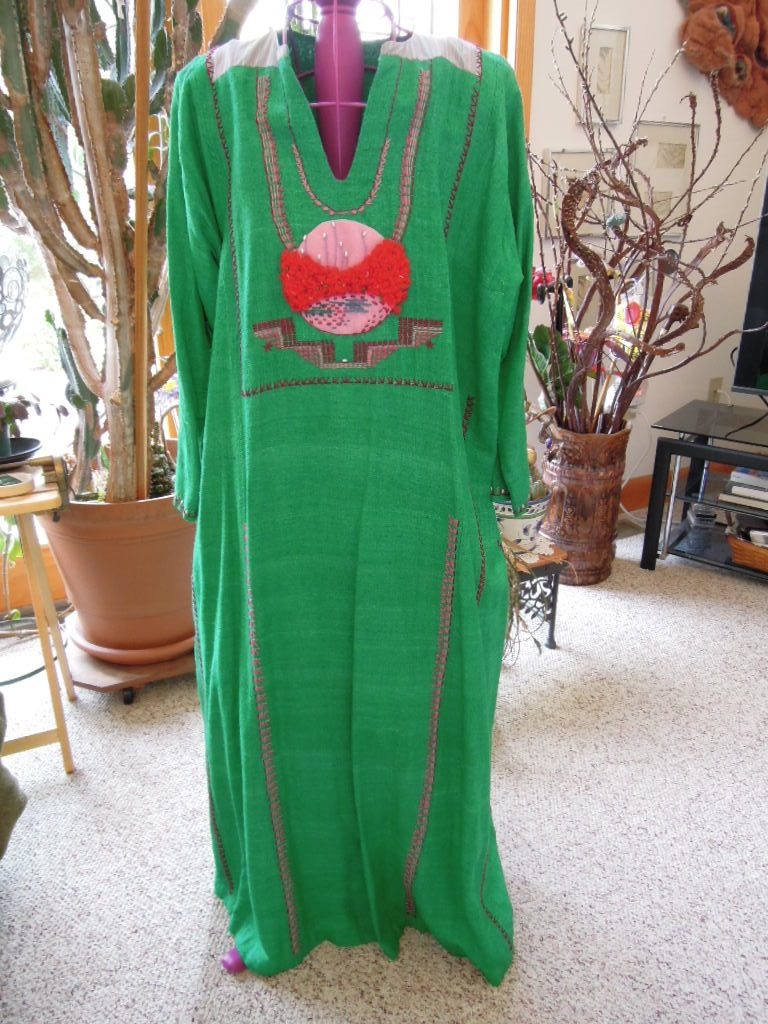
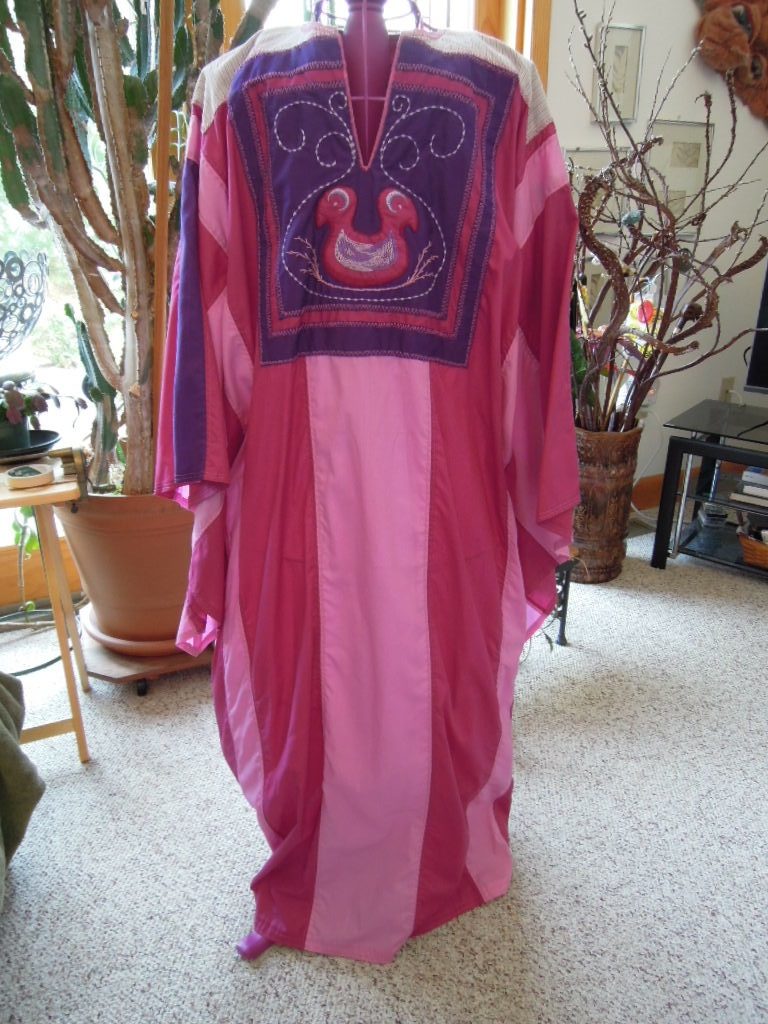
If nothing else inspires, I can always redesign/embellish wearables from my closet.!
C’est Finis!
Conference Key Note Sneak Peek
Have you signed up for the PAEA conference in Harrisburg yet?? It’s coming up!! 3 weeks away…October 5-7! I personally can’t wait!
Do you know about one of the Key Note speakers, Wynne Kinder?? Read below to find out more!!

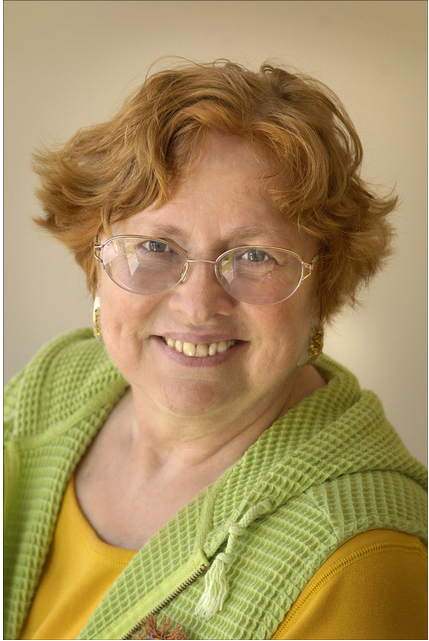
WYNNE KINDER, M. Ed. Wynne’s teaching career spans 28 years in private and public schools, most recently including 13 years bringing mindfulness into regular, special (autistic & emotional support) and alternative education (including incarceration) settings. As owner of Kinder Associates LLC and trainer for Wellness Works in Schools™ (preK-12 classrooms & teacher training), she creates curriculum, programming, online trainings and teaching tools that address: mindful awareness, diverse learning needs, trauma in the classroom, healthy connection, social emotional skills, engagement & participation, and behavior guidance. Her work is informed by training with: the Mindfulness-based Mind Fitness Institute, the Trauma Center – Justice Resource Institute and UMass Mindfulness-based Stress Reduction. Wynne is the author and content creator of: Peace Work – mindful lessons for the early years,Mindful Moods – a mindful, SEL curriculum for grades 3-5, Mindful Choices – a mindful, SEL curriculum for grades 6-8, a chapter on special education in Teaching Mindfulness Skills to Kids and Teens (2015), GoNoodle.com’s digital brain breaks (mindful SEL themes in FLOW, Think About It, Maximo, BLAZER Fresh) & Audio practices for MindfullyADD.com. She has practiced mindfulness for more than 15 years and received training in Mindful Yoga, Mindfulness-Based Stress Reduction, Trauma Sensitive Approaches through the Justice Resource Institute (MA), Boys Town – Teaching Social Skills to Youth; CASEL, Mindfulness-based Mind Fitness Institute (VA), Yoga Ed teacher training, and Social Action Teacher Training – Lineage Project (NYC). Wynne holds a PA Teaching Certificate (K-6) and earned a bachelor’s degree in elementary education from Alma College (MI). www.wynnekinder.com
Spring Symposium at Moore College of Art and Design with School District of Philadelphia Art Teachers!
Guest post by:
NAEA Special Needs in Art Education President-Elect
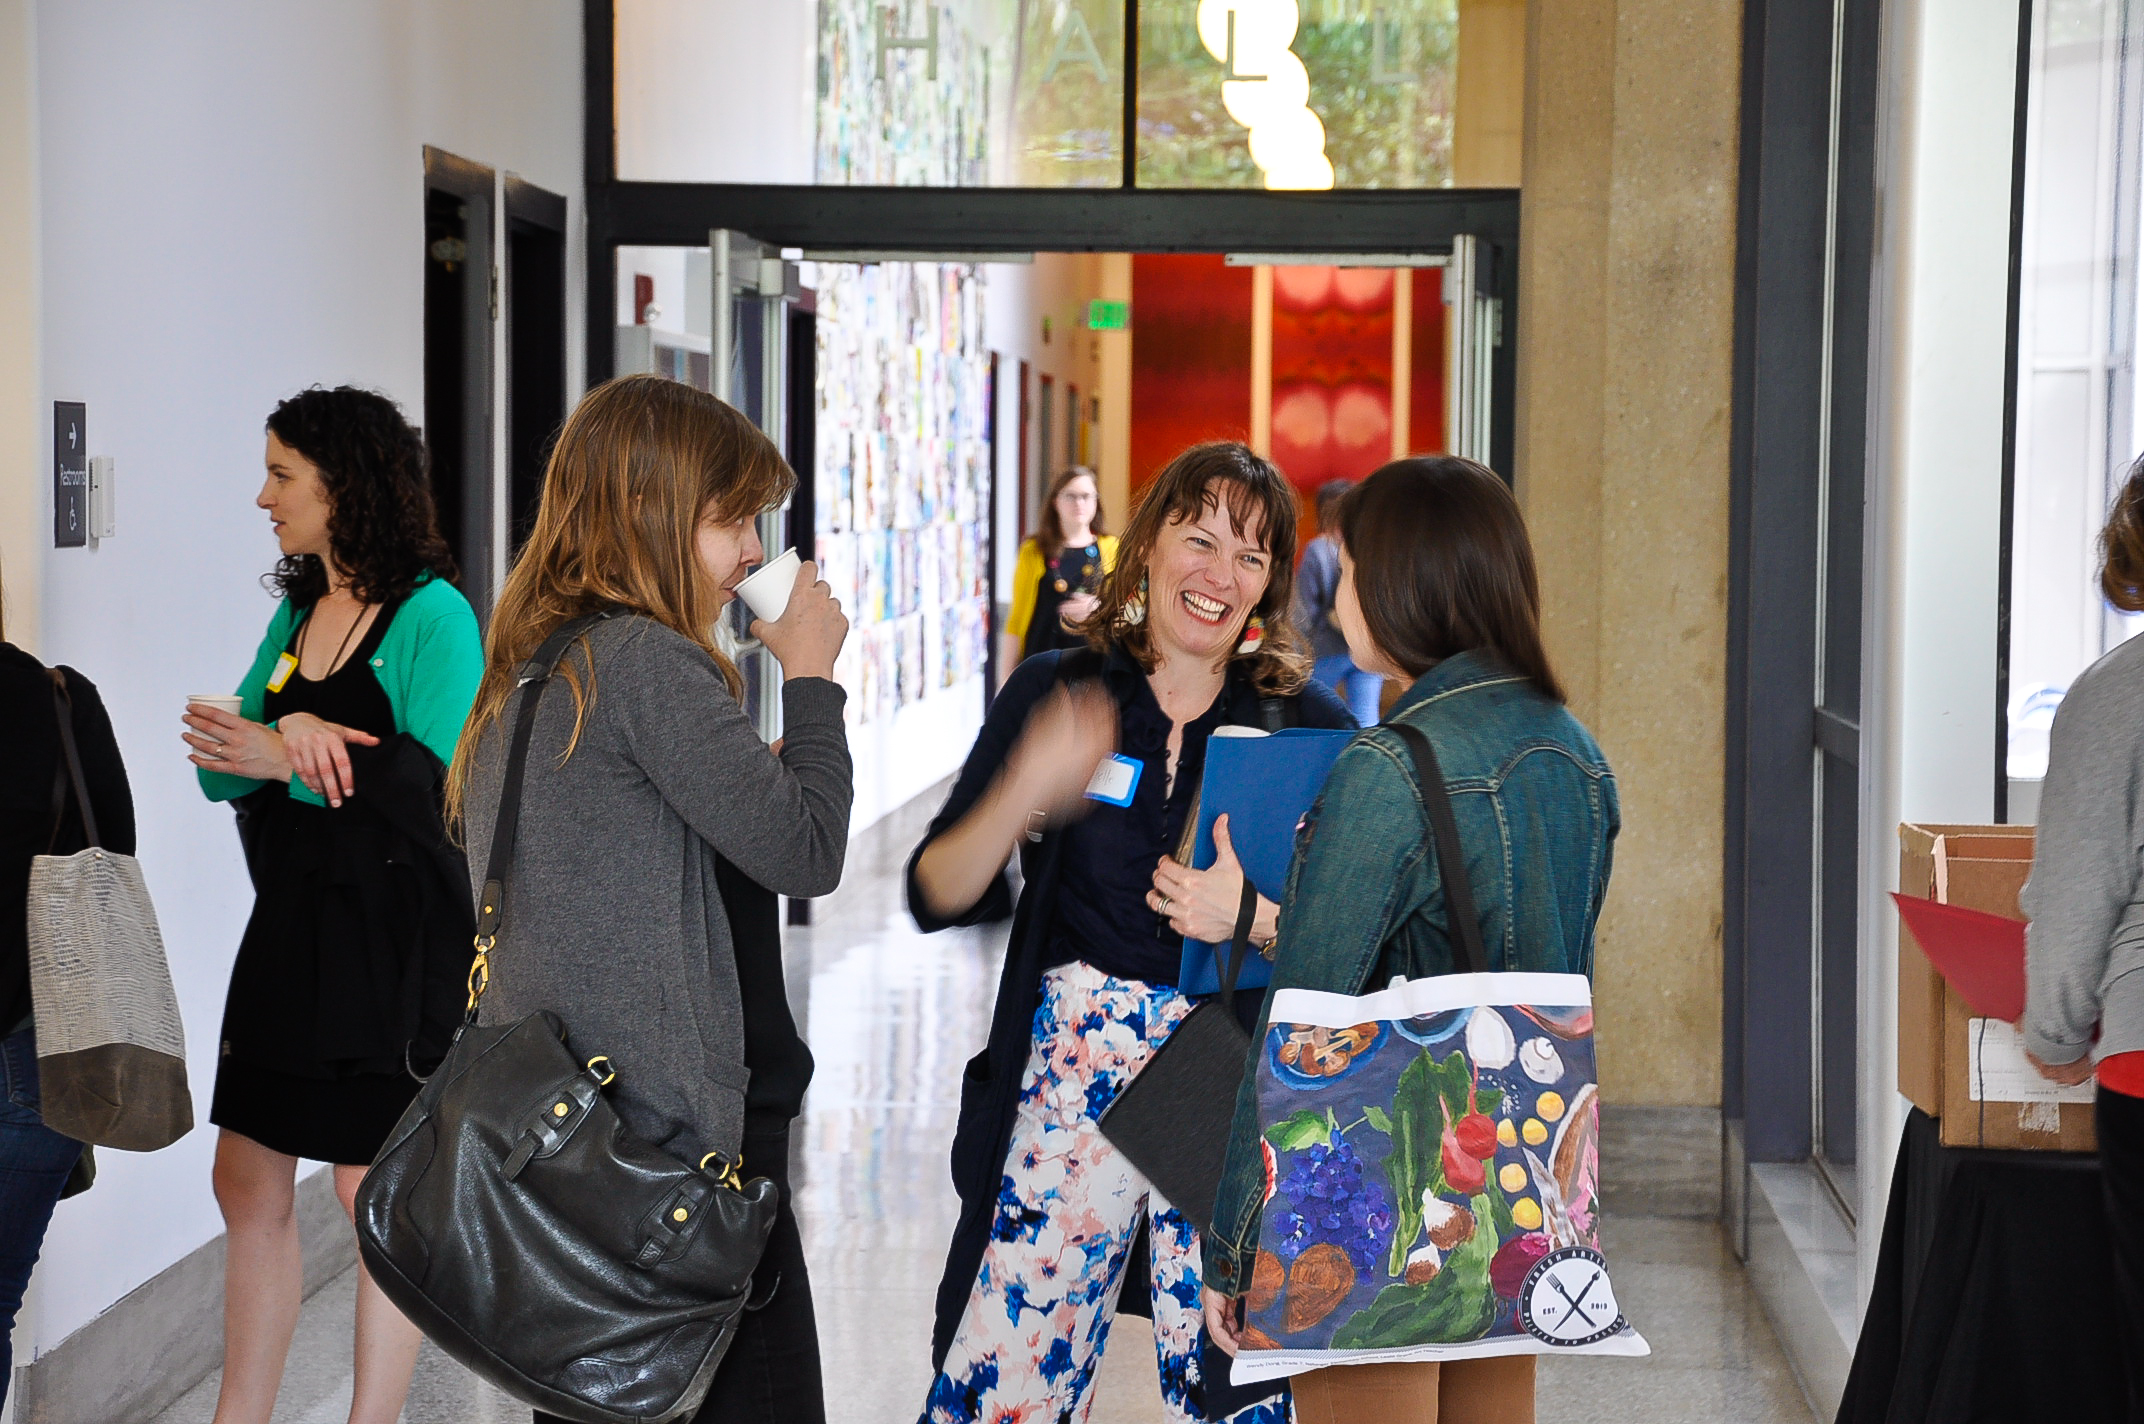
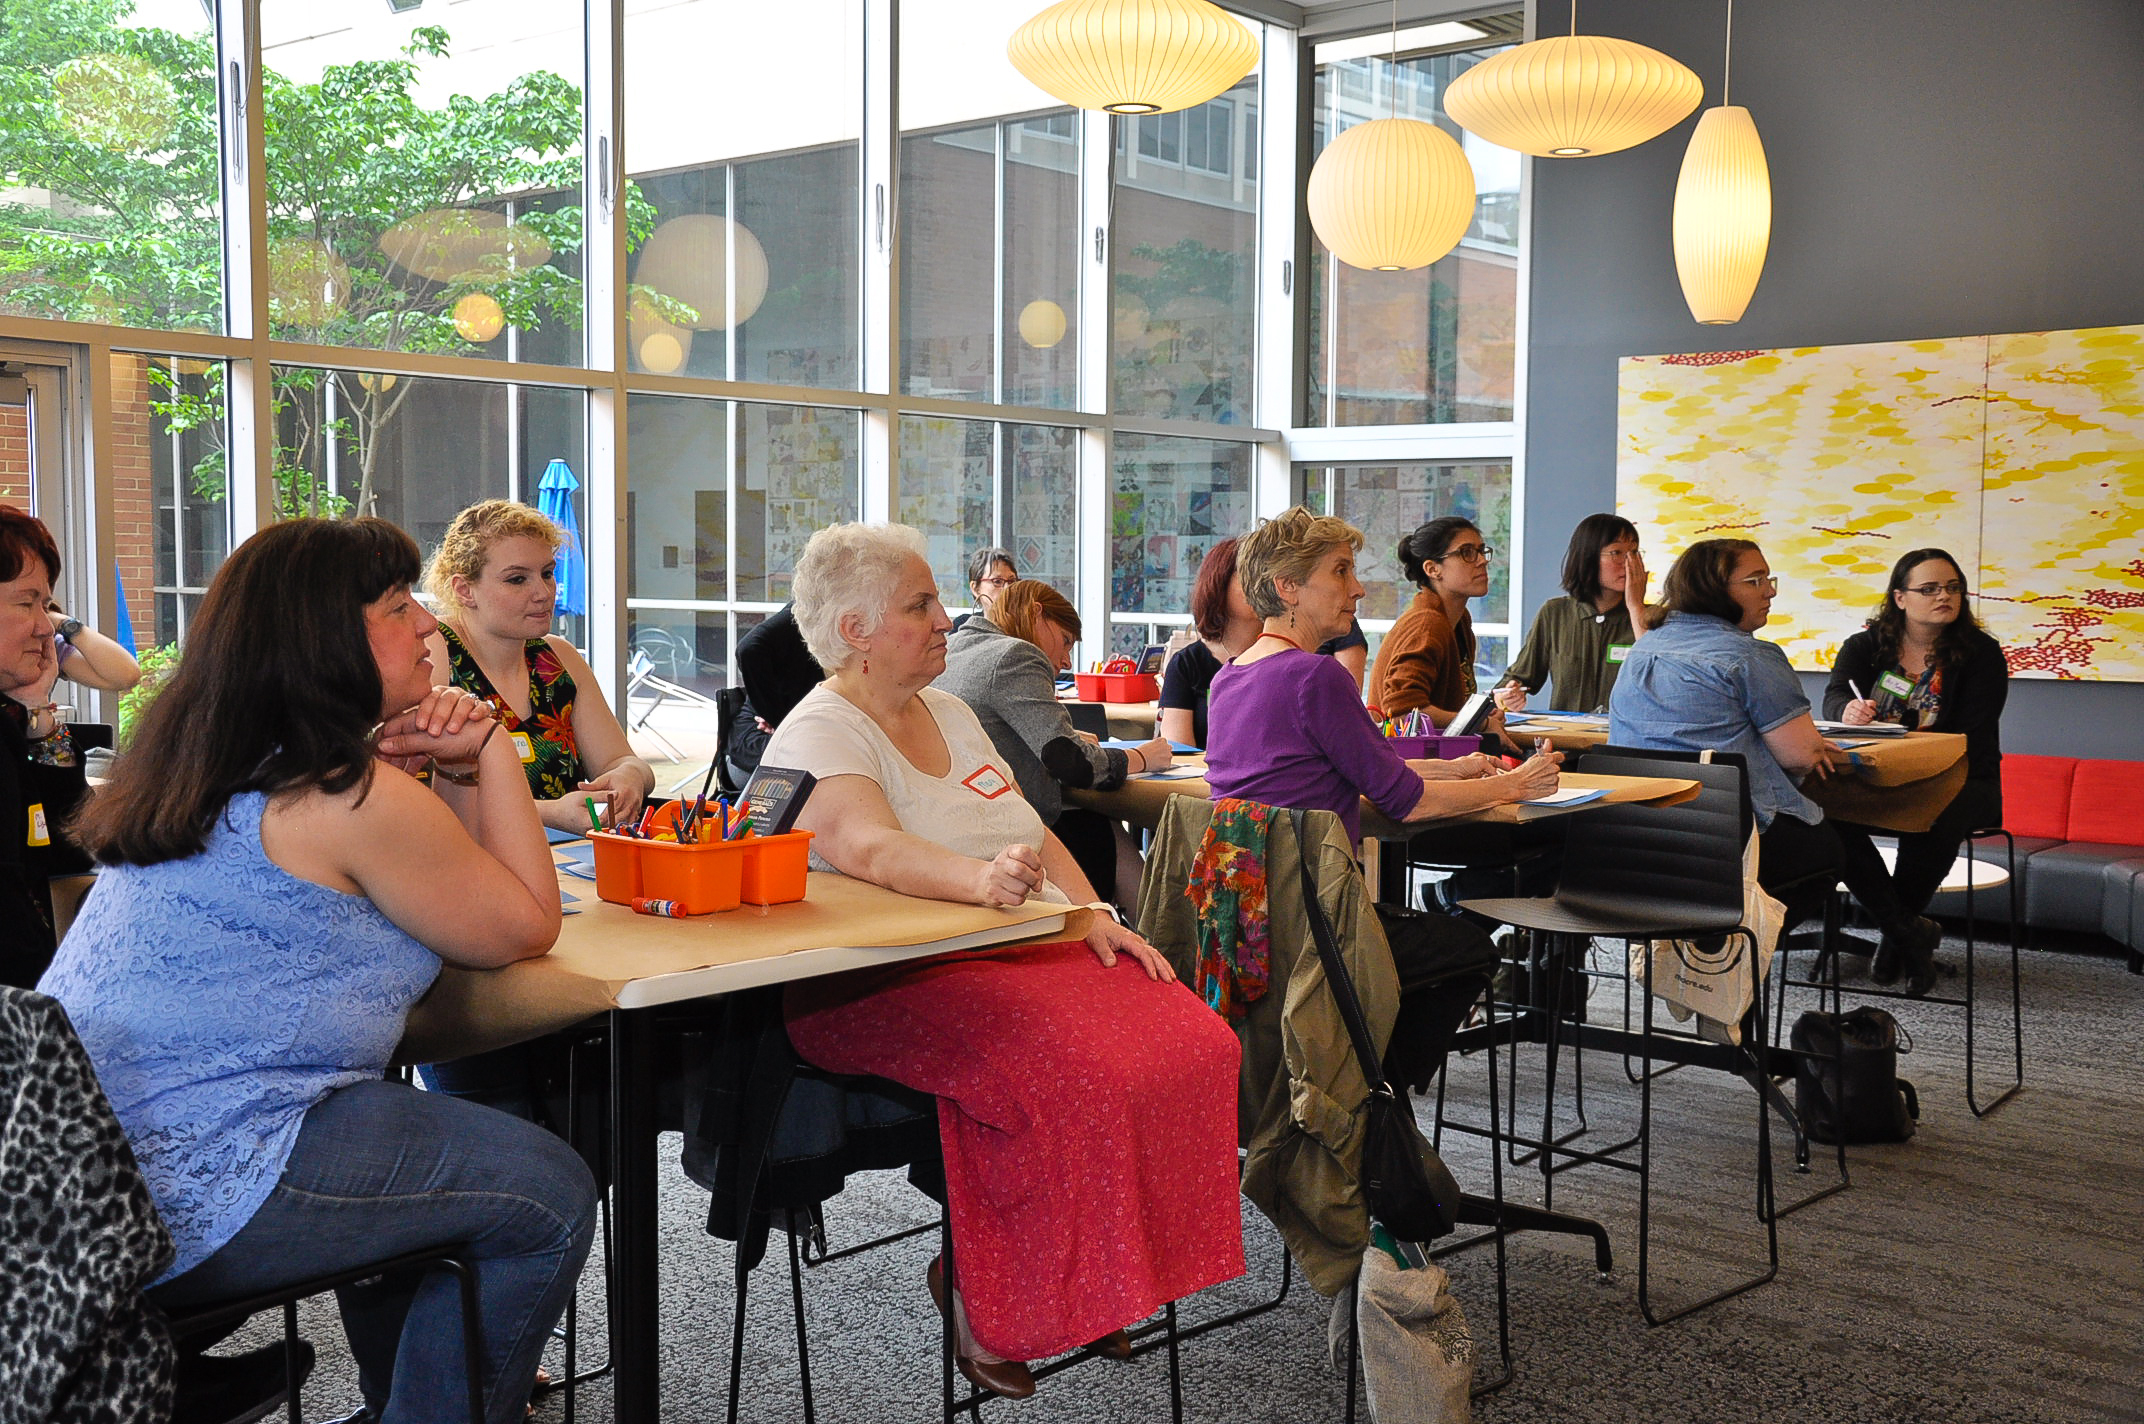
On May 18th, 2018 Moore College of Art & Design’s MA in Art Education with an Emphasis in Special Populations program hosted its annual Art Education Symposium titled “Creating Multiple Modalities of Language in and Through the Arts”
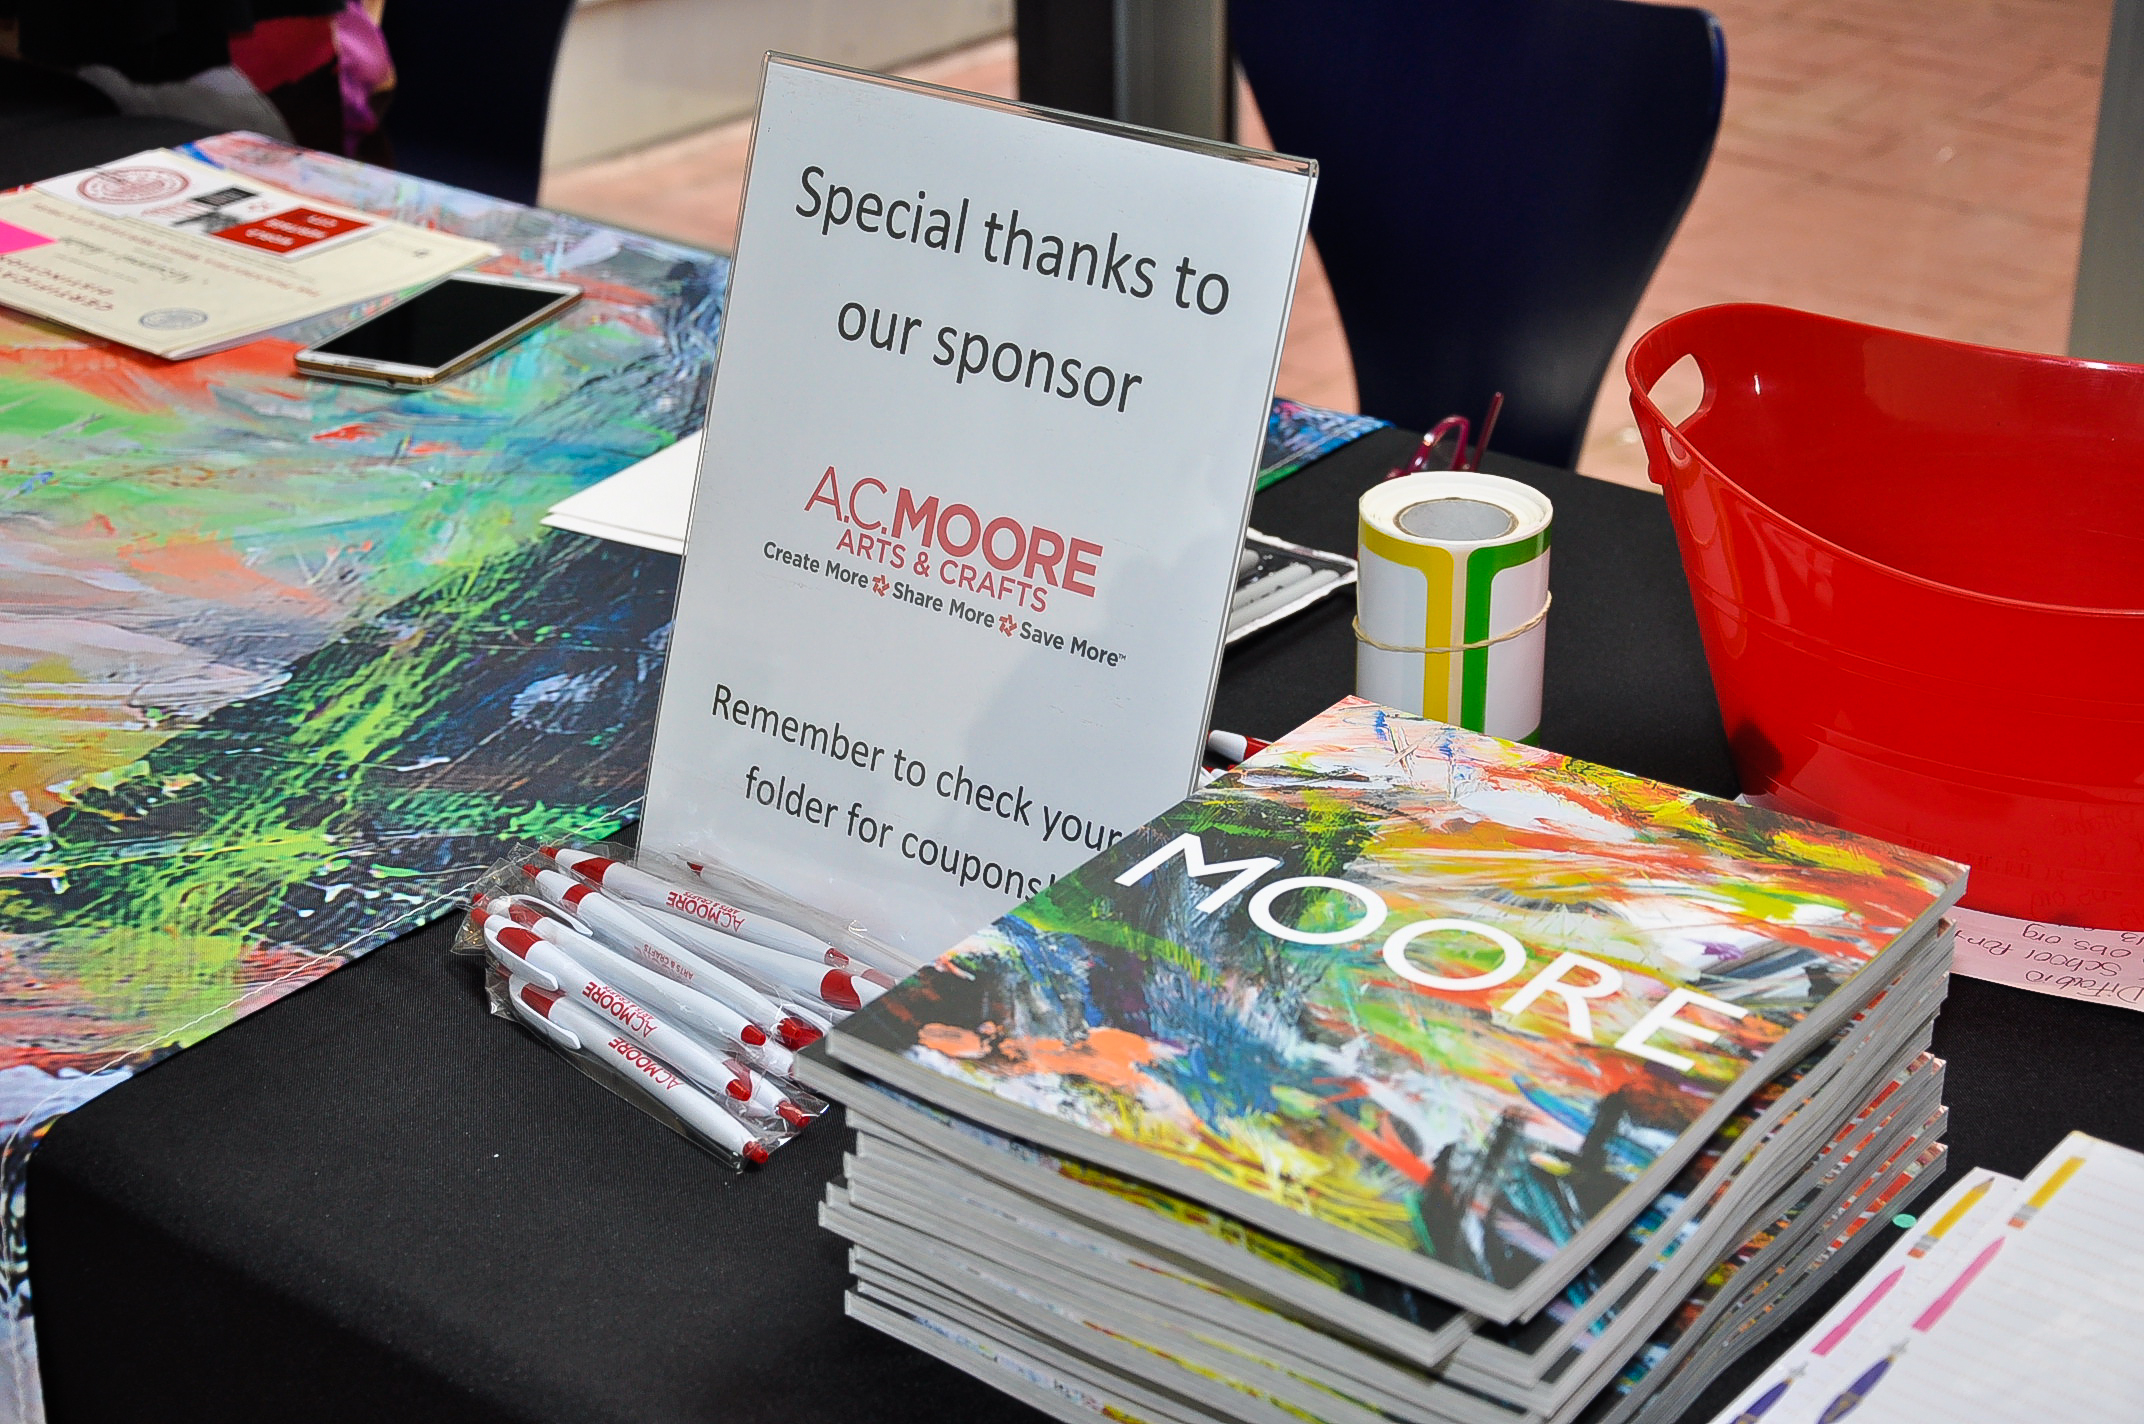
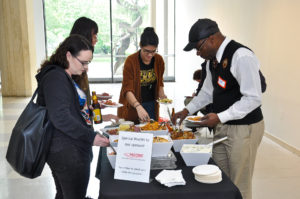
We were honored to have this event sponsored by A.C. Moore!
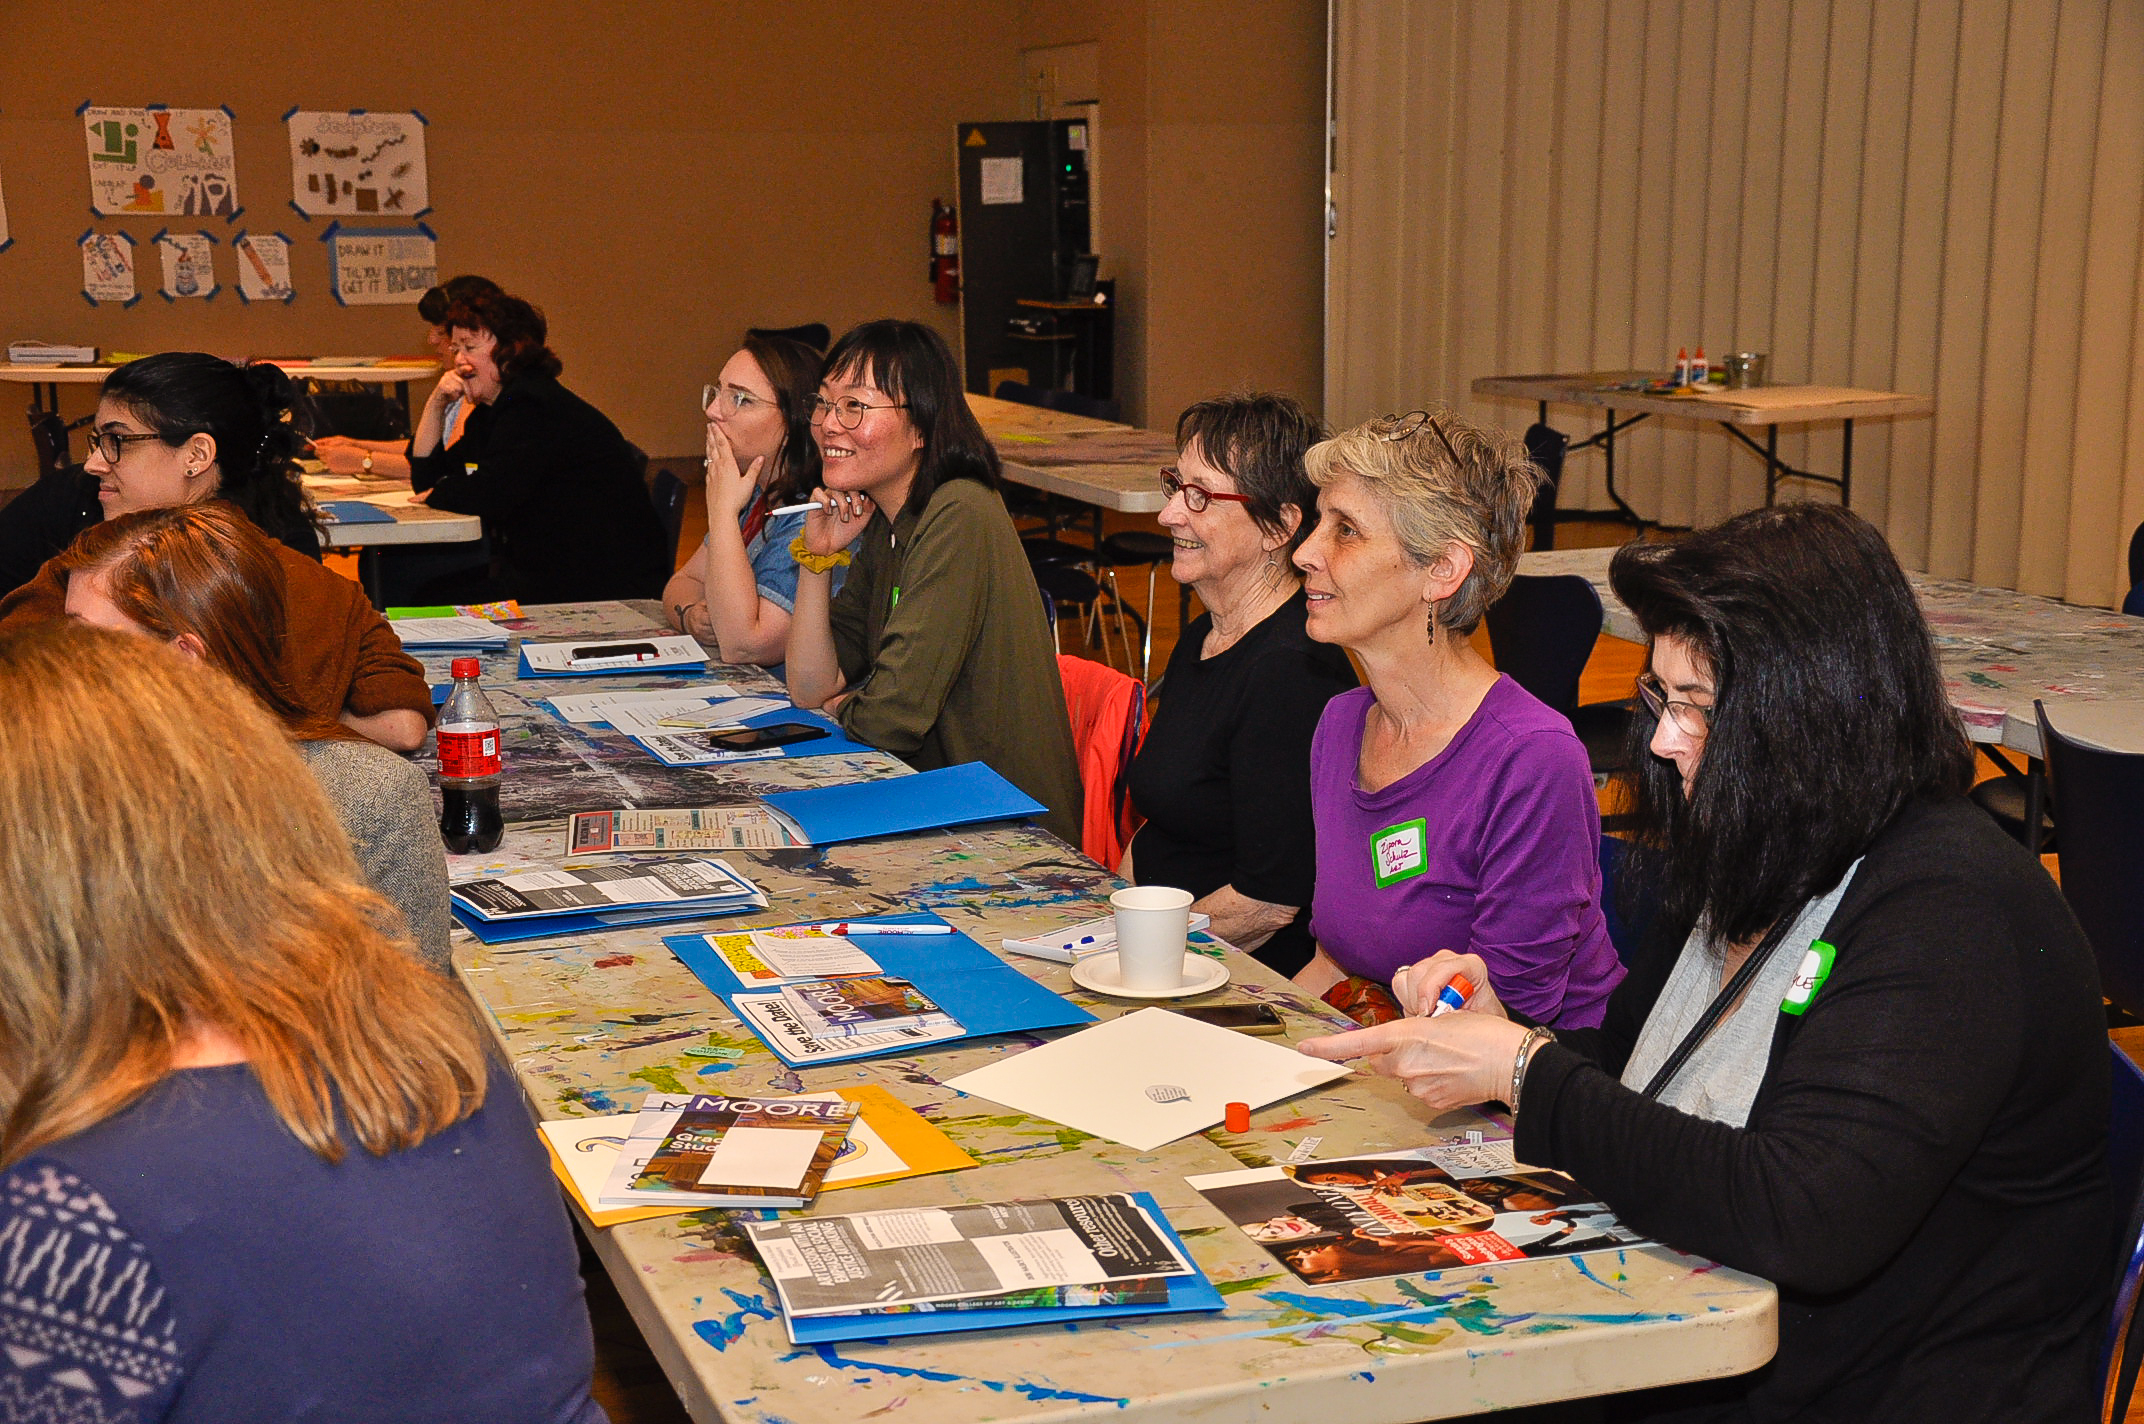
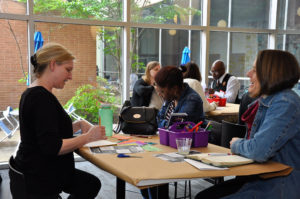
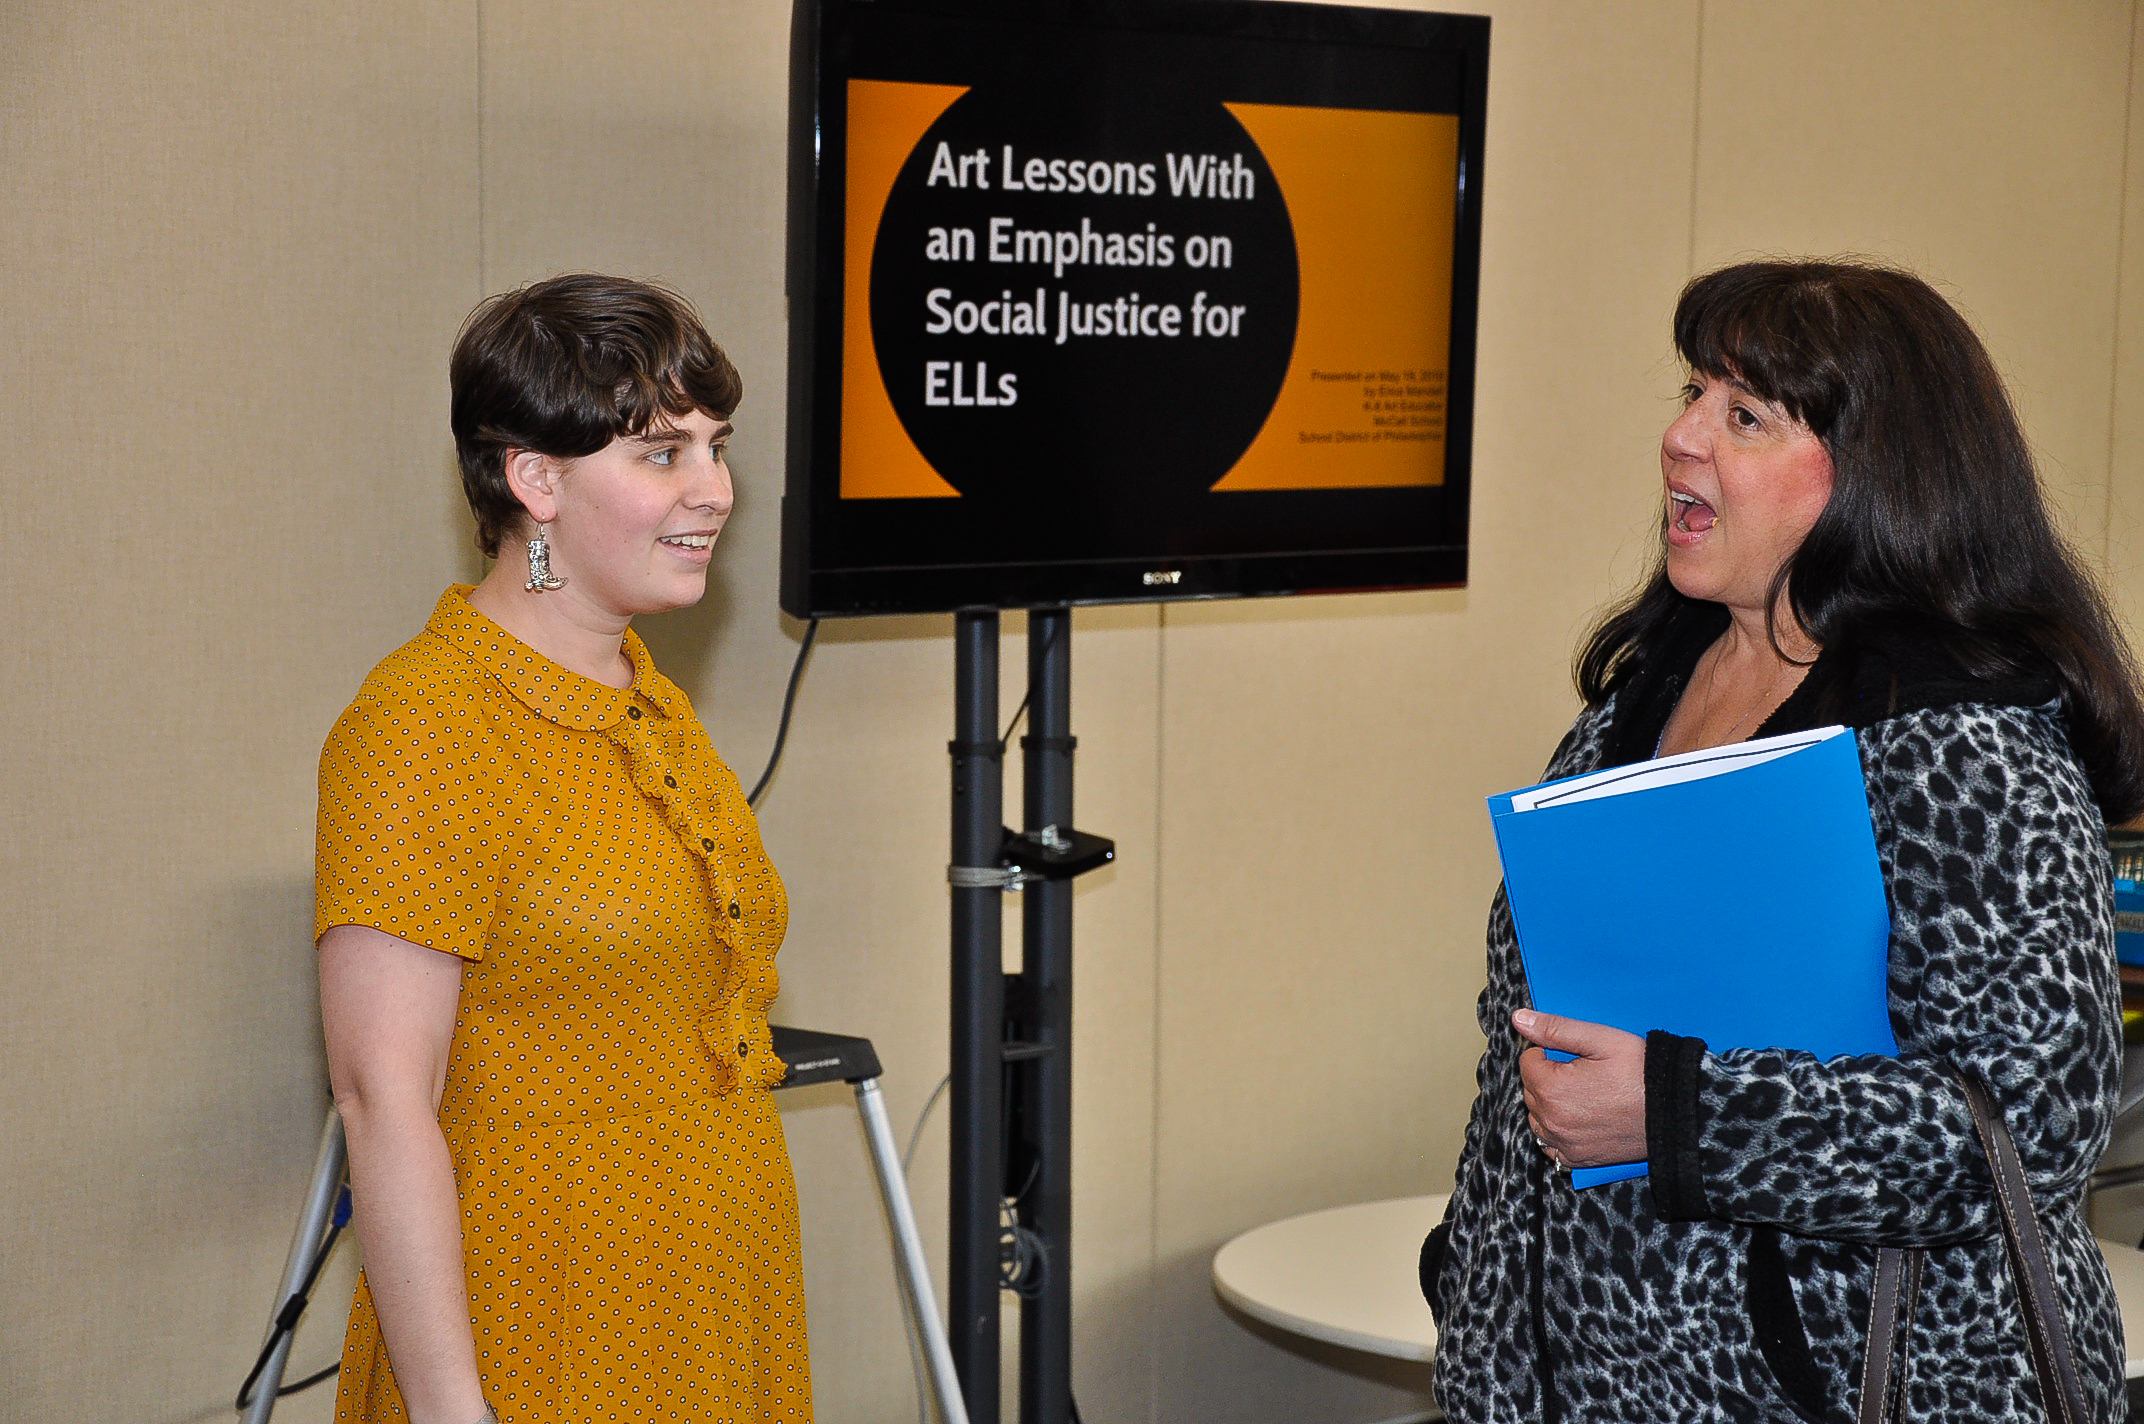
The symposium featured regional Art and English Language Learner instructors Angela Renish, Lori Logan and Erica Mandell who shared their personal stories, knowledge, and skills on developing inclusive practices for English Language Learners in and through the arts. The afternoon included lightning round, hands-on workshops that offered attendees easy takeaways to incorporate into their teaching methods.
Session A with Angela Renish: Visual Tools and Strategies for Making Art Lessons Accessible for English Language Learners.
Session B with Lori Logan: Visual Structures for Engaging English Language Learners in All Educational Settings.
Session C with Erica Mandell: Art Lessons with an Emphasis on Social Justice for English Language Learners.
Save the date for our Fall 2018 Symposium
Saturday, November 3rd ““Understanding Our Humanity Through the Arts”
Learn new skills and strategies that address our diversity, identity, and different abilities through the arts. Featuring keynote speaker Justin Brown and session leaders Sika Wheeler, Christina Lukac and Amanda Thoma.
Photos by Riley Evan Lloyd
PAEA trip to Cuba!
Hola, Art Teachers!
This Summer, members of PAEA embarked on a trip from Pennsylvania to Havana to experience Cuban culture, learn about art and education there, and share ideas and inspiration with our fellow teachers.
In the midst of this Socialist island, we found ourselves in a sort of time warp, surrounded by latino culture, 50’s Americana, 70’s and 80’s Soviet influences. With our guide, we visited cities, small towns, and a biosphere, swam in rivers and the gulf, and met local Cuban artists in many mediums.
Instead of a complete reiteration of our itinerary, I thought I’d share a few inspirational highlights, with a special focus on those that I felt might lead to lesson plans:

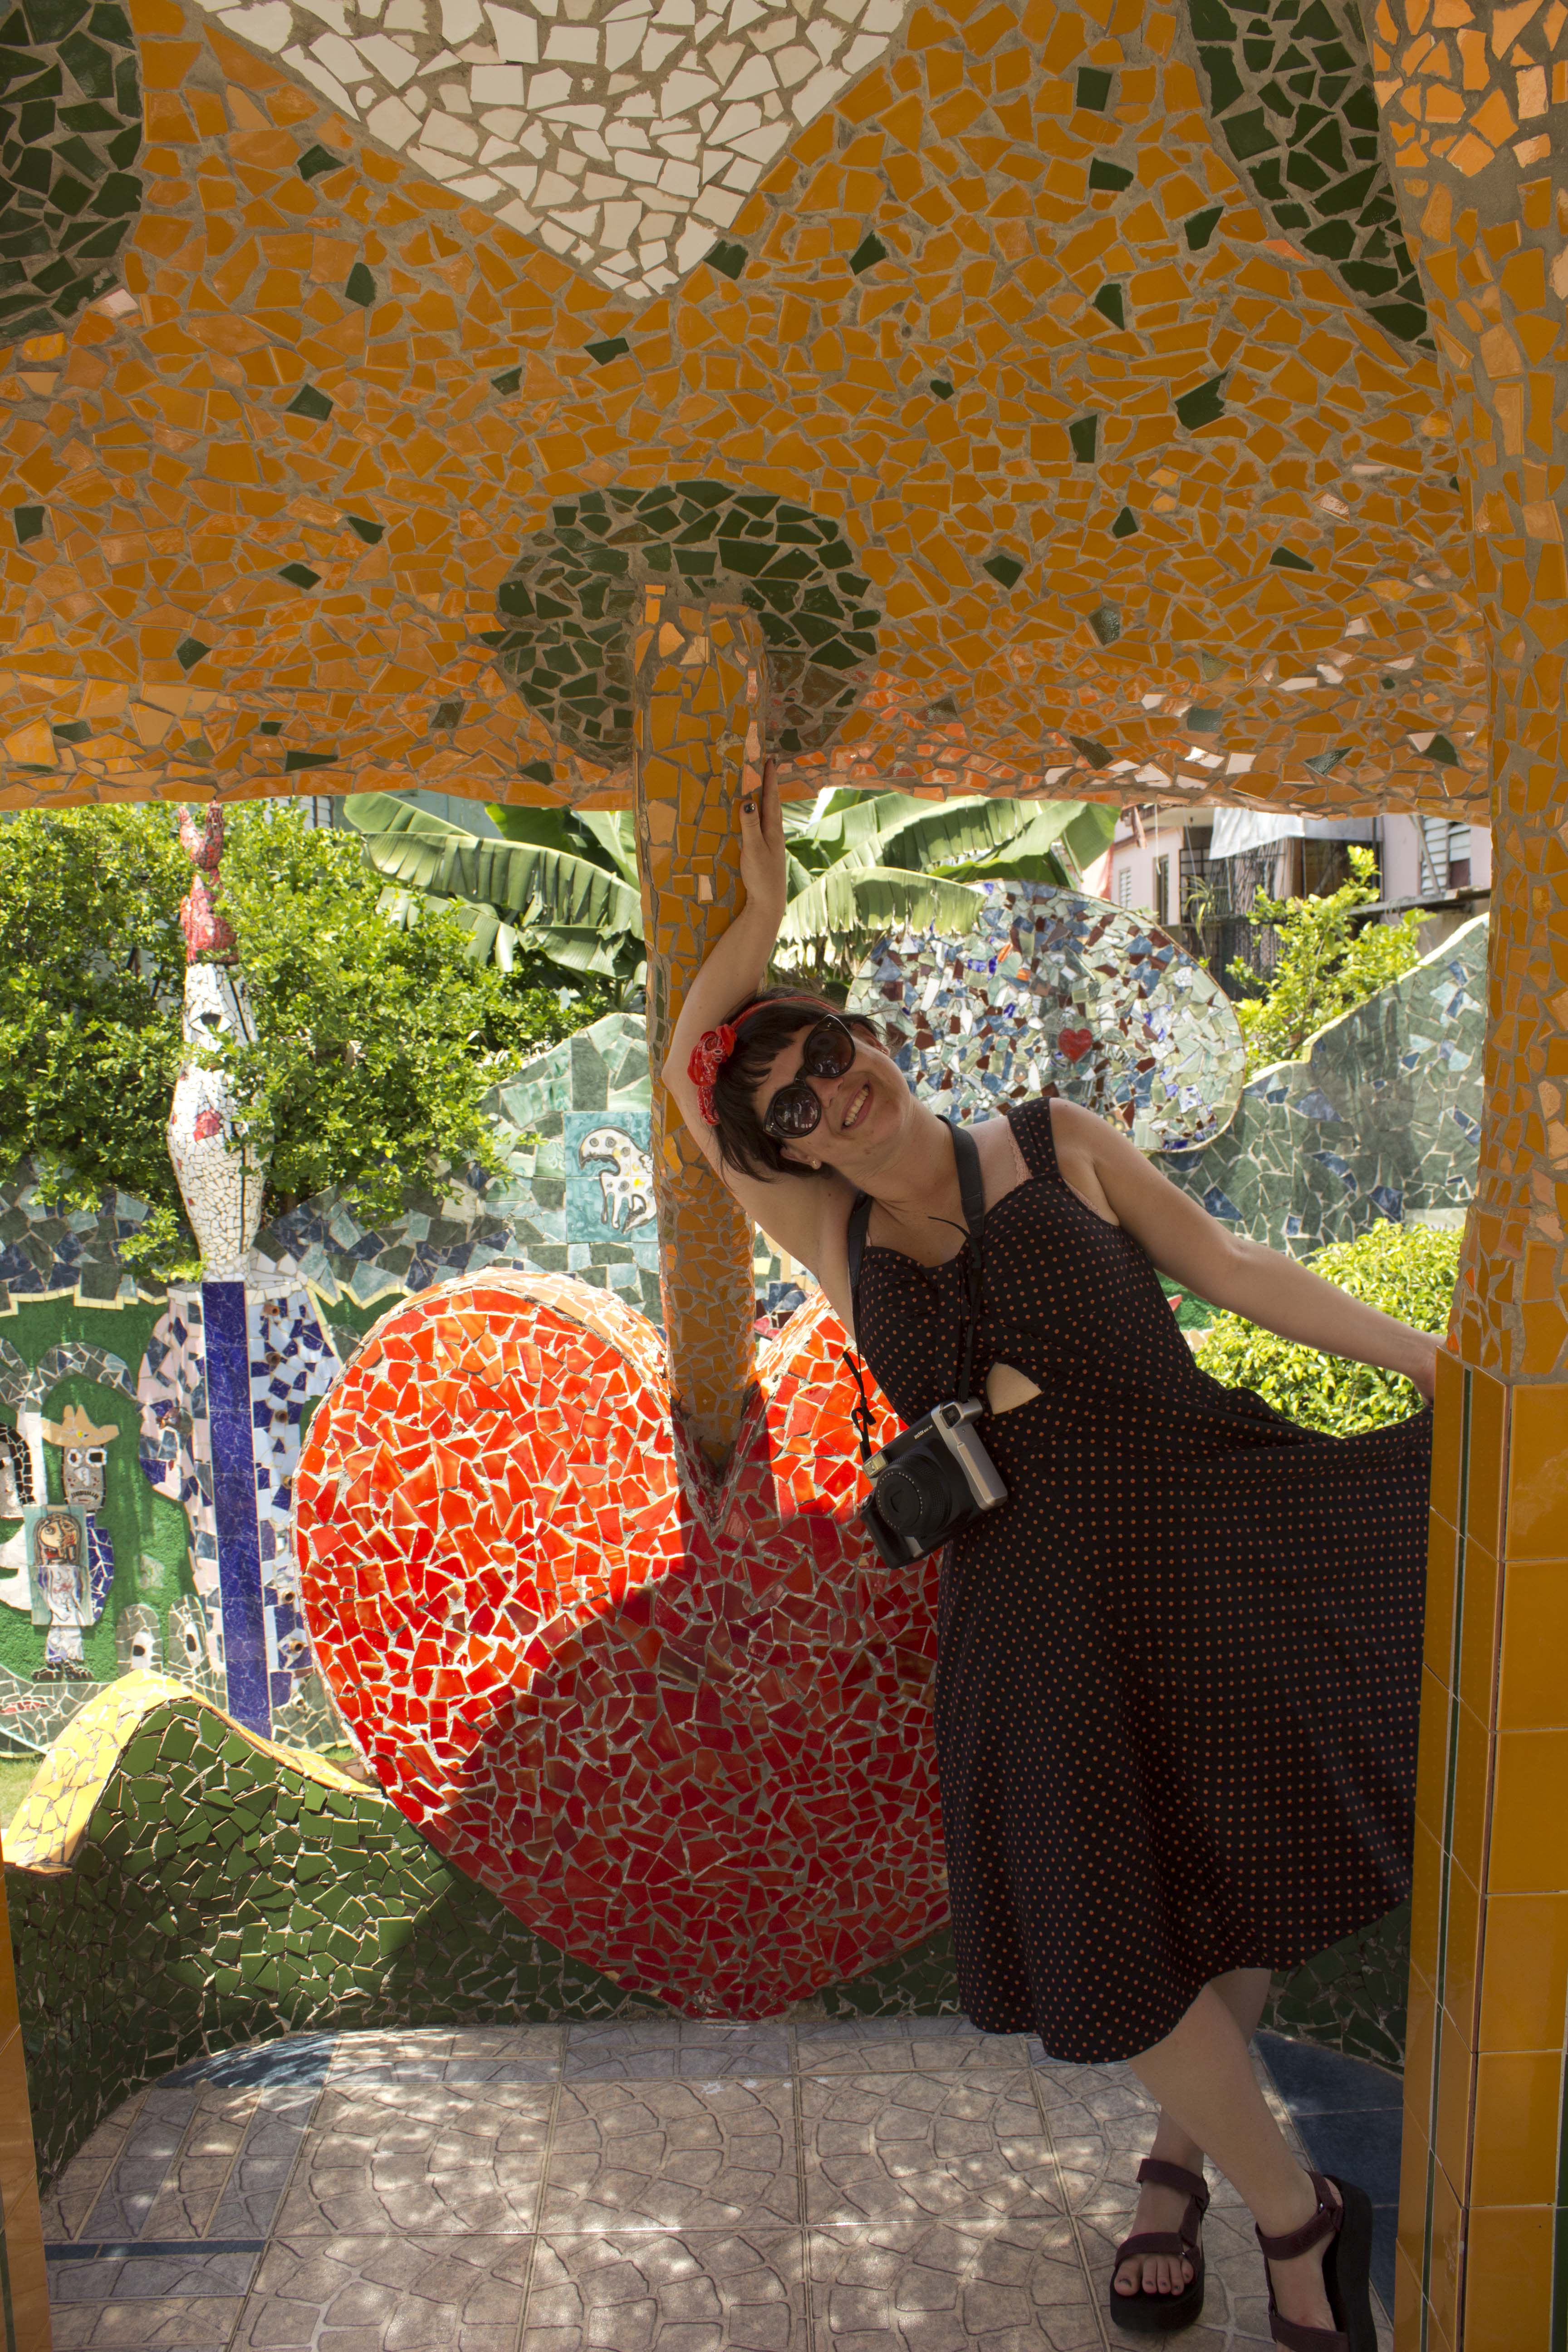
FUSTERLANDIA (Jaimanitas, outside Havana)
Mosiac artist José Fuster has created a whole magical neighborhood, constantly expanding for the past 20 years. It was cool to explore the grounds and walk through his workshop, finding repeating themes and symbols in his work. His simple images and complicated forms reminded me of Isaiah Zagar’s Magic Gardens in Philly! I think I’m going to revamp an old Zagar lesson, showing some images of Fusterlandia to my students. What is the same, and what is different in these two artists’ work?

CAMERA OBSCURA (Plaza Vieja, Havana)
On the top floor of a vila in Havana (115 ft up!) a “Cámara Obscura” (invented by da Vinci) uses mirrors and a lens to project a live 360 degree view of Havana onto a platform in a pitch black room. I was in awe – as a photo student, I’ve been introduced to the concept of camera obscura, and even seen some primitive examples of it. This one though, blew me away. The operator used manipulated it and focused it with such precision that we could see individual figures on rooftops having breakfast and going about their days, far from where we stood. Two PAEA members shared ways to create camera obscura lessons with students in your studios or art rooms!
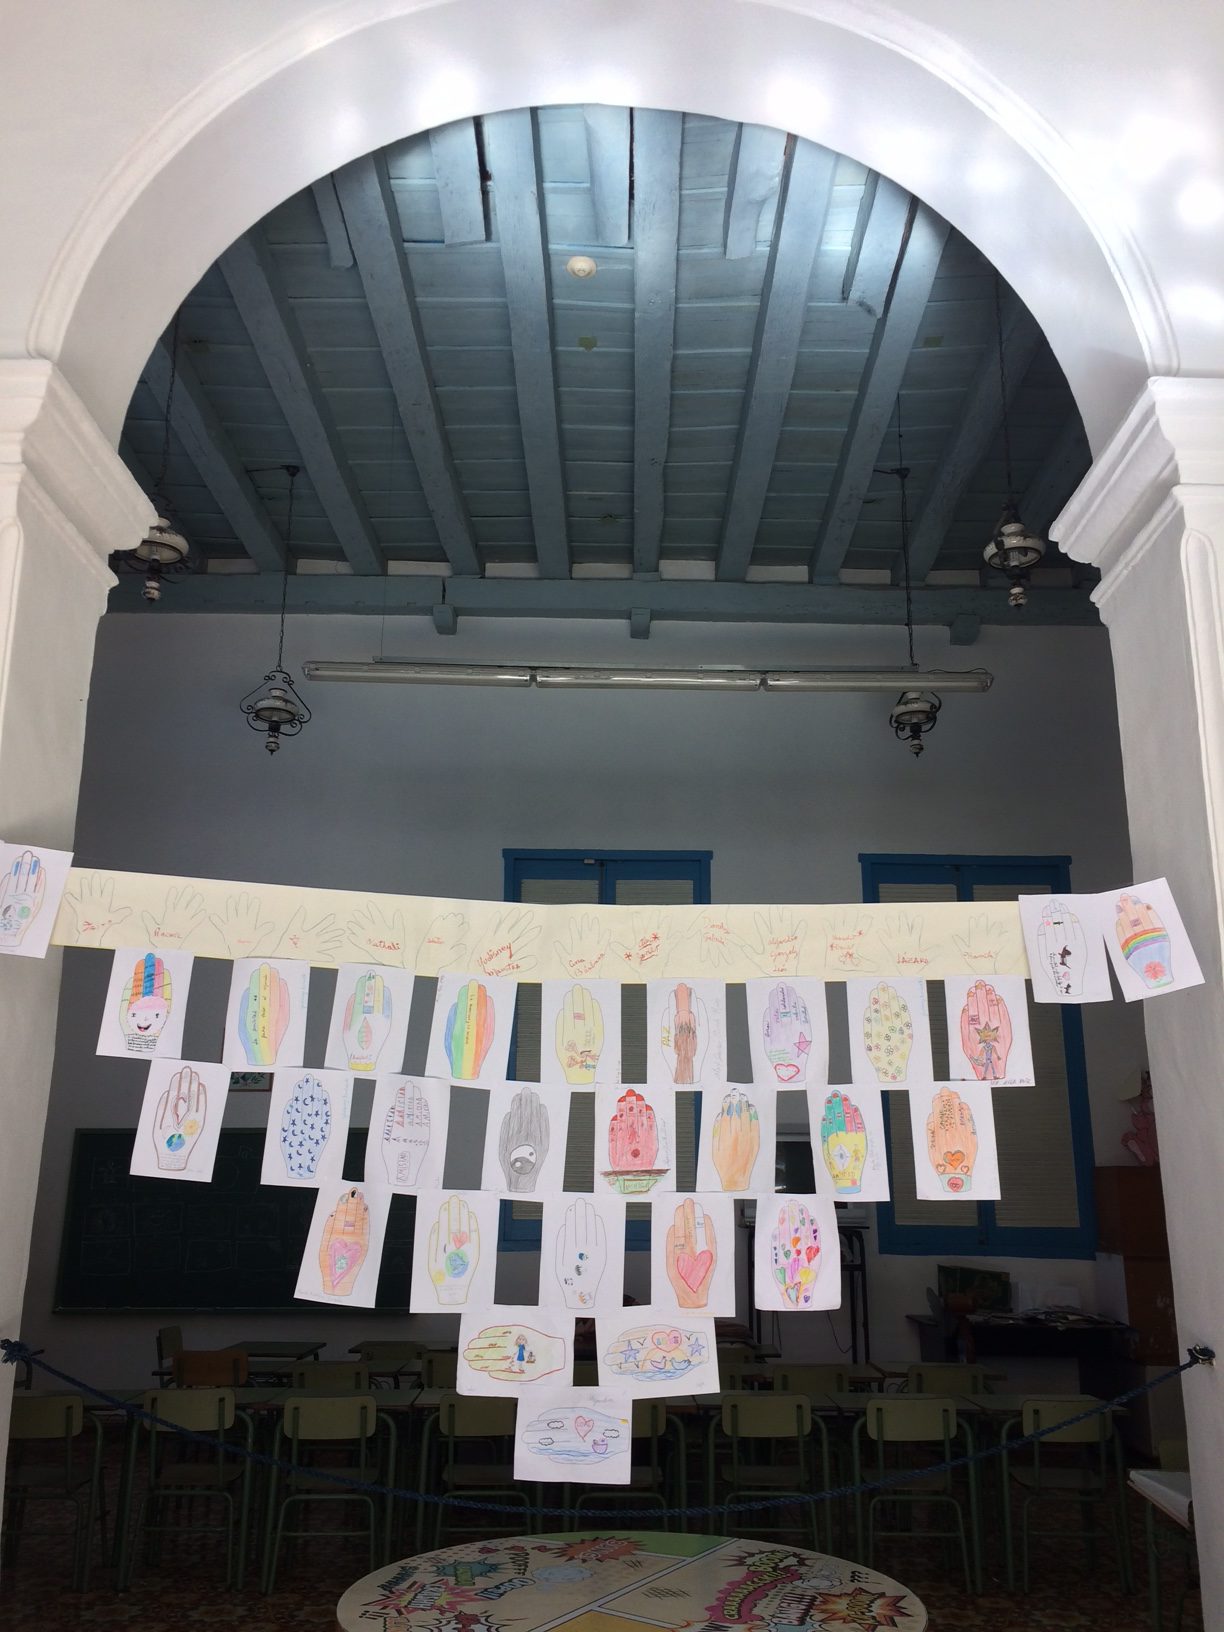
ANTWERP HANDS (Children’s Museum in Havana)
Across the plaza, we found a children’s art gallery featuring a traveling exhibit from Antwerp Hands. Loads of illustrated hands featuring the theme of friendship were on display, along with the ideas of different culture’s phrases, stories, and lore involving hands. I’ve got a feeling I’ve got a hand project in my future!
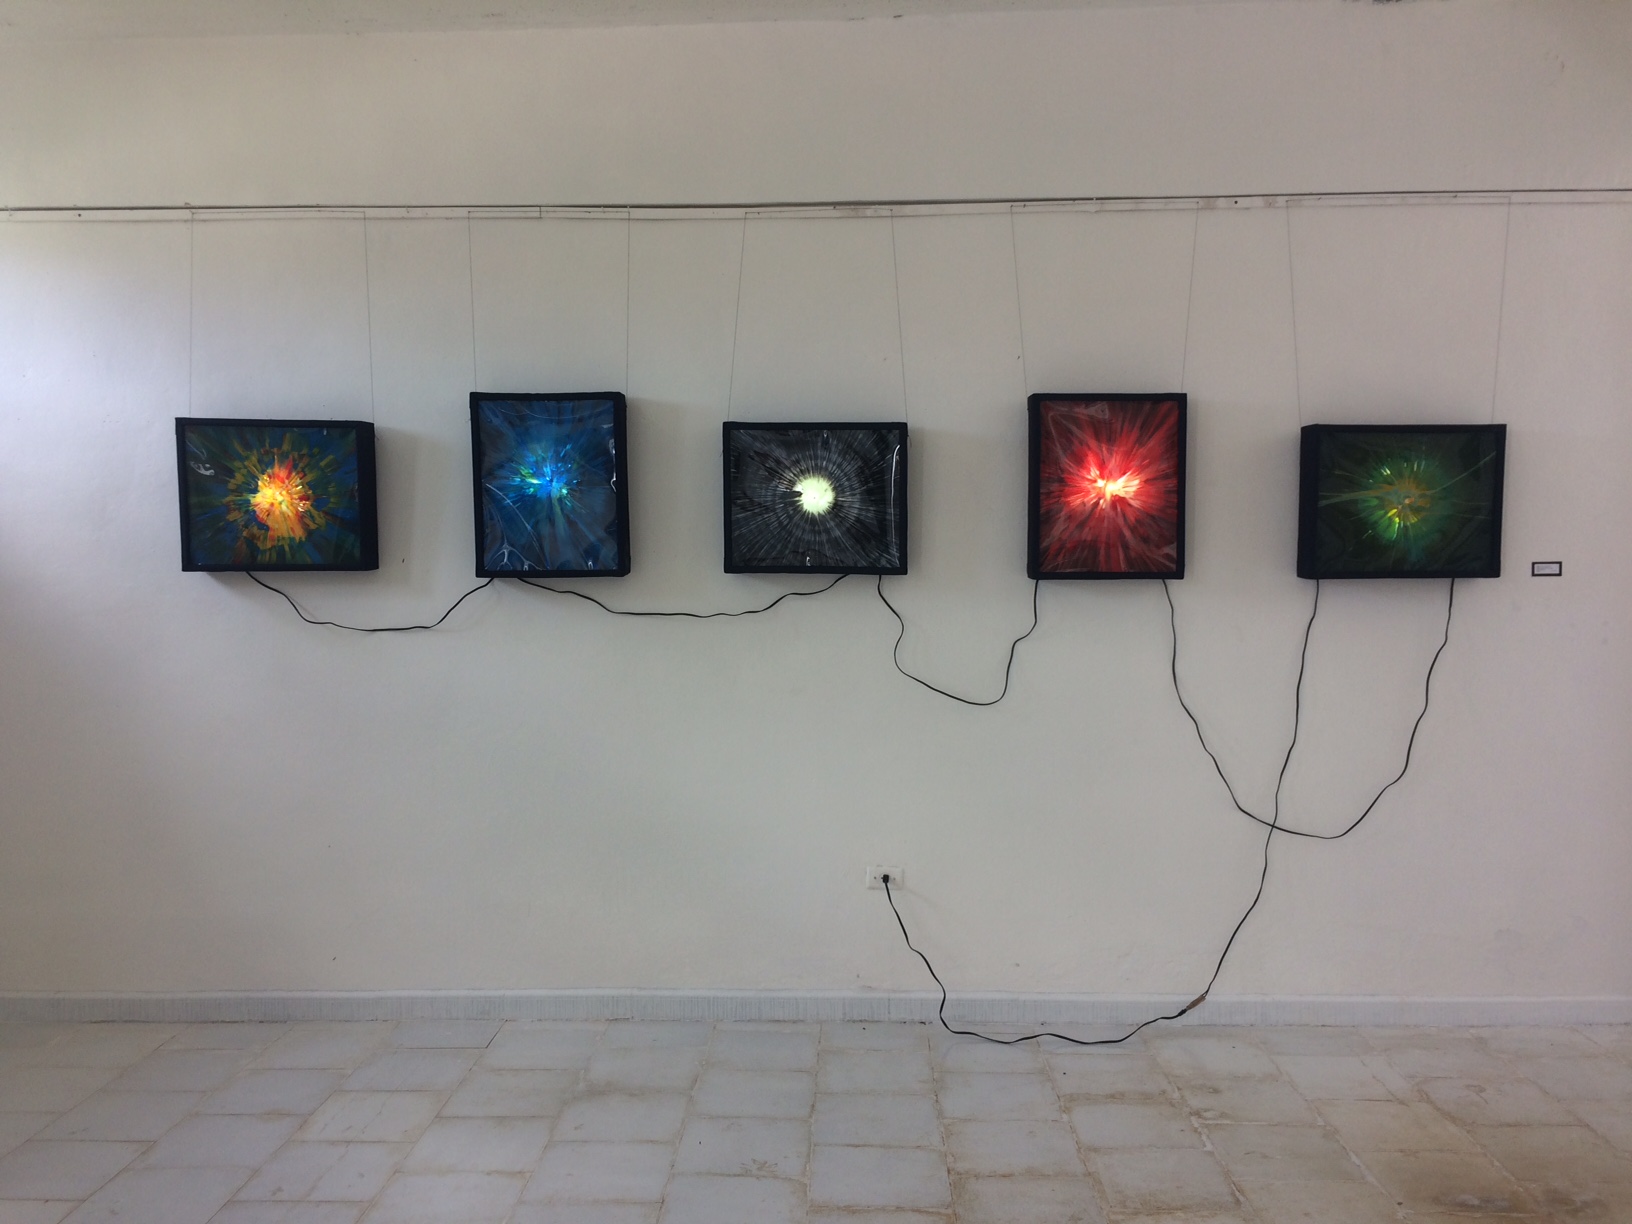
KORIMAKAO CULTURAL PROJECT (Zapata wetlands)
This rather out of the way spot is home to Korimakao Community Arts Group – which brings art, theatre, music and dance to small towns and the rural communities of Cuba. When we visited, we were treated to an enthusiastic live music performance, saw dancers perform in their studio, and got to see the visual art gallery featuring member’s work. The work on display gave me some ideas about presenting work in shows – particularly these cool spin art paintings which were displayed on light boxes! Definitely gave this work an added dimension.

SANTANDER POTTERY (near Trinidad)
We got to visit the Santander family pottery studio. All of us art teachers have thrown on a wheel at some point, and I gotta say, we were blown away with the deftness and skill we saw from these master potters. I’ve never seen something I know to be difficult look SO easy. It was awesome to get a live demo!
Among all the pots and vases (which were available for purchase, and yes, broke in my luggage on the way home), were these very cool delicate windchimes. I bought two, (one for home and one for my art studio), where I hope to use it as an inspiration so we can do some collaborative work with some air dry clay. Maybe each class will make one together?
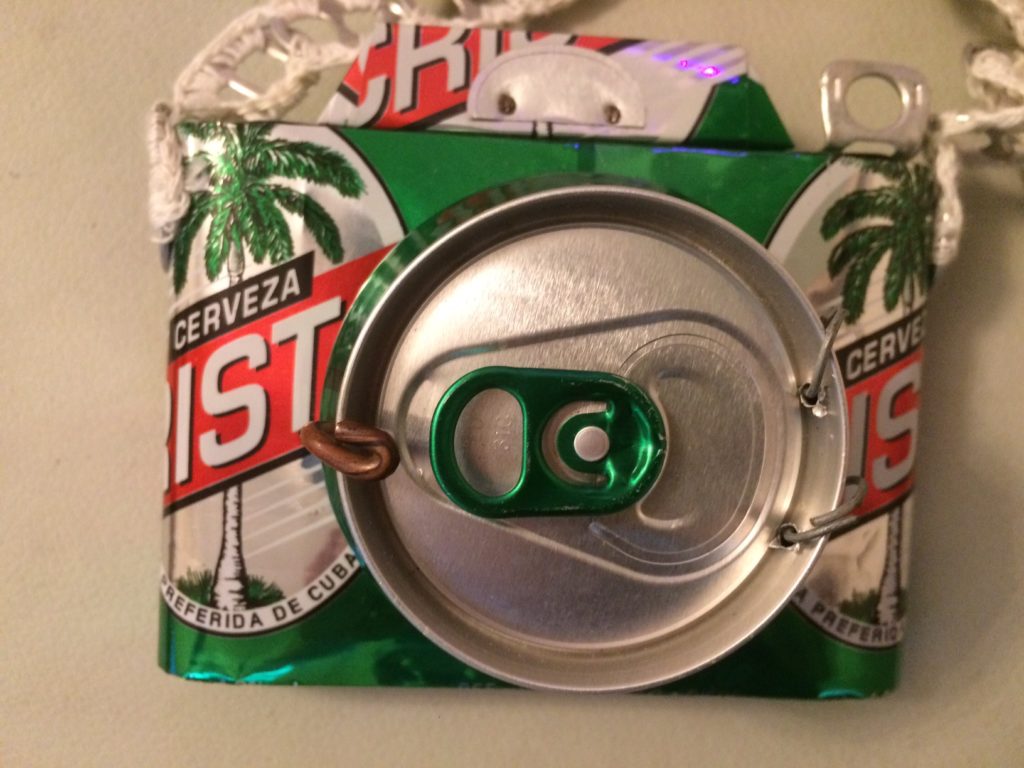
RECYCLED OBJECTS
One thing we noticed again and again through our travels on the island was the use of recycled materials. Like I do, you may associate Cuba with a sort of vintage aesthetic, and that’s no joke. With US embargoes going back 50+ years, access to general supplies can be sporadic, and acquiring “frivolous” materials (like art supplies) is nearly impossible. We saw so many beer cans, bottles, second hand fabrics, even palms – repurposed into visual art. I bought a couple small items that fit the bill to bring back and show my students when it comes time to do a recycling project! I know they’ll be impressed with the craftsmanship and ingenuity.

EMBROIDERY (mainly in Trinidad)
I can’t resist some beautiful embroidery. We saw so much cool textile/embellishment work (particularly in Trinidad) that made me decide I *must* get some needles and thread (or…floss?) into my kids hands next year. Gotta work on the logistics for that one!
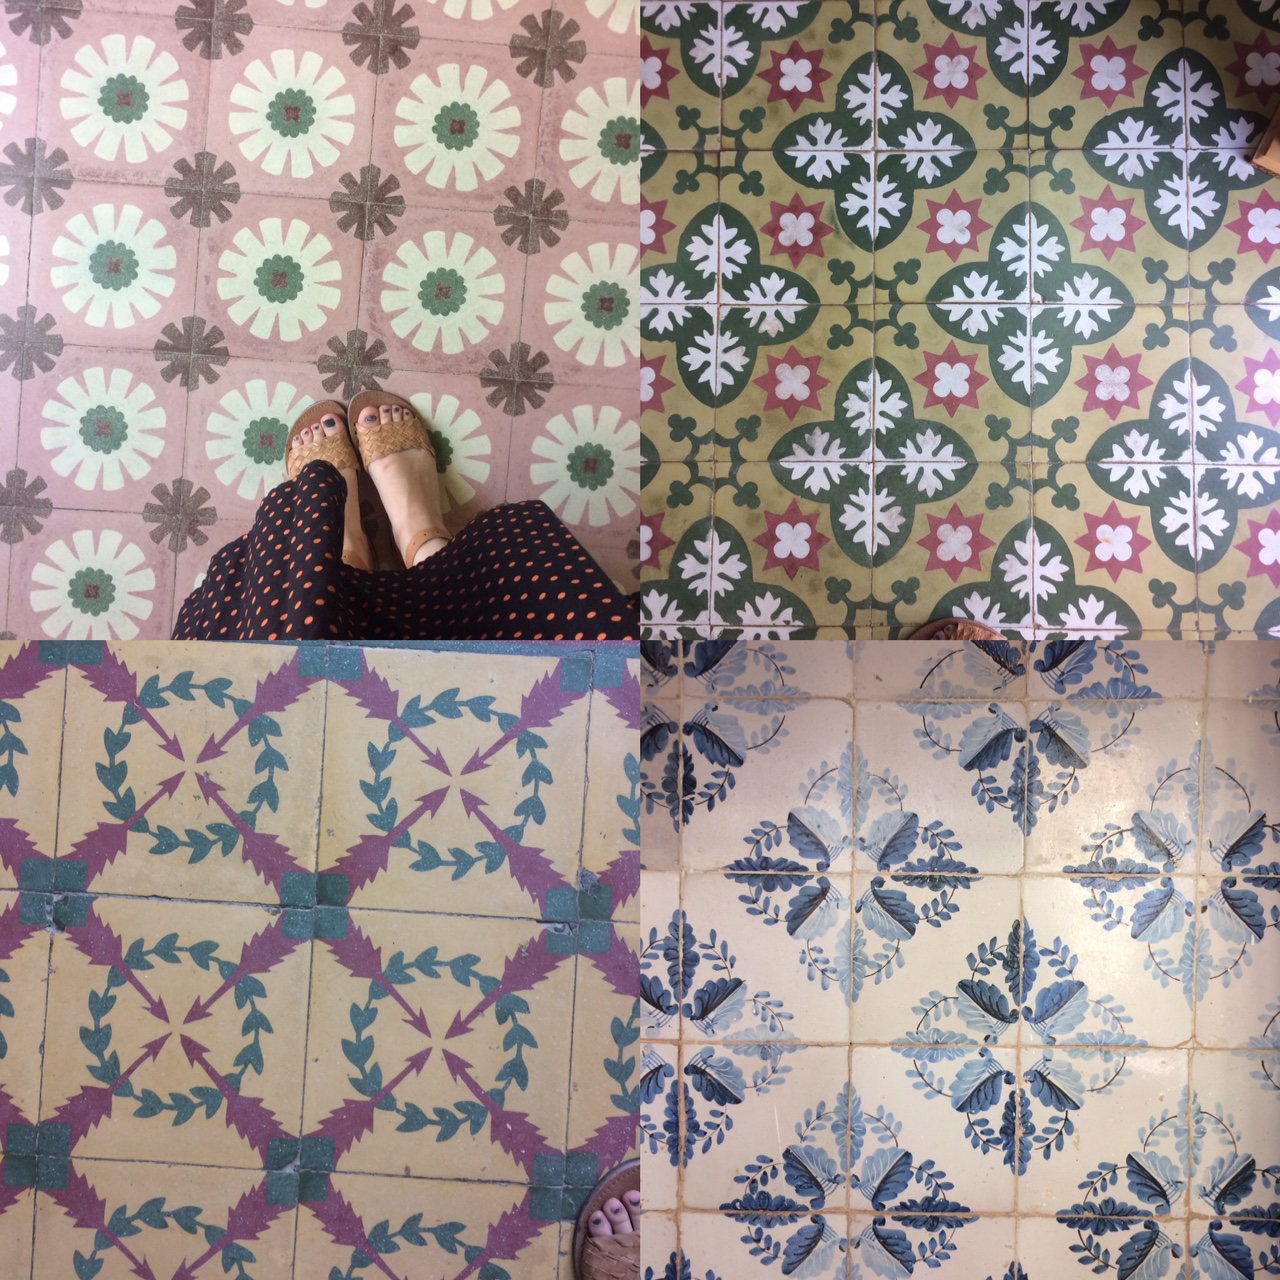
TILE (Havana and Trinidad)
Sooo many crazy tiles. In the cities with older architecture, the beautiful ceramic repeating patterns were everywhere, and I couldn’t resist them. Bright colors, geometric and organic shapes, crazy combinations. Working out how I might implement this in a lesson. And into my kitchen.
What an awesome opportunity to bring new perspectives to our students. Can’t wait to see where else PAEA might go next! Keep your eye on the blog, IG, and turn out for conferences to learn more.
Video of our trip here!
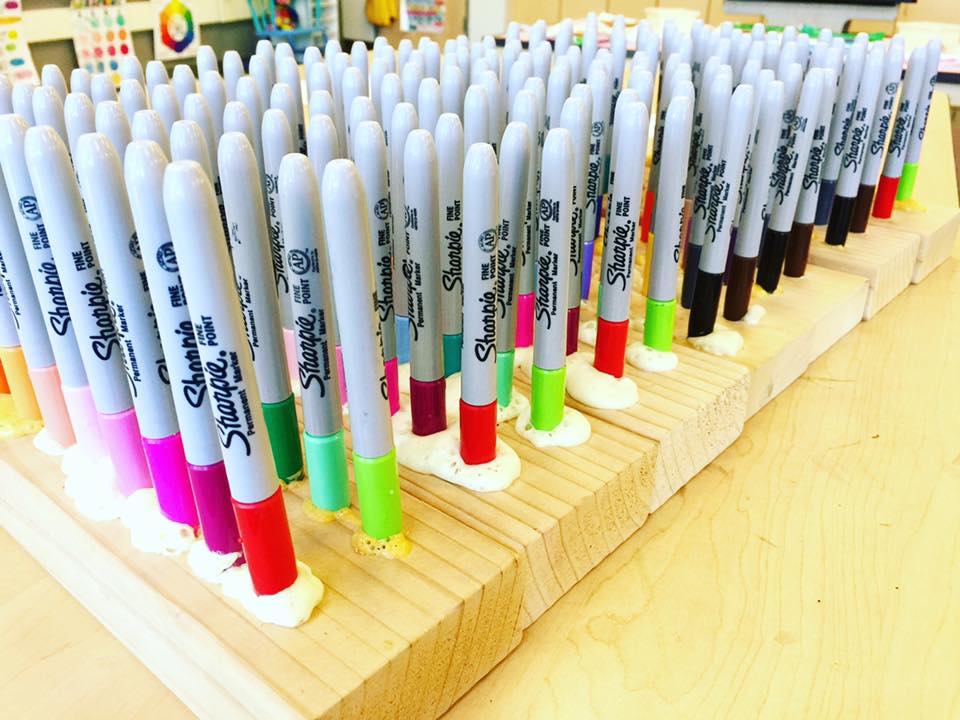
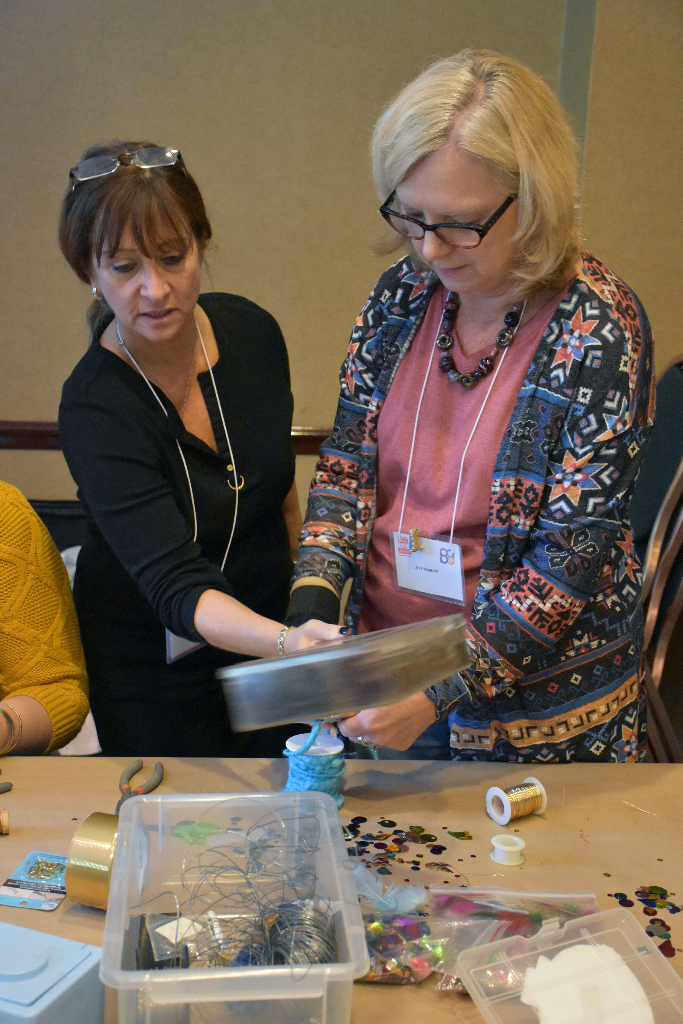
Organization in the Art Room
The following query was posted to our PAEA Facebook Page. Members chimed in, and their responses are below for your benefit and organizational enjoyment! I’m getting goose pimples already thinking about the wonderful ways to organize!!!!
“Please share some of your unique and successful classroom organizational devices/structures. How do you store 2-D work? How do you store 3-D work? What do you feel is necessary to always have on the table? What are your art room life hacks? Etc…”
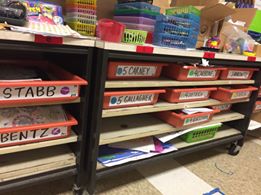
Marita Fitzpatrick of Bodine High School in Philadelphia suggests: “For small 3d (our recent stuffed toys): I have a copy paper box for each class. The students put their work in manila envelopes, write their names on them and I have one person from each table collect the envelopes and return them to the box. For 2d, each table puts their work in folders marked w the table color (tables are color-coded) and that goes in the copy paper box. This box is marked, period 1, period 2, etc. I have a closet of shelves for ceramics and each kid gets a shoe box to store their stuff in. It keeps the others from touching the work and breaking it. Students wrap their work in dry cleaning plastic to keep it moist. I regularly have kids empty the drying rack, sort the work and put it in the copy paper boxes. I keep nothing on the tables, because the stuff disappears and they put trash in the containers. I store markers and colored pencils in plastic pencil boxes on open shelves in the room and number them. I never look at the numbers or count them, but the kids think I do, so nothing disappears. On those shelves, I also have scissors and other frequently used supplies that students have open access to.”
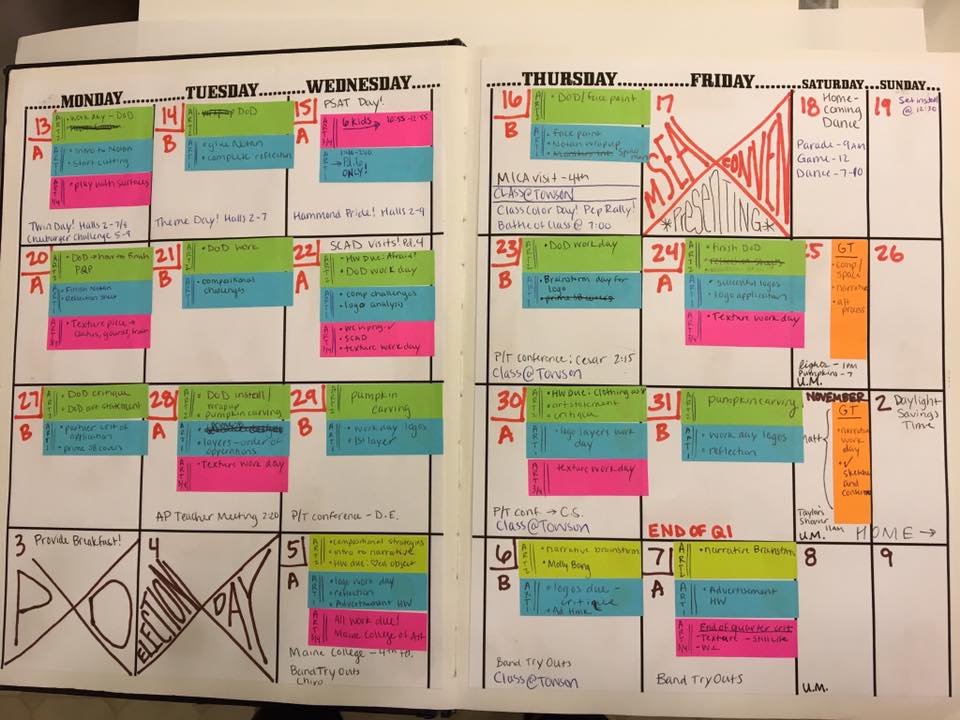
Alison Elizabeth of Lancaster, PA shares her planning strategy: “Each class I teach is a different colored sticky note. This calendar is glued into the front of my sketchbook (which I use for all of my demos, meeting notes, and conference notes). It’s all with me and ready to go at all times.”
Linda Keels suggests making the investment in folding tables from the local hardware store (she uses 3) for about $30-40 a piece—there is room to hold up to 6 classes worth of work (she teaches 12) which forces her to keep it moving and the kids to stay on track for 3-D things.
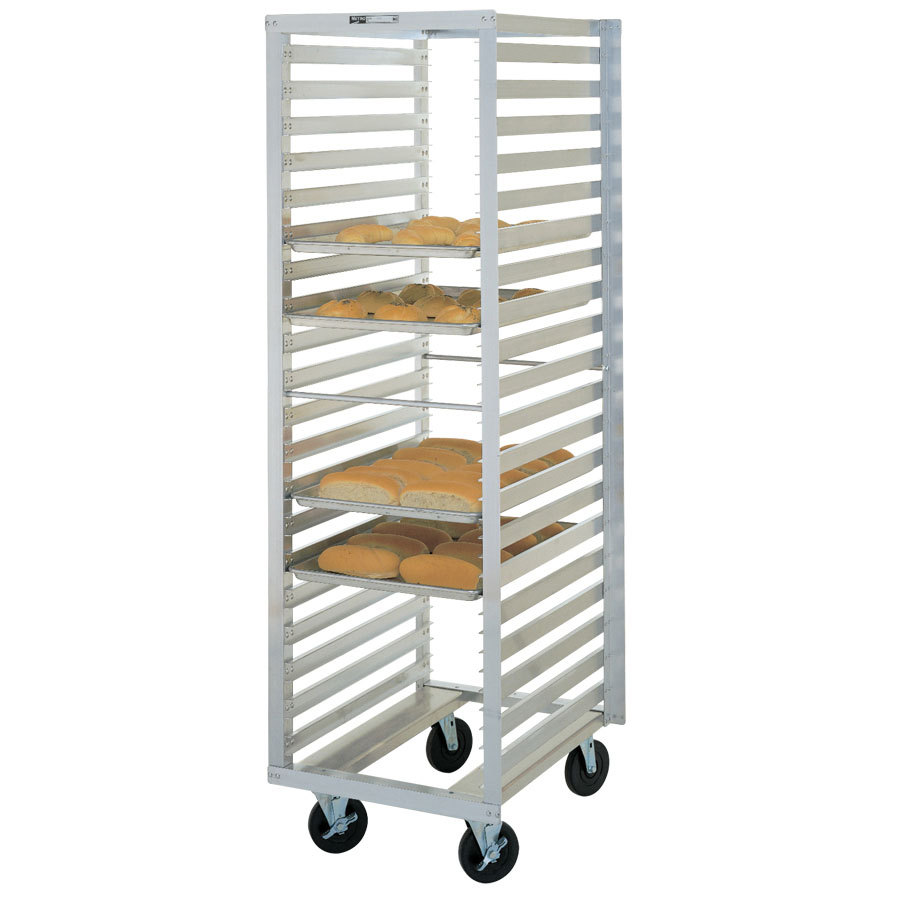
Eleanor A-Evans For stores 3D work, such as clay sculptures and paper mache on ‘mobile pan racks’ (like the one in the photo- thanking Google image search). Depending on your supplies resources, the cost on the average is under $90, and can be the solution for saving space and stowing away the masterpieces!
Julie Schedin share with us how her students creatively tackle this issue with a little design thinking! “My Crafts class yarn bombs a coat hanger. They own the airspace above their seat, and hang all work (basket weavings, etc) from the coat hanger in the drop ceiling. The room develops a type of “rainforest canopy” but a least we can keep 3d projects organized and handy.”
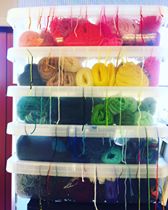
Judi Treffinger of Carlisle, and formerly the Carlisle Area School districts has an idea for yarn storage! “You know all those large gallon sized plastic food containers your cafeteria gets when they purchase food? I duct tape then together with the open sides up and use them to store and separate skeins of yarn. They can sit on a counter top, or stash neatly in a cupboard with open ends facing out- all colors are visible and yarn doesn’t get tangled!”
Moore College of Art and Design Alumni, Autumn Rae suggests art teachers to follow her Instagram: mrsdow_artroom where shes posts things about classroom display and specific grade levels k-5 . She posts lots of classroom things about organization what materials I use.
Autumn also shares:
“- Container store bins are the best!
– It needs to be organized and colorful for me to function. I cannot stand messes or piles.
– I keep messes at the middle table whenever possible.
– I use my drying rack when I can but I actually love rolling out a sheet of paper and either working on the floor with the kiddos or having them dry their work flat and organized on a sheet of paper. Work great for printmaking each student gets a row for all their prints.
– All my notes are on my Instagram that describe each photo and what it relates to classroom, display, or a grade level.”

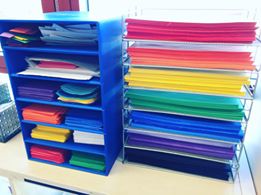

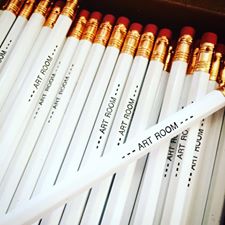
Autumn teaches art to 881 students k-5 students. She describes, “We are an emotional support school with a high ESL population and also a title 1 school. I have put lots of my own money into my class but once the upfront cost is paid off then I have all these organizational systems in place for years to come. I need everything organized like I said but also kid friendly. I have created two closets for classroom teachers and stock it at the beginning of the year so they don’t ask me for supplies I need for my own classes.”


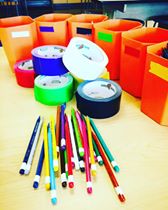
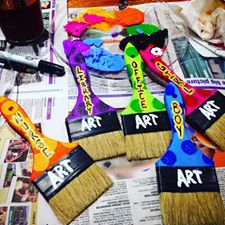
Woah Autumn! Thanks for all of that!!! Loooooove the colors!!! And there is no denying where those pencils came from!!
Daisy Konowal uses a system of table color folders. 2 sets- one for work in progress and one completed work. Also, Daisy uses sheets/fabric/blankets to cover her shelves to limit access to shelves.
Sunnylee Mowery of Philadelphia’s Greenfield Public School strives to make my classroom organization methods so easy a kid can do it! Each table is color coded and this helpful chart rotates at the start of each week so everyone knows who is in charge of what. The artists are expected to pass out work and supplies, monitor volume, tidy table bins and floors, and even call each other to line at the end of class.
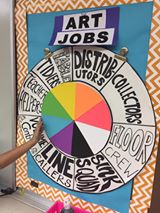
Sunnylee has clearly labeled bins with teacher name are organized by grade level. All supplies that accompany the project are placed above in their grade section.
Sunny poses the question, “How do students monitor sound, you ask? The volume giro migrates to the table in charge of volume each week. If the room gets too noisy, the students “ring” the giro to signal to the class to quiet down. If we get 3 giro rings, we lose the privilege to talk.”Click Here for a link to the video of the magical giro sounds that have the power to quiet students!
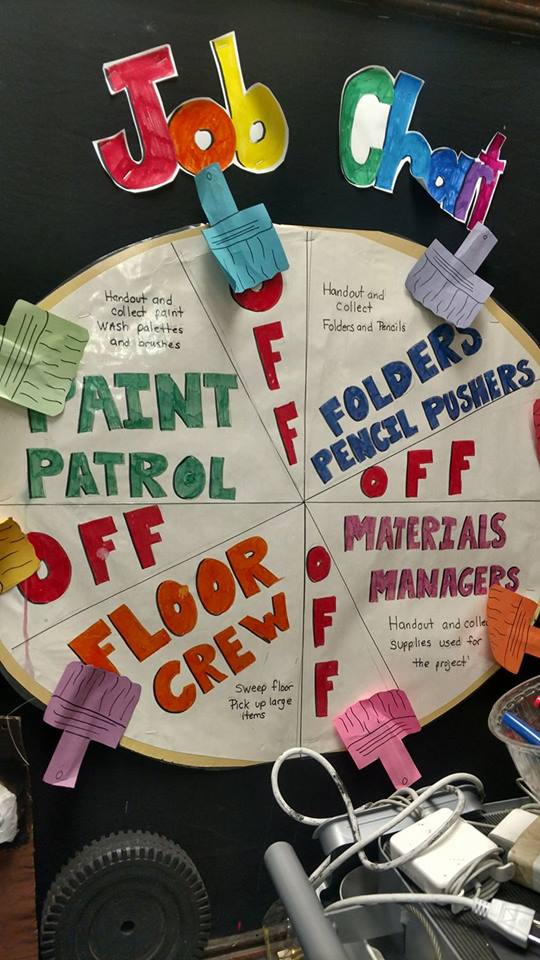
Kim Horan Colasante, art teacher in the School District of Philadelphia shares, “My routine is very much the same as Sunny’s. Each table has a color, table folders or student folders are matched to the table they sit at. I have a job chart, students give out folders, supplies, paint patrol, and floor sweepers. Jobs rotate weekly according to table colors. Supplies are located in front of the room and Barney’s Cleanup song plays at the end of every class 10 minutes to go. The students know to stop, put their work away and do their jobs. The ones that are done sing to barney. (I teach middle school) they dab to it also. It only plays for a minute so work must be away by the time song is done. then folders are collected and floors swept etc. 3D work is done a bit differently due to lack of space in classroom. When Barney plays each table brings me their 3d work and I place it in a special section so that they may retrieve it the following day. Clay is kept in large Rubbermaid containers until in it ready for drying.”

What do you do in your classroom?????
Sneak Peek: Clayprinting at PAEA 2016
Some of the conference presentations I find most valuable as a teacher feature hands-on demonstrations. With that in mind, I offer you something else to add to your list of “Things to Check Out at the Conference” this year! Potter turned printmaker, Mitch Lyons will be doing a demo on making clay monoprints – bright and early Friday morning! I love printmaking with students, and I feel like they’d be very into these techniques (and the results):
Check out Mitch’s work at his website, and read the description below:
Mitch Lyons, innovator of the clayprinting process and author of The Art of Printing with Clay, will be demonstrating at this year’s PAEA Conference on Friday, October 7th, at 9:00 AM.
Since 1968 Mitch has been pioneering his image making from a slab of leather-hard stoneware clay. Mitch will demonstrate how he applies colored slips, one color over another, and then builds a design using textures, slip trailing, pastels, and stencils. Once ready to print, a moistened piece of paper/canvas is placed over the slab. Pressure is applied using a rolling pin to transfer the clay slips onto the substrate to create a one-of-a-kind clay monoprint. Using very simple techniques and tools, he is able to achieve very sophisticated results. You’ll be inspired to take this simple, non-toxic printing process back to your own classroom to teach your students!
You can view examples of Mitch’s clay monoprints by visiting his website mitchlyons.com. Several videos are also included on his site that show the process in action. Visit him later at his booth in the vendor area where he will have his book, DVDs, calendars and more for sale.
“Do we love our kids? Do they matter to us?”
There’s a lot going on in the world right now that affects many of our students’ lives, opinions, and environment as as well as our own. So when we are teaching or talking to our kiddos, how do we take everything into consideration? Are you wrestling with how to approach these issues in your art room?? I know I am. How do we make our art room the safe and nurturing environment it should be so that students can express themselves and grow emotionally?
This article was sent to me, and it resonates loudly. Click the text link below, and give it a gander:
“Part of our job as educators and caring adults is to make school a place where all students can find productive outlets for their emotions in response to the adversity and trauma they experience. But educators do not bear the sole responsibility for helping communities recover or changing systems that perpetuate injustice. ”
The article mentions that as educators we must be connected with our communities to help support our students and help them get through what the world is throwing in their faces. This, obviously is where we must go above and beyond our call of duty. This is our before and after school time, where we give ourselves selflessly to our profession without consideration of being compensated for that time. There are of course teachers who only work the contract, and I understand. BUT, if we truly want to affect change and to make a difference in our children’s lives and communities, then we have to give a little more of ourselves. I believe it to be our call of duty as educators. One does not get into this profession for the pay, nor do should they come into the classroom thinking their job starts and stops at the school doors. Being and educator in today’s world is demanding, and no one should have a veil over their eyes on that.
The article continues to give some advice on how we can help support our students, and as art teachers I believe we are the perfect conduit to follow through on those points. We see our students year after year- we are a constant in their life. We are the ones that can develop long and lasting relationships where students can come to trust us. Often, the art room is the place where they can fully express their dreams, hopes, rage, and personality and we need to remember to embrace that. Art educators need to give students that room for choice and expression so that they can fully realize their potential.
Naturally this article made me think about teaching from a trauma informed or trauma sensitive background. And during a summer where I am reevaluating and reconsidering my approach to classroom management, this article enforces my belief that we must be the calm and centered educator they need. If they lash out, don’t lash back. If they say hateful things, don’t take it personally. Always remain calm, and tell them you love them. And keep striving to make schools a better place, and the world a better place.
“So as we work to prepare our kids for the world they live in today, we will not stop fighting to create the world we want for them.”

BTW- This year’s theme for the PAEA is “social justice” and I hope that you consider how you approach these issues in your art room this year.
Thanks for letting me bend your ear.
Sneak Peek: Rande Blank’s Presentations
Rande Blank has been the Director of the MAT in Visual Arts Education program since 2012 and a faculty member with UARTS – Art + Design Education department since 2003, teaching graduate courses, and mentoring students in their practicum experiences. Most recently she has been selected to be on the Advisory Council for the Design-Ed organization and the Director of the Higher Education Division for the Pennsylvania Art Education Association. (Text borrowed from http://www.uarts.edu/users/rblank )
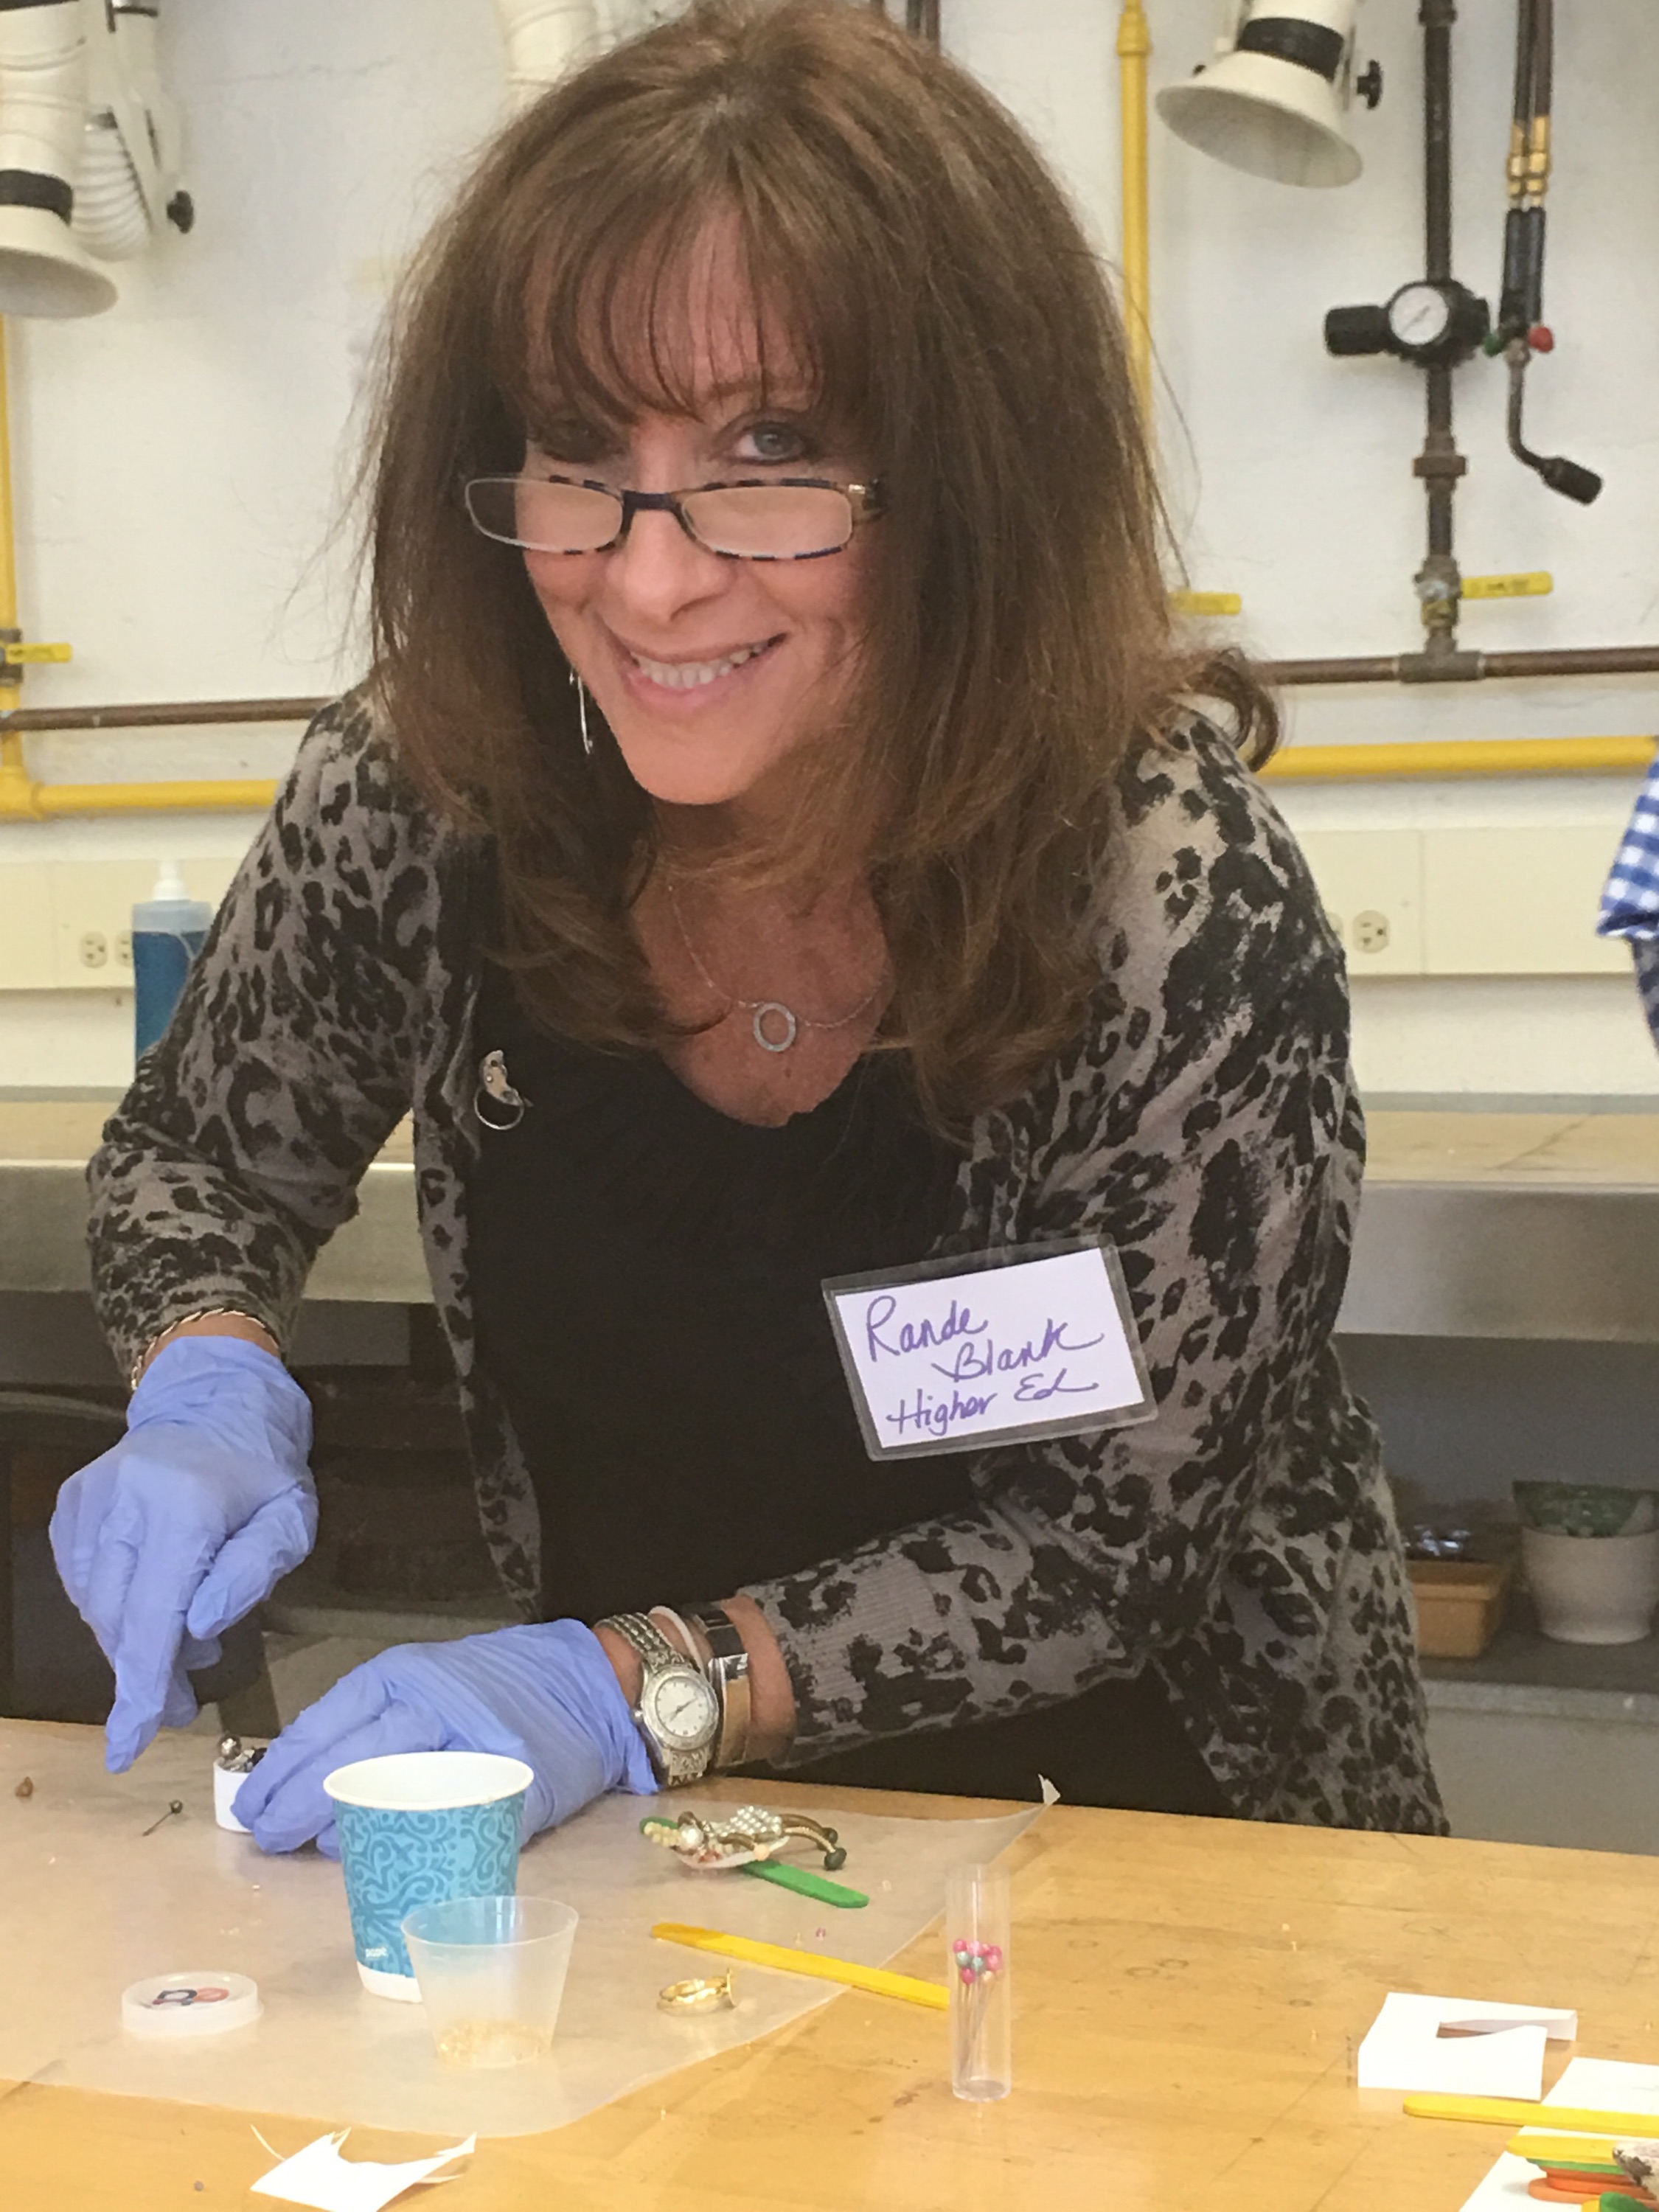 Rande will be delivering not one, but two presentations!
Support Your NAEA Student Chapter Through Fundraising Events: University Student Panel Discussion
Friday at 2:00 – 2:50 PM
University faculty and students discuss advocating for professional association participation, fundraising activities, conference proposal writing, and art education studio workshop opportunities. Experience pride and success with your university chapter.
Design Thinking as a Problem Solving Process: 5 hands-on participatory activities
Sunday at 9:00 – 10:50 AM.
Teach students to become independent, innovative and thoughtful decision-makers. Apply the design thinking cycle where problems are identified, solutions proposed, produced and evaluated. Participate in design activities to explore process.
 D5 Creation